
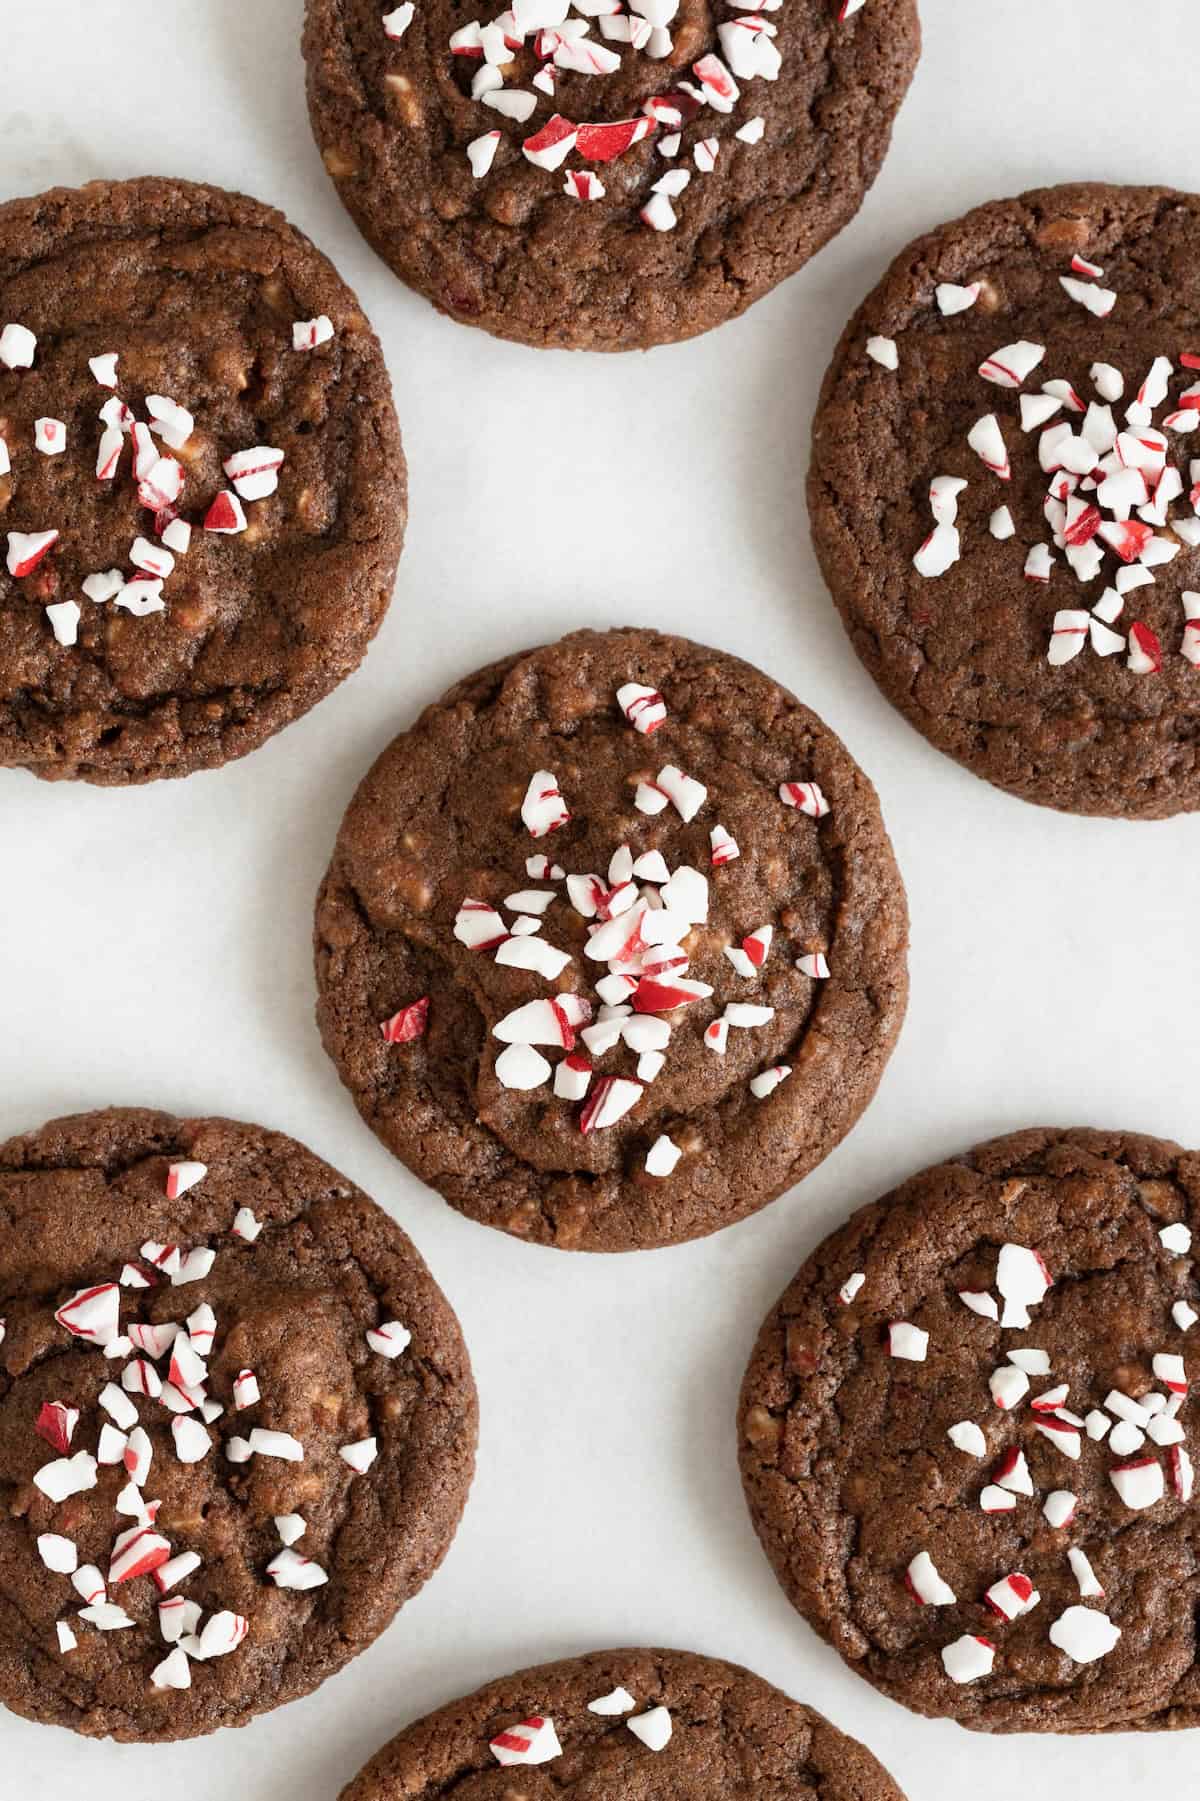
Chewy Chocolate Peppermint Crunch Cookies are soft chocolate cookies with peppermint flavor in every bite.
Peppermint Cookie Perfection
These Chocolate Peppermint Crunch Cookies are peppermint perfection! Chewy chocolate cookies are infused with peppermint flavor, studded with peppermint crunch and topped with even more crushed peppermint. Since the cookies are so chocolaty, all that peppermint compliments them so deliciously.

For Your Holiday Cookie Exchange
Tis’ the peppermint season! If it’s got peppermint in it, on it, or around it, I want it. And if the peppermint is combined with chocolate in some way, I pretty much do a happy dance! What a tasty combo!
Along with my Candy Cane Cookies and Gingerbread Men Cookies, these are another great one for a cookie exchange, holiday party, Santa or just to have in the cookie jar throughout the season. They’ll be a holiday hit! Want them without chocolate? Try my Peppermint White Chocolate Pudding Cookie recipe!
They are so easy, in less than 20 minutes, you can have a warm batch of these tasty gems ready to be enjoyed.

Ingredients and Supplies
(see recipe card at the bottom of this post for measurements and details. To learn more about specific baking ingredients and how they function in baking recipes, reference my Complete Guide to Baking Ingredients)
Ingredients:
- Softened butter – here are some tips for how to soften butter
- Granulated sugar
- Dark brown sugar – you can use light brown sugar instead
- Egg
- Peppermint extract – if you don’t have peppermint extract, you can substitute it with vanilla extract
- All-purpose flour
- Unsweetened cocoa powder
- Baking powder
- Baking soda
- Kosher salt
- Coarsely crushed peppermint candy – or you could use peppermint crunch baking chips for a more melty texture. (If your peppermint candy is finely crushed, you’ll want to reduce the amount you stir into the cookie dough to just 1/2 cup or it will be too much peppermint throughout the dough causing the cookies to spread more as they bake.)
Supplies:

How to Make Chocolate Peppermint Crunch Cookies
- Preheat oven to 350°F. Line cookie sheets with parchment paper.
- In the bowl of an electric mixer, beat the butter and sugars until smooth.
- Add the egg and peppermint extract and beat until well combined.
- In a separate bowl, whisk together the flour, cocoa, baking powder, baking soda and salt.

- Add dry ingredients to the butter/sugar mixture and beat on low speed until just combined.
- Stir in 1 cup of the coarsely crushed peppermint candy. (If your crushed peppermint candy is finely crushed, only stir in 1/2 cup so there’s not too much peppermint throughout the dough and so they don’t spread too much.)
- Scoop dough by heaping tablespoons onto prepared cookie sheets.
- Press down on each scoop of dough with the palm of your hand to flatten slightly.

- Bake for 8 minutes or until cookies just start to crack on top. Remove from oven and immediately sprinkle each cookie with some more crushed peppermint, if desired.
- Let cookies cool on cookie sheets 10 minutes before transferring to a wire rack to cool completely.

Storage
Store leftover cookies in an airtight container at room temperature for up to three days.
To freeze cookies, let cookies cool completely, stack with parchment paper in between each layer of cookies and store in a freezer safe container or resealable plastic bag. Let thaw completely at room temperature.
To freeze the cookie dough, shape dough into rounds, top with peppermint crunch and flatten slightly before lining them up on a parchment-lined baking sheet that will fit in your freezer. Place the baking sheet in the freezer for 1 hour to flash freeze the cookie dough and then transfer the cookie dough balls to a freezer safe container or freezer-safe plastic bag with parchment paper between each layer. Store cookie dough in the freezer for up to 3 months. When ready to bake, remove cookie dough from the freezer and bake from frozen, increasing the baking time by a few minutes.

More Christmas Cookies
Bring your A game to this year’s Christmas cookie exchange! I’ve got the Best Christmas Cookies to share at holiday cookie exchange or to gift to your neighbors this holiday season. They’re sure to spread tons of cheer! Plus, get tips on hosting your own Christmas cookie exchange party.

If you make these Chocolate Peppermint Crunch Cookies, be sure to snap a picture and share it with me on Instagram @thebakermama so I can see. If you’re on Facebook, be sure to join my Friends of The BakerMama group to connect and share all the fun and yummy recipes of mine that you make!  I just love seeing how inspired and creative y’all get with the ideas I share. Enjoy!
xoxo,


Chocolate Peppermint Crunch Cookies
- Prep Time: 10 mins
- Cook Time: 8 mins
- Total Time: 18 mins
- Yield: 36 cookies
- Category: Dessert
Description
Chewy Chocolate Peppermint Crunch Cookies are chocolate peppermint crunch perfection in every bite.
Ingredients
- 1/2 cup (1 stick) unsalted butter, softened
- 1/2 cup granulated sugar
- 1/2 cup dark brown sugar
- 1 large egg
- 1/2 teaspoon peppermint extract
- 1 cup all-purpose flour
- 1/4 cup unsweetened cocoa powder
- 1/2 teaspoon baking powder
- 1/4 teaspoon baking soda
- 1/4 teaspoon kosher salt
- 1 cup coarsely crushed peppermint candy, plus more for garnishing
Instructions
- Preheat oven to 350°F. Line cookie sheets with parchment paper.
- In the bowl of an electric mixer, beat the butter and sugars until smooth. Add the egg and peppermint extract and beat until well combined.
- In a separate bowl, whisk together the flour, cocoa, baking powder, baking soda and salt. Add to the butter/sugar mixture and beat on low speed until just combined. Stir in 1 cup of the coarsely crushed peppermint candy. (If your crushed peppermint candy is finely crushed, only stir in 1/2 cup so there’s not too much peppermint throughout the dough and so they don’t spread too much.)
- Scoop dough by heaping tablespoons onto prepared cookie sheets. Press down on each scoop of dough with the palm of your hand to flatten slightly. Bake for 8 minutes or until cookies just start to crack on top.
- Remove from oven and immediately sprinkle each cookie with some more crushed peppermint, if desired.
- Let cookies cool on cookie sheets 10 minutes before transferring to a wire rack to cool completely.


Hi Maegan, I tried this recipe today with the same awful result as Sharon. I was very careful in measuring everything, and only used 1 stock of unsalted butter per the recipe. They flattened out almost paper thin. I put in another tray but didn’t flatten and they did the same thing. Thought these would be great as part of gifts for the neighbors but they’re going in the trash. I’ve had good luck with some of your other recipes but not this one.
Hi Lynda! I’m so sad to hear this. In fact, your review of these cookies confused and concerned me so much that I had to bake them again tonight just to make sure the recipe measurements and instructions are listed accurately and indeed they are. My cookies baked great! No spreading at all. I’m so confused as to what could have gone wrong on your end. Do you live in a high elevation? Which brand of crushed peppermint did you use? I can confidently say the recipe is accurate and the results are amazing so I hope you get to try them again soon with better results.
Hi Maegan, No to the higher elevation. Unfortunately I no longer have the bag the candies came in, but I did crush them myself rather than using already crushed. I wondered if refrigerating the dough would have helped? Otherwise, I’m stumped. I’m glad you tried the recipe again to confirm there’s not something missing. I may try them again sometime. For now, I’m making your white chocolate cranberry Oatmeal cookies in place of the others. I’m not including the nuts though. 😉 Merry Chtistmas!
Hi Lynda! I’m stumped too. Ugh, I hate it when recipes don’t turn out as great as they should for y’all. Enjoy the Cranberry Oatmeal Cookies. Those are so yummy too! Merry Christmas!
I made this cookies exactly as the recipe called and they spread all over the pan like one giant cookie! I made the second batch smaller. Used a teaspoon instead and same thing except they didn’t completely merge together. It’s like they had too much butter. I won’t try it again.
Hi Sharon! Oh no, I hate to hear that happened when you made them as that is not how they are supposed to bake up. I wonder what went wrong? I sure you only used 1/2 cup of butter and that you measured the flour and cocoa powder accurately? They certainly should spread…in fact, that is why I instruct to press them slightly before baking because they don’t flatten much as they bake.
Do you think I can make dough balls and freeze?
Hi Elaine! Absolutely! Just form the cookie dough into balls and place in a single layer on a parchment-lined sheet pan in the freezer for about 1 hour until firm and then transfer to a resealable freezer-safe plastic bag or container to freezer for up to 3 months. When ready to bake the cookies, you can let the cookie dough defrost overnight in the refrigerator or bake them straight from the freezer. If baking straight from the freezer, just set the cookie dough balls out on the baking sheet while you preheat the oven and then bake for about 2 minutes longer than directed, watching carefully. Hope this helps. Enjoy!
Hi Beth! What a great recipe. Can’t wait to try them this season. Does the crushed peppermint on top of the cookie fall off easily? Or does it stick to the cookie well once put on right after taking them out of the oven? Thanks and Merry Christmas!
Hi Sarah! The crushed peppermint sticks great to the top of the cookies if you immediately sprinkle it on them right after they come out of the oven so it melts to the top of the cookie. Enjoy & Happy Holidays!
Hi…just wondering if these cookies freeze well if made in advance of the holidays?
Hi Steven! They freeze great. Just store them in a freezer safe baggie or container separated by parchment paper. Enjoy & Happy Holidays!
What is the easiest way to crush the peppermint/candy canes? Can you do it in a blender or just in a bag and crush with hammer or something? Thanks! Looking forward to trying these!
Hi Beth! Crushing it in a resealable bag with a meat pounder or hammer is the easiest, most effective way I’ve found. Enjoy! 🙂
I’m not sure if you have a Fleet Farm by you, but if you do, check there for bags of chopped peppermint candy. I was there last week & picked up a bag.
I’d love to take some of those cookies off your hands! 😉 Peppermint is all I’ve had on my brain, too!
[…] Chocolate Peppermint Crunch Cookies by The BakerMama […]
There is nothing wrong with a peppermint obsession!
YUM! I love the chocolate and peppermint combo. AND I love that these are so quick and easy to make. Definitely gonna make these for the holiday!