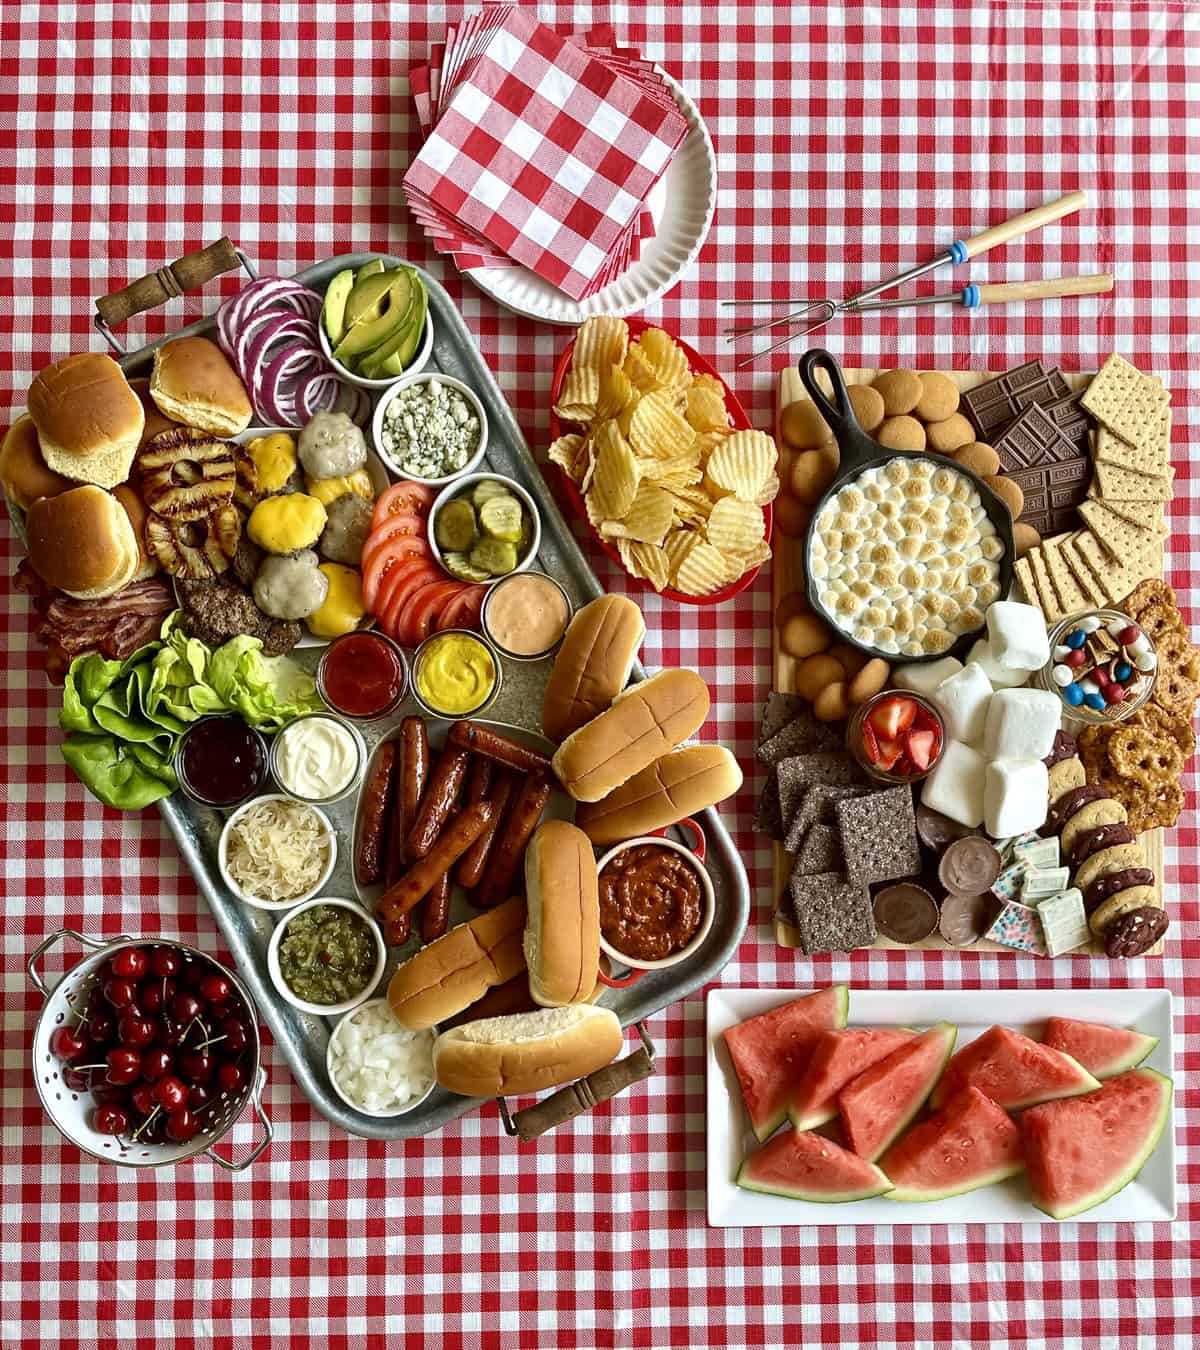
Make entertaining outdoors a breeze with The Ultimate Summer Cookout Spread. With build-your-own hot dogs and burgers, as well as satisfying sides and a sweet treat, it’s an easy and delicious menu that’s sure to please everyone!
Gettin’ our Summer Grill On
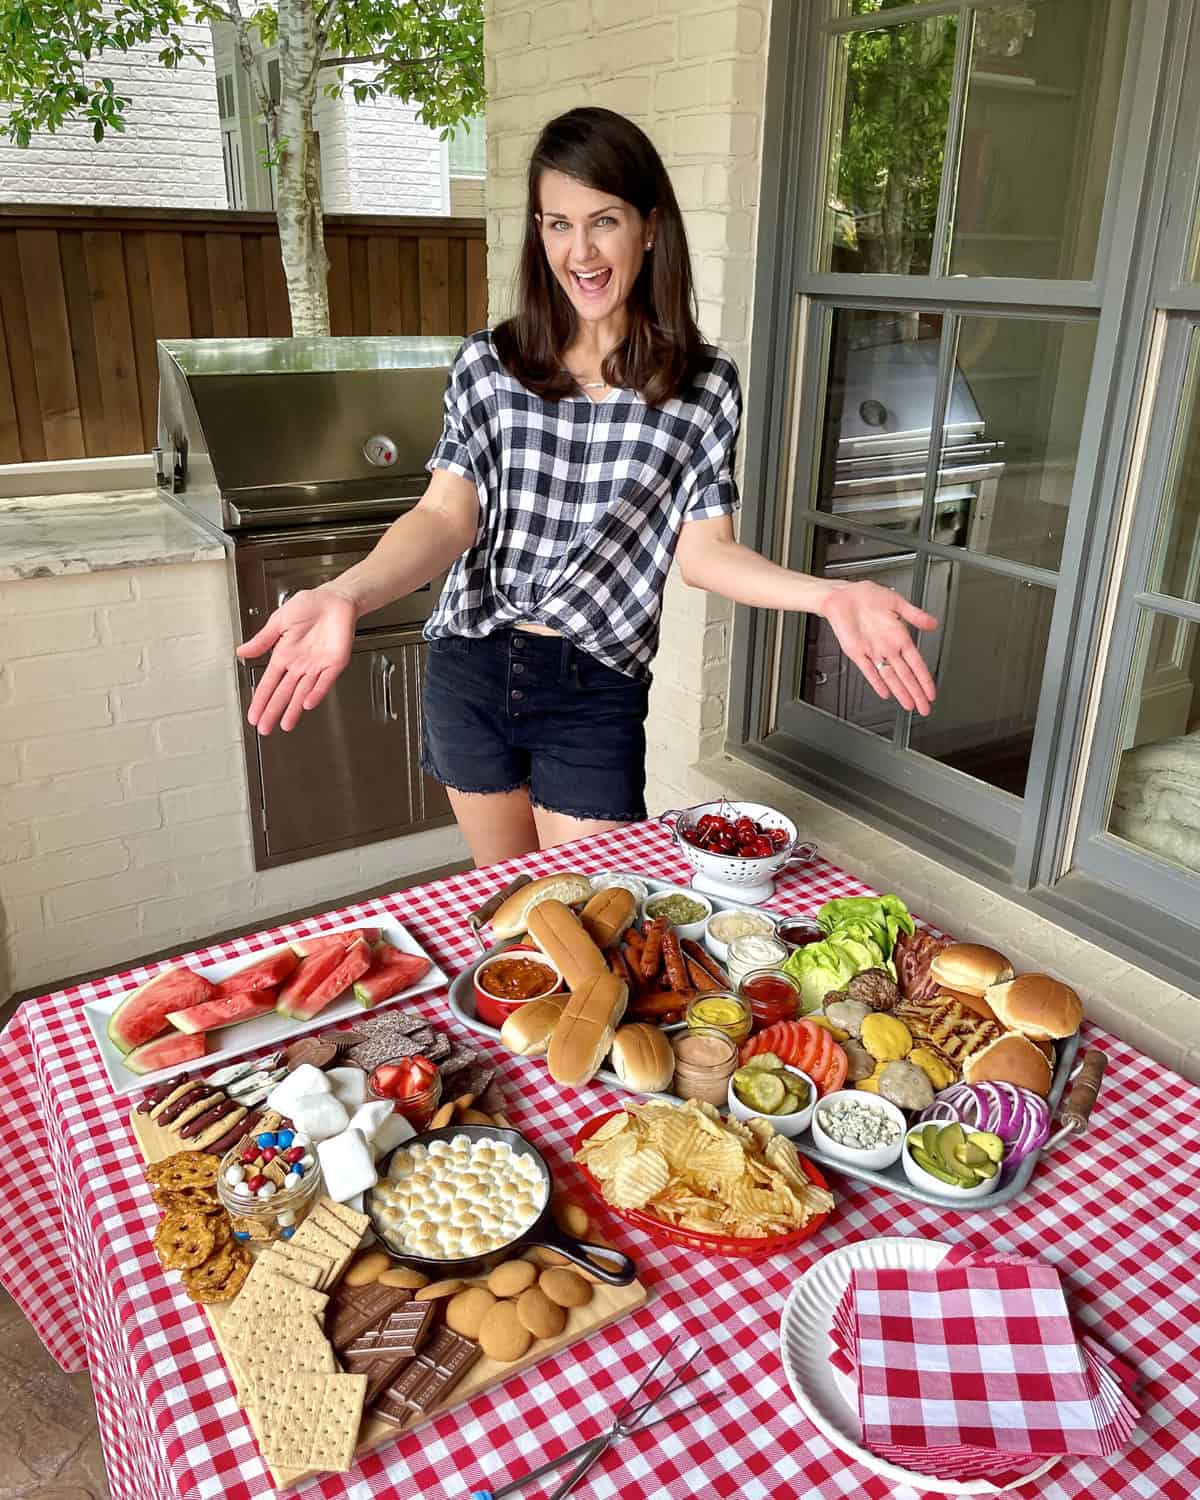
Outdoor cooking, here we come! Every year, it’s the same story: the first hint of good weather and we’re out lighting up the grill! Hot dogs, hamburgers, corn on the cob, and if the mood strikes, maybe a perfectly-seared steak. Nothing beats it! One of my favorite ways to feed my family is also one of my favorite ways to entertain. Sharing great food with dear friends and family while enjoying the warm weather – it just doesn’t get any better! Bonus? Cooking out also cuts down clean-up time in the kitchen. Yes, please!
I recently had so much fun sharing my ultimate summer cookout spread with Studio 5. You can check it out here! Just remember, friends, outdoor cooking should be flexible and most of all, fun. Customize your spread in any yummy way you want to make the experience all about you and your loved ones!
Prep the Ultimate Summer Cookout Spread
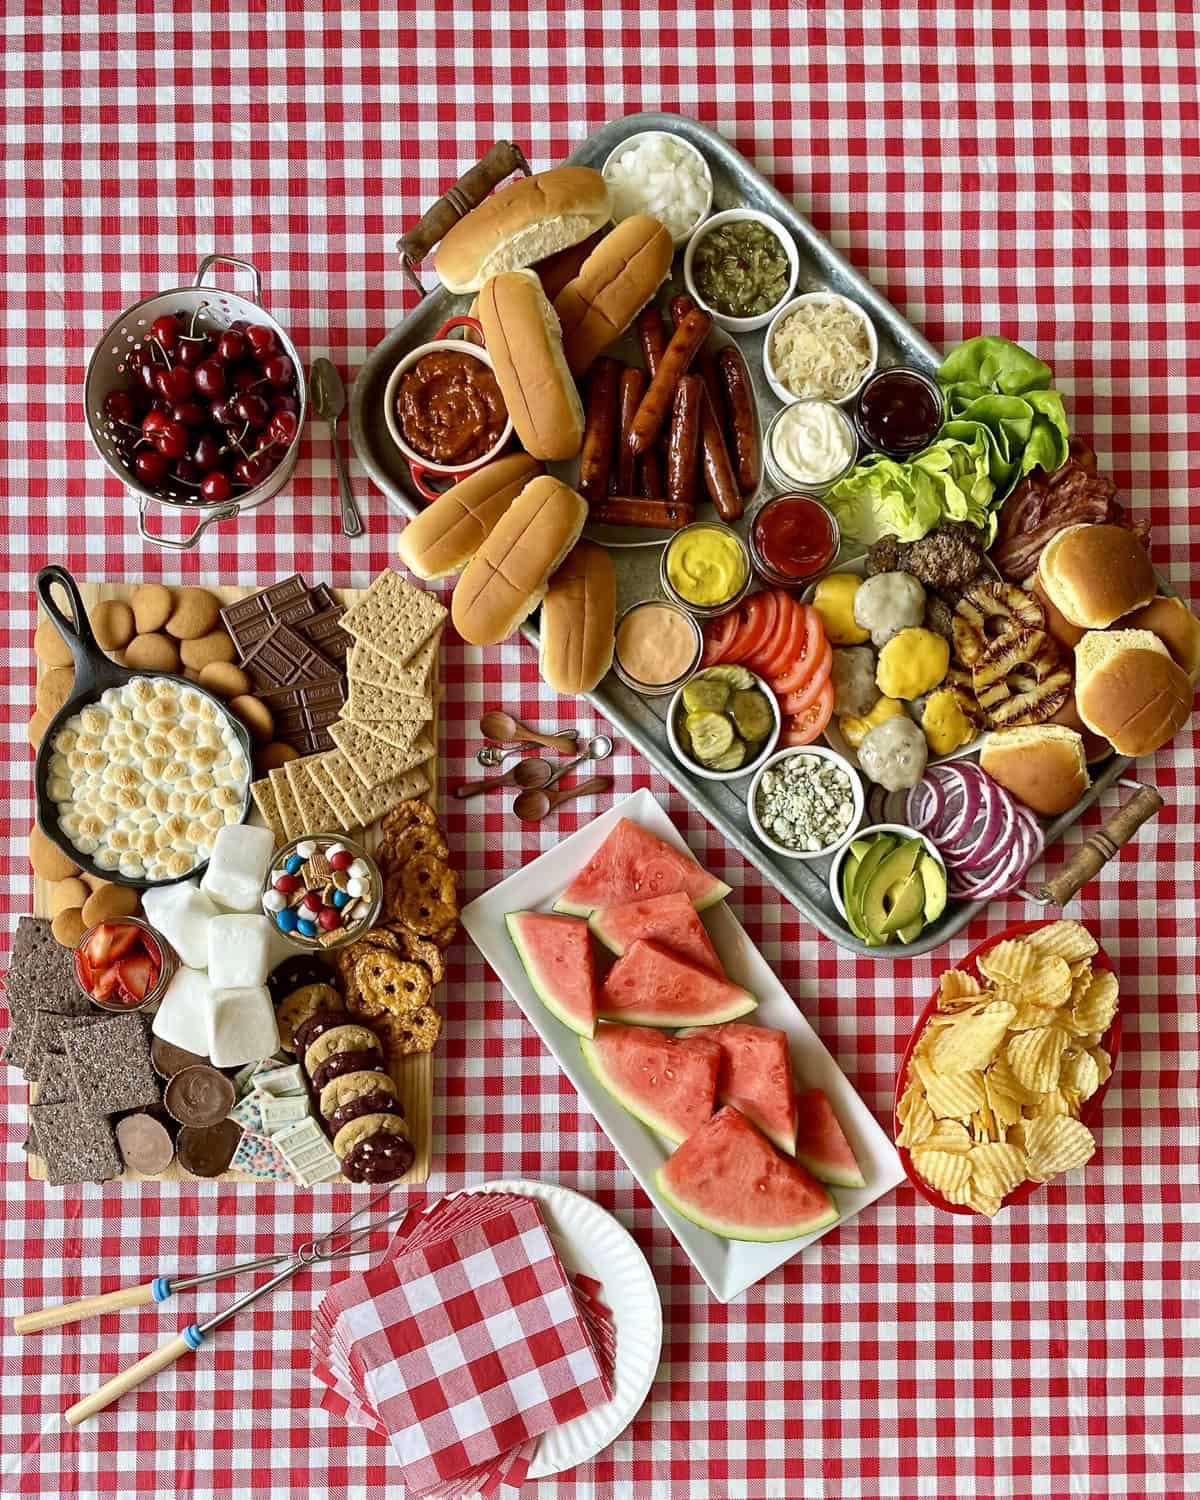
When I set up a summer spread, I like to make sure it has a few key items: finger foods for snacking, fresh fruit (to ease my mom guilt), a build-your-own hot dog, hamburger or sandwich board, and a sweet treat. But if y’all feel like you need to throw in some veggies, the more the merrier!
To prep this spectacular spread, first heat the chili and cook the bacon for the hot dog & hamburger tray. Keep the chili over low heat on the stove and the bacon warming in a 200-degree oven until you’re ready to add them to the tray.
Next, prepare all of the toppings (except for the grilled pineapple), and arrange them in small serving bowls or directly on the tray. Additional topping ideas:
- shredded cheese for the hot dogs
- jalapeno slices
- crispy fried onions
Arrange the slider and hot dog buns on the tray. Put the chips, cherries and watermelon on serving dishes on the spread table. Cover them, if necessary.
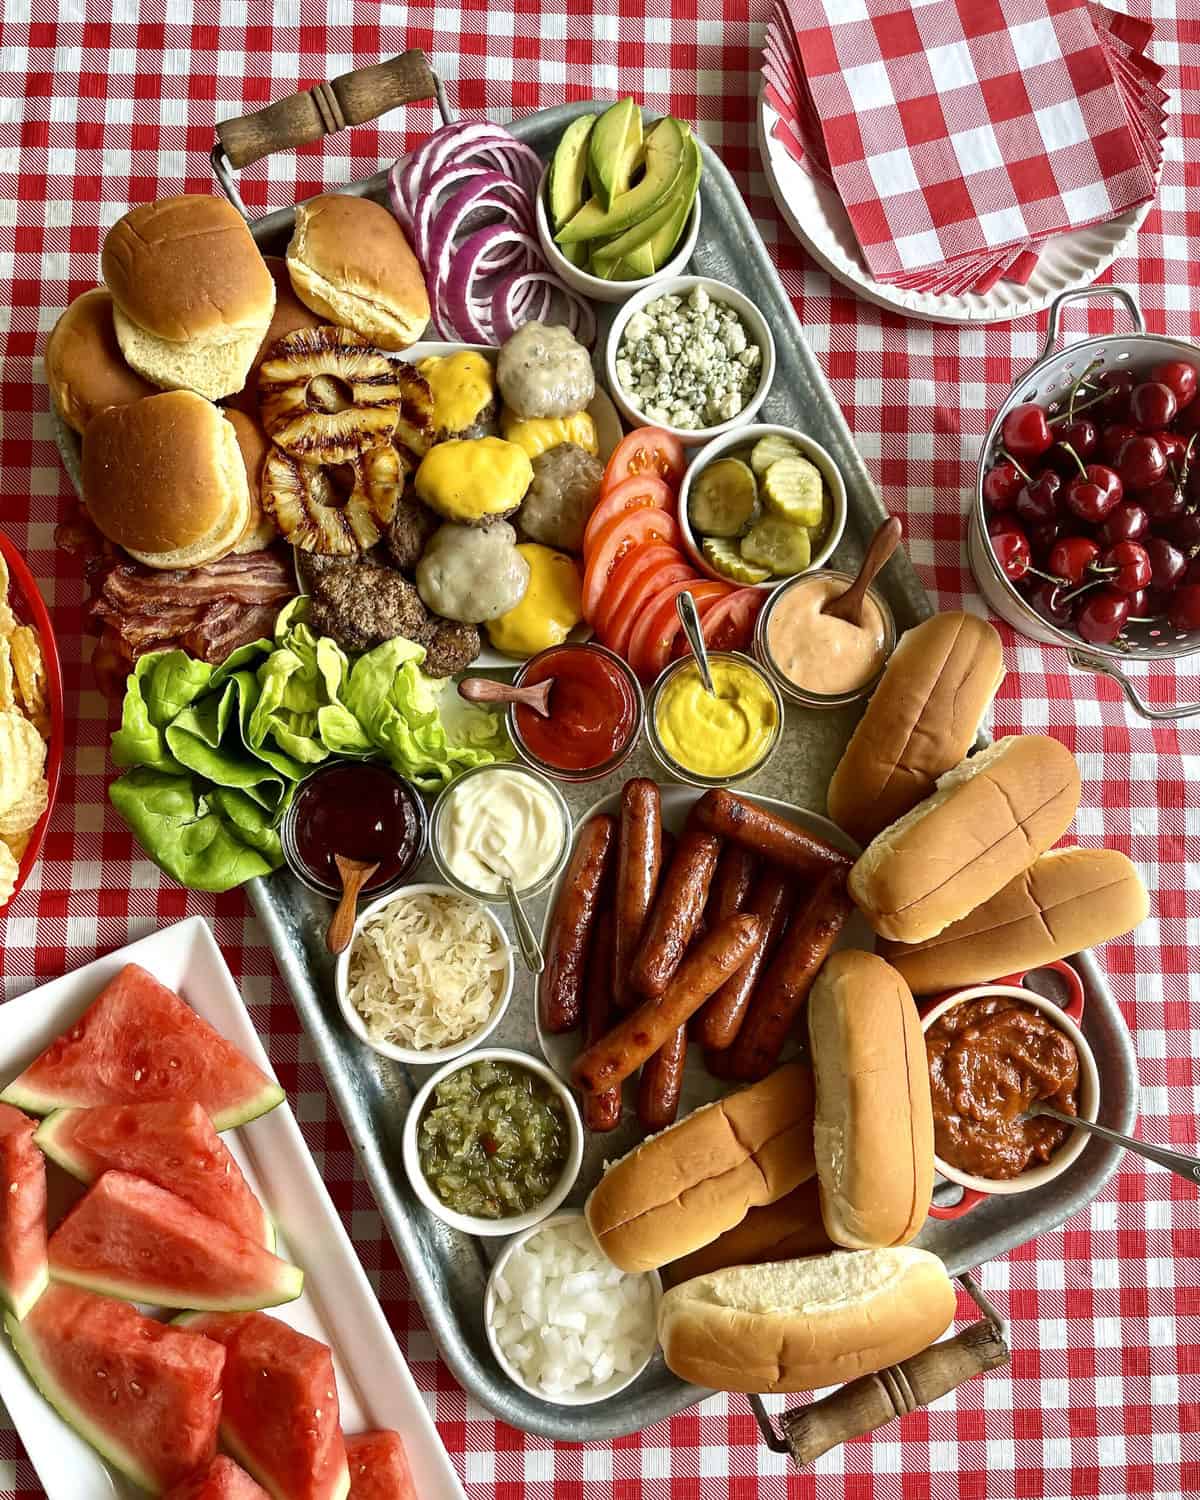
Make the Hot Dog & Hamburger Tray
First, put two small plates on a large serving tray as place holders for the grilled hamburger patties and hot dogs. Place a small serving bowl for chili on the tray, but wait to add the warm chili until just before serving.
Grill the burgers and hot dogs. See Easy Cheeseburger Sliders recipe and hot dog grilling tips below. Add cheese to the burgers while still on the grill, if guests want the cheese melted. Leave some patties without cheese for those who prefer it without.
While the burgers are grilling, brush the pineapple rings with olive oil and add them to the grill. Grill the pineapple slices for 2-3 minutes per side until they have nice grill marks.
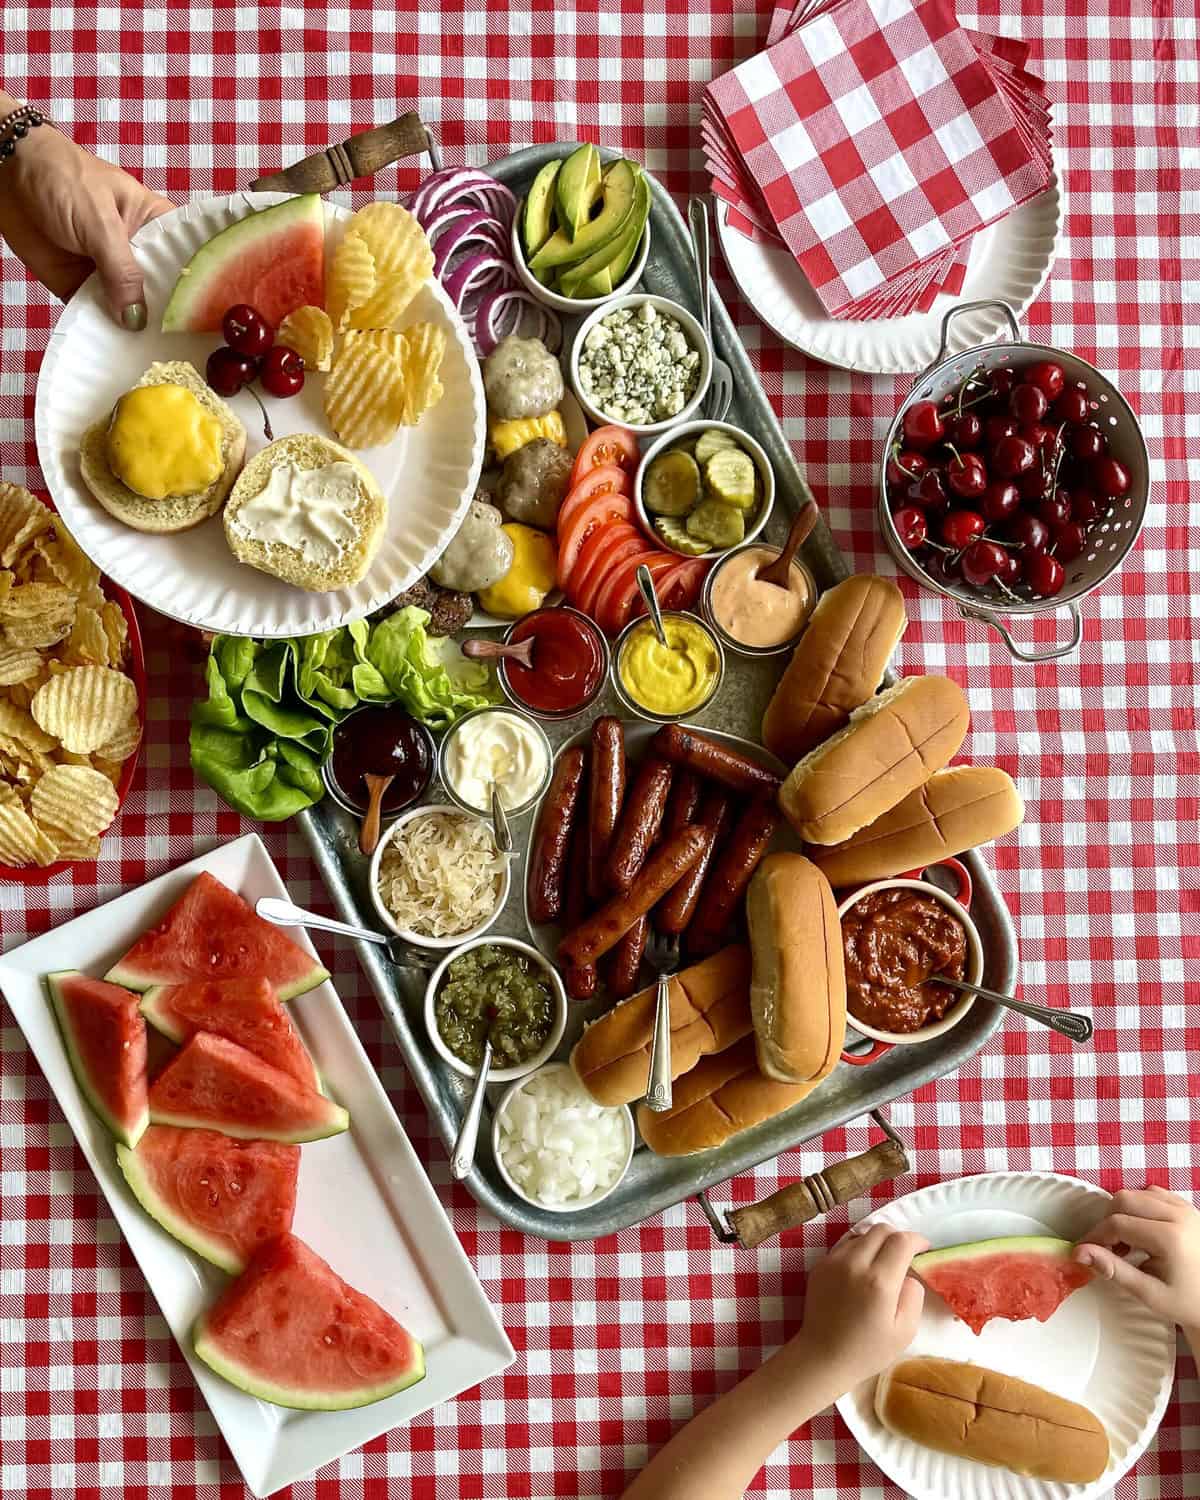
Add the warm chili and bacon to the tray. Put the grilled hamburgers and hot dogs on the plates reserved for them on the tray. Arrange the grilled pineapple rings next to the hamburger patties. Serve the tray and let each person build their own sliders and hot dogs while snacking on the satisfying sides!
Top Tips for Budding Grill Masters
It’s not hard to become a wiz at the grill. All it takes is a little practice and the right know-how and soon, you’ll be flippin’ with the best of ’em. Here are my top tips for hot dogs and burgers.
Awesome Dogs
- I don’t recommend scoring the meat since the juices will flow out during cooking resulting in a dried out hot dog.
- Lay the hot dogs at an angle on the grates to get those signature char marks.
- Heat your grill to where one side is more hot than the other. First, cook the hot dogs on the cooler side of the grill for about 5 minutes to heat them all the way through and then move them to the hot side of the grill to crisp them up, for 1-2 minutes, turning them frequently to get char marks on all sides.
- When they start to expand but before they start spattering juices, they’re done.
- A standard size beef frank takes about 7 minutes to grill and a jumbo beef frank takes about 10 minutes.
Best Burgers
- Don’t combine salt into the mixture, especially if you’re not going to grill the patties right away. Salt will extract moisture from the meat, leaving you with dry burgers. Instead, generously sprinkle each burger with salt and pepper right before you put it on the grill.
- To keep patties from swelling in the middle, make small indentations in the center.
- Medium heat is best. Too hot, and burgers burn on the outside before getting done on the inside. Keep the lid closed while cooking; it shortens cooking time and keeps burgers moist.
- For juicy burgers, use ground beef that has at least 20% fat. We like to use a 80/20 ground chuck for our burgers.
- Use wet hands to form the patties. This will help the meat from sticking to your fingers as you shape the burger patties.
- Do not press down on the patties while they’re grilling. This will release the juices taking out the moistness of the end result.
- Burgers should reach at least 160-degrees internally.
Build the S’mores Board
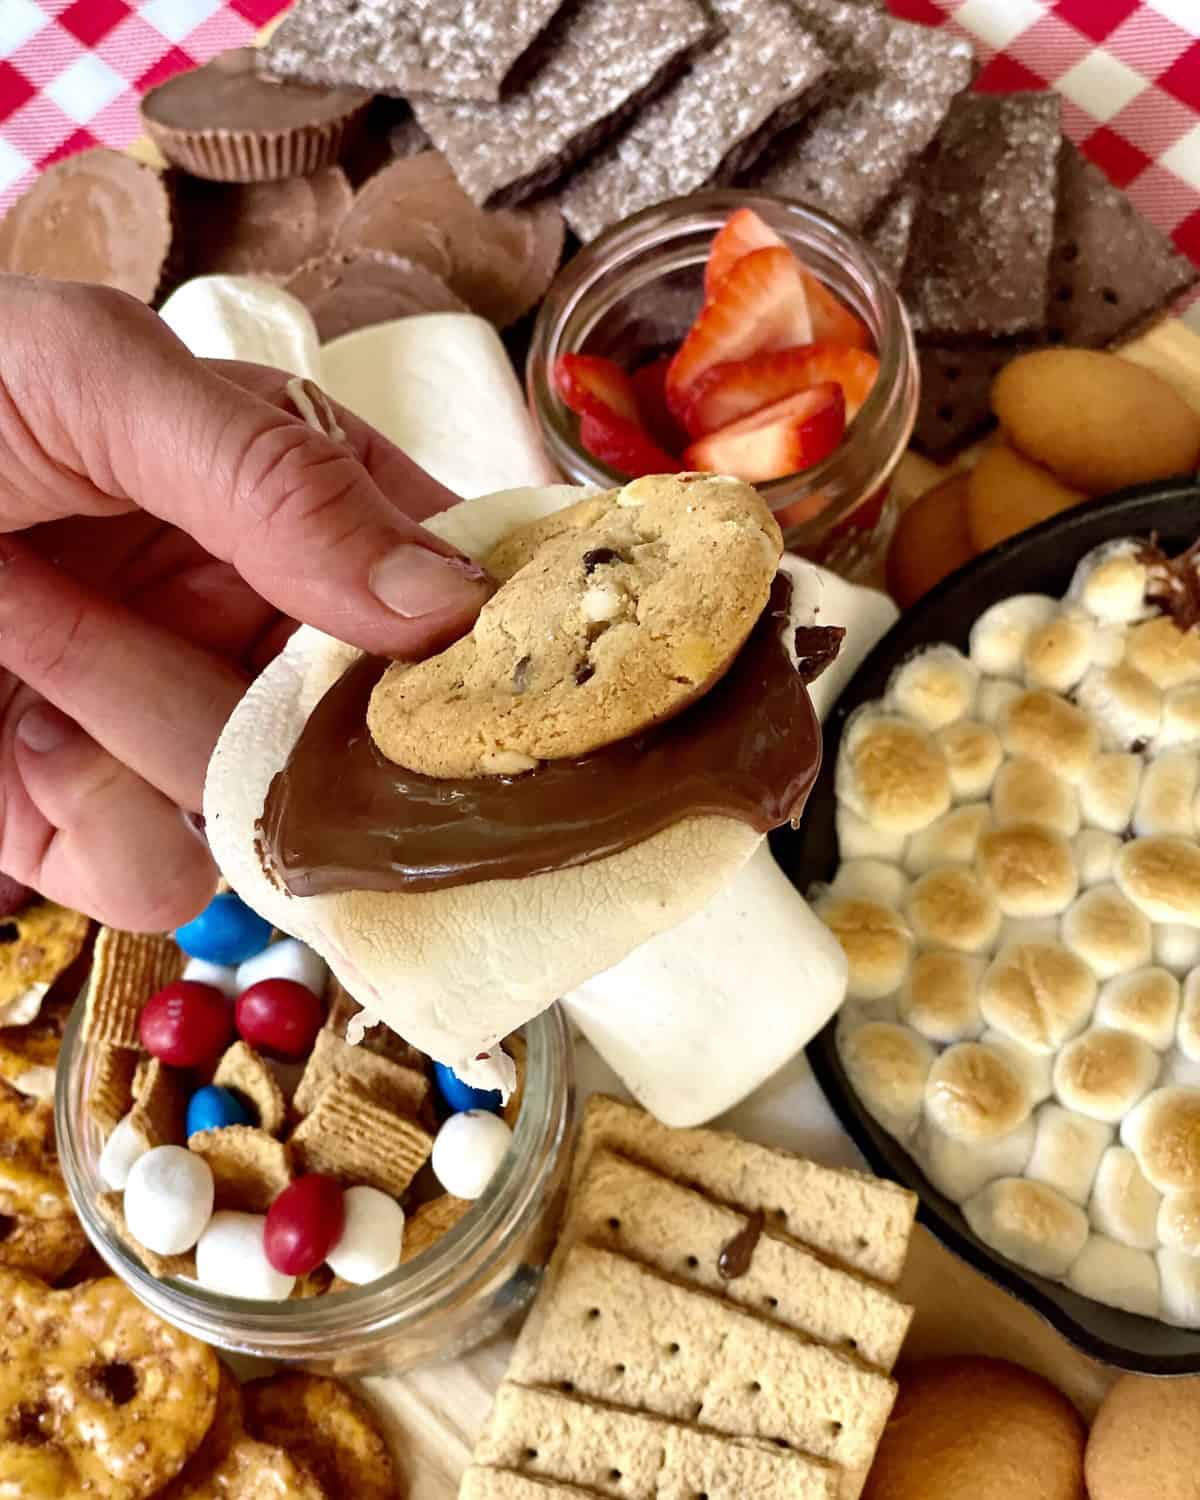
And then there’s dessert! Y’all already know how I feel about s’mores. A sticky, burnished marshmallow between crunchy graham crackers and a square of melty chocolate. There might be nothing better! Add a hot summer night, friends and family, and it all equals sweet, yummy fun. I can’t get enough. A s’mores board can be as simple or as elaborate as you want to make it. The best thing about dessert is, there are no rules. But here’s a great plan to get started.
Make the grilled s’mores dip:
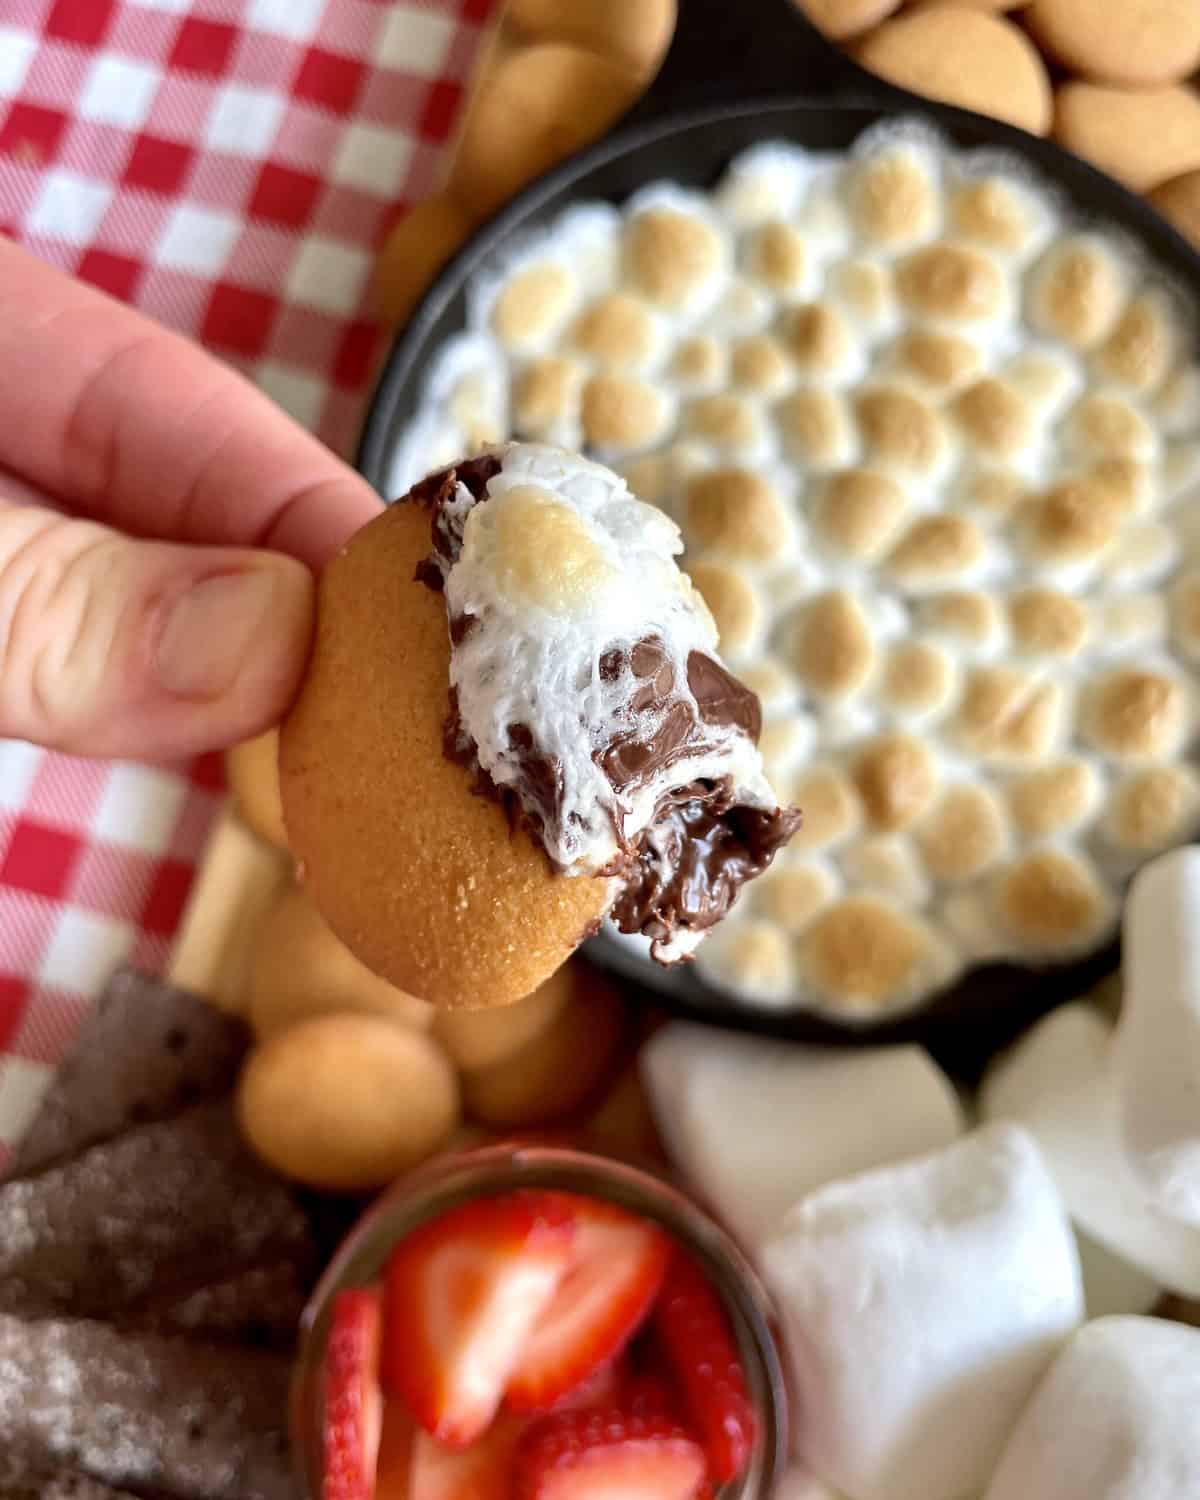
First, place the chocolate chips in a small cast iron skillet and top with the mini marshmallows. Heat the grill to medium heat, place the skillet on the grill and close the grill lid. Cook until the chocolate is melted and the marshmallows are golden, about 10-15 minutes. Let set for about 5 minutes off of the grill before adding to the board to dip into.
Build the Board:
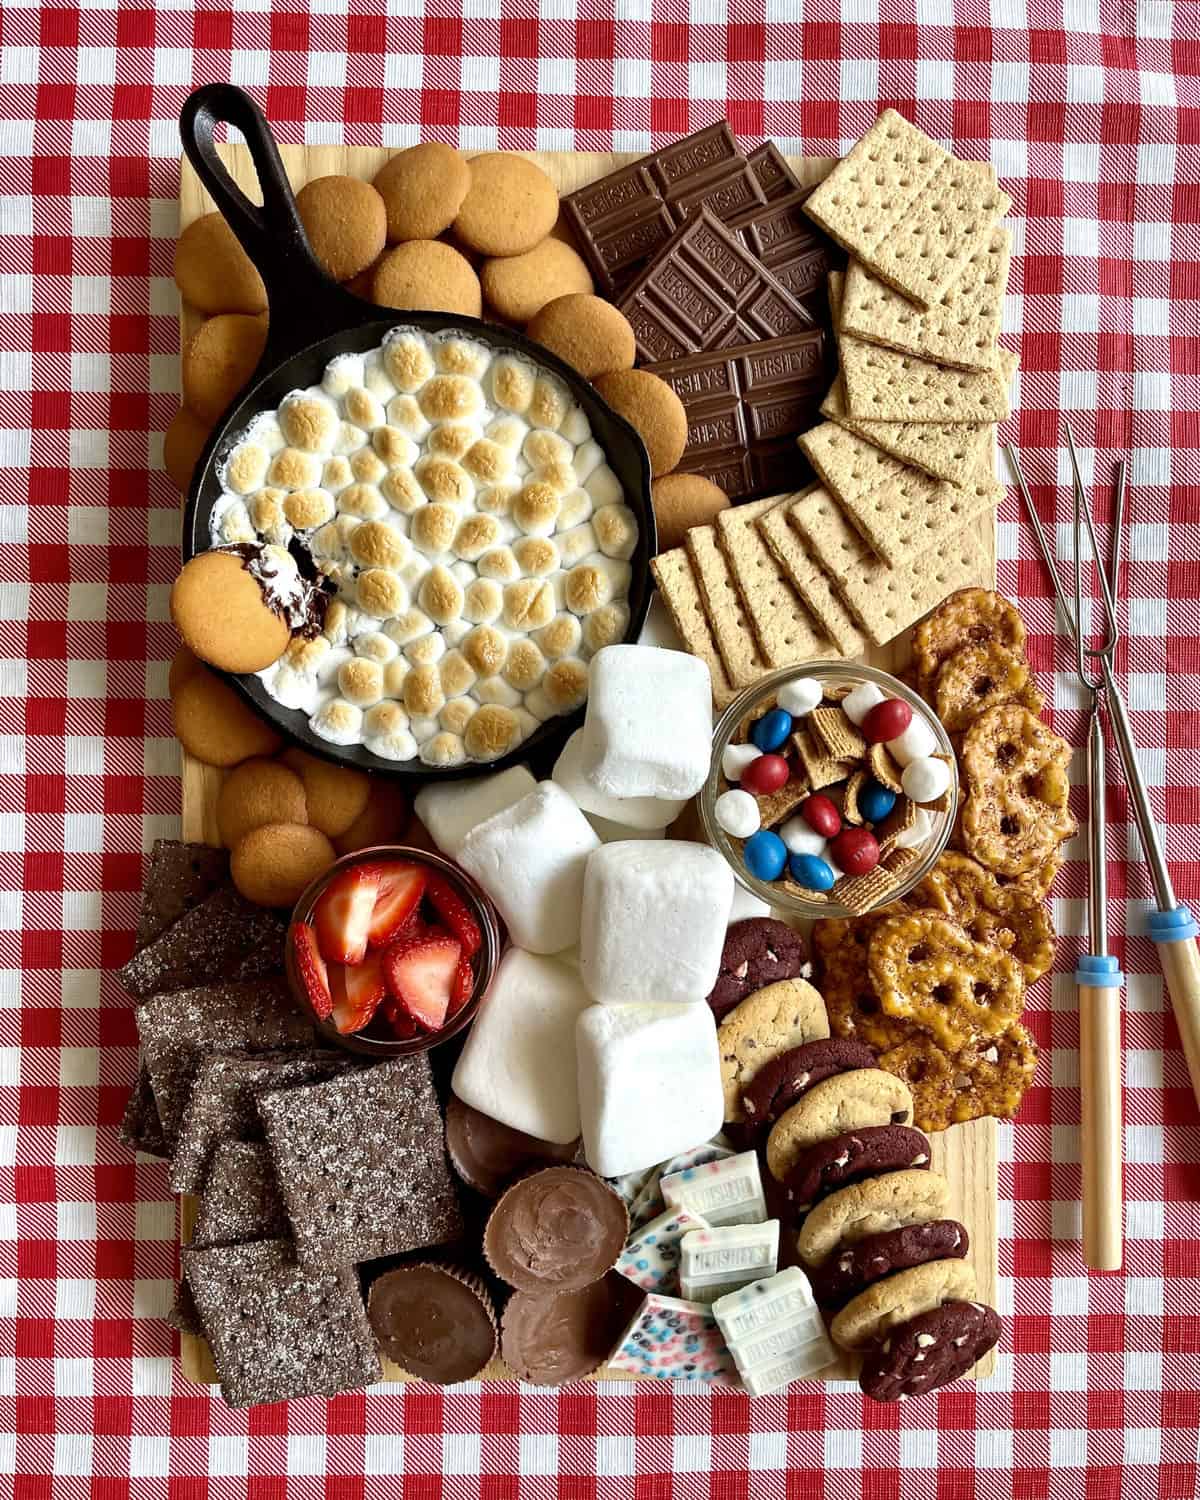
First, mix together the ingredients for the S’mores Snack Mix and place in a small serving bowl on the board. Then fill another serving bowl with strawberry slices and place it on the board.
Place the s’mores sized marshmallows on the middle of the board. Next, fan the regular graham crackers on the upper right corner and place the chocolate graham crackers on the bottom left corner of the board. Then set the Hershey’s Milk Chocolate bars on the top middle of the board.
Place the cinnamon sugar pretzel crisps around the s’mores snack mix on the right side of the board.
Line the cookies down the lower right corner alternating between the s’mores and red velvet flavors.
Place the red, white and blue cookies ‘n’ cream chocolate bar pieces and peanut butter cups along the bottom of the board in between the cookies and chocolate graham crackers.
Add the grilled s’mores dip skillet to the upper left corner of the board and surround it with the Nilla Wafers for dipping into it with.
Serve with roasting sticks for roasting the marshmallows and enjoy!
Ultimate Summer Enjoyment!
That’s all there is to it, my friends! If this spectacular spread doesn’t scream summer, I don’t know what does. It’s the ultimate menu that is sure to make for a great summer get-together. By giving you the inspiration, the menu, the recipes and my best spread serving tips, I hope you’re able to easily and stress-free set this spread and enjoy it with your loved ones.
Here’s to a summer filled with delicious grilling and lots of chilling. I hope you love this Summer Cookout Spread as much as we do. When you make it, be sure to snap a picture and tag me on Instagram @thebakermama so I can see! I just love seeing how inspired and creative y’all get with the ideas I share.
xoxo,


Hot Dog and Hamburger Tray
- Prep Time: 30 min
- Cook Time: 10 min
- Total Time: 40 minutes
- Yield: 10-12
Description
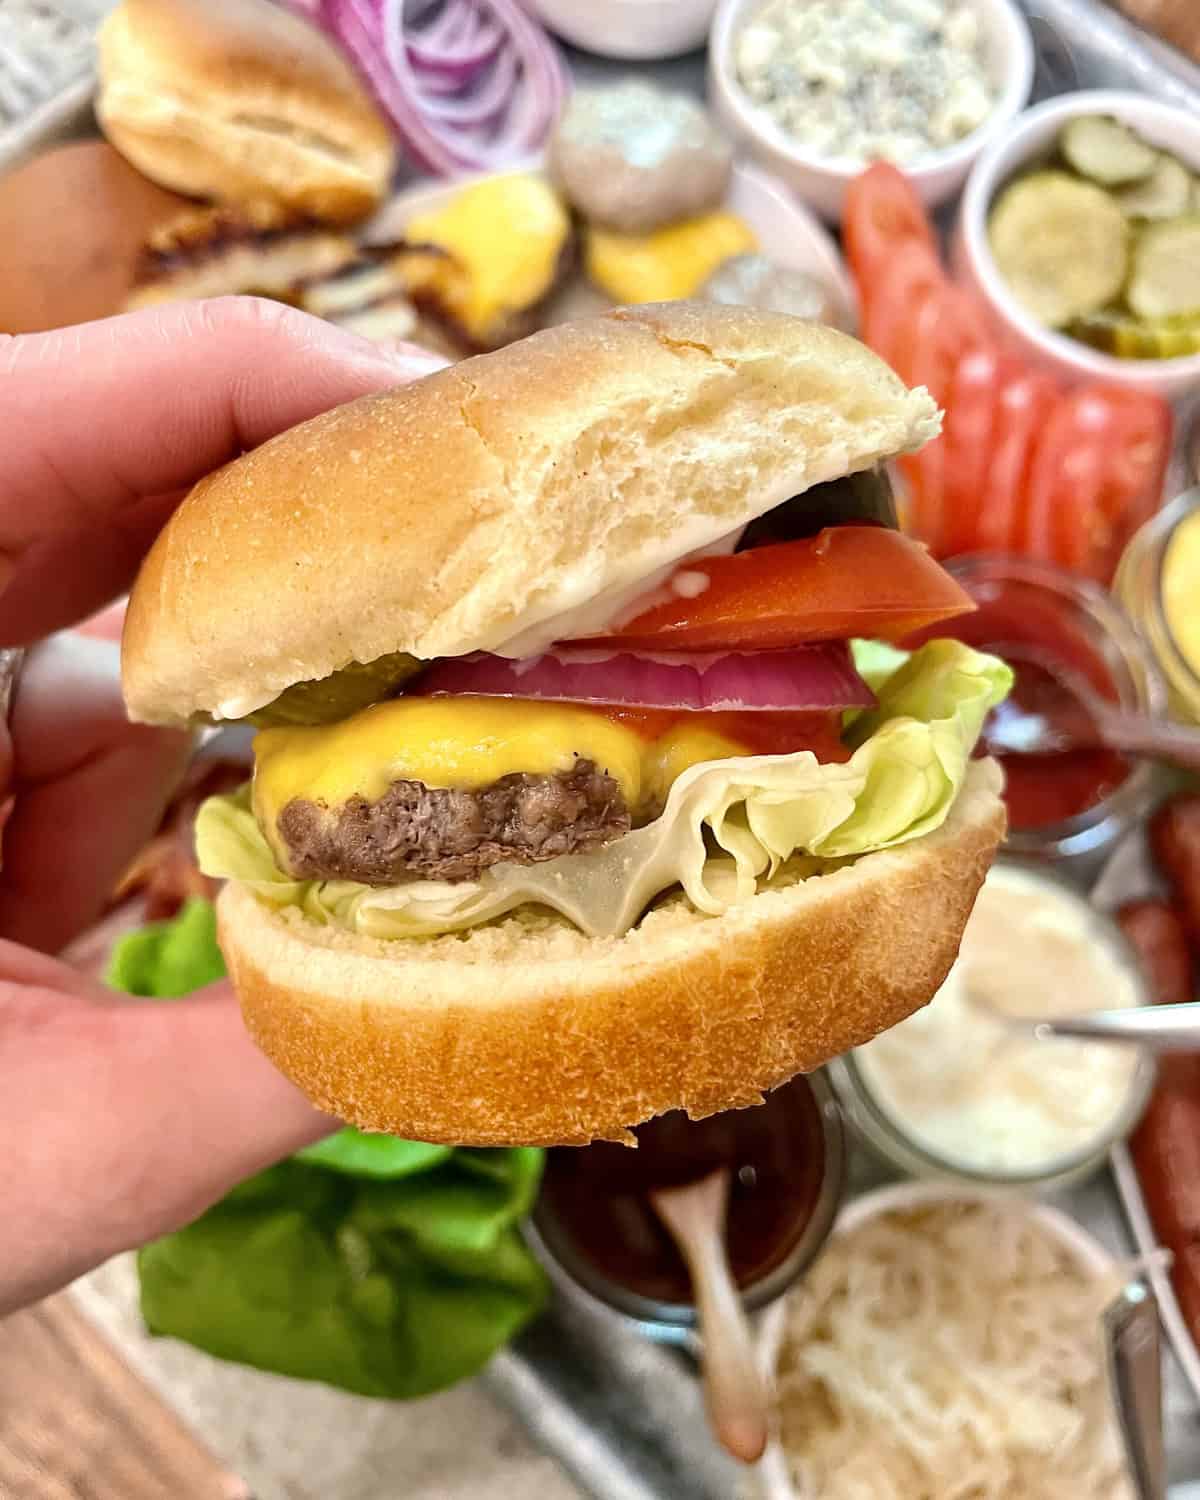
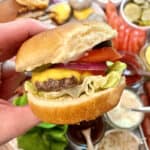
Let your guests build-their-own burgers and hot dogs with an awesome variety of fixings to choose from. It’s an easy and delicious way to serve and please everyone!
Ingredients
Sides:
- potato chips
- fresh cherries
- watermelon slices
Hamburger and Hot Dog Tray:
For the Hot Dogs:
- hot dog buns
- hot hogs
- mustard
- ketchup
- relish
- chili
- sauerkraut
- diced white onion
For the Hamburgers:
- slider buns
- hamburger patties
- American cheese slices
- provolone cheese slices
- blue cheese crumbles
- bacon
- lettuce
- tomato slices (tomatoes on the vine or roma tomatoes are a great size for sliders)
- pickle chips
- red onion slices
- avocado slices
- grilled pineapple rings
- mayonnaise
- ketchup
- mustard
- burger sauce
- barbecue sauce
Instructions
- Heat the chili and cook the bacon. Keep the chili over low heat on the stove and the bacon warming in a 200-degree oven until you’re ready to add them to the tray.
- Put two small plates on a large serving tray as place holders for the grilled hamburger patties and hot dogs. Place a small serving bowl for chili on the tray, but wait to add the warm chili until just before serving.
- Prepare all of the toppings, except for the grilled pineapple, and arrange them in small serving bowls or directly on the tray. Arrange the slider and hot dog buns on the tray.
- Put the chips, cherries and watermelon on serving dishes on the spread table. Cover them, if necessary.
- Grill the burgers and hot dogs. See Easy Cheeseburger Sliders recipe and hot dog grilling tips. Add cheese to the burgers while still on the grill, if guests want the cheese melted. Leave some patties without cheese.
- While the burgers are grilling, brush the pineapple rings with olive oil and add them to the grill. Grill the pineapple slices for 2-3 minutes per side until they have nice grill marks.
- Add the warm chili and bacon to the tray. Put the grilled hamburgers and hot dogs on the plates reserved for them on the tray. Arrange the grilled pineapple rings next to the hamburger patties. Serve the tray and let each person build their own sliders and hot dogs!
Notes
If you want to grill the hamburgers and hot dogs in advance, transfer them to a sheet pan after they’re finished grilling and keep them in the turned off (but still warm) grill with the lid closed or in a 200-degree warming oven until ready to serve.
Other Topping Options: shredded cheese for the hot dogs, jalapeno slices, crispy fried onions
Easy Cheesy Sliders
- Prep Time: 10 min
- Cook Time: 6 min
- Total Time: 16 minutes
- Yield: 12
Description
Bet you can’t eat just one! These Easy Cheesy Sliders are juicy, tender, and customizable. The perfect burger for your cookout!
Ingredients
- 1 pound ground beef (I like to use 80/20)
- Kosher salt, for seasoning the patties
- Freshly ground black pepper, for seasoning the patties
- 12 slices American or provolone cheese slices, cut ½ inch smaller than the slider buns
- 12 slider buns
Instructions
- Form the ground beef into 2-tablespoon-size balls, and flatten each one with the palm of your hand to ½ inch larger than the slider buns. Season the outside of each patty generously with salt and black pepper.
- Heat the grill over medium heat for 5 minutes. Brush the grates with oil, and then add the patties. Sear the patties for 3 to 4 minutes on one side, then flip them. Immediately add the cheese and close the grill lid. Let the sliders continue to cook for another 1 to 2 minutes, or until they reach desired doneness and the cheese has melted.
- Remove the patties from the grill and add to the serving tray
Notes
Tips for grilling a great burger:
Don’t combine salt into the mixture, especially if you’re not going to grill the patties right away. Salt will extract moisture from the meat, leaving you with dry burgers. Instead, generously sprinkle each burger with salt and pepper right before you put it on the grill.
To keep patties from swelling in the middle, make small indentations in the center.
Medium heat is best. Too hot, and burgers burn on the outside before getting done on the inside. Keep the lid closed while cooking; it shortens cooking time and keeps burgers moist.
For juicy burgers, use ground beef that has at least 20% fat. We like to use a 80/20 ground chuck for our burgers.
Use wet hands to form the patties. This will help the meat from sticking to your fingers as you shape the burger patties.
Do not press down on the patties while they’re grilling. This will release the juices taking out the moistness of the end result.
Burgers should reach at least 160-degrees internally.

S’mores Board
- Prep Time: 15 min
- Cook Time: 15 min
- Total Time: 30 minutes
- Yield: 12
Description
A s’mores board is such a fun and yummy way to bring everyone together and enjoy the classic summer sweet treat!
Ingredients
Grilled S’mores Dip:
- 1 cup chocolate chips
- 18 mini marshmallows
S’mores Snack Mix:
- 1/2 cup Golden Grahams cereal
- ¼ cup mini marshmallows
- ¼ cup Red, White and Blue Peanut Butter M&M’s candies
For the board:
- Hershey’s Milk Chocolate Bars
- Hershey’s Red, White & Blue Cookies ‘n’ Creme S’mores Candy Bars, broken into fourths
- Reese’s Peanut Butter Cups
- regular graham crackers
- chocolate graham crackers
- Cinnamon Sugar Pretzel Crisps
- Jet-Puffed s’mores size marshmallows
- Chips Ahoy S’mores Cookies
- Chips Ahoy Red Velvet Cookies
- Nilla Wafers
- strawberries, sliced
Instructions
- To make the grilled s’mores dip: place the chocolate chips in a small cast iron skillet and top with the mini marshmallows. Heat the grill to medium heat, place the skillet on the grill and close the grill lid. Cook until the chocolate is melted and the marshmallows are golden, about 10-15 minutes. Let set for about 5 minutes off of the grill before adding to the board to dip into.
- Mix together the ingredients for the S’mores Snack Mix and place in a small serving bowl on the board. Fill another serving bowl with strawberry slices and place it on the board.
- Place the s’mores sized marshmallows on the middle of the board.
- Fan the regular graham crackers on the upper right corner and place the chocolate graham crackers on the bottom left corner of the board. Set the Hershey’s Milk Chocolate bars on the top middle of the board.
- Place the cinnamon sugar pretzel crisps around the s’mores snack mix on the right side of the board.
- Line the cookies down the lower right corner alternating between the s’mores and red velvet flavors.
- Place the red, white and blue cookies ‘n’ cream chocolate bar pieces and peanut butter cups along the bottom of the board in between the cookies and chocolate graham crackers.
- Add the grilled s’mores dip skillet to the upper left corner of the board and surround it with the Nilla Wafers for dipping into it with.
- Serve with roasting sticks for roasting the marshmallows and enjoy!