
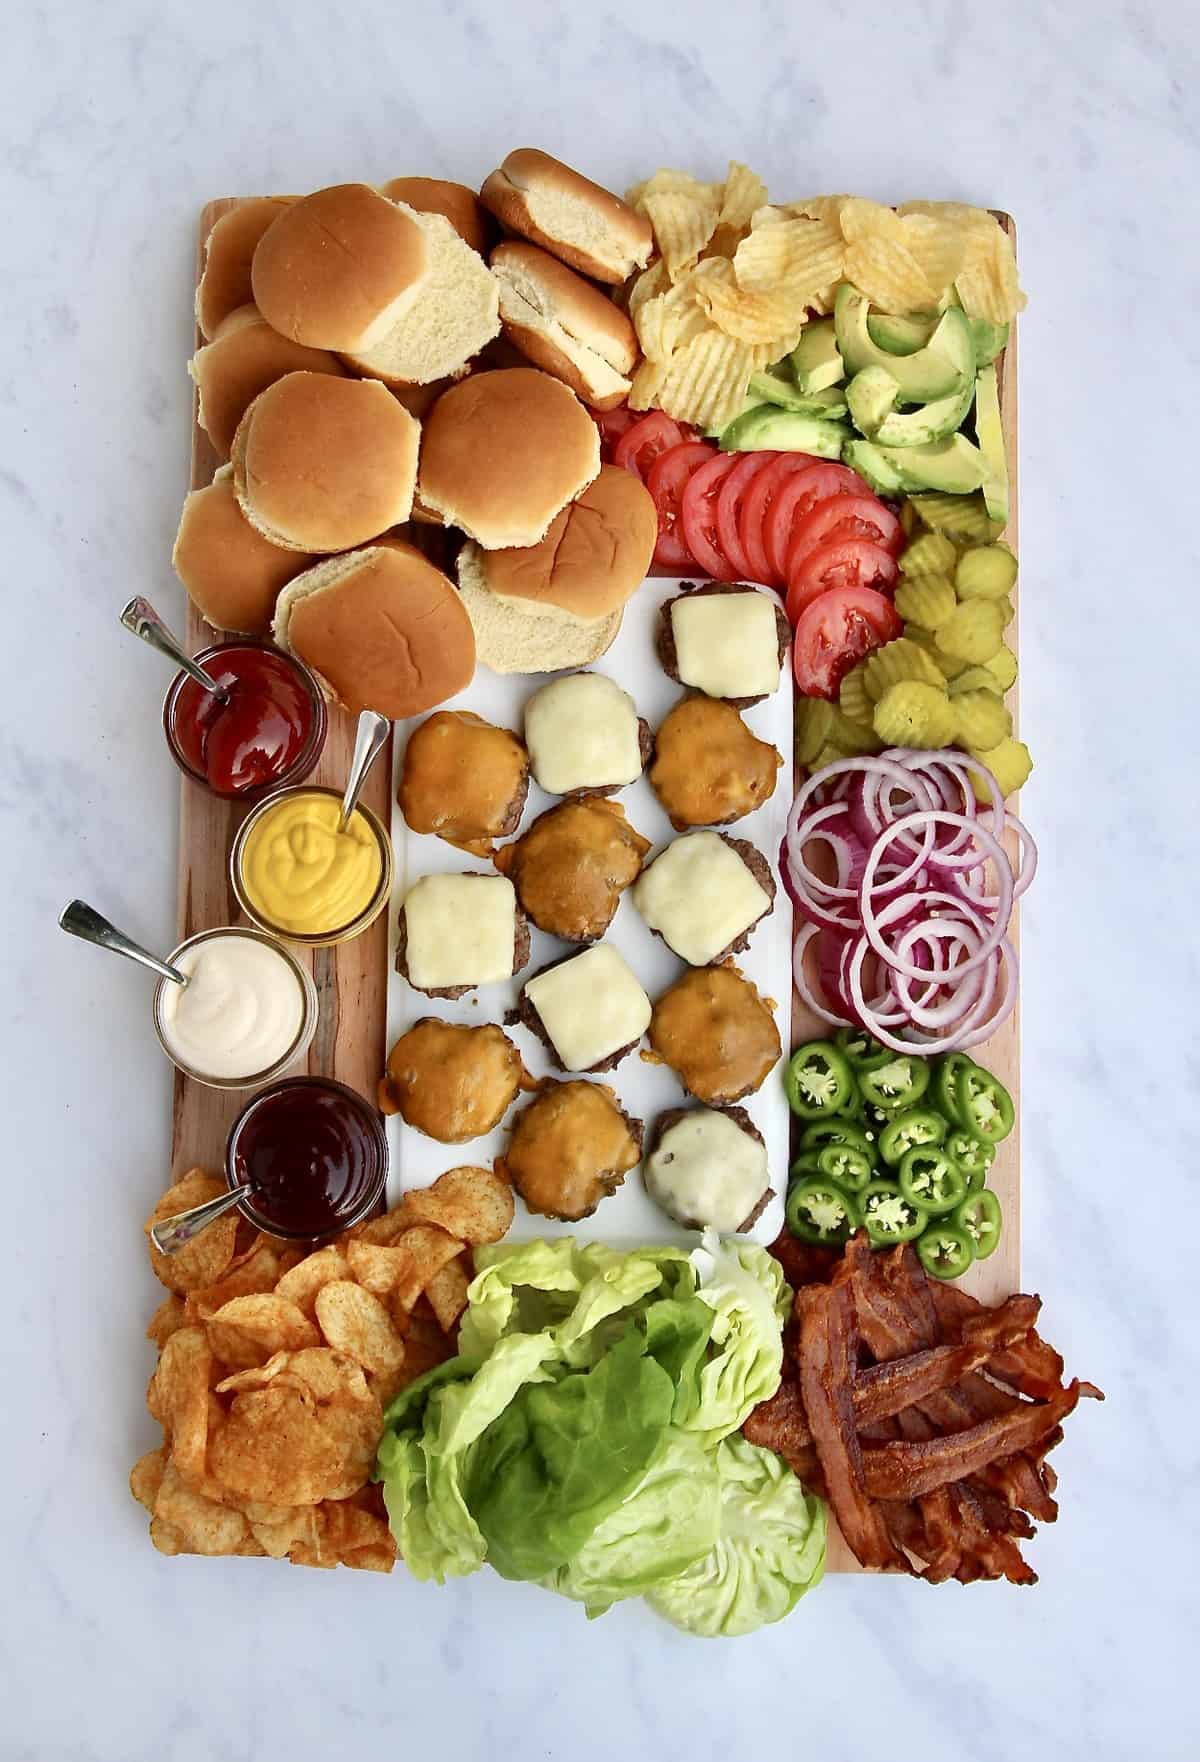
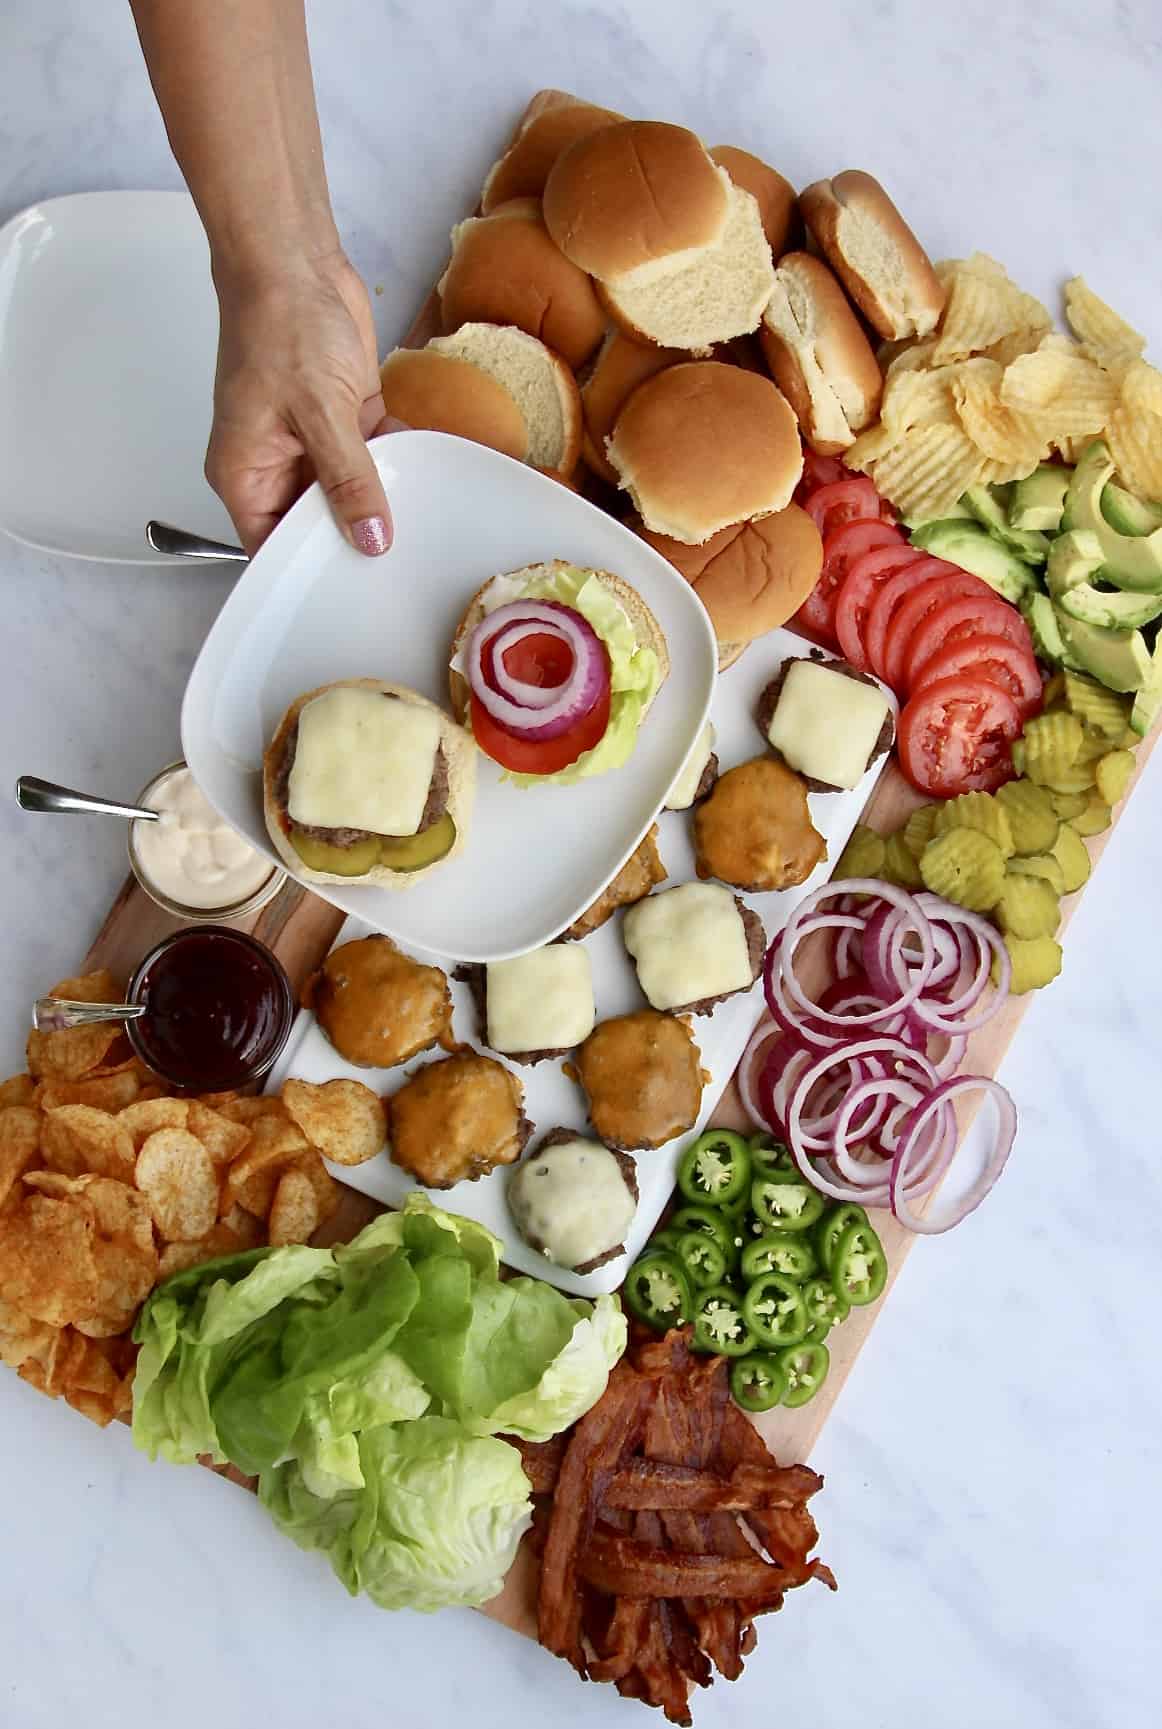
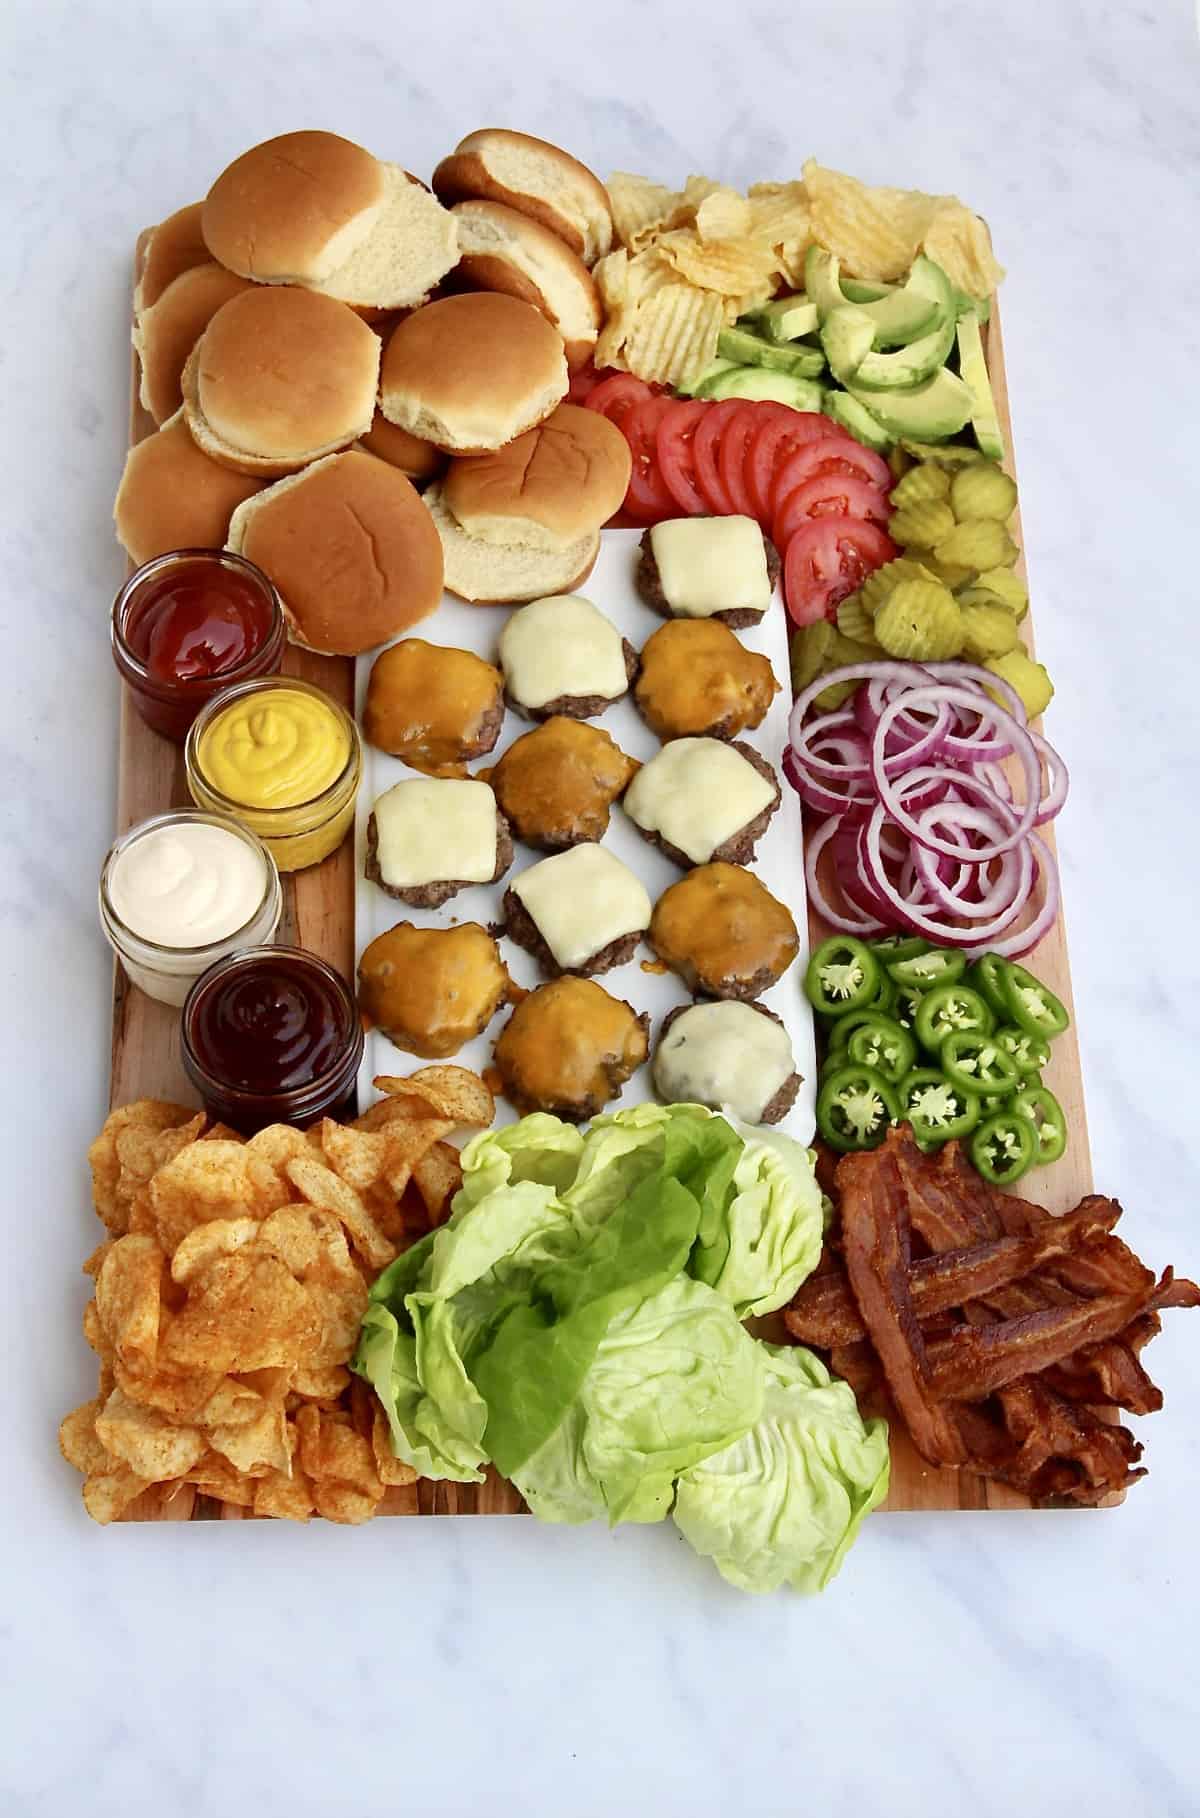
Let your crowd fix their burgers just the way they like ’em! A Build-Your-Own Burger Board offers a variety of delicious toppings and spreads to choose from.
Something for Everyone
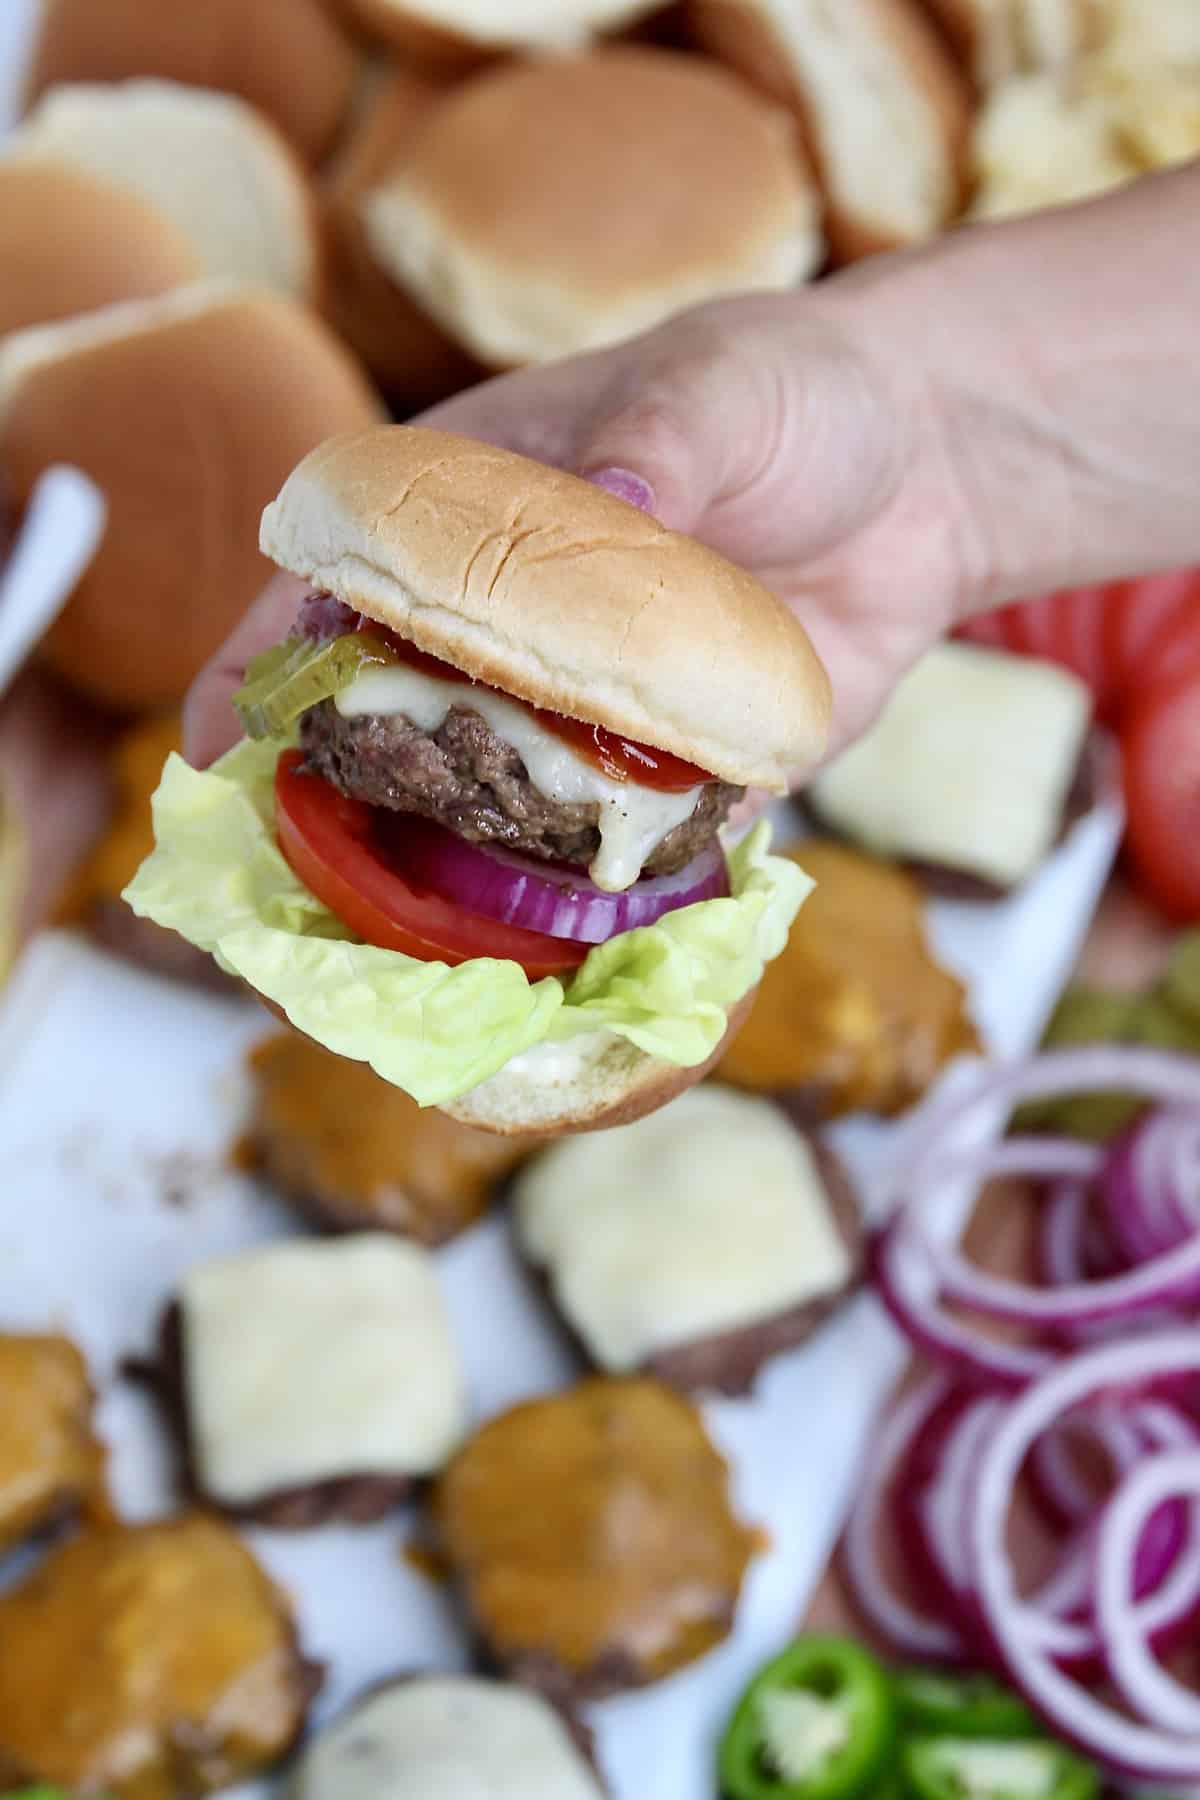
What makes your favorite burger? While one of my kids likes to keep it simple with ketchup only, another loads up on pickles, lettuce and tomato. My personal favorite is bacon, avocado and a few slices of jalapeño! With this Build-Your-Own Burger Board, everyone gets to build and enjoy their favorite burger!
Sliders, too!
This time I made it with sliders, but we’ll also make this board with regular-sized hamburgers and both ways are always a huge it. Sliders are a great way to serve them because some people (especially kids) don’t eat a full-size hamburger.
Also, sliders are great because most people will enjoy a few and build each one a different way. So much fun!
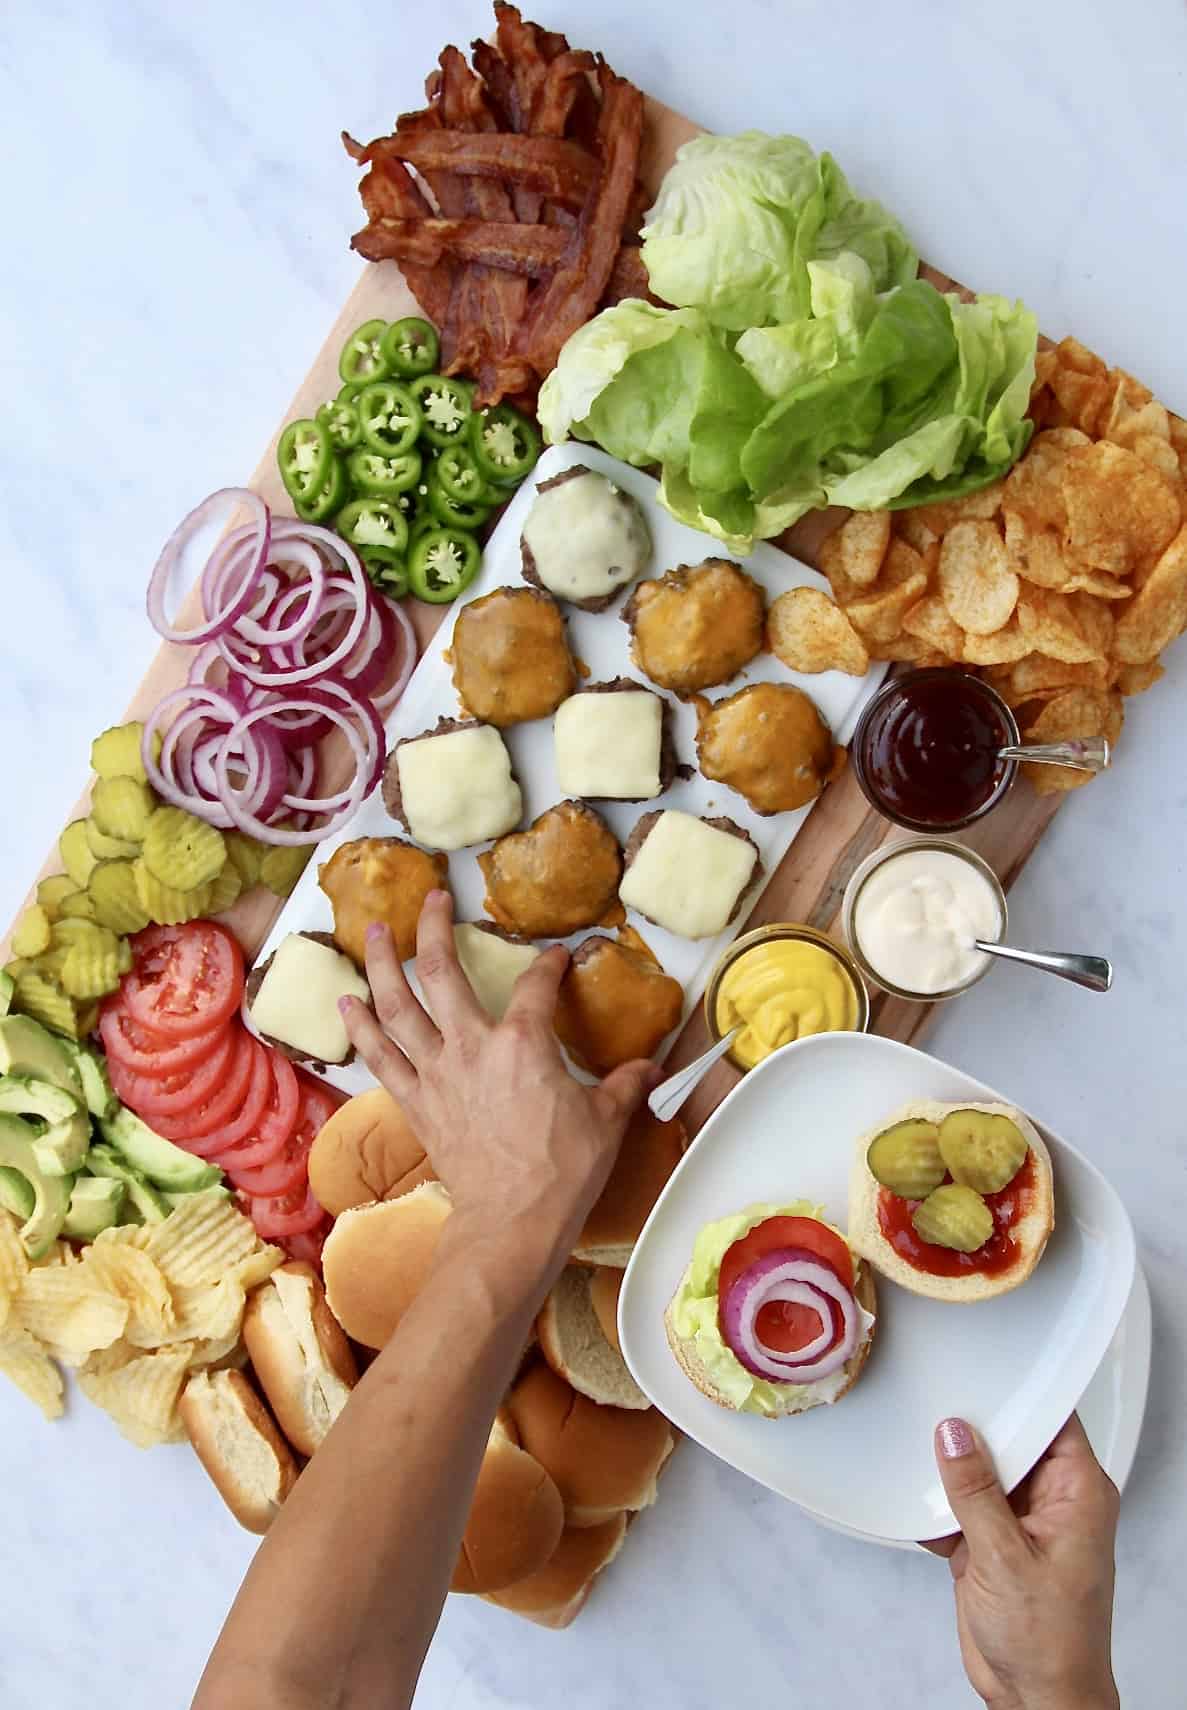
The excitement on people’s faces when they approach this board is pretty awesome. You can just see their eyes grow big as they take in the burger charcuterie board. Then a smile of concentration on their faces as they choose their burger toppings. The combinations are endless!
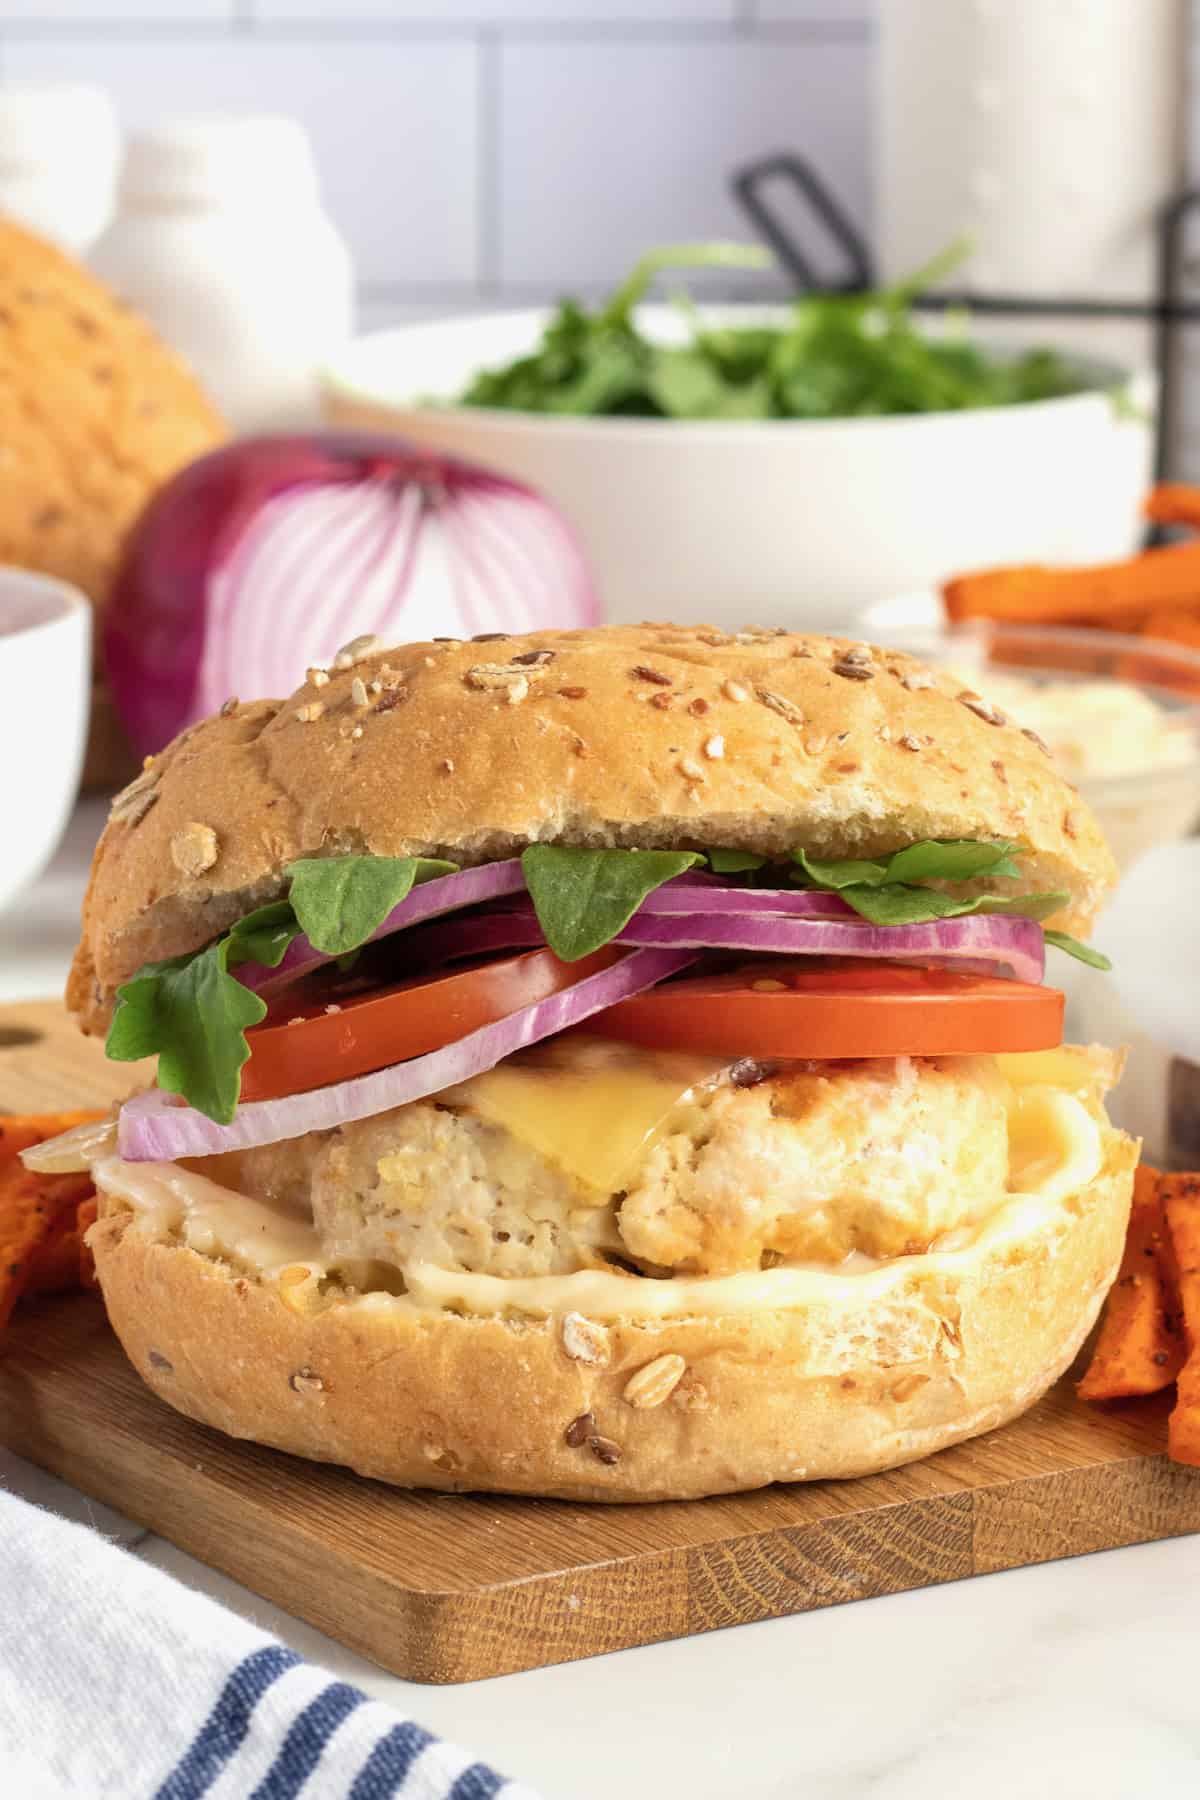
Grilled Turkey Burgers
Not into ground beef? Change it up at the grill with easy and delicious Grilled Turkey Burgers. Gruyere, green onion and Dijon mustard make every bite flavorful and moist!
What Do I Need to Build a Burger Board?
- hamburger or slider patties
- cheese slices (cheddar cheese, Swiss, pepper jack)
- hamburger buns or slider buns
- lettuce
- tomato slices
- red onion slices (or caramelized onions)
- jalapeños slices
- avocado slices
- pickles slices
- bacon
- ketchup
- mustard
- mayonnaise
- BBQ sauce
- potato chips
- BBQ potato chips
- 24″ x 18″ wood board (any big board for serving)
- mini mason jars or small bowls
Quick Tip: Internal Temperature of Hamburgers
If you’re grilling burgers, check the doneness with a meat thermometer. Ground beef should be cooked to an internal temperature of at least 160 degrees. Then let the patties rest for at least five minutes before serving.
How to Make a Build-Your-Own Burger Board
- Place a dish in the middle of a large wood board to put the hamburger patties on once they’re grilled. Prep the hamburgers for grilling.
- Before grilling the burgers, place all of the hamburger makings around the plate to the edge of the board. The key is to arrange everything so everyone can easily grab what they need to build their own burger.
- Start by placing the burger buns in the top left corner of the board.
- Down the right side of the board, place the sliced avocado, sliced tomato, pickle slices, sliced red onion, sliced jalapeños and bacon strips.
- Place four mini mason jars, filled with ketchup, mustard, mayonnaise, and BBQ sauce, on the left middle side of the board. Add small spoons or spreading knives for spreading.
- Place the lettuce at the bottom center of the board and potato chips in the top right corner and bottom left corner of the board.
- Grill the hamburger patties, melting cheese on them, if desired. Place the grilled hamburger patties on the plate in the middle of the board and serve.
Once the board is built to this point, we’ll grill the hamburger patties with or without melted cheese on them. We always ask who wants cheese on their burger before adding it. Once the patties are grilled and the cheese is melted on each one, place them on the plate in the center of the board and serve.
No, Grill? No Problem!
If you don’t have a grill or it’s not grilling season where you live at the time, you can always cook the patties in a skillet and they will taste just as great! Try my awesome Skillet Sliders recipe.
That’s all there is to it! A burger bar is such a fun and, of course, yummy way to serve a meal! I love a good build-your-own meal to feed a crowd and this ultimate Build-Your-Own Burger Board is one of our favorites for family dinner or really any get-together with family and friends. Enjoy!
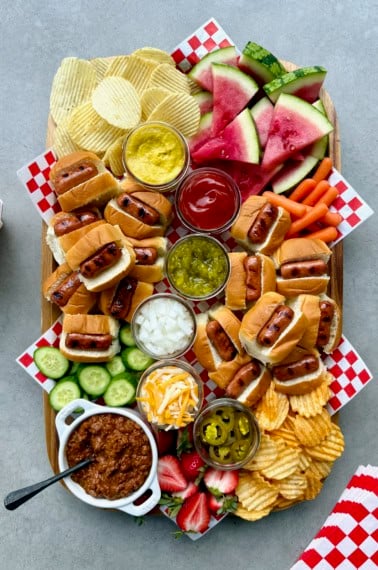
Summer Cookout Favorites
Make your summer cookout delicious from start to finish with my Summer Grilling Favorites. Irresistible appetizers, fresh salads and perfect sides, cold drinks and tempting desserts — it’s all here to enjoy!

If you make this Build-Your-Own Burger Board and post to social, be sure to tag me @thebakermama so I can see. 😍 I just love seeing your recreations of the boards I share with you! Enjoy!
xoxo,

Build-Your-Own Burger Board
- Prep Time: 30 mins
- Cook Time: 10 mins
- Total Time: 40 mins
- Yield: 6-12
- Category: Main Course
Description
A Build-Your-Own-Burger Board is such a great way to let your crowd enjoy their burgers just the way they like them with a great variety of toppings and spreads to choose from.
Ingredients
- hamburger or slider patties
- cheese slices
- hamburger or slider buns
- lettuce
- tomato slices
- red onion slices
- jalapeños slices
- avocado slices
- pickles slices
- bacon
- ketchup
- mustard
- mayonnaise
- BBQ sauce
- potato chips
- BBQ potato chips
Instructions
- Place a dish in the middle of the board to put the hamburger patties on once they’re grilled. Prep the hamburgers for grilling. Before grilling the burgers, place all of the hamburger makings around the plate to the edge of the board.
- Start by placing the buns in the top left corner of the board.
- Down the right side of the board, place the sliced avocado, sliced tomato, pickle slices, sliced red onion, sliced jalapeños and bacon strips.
- Place four mini mason jars, filled with ketchup, mustard, mayonnaise, and BBQ sauce, on the left middle side of the board. Add small spoons or spreading knives for spreading.
- Place the lettuce at the bottom center of the board and potato chips in the top right corner and bottom left corner of the board.
- Grill the hamburger patties, melting cheese on them, if desired. Place the grilled hamburger patties on the plate in the middle of the board and serve.

Love this! How big is the board you used for this?
Hi, Christina! I used my 24″ x 18″ wood board but you can use any big board for serving.
I love your recipes. I’m often at a loss of ideas to make for us. (We are only 2). And I also love your burger plater boards. That is so out of the box, it makes me smile and look forward to a new display ideas when friends come over. Thank you so much Maegan.
Hi, Fran! Thank you so much. What a kind thing to say. I am so happy you enjoy them!
I love this idea! What a beautiful way to display cheeseburgers! I’m definitely going to try this. Thank you for sharing.