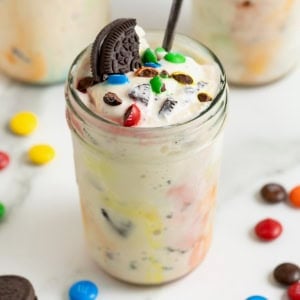
This Easy Homemade Blizzard made with just ice cream, your favorite mix-in(s) and a few key steps for a delicious, thick treat!
Not Your Mama’s Milkshake
Homemade Blizzards are just as tasty, if not tastier than the real thing. Thick and creamy and filled with whatever mix-in(s) your Blizzard-loving heart desires. You won’t believe how deliciously similar these homemade blizzards are to the DQ originals and the beauty is you can make them in the comfort of your own home, in a matter of minutes, for a lot cheaper than driving there to buy one.
The Blizzard Queen of Ada, Oklahoma
Let’s take it back to my high school days when I was on the Dairy Queen blizzard-a-day diet. I was 16 and free to roam around town on my own, so where did I go?! Why the DQ, of course! Like every day.
I kid you not. I would drive through DQ nearly every day and get a blizzard. Sometimes, I even brought my own mix-ins (think homebaked cookies, brownies and even granola…say what?!). I’m pretty sure they shouldn’t have been letting me bring my own mix-ins or using the machines to mix them into my blizzard for that matter, but what happens in small town Oklahoma, happens in small town Oklahoma, y’all. Oh, and they even let me come behind the counter and make my own blizzard every once in a while. Talk about a highlight of my life! 😉
With my daily blizzard diet for nearly two years, I think I kept our small town DQ in business. Seriously! You’ll never believe it, but a few months after I moved away to college, the Dairy Queen closed. Gasp!
So with no DQ back home and no DQ in my college town, I started making my own blizzards…
Watch Me Make It
Join me in the kitchen as I make this Easy Homemade Blizzard!
Ingredients and Supplies
(see recipe card at the bottom of this post for measurements and details)
Ingredients:
- Vanilla ice cream: I usually use vanilla, but sometimes chocolate or strawberry depending on the Blizzard flavor I’m creating. And sometimes I’ll use a healthier ice cream or frozen yogurt and it still turns out great!
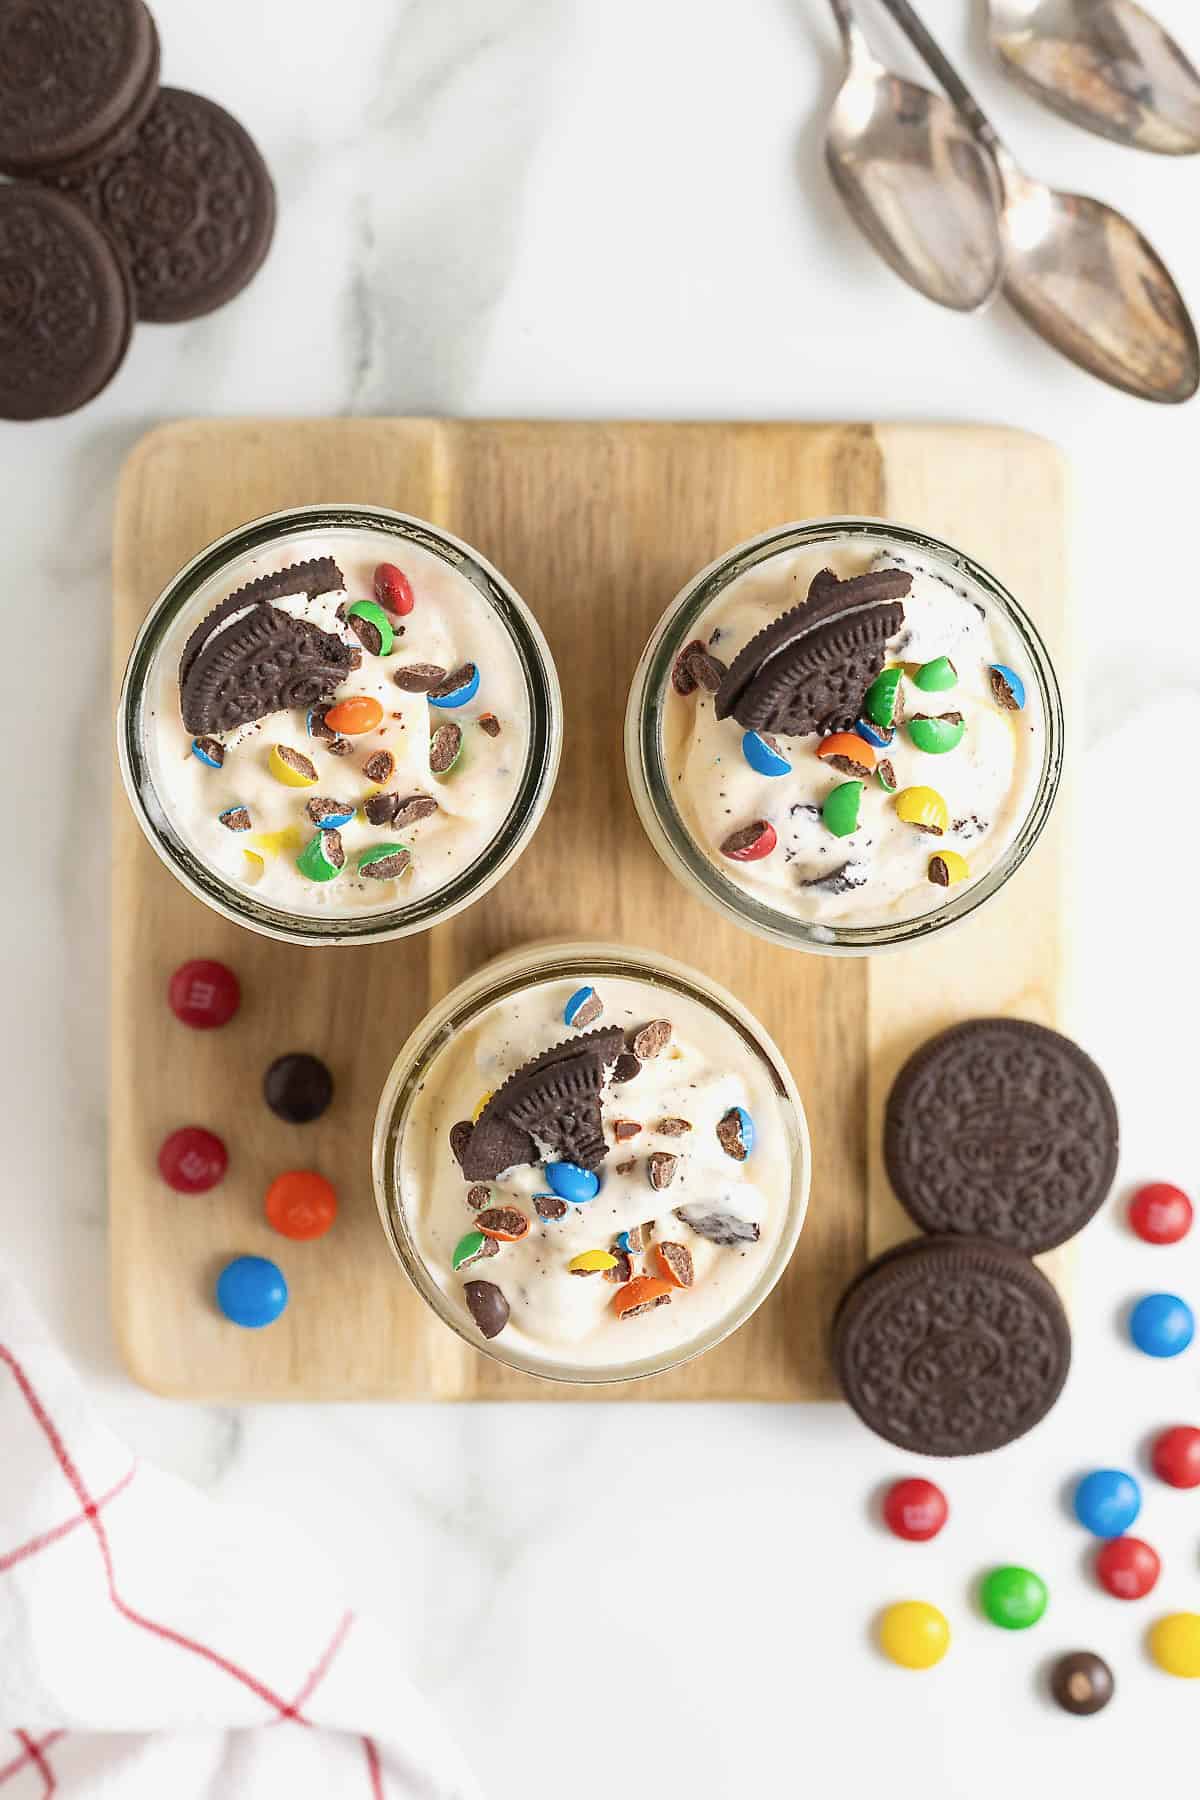
- Crushed mix-ins: Oreos are my go-to with mini M&M’s a close second, but we get super creative depending on our cravings and what we have on hand. Think S’mores Blizzards, Take 5 blizzards (with pretzels, caramel, chocolate, and peanut butter), holiday themed blizzards (like peppermint for Christmas, pumpkin for Thanksgiving, and candy loaded for Halloween), or as simple as tossing a fresh baked cookie or brownie in the mixer with the ice cream to make cookie or brownie blizzard. The options are truly endless!
Supplies:

Quick Tips:
- Use an electric stand mixer with the paddle attachment or a hand mixer. DO NOT use a blender. I repeat, do not use the blender! You would be making more of a milkshake it won’t have that thick texture that I good Blizzard should have.
- Do not add milk. Again, we’re not making a milkshake here, my friends. We’re making a DQ Blizzard! And a Blizzard should be thick. No need to thin it out with milk. Just let the ice cream do its thing.
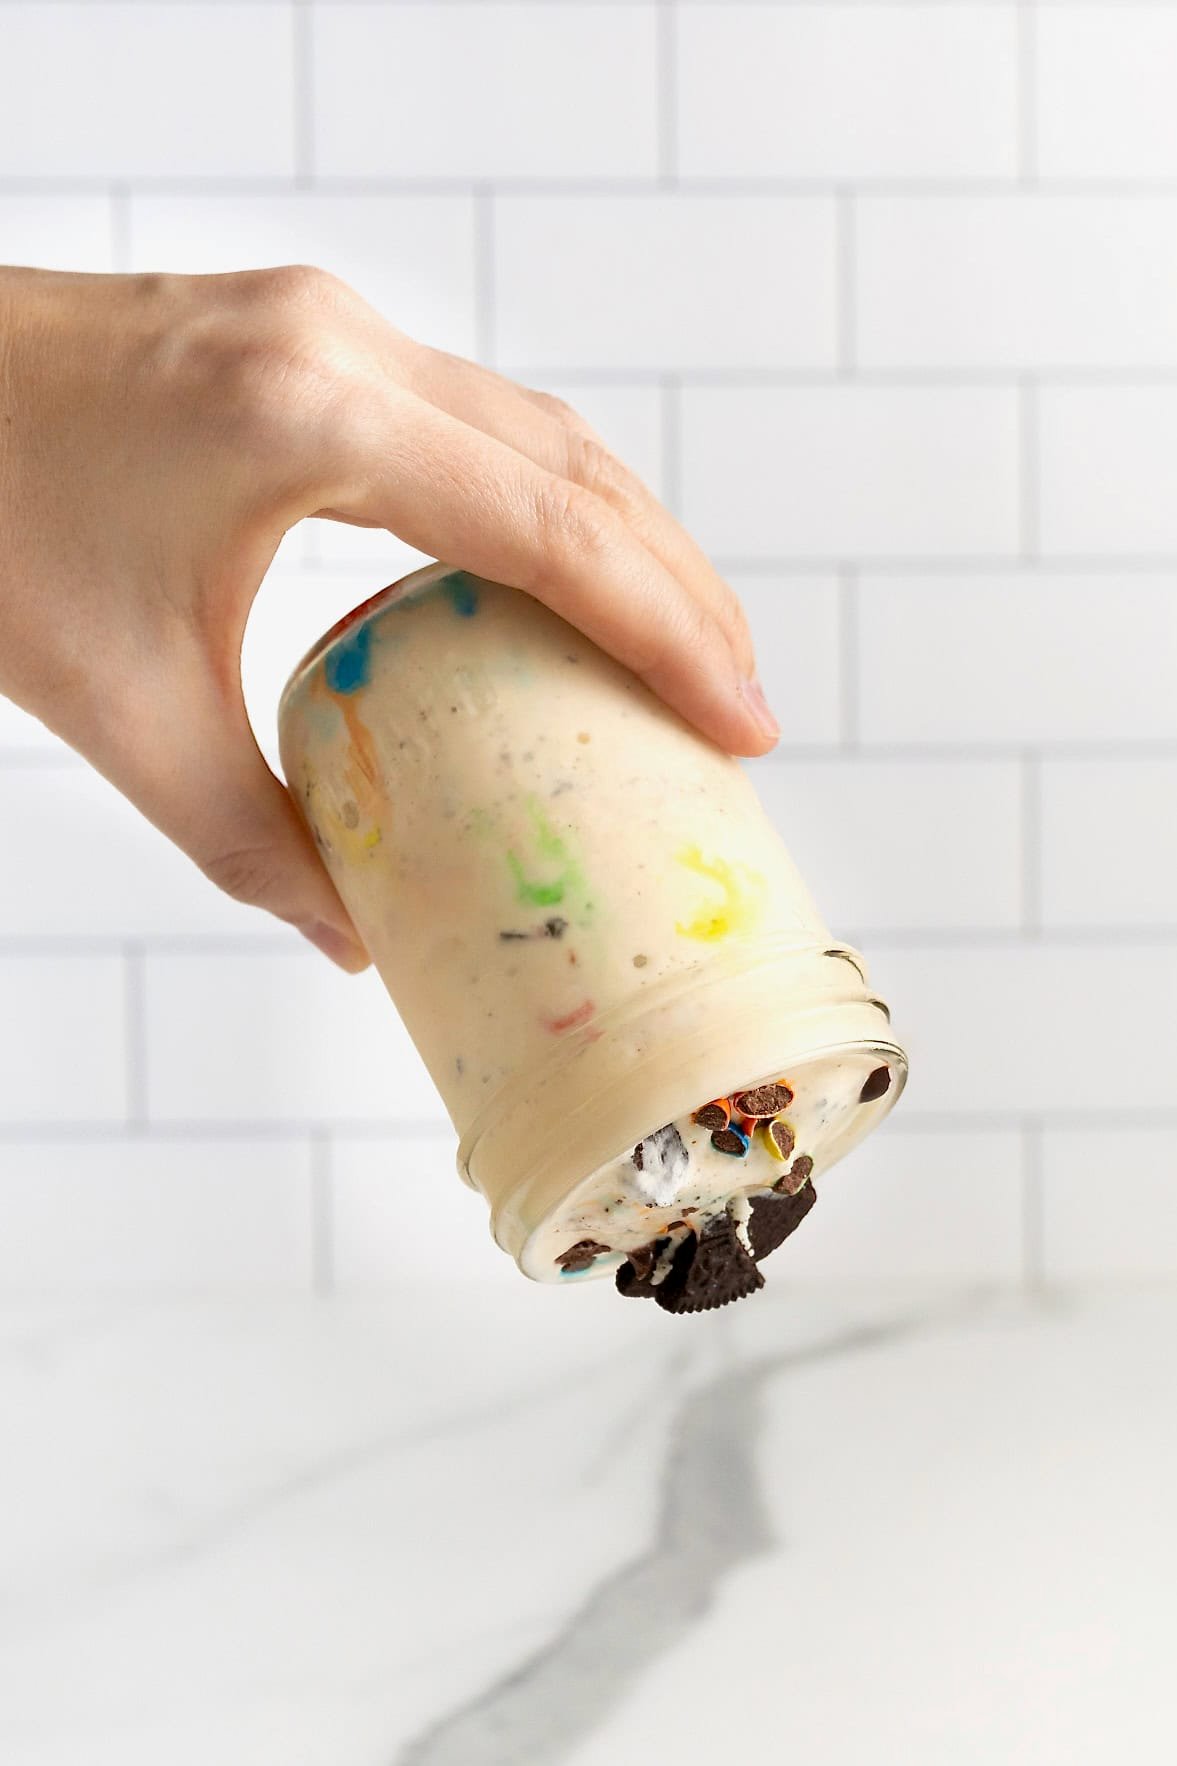
- Place your mixing bowl in the freezer for at least 10 minutes beforehand. This will help keep the ice cream thick and frosty (so you can attempt the upside down challenge 😉 at your own risk!)
How to Make an Easy Homemade Blizzard
- First, scoop the frozen ice cream into the chilled bowl of the stand mixer. You can use any flavor you like for a base (vanilla bean, chocolate, even mint!).
- Beat on medium speed for about a minute until creamy, scraping down the sides of the bowl a few times with a spatula so all ice cream is incorporated and looks a little more like soft serve.
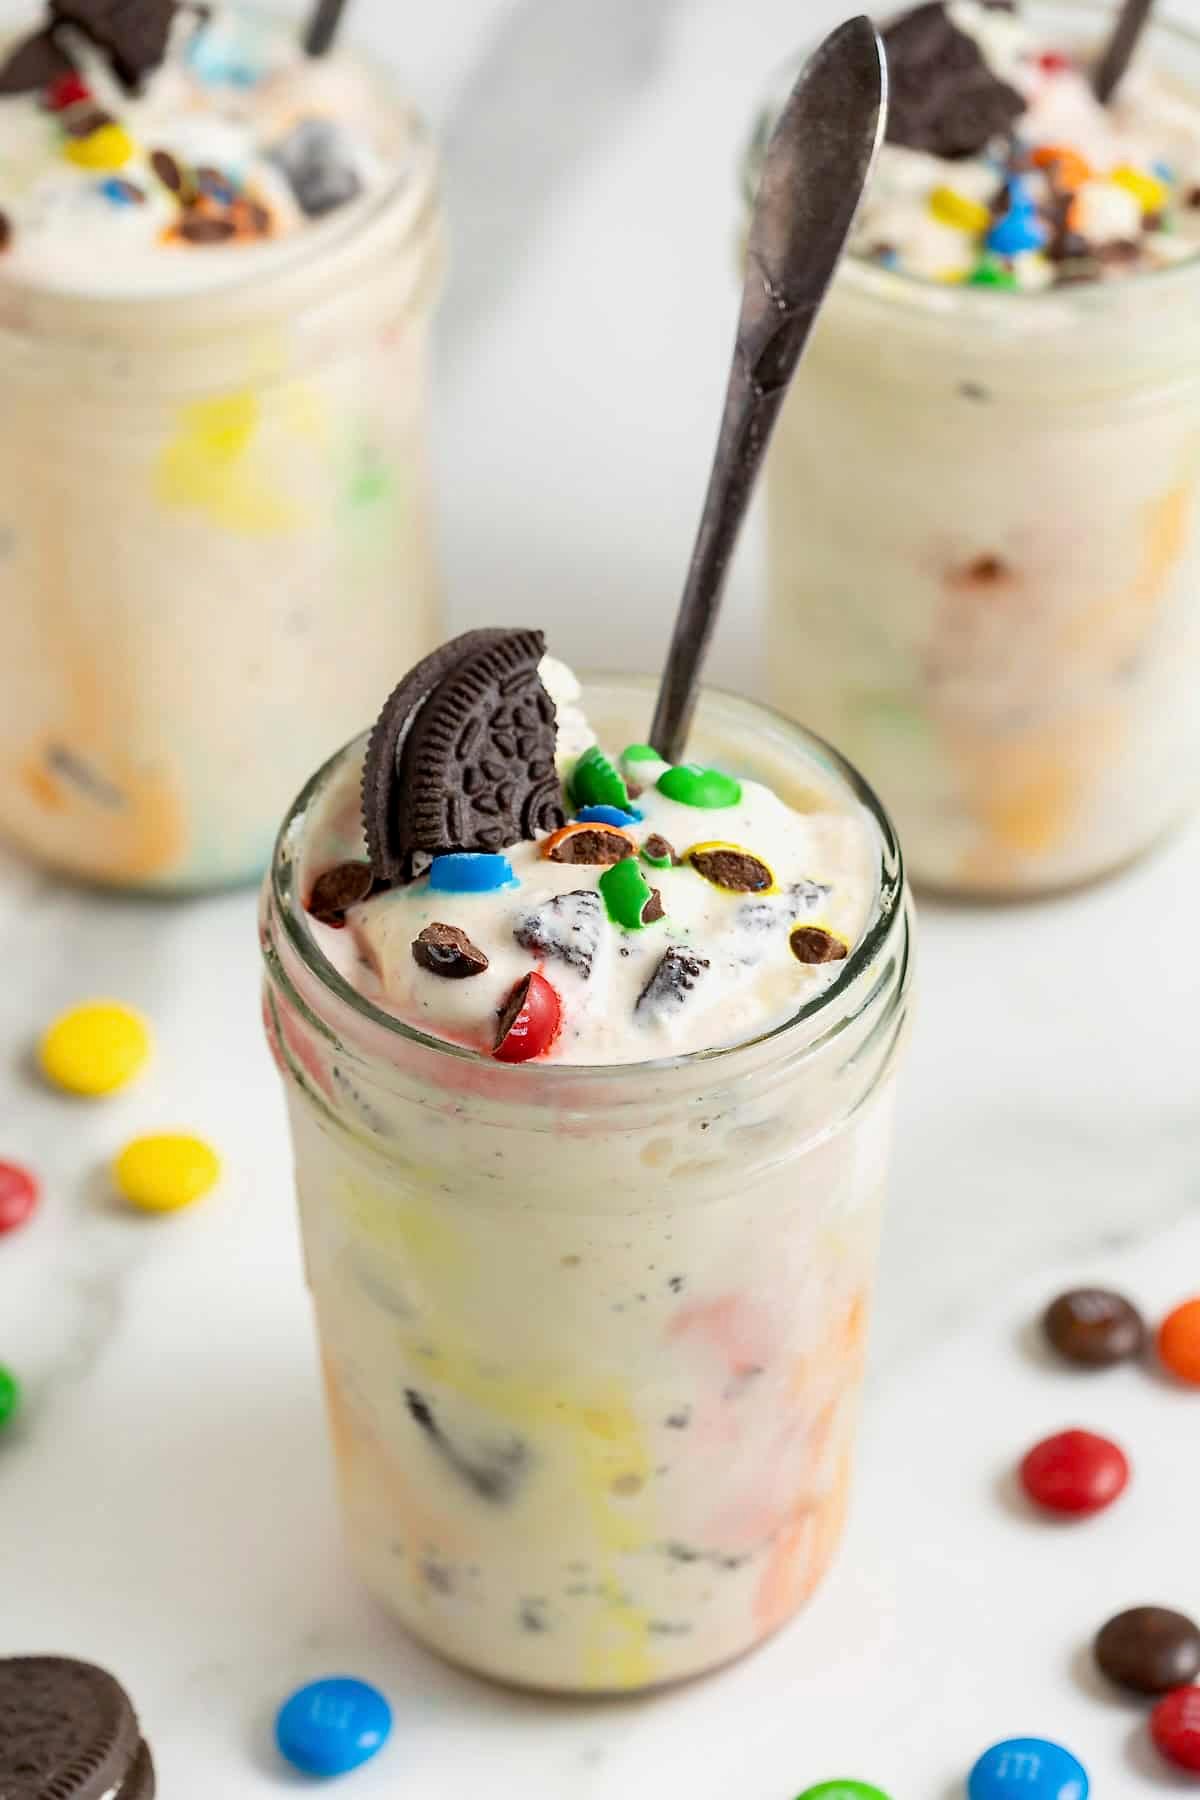
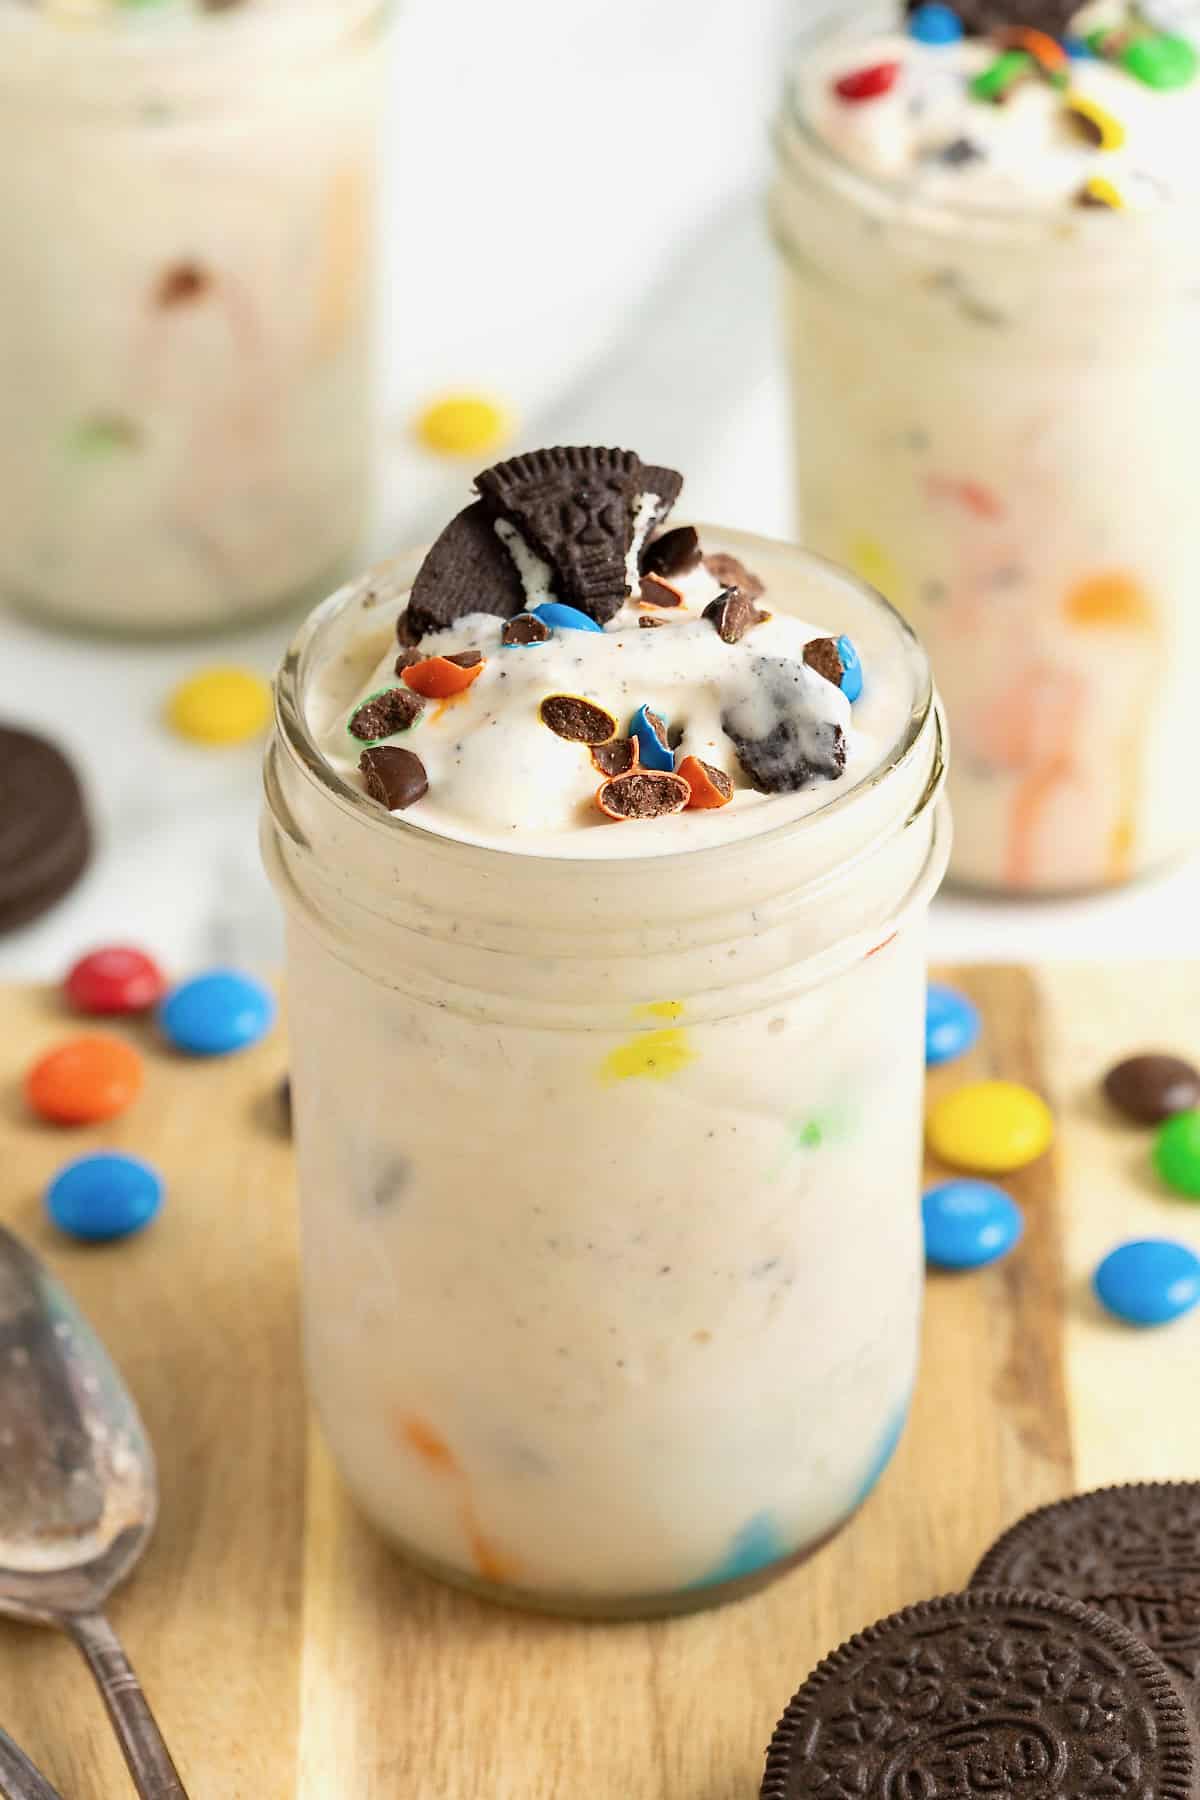
- Add whatever mix-in(s) you want. For add ins, we like to blend in Oreo cookies, candy bars, Reese’s peanut butter cups, and edible cookie dough. Most times, I like an M&M Blizzard or Oreo Blizzard. But for a really special treat, try out my Homemade S’mores Blizzard. It’s amazing!
- Beat on low speed until the chunks are mixed evenly throughout the ice cream…

- Spoon into serving cups, hold that baby upside down just for fun, and then dig in!
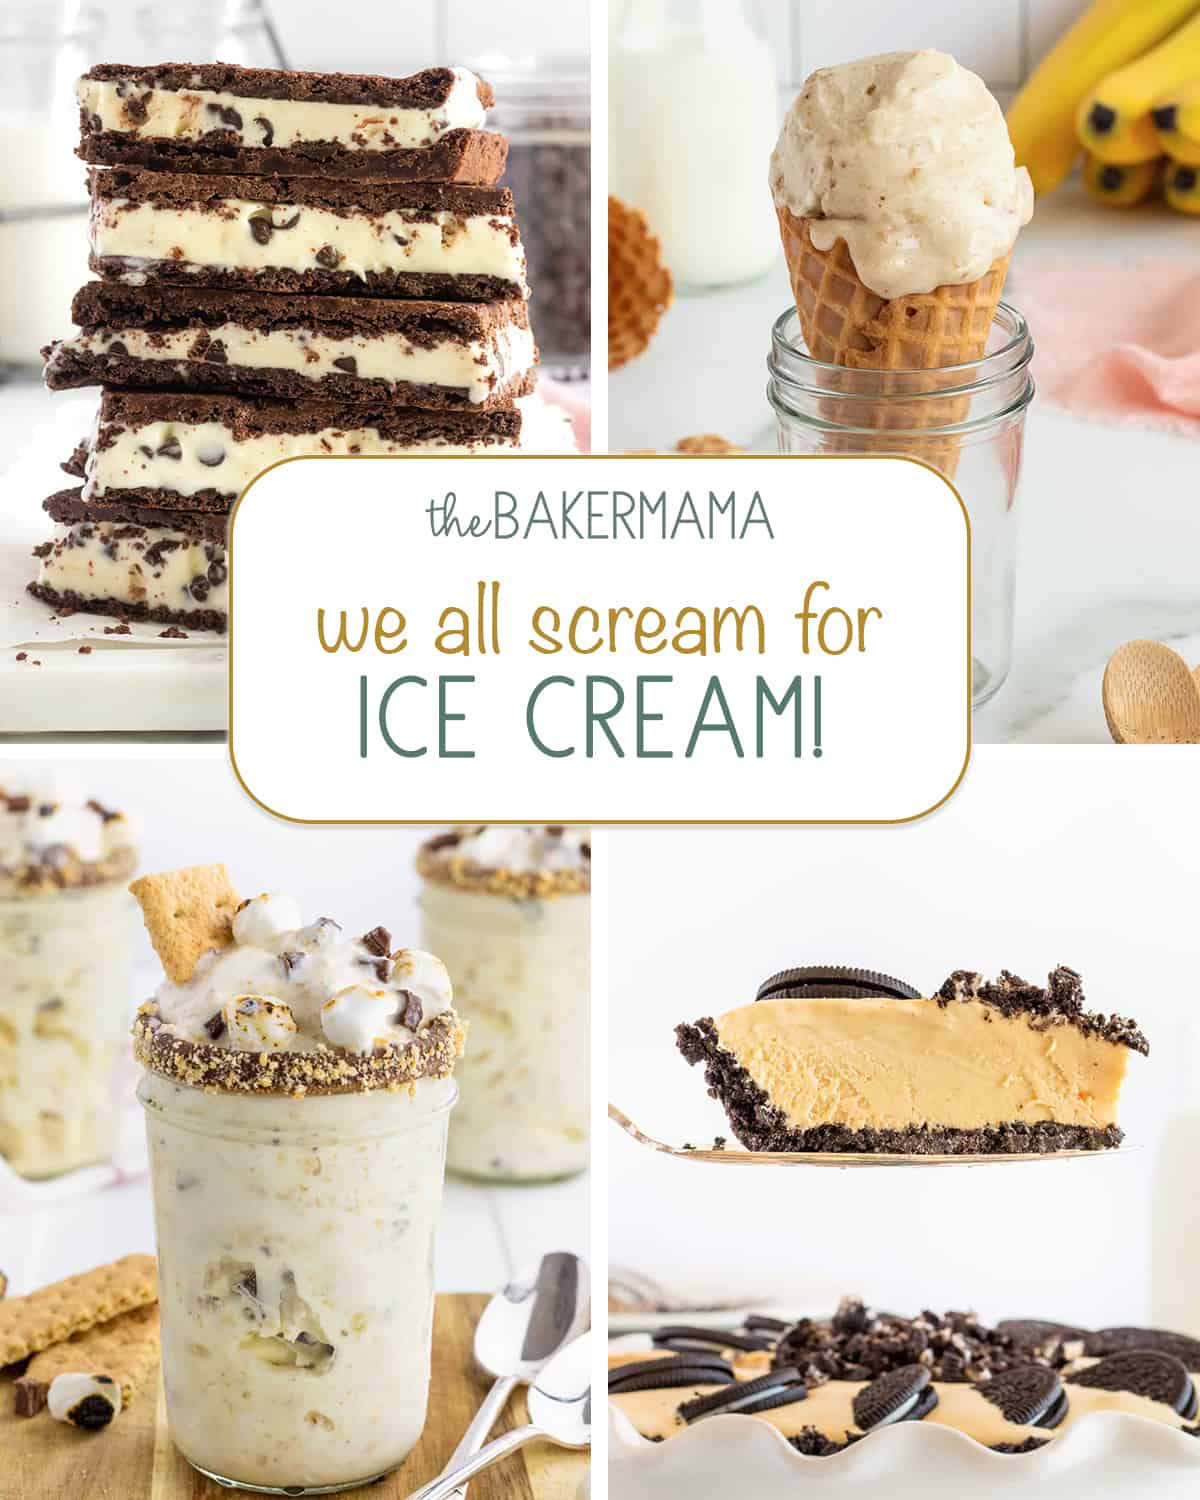
More Ice Cream Recipes You’ll Love
Whether you sip it through a straw, devour it in a pie, or chomp down on a delicious sandwich, ice cream is simply divine. We All Scream for Ice Cream is a collection of my all-time favorite ice cream recipes. Enjoy!
If you make my Easy Homemade Blizzard, be sure to snap a picture and share it with me on Instagram @thebakermama so I can see. If you’re on Facebook, be sure to join my Friends of The BakerMama group to connect and share all the fun and yummy recipes of mine that you make! 😍 I just love seeing how inspired and creative y’all get with the ideas I share. Enjoy!
xoxo,

Easy Homemade Blizzard
- Prep Time: 5 mins
- Total Time: 5 mins
- Yield: 2
- Category: Dessert
Description
This Easy Homemade Blizzard made with just ice cream, your favorite mix-in(s) and a few key steps for a delicious, thick treat!
Ingredients
- 6 scoops vanilla ice cream or frozen yogurt (or any ice cream flavor)
- 1/3 cup crushed mix-ins (Oreos, M&M’s, Butterfinger, Snickers, Reese’s Pieces, peanut butter cups, Nutter Butters, granola, homemade chocolate chip cookies, brownie, cake, cupcake, etc.)
Instructions
- Place mixing bowl in the freezer for at least 10 minutes before using.
- Scoop ice cream into the chilled bowl of an electric stand mixer with the paddle attachment. Beat on medium speed until ice cream is creamy, about a minute, scraping down the sides of the bowl with a spatula as needed.
- Add mix-ins and beat on low speed just a few times until mix-ins are mixed evenly throughout the ice cream.
- Scoop mixture into serving cups and dig in!
Thanks for posting this. Was curious if it would work.
You sure do have a way with words! Can’t wait to try this at our Bachelorette night tomorrow!! You have inspired us with your creativity and a story that is much the same to our own. ❤🎂🎉🍨🥄🏵
Thanks for sharing this recipe! It was so easy to make and absolutely delicious. I mixed the ice cream with green food colouring and peppermint extract then stirred in some Oreo pieces to make a mint Oreo version. Tastes exactly like the real thing!
P.S. I used my hand mixer with the beaters attachment and it worked very well!
I am so pleased by the results!
I followed these directions loosely and got an amazing smooth textured blizzard aside from my Oreos 🤤
Holy cow, so easy and delicious!!! This is exactly how we’ll do it from now on!
For the first time in years we were able to recreate the original Blizzard, the Chocolate Covered Cherry Blizzard. DQ stopped sending the ingredients to the stores years ago. I contacted corporate and got the original recipe that I adapted to your recipe.
Theirs was Cherry Topping with Chocolate Cone Shell.
Ours is:
Add 1/3 cup of chopped Maraschino Cherries
Add a good squirt of Hershey Chocolate Shell
Mix for a few seconds. You want the shell to break up to little specks, no more.
First try, WOW! That brings back memories!
Can I use an electric mixer with two beaters on it?
Hi Ange! I haven’t tried it with a hand mixer, but I think it would work great. Certainly worth a try! Enjoy!
Grandkids are going to give me extra hugs for this I believe. They will do chores to help me if I use this in a this for that situation. Thanks for the help dear!
Yay! Have so much fun and enjoy!
So excited to try this! My oldest boy has a peanut/tree nut allergy some can’t go to DQ for a treat whenever we feel like it. I have a serious Blizzard addiction, so I’m really happy I found this. Thanks!
Great diy blizzard! Next time we will use custard versus ice cream so it’s thicker. My kids and hubby loved them, especially during quarantine when we extra creative at home.