• Skip to primary navigation
  • Skip to main content
  • Skip to primary sidebar
  • Skip to footer

The BakerMama logo

Nav Social Menu

  • Facebook
  • Pinterest
  • Instagram
  • Twitter
  • YouTube
  • Nav Social Menu

    • Facebook
    • Pinterest
    • Instagram
    • Twitter
    • YouTube
  • Home
  • About
    • About
    • Contact
    • faq
    • Subscribe
    • Work With Me
  • Recipes
    • Recipes
    • Basics
    • Gathering Guides
    • Tips & Tricks
  • Cookbooks
    • Spectacular Spreads – NEW!
    • Beautiful Boards Cookbook
  • Boards by The BakerMama
    • Shop Boards
    • Board Inspiration
  • Shop
    • Amazon Favorites
    • Boards
    • Board Accessories
    • Family Favorites
    • Gift Guides
      • Anniversary Gifts
      • Gifts for the Baker
      • Gifts for the Homebody
      • Gifts for a New Mom
      • Gifts to Say Thank You
      • Gifts for the Sports Fan
      • Housewarming Gifts
      • Hostess Gifts
      • Kid’s Birthday Party Gifts
      • Teacher Gifts
      • Wedding Gifts
    • In The Kitchen
    • Around the House
    • Holiday Favorites
    • Shop All

Home » Recipes » Easy Homemade Blizzard

Published on March 22, 2017 | Updated on June 30, 2022 by The BakerMama

Easy Homemade Blizzard

Jump to Recipe

This Easy Homemade Blizzard made with just ice cream, your favorite mix-in(s) and a few key steps for a delicious, thick treat!

The Blizzard Queen of Ada, Oklahoma

Let’s take it back to my high school days when I was on the Dairy Queen blizzard-a-day diet. I was 16 and free to roam around town on my own, so where did I go?! Why the DQ, of course! Like every day.

I kid you not. I would drive through DQ nearly every day and get a blizzard. Sometimes, I even brought my own mix-ins (think homebaked cookies, brownies and even granola…say what?!). I’m pretty sure they shouldn’t have been letting me bring my own mix-ins or using the machines to mix them into my blizzard for that matter, but what happens in small town Oklahoma, happens in small town Oklahoma, y’all. Oh, and they even let me come behind the counter and make my own blizzard every once in a while. Talk about a highlight of my life! 😉

With my daily blizzard diet for nearly two years, I think I kept our small town DQ in business. Seriously! You’ll never believe it, but a few months after I moved away to college, the Dairy Queen closed. Gasp!

So with no DQ back home and no DQ in my college town, I started making my own blizzards…

Not Your Mama’s Milkshake

Homemade Blizzards are just as tasty, if not tastier than the real thing. Thick and creamy and filled with whatever mix-in(s) your Blizzard-loving heart desires.

Here’s all you need:

  1. Your favorite ice cream. I usually use vanilla, but sometimes chocolate or strawberry depending on the Blizzard flavor I’m creating. And sometimes I’ll use a healthier ice cream or frozen yogurt and it still turns out great!
  2. Whatever mix-in(s) you want. Oreos are my go-to with mini M&M’s a close second.

A few very important tips:

  • Use an electric stand mixer with the paddle attachment or a hand mixer. DO NOT use a blender. I repeat, do not use the blender!
  • Do not add milk. We’re not making a milkshake here, my friends. We’re making a DQ Blizzard! And a Blizzard should be thick. No need to thin it out with milk. Just let the ice cream do its thing.
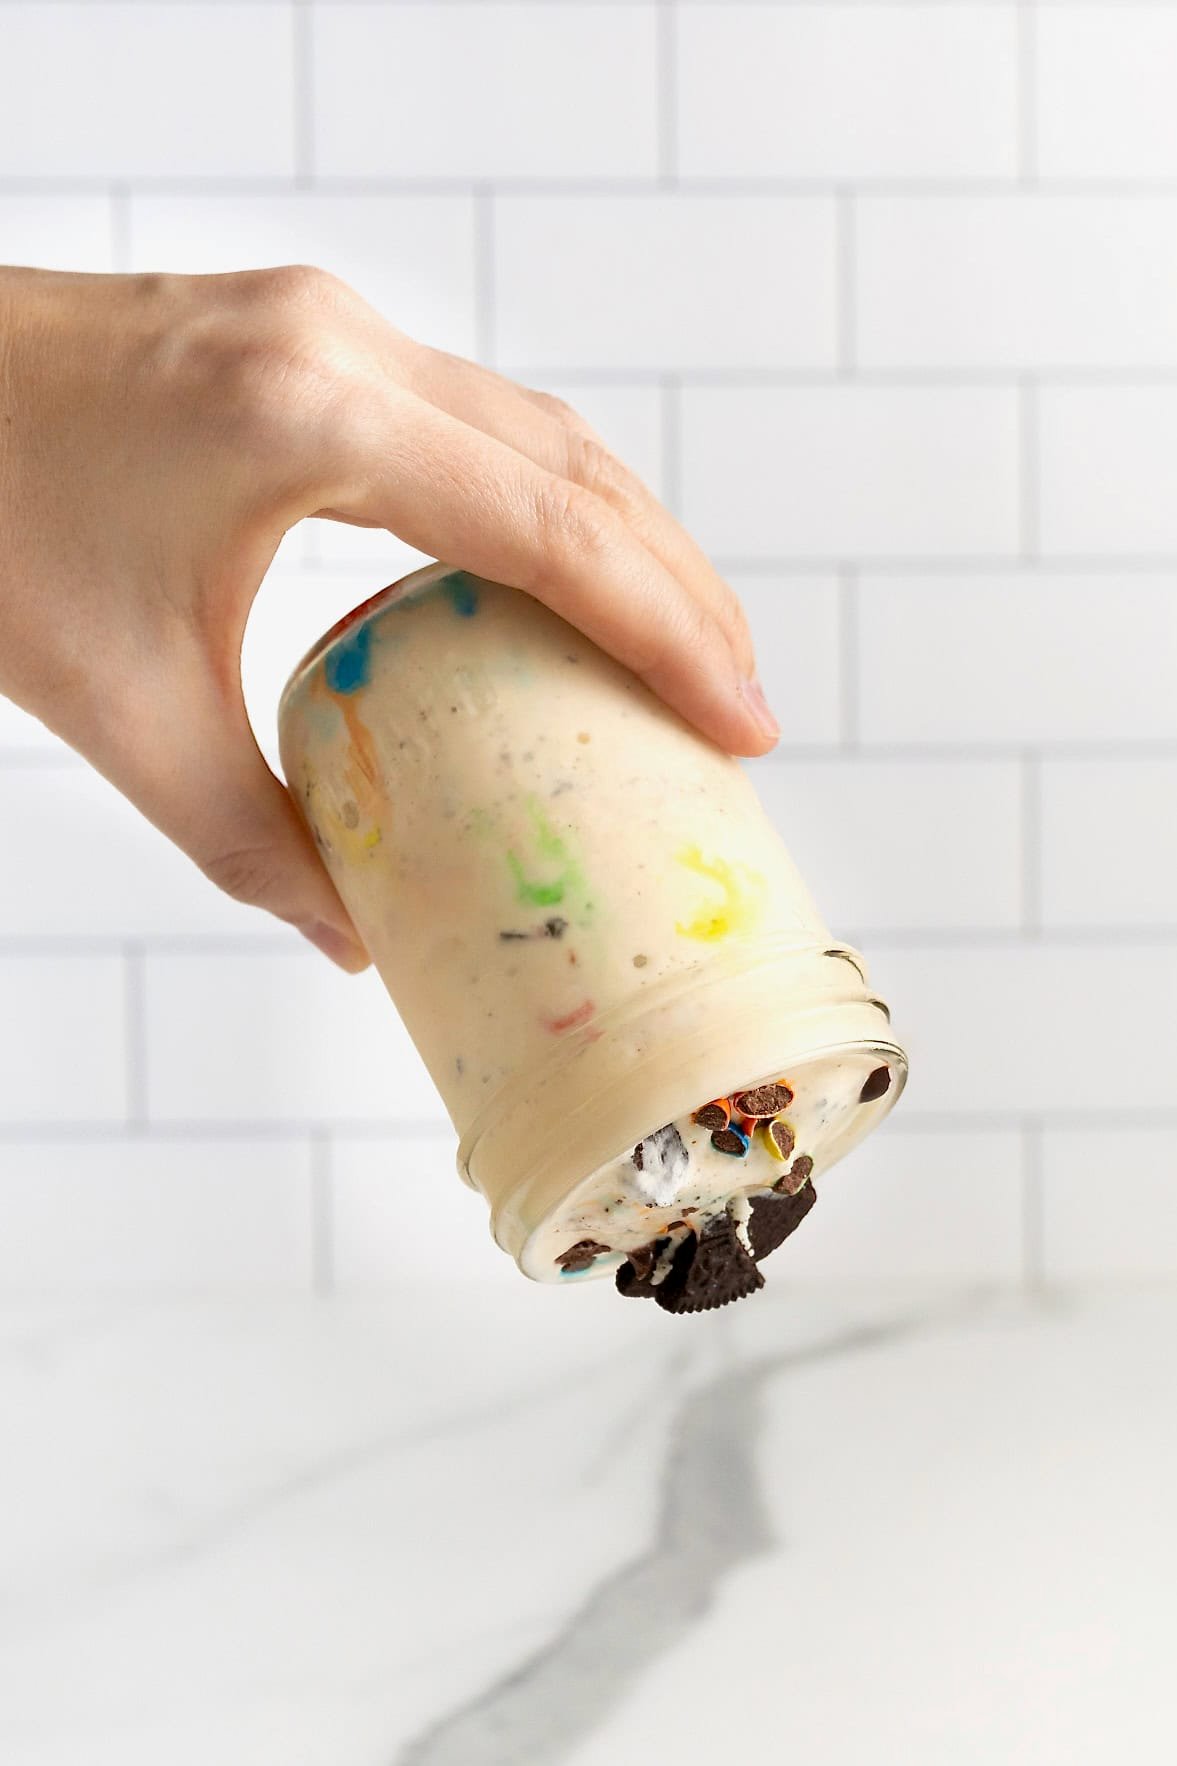
  • Place your mixing bowl in the freezer for at least 10 minutes beforehand. This will help keep the ice cream thick and frosty.

Okay, I think we’re all set. Don’t blink because you might miss the steps involved. It’s that quick and easy.

Scoop, Beat, Repeat! How to Make an Easy Homemade Blizzard

First, scoop the frozen ice cream into the bowl of the stand mixer. You can use any flavor you like for a base (vanilla bean, chocolate, even mint!) and beat on medium speed for about a minute until creamy, scraping down the sides of the bowl a few times with a spatula so all ice cream is incorporated and looks a little more like soft serve.

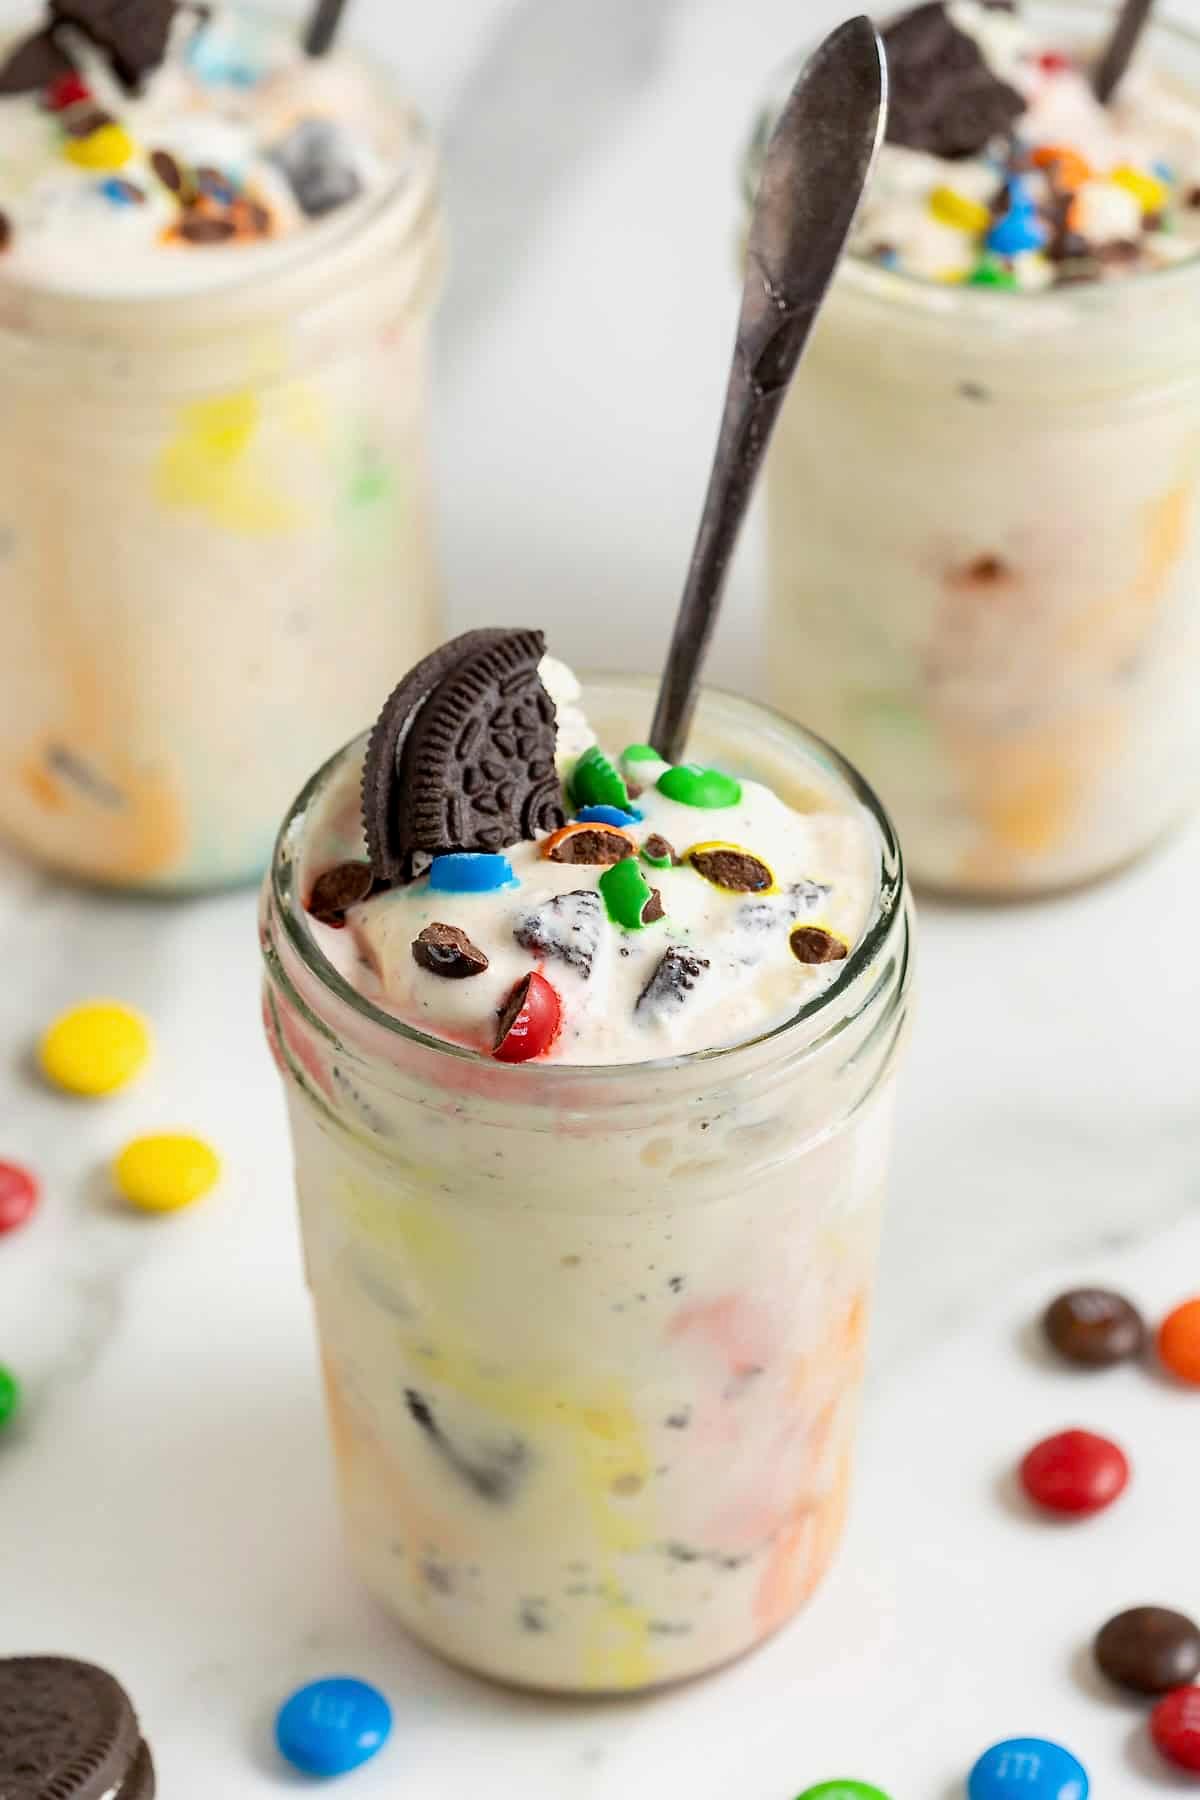
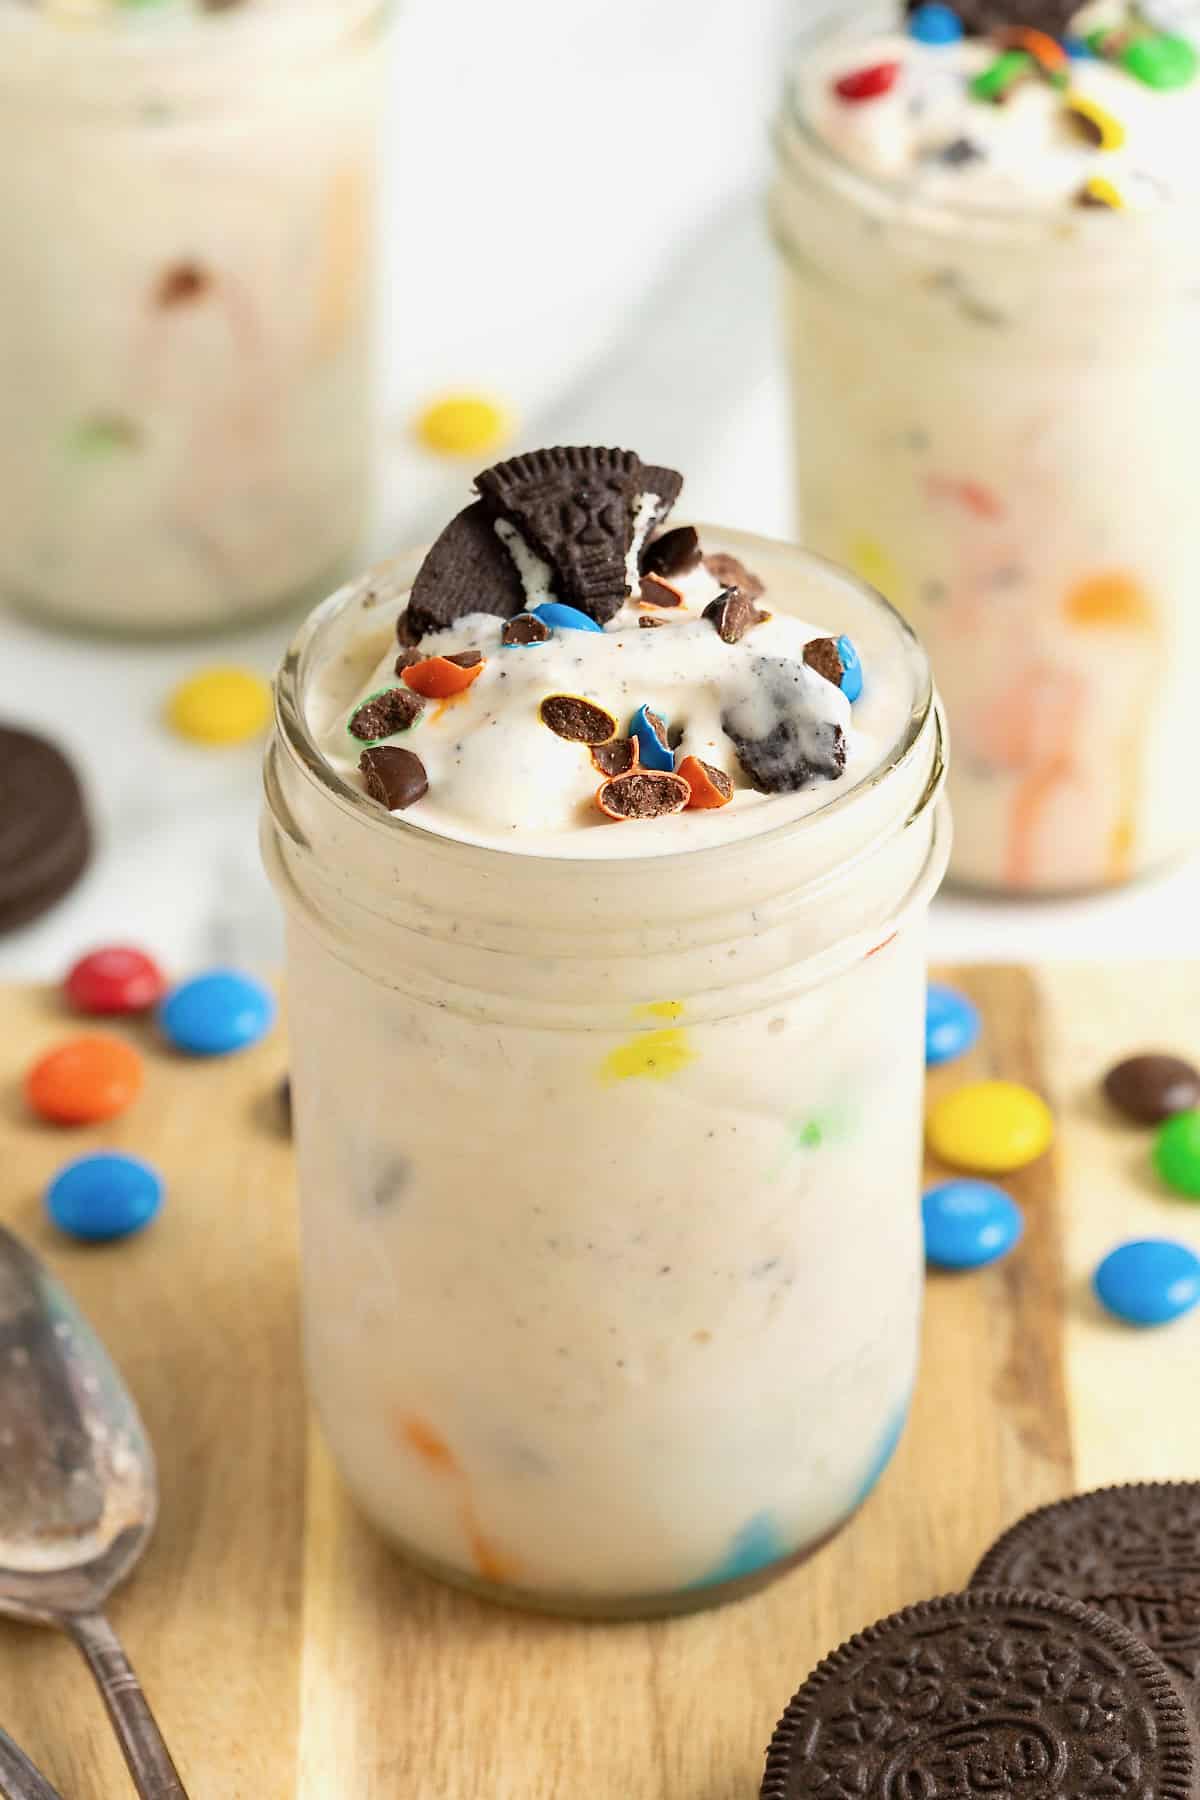
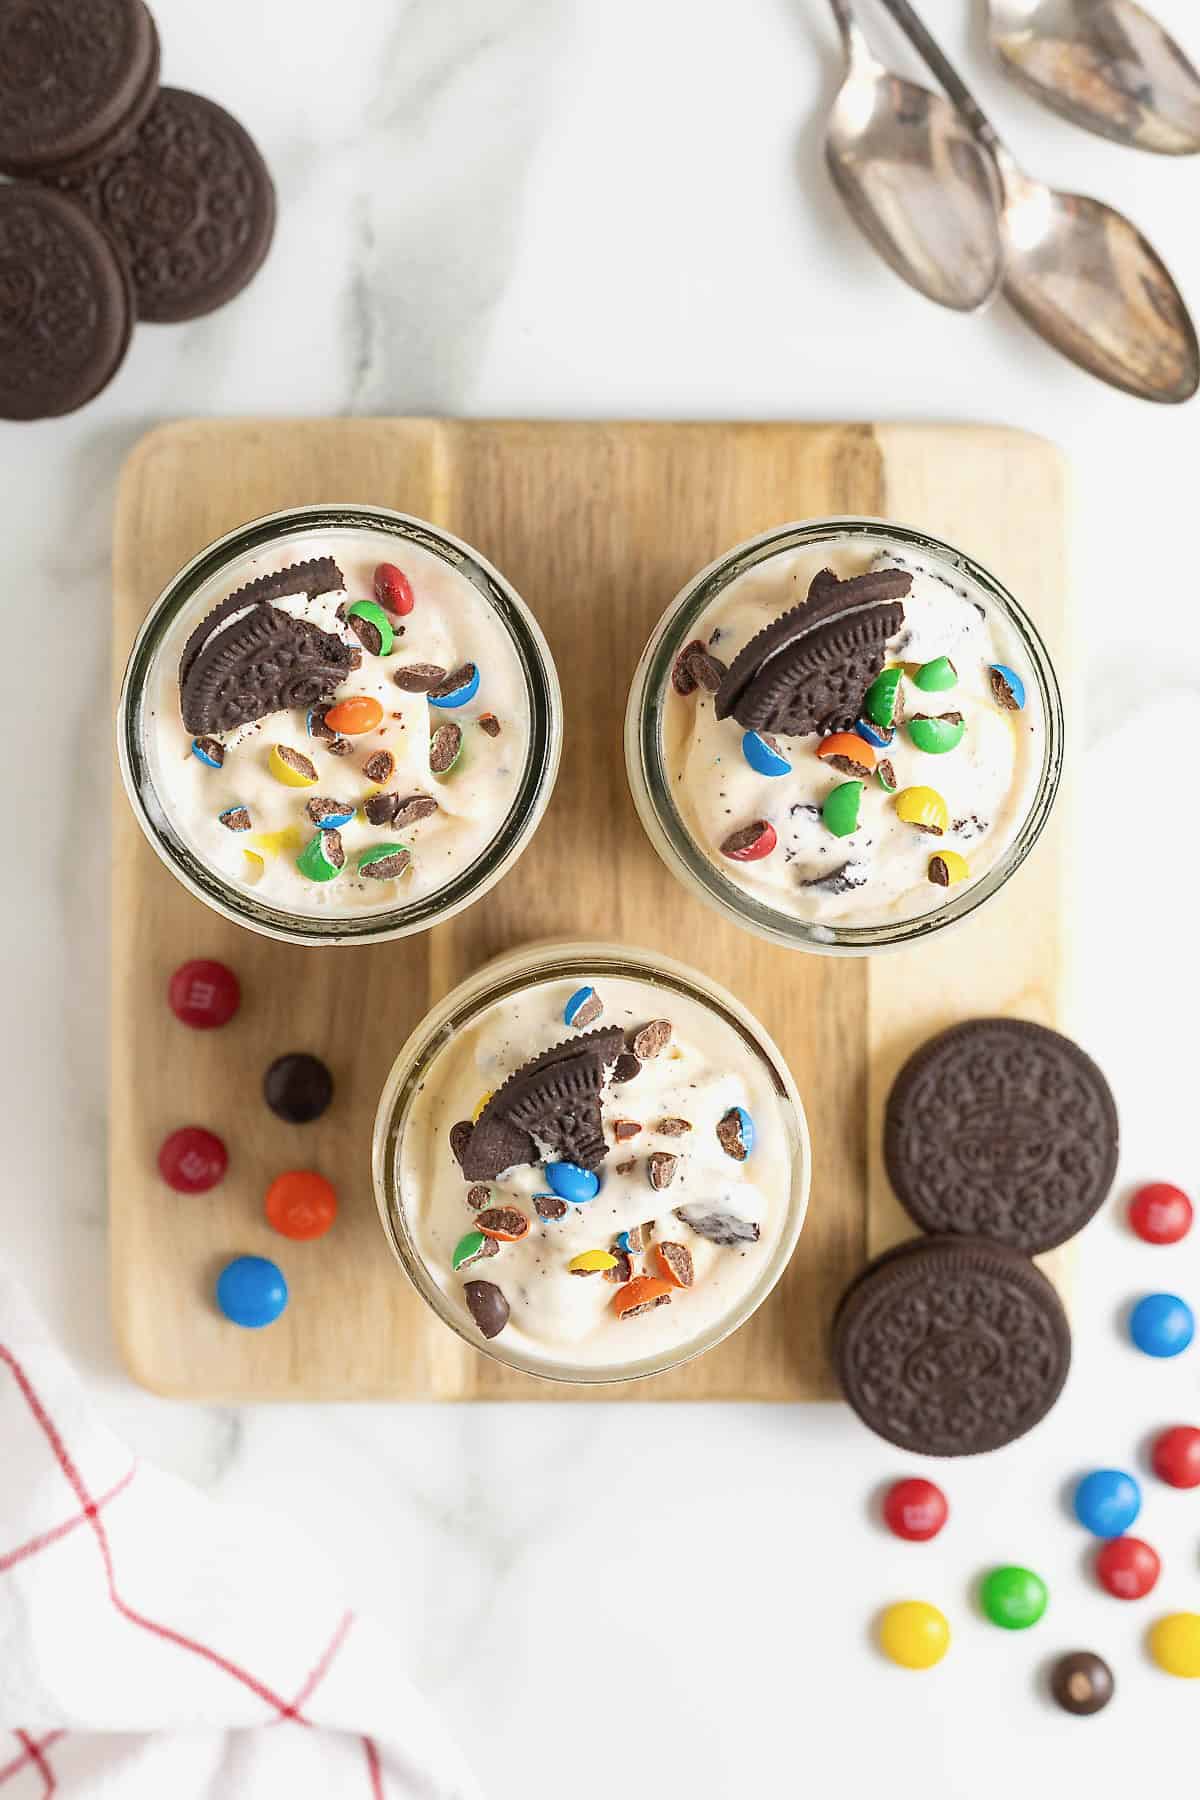
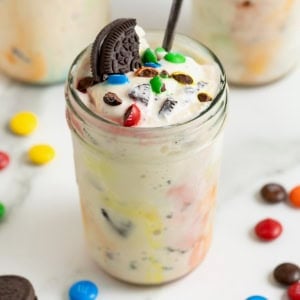
Add whatever mix-in(s) you want. For add ins, we like to blend in Oreo cookies, candy bars, Reese’s peanut butter cups, and edible cookie dough. Most times, I like an M&M Blizzard or Oreo Blizzard. But for a really special treat, try out my Homemade S’mores Blizzard. It’s amazing!

Add your mix-ins and beat on low speed until the chunks are mixed evenly throughout the ice cream…

Spoon into serving cups, hold that baby upside down just for fun, and then dig in!
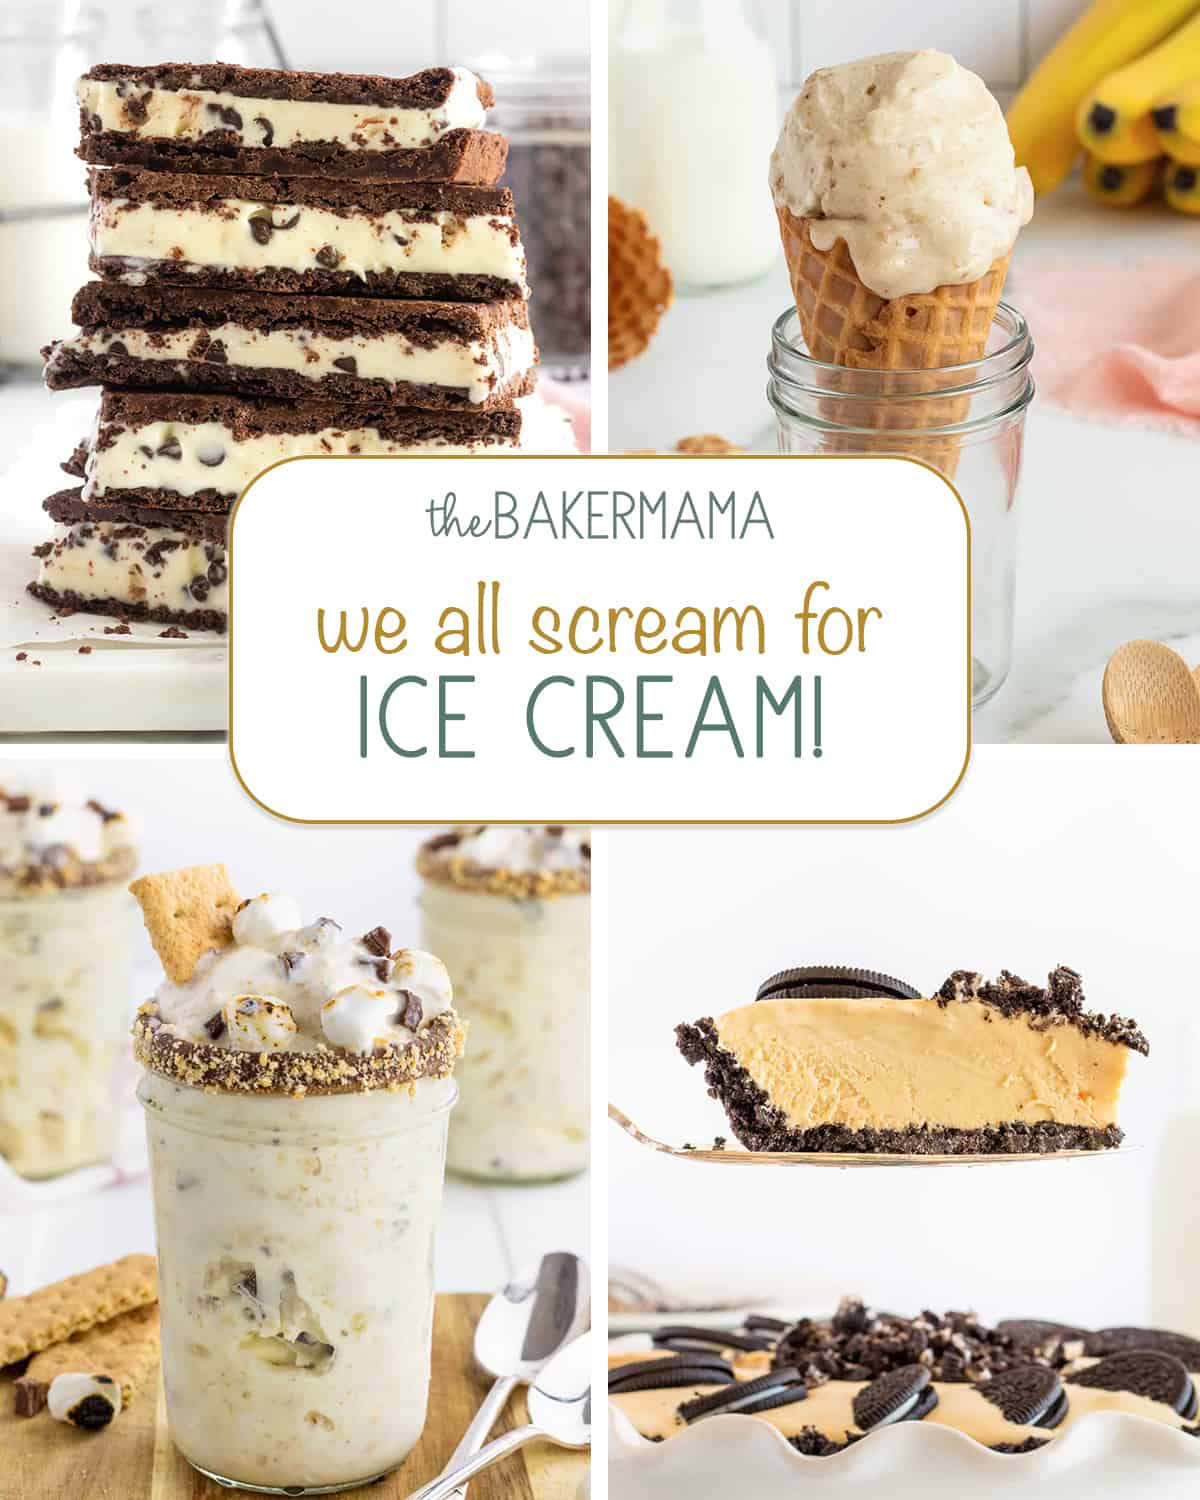
 You won’t believe how deliciously similar these homemade blizzards are to the DQ originals and the beauty is you can make them in the comfort of your own home, in a matter of minutes, for a lot cheaper than driving there to buy one.

WATCH FOR MORE!

Join me in the kitchen as I make this Easy Homemade Blizzard!

Watch me in action!


View this post on Instagram


A post shared by Maegan Brown (@thebakermama)

Let the homemade blizzard making begin! 😉 Enjoy!

xoxo,

Print
clock clock iconcutlery cutlery iconflag flag iconfolder folder iconinstagram instagram iconpinterest pinterest iconfacebook facebook iconprint print iconsquares squares iconheart heart iconheart solid heart solid icon

Easy Homemade Blizzard

★★★★★ 5 from 6 reviews
  • Author: Maegan - The BakerMama
  • Prep Time: 5 mins
  • Total Time: 5 mins
  • Yield: 2
  • Category: Dessert
Print Recipe
Pin Recipe

Description

This Easy Homemade Blizzard made with just ice cream, your favorite mix-in(s) and a few key steps for a delicious, thick treat!


Ingredients

  • 6 scoops vanilla ice cream or frozen yogurt (or any ice cream flavor)
  • 1/3 cup crushed mix-ins (Oreos, M&M’s, Butterfinger, Snickers, Reese’s Pieces, peanut butter cups, Nutter Butters, granola, homemade chocolate chip cookies, brownie, cake, cupcake, etc.)

Instructions

  1. Place mixing bowl in the freezer for at least 10 minutes before using.
  2. Scoop ice cream into the bowl of an electric stand mixer with the paddle attachment. Beat on medium speed until ice cream is creamy, about a minute, scraping down the sides of the bowl with a spatula as needed.
  3. Add mix-ins and beat on low speed just a few times until mix-ins are mixed evenly throughout the ice cream.
  4. Scoop mixture into serving cups and dig in!

Did you make this recipe?

Tag @thebakermama on Instagram and hashtag it #thebakermama

Recipe by Maegan Brown/Photography by Madison Mentesana

You may also like

  • S’mores Ice Cream CakeS’mores Ice Cream Cake
  • Build-Your-Own Ice Cream Sundae BoardBuild-Your-Own Ice Cream Sundae Board
  • Two-Ingredient Banana Chocolate Chip Ice Cream BitesTwo-Ingredient Banana Chocolate Chip Ice Cream Bites
  • Cookies and Creme PopcornCookies and Creme Popcorn
  • M&M Chocolate Chip Pudding CookiesM&M Chocolate Chip Pudding Cookies

Sharing is caring!

3905 shares

Reader Interactions

Comments · 32

  1. Izzy says

    March 22, 2017 at 2:24 pm

    Oh my goodness! This looks incredible – I can’t believe how easy and thick it looks!
    Izzy | Pinch of delight

    Reply
  2. Melissa says

    November 8, 2017 at 2:12 pm

    Is your spatula beater broken at the top corner, too? Mine lost a hunk fairly early on; I was disappointed given the cost! Glad to see that a broken spatula beater can still make a treat that I’m way too cheap to buy. I found a recipe a few years back for a peanut buster parfait clone but hadn’t searched for a blizzard until today. You’ve just made my cravings disappear! Thank you!

    Reply
    • Maegan says

      November 8, 2017 at 11:09 pm

      Hi Melissa! Yes it is, so frusturating! This is actually my second one and the first did the same. I contacted KitchenAid with the first and they replaced it, but it’s just a process that I haven’t gotten around to with this paddle. I might just have to reach out to them tomorrow. 😉 I’m so glad you found my homemade blizzard recipe too. You’re sure to love it! Enjoy! 🙂

      Reply
    • Christa says

      April 17, 2020 at 9:11 pm

      Wow, I can’t believe how easy these are! I may never go back to Dairy Queen! My whole family was blown away.

      Reply
  3. Jamie Harris says

    January 23, 2018 at 12:38 pm

    Amazing and so easy! I was looking at immersion blenders and other things trying to figure out how to mix in the candy and not blend it in to oblivion. How simple is this? Butterfinger also now has baking pieces already broken up for you, so it’s even easier. Made my first one today and it is excellent! I’m so glad I found this article.

    Reply
    • Maegan says

      January 23, 2018 at 2:35 pm

      Yay Jamie! These are one of our absolute favorite treats to easily make in the comfort of home. Love the Butterfinger bits idea! Enjoy!

      Reply
  4. Star says

    April 8, 2018 at 4:42 pm

    Thanks Megan! You don’t know how many recipes I clicked out of that said “pour milk” “add creamer” how silly… I’m about to whip up a blizzard now <3

    Reply
    • Maegan says

      April 9, 2018 at 2:17 pm

      Yay Star! So happy you found my super easy recipe for a blizzard fix. 🙂

      Reply
  5. Amanda Meyer says

    April 15, 2018 at 3:22 pm

    Would have never thought to use my KitchenAid! Turned out awesome!

    Reply
  6. Tammy Petschke says

    January 19, 2019 at 1:58 pm

    I think we’re kindred spirits lol- I was on the “DQ diet” for years. I was obsessed with their chocolate soft serve with chocolate sprinkles. Every day I would stop and order my large cone for lunch. It got so bad I would see the employees out and about at stores and they’d say “hey! large chocolate cone!”. 😛 I have kicked my habit (and lost 5 lbs. lol) but my kids still crave their blizzards. Made my youngest the oreo and he loved it. My oldest loves cookie dough blizzards but I don’t know where to buy those hard little chunks of chocolate chip cookie dough..do you know of any?

    Reply
    • Maegan says

      January 24, 2019 at 6:21 pm

      Hi Tammy! Haha! Love it! I miss being a DQ regular 😉 I’ve seen these cookie dough bites at the store. Here’s a link to them on Amazon: https://amzn.to/2UdgVj2 Continue to enjoy! 🙂

      Reply
  7. Jill says

    April 10, 2019 at 7:58 pm

    Did your DQ use a stand mixer to make the blizzards back then? I thought I saw the local DQ using a Vitamix blender to make them.

    Reply
    • Maegan says

      April 13, 2019 at 8:04 am

      Hi Jill! No, I’ve just seen those blizzard machines that they stick the cup up to.

      Reply
  8. Golly Charlotte says

    June 5, 2019 at 6:56 pm

    Can I freeze blizzards after I make them ?

    Reply
    • Maegan says

      June 6, 2019 at 1:18 pm

      Hi Golly! Yes, just freeze in a sealed, freezer-safe container to prevent freezer burn. Enjoy!

      Reply
  9. Donna Turner says

    January 21, 2020 at 3:28 pm

    Could you give me a rough idea as to how much 6 scoops of ice cream equals. I don’t have a scoop. I just use a heavy spoon.
    I would really like to try this.

    Reply
    • Maegan says

      February 12, 2020 at 11:27 pm

      Hi Donna! 6 scoops of ice cream is about 2.5-3 cups. Enjoy!

      Reply
    • Connie says

      February 13, 2022 at 5:23 pm

      Thanks for asking this question!

      Reply
  10. Karen says

    February 4, 2020 at 12:30 pm

    I’m so excited to try your recipe with our kitchen aid!!
    Do you recommend a brand of vanilla ice cream that tastes most authentic?
    Thank you!

    Reply
    • Maegan says

      February 12, 2020 at 11:11 pm

      Hi Karen! I recommend you use a good quality real vanilla ice cream like Alden’s, Tillamook, Blue Bell or Braum’s. Enjoy!

      Reply
  11. Cynthia says

    July 9, 2020 at 7:15 pm

    Great diy blizzard! Next time we will use custard versus ice cream so it’s thicker. My kids and hubby loved them, especially during quarantine when we extra creative at home.

    ★★★★★

    Reply
  12. Lynne says

    August 13, 2020 at 7:39 pm

    So excited to try this! My oldest boy has a peanut/tree nut allergy some can’t go to DQ for a treat whenever we feel like it. I have a serious Blizzard addiction, so I’m really happy I found this. Thanks!

    Reply
  13. Barb says

    August 16, 2020 at 7:08 pm

    Grandkids are going to give me extra hugs for this I believe. They will do chores to help me if I use this in a this for that situation. Thanks for the help dear!

    Reply
    • The BakerMama says

      August 18, 2020 at 10:58 am

      Yay! Have so much fun and enjoy!

      Reply
  14. Ange says

    August 18, 2020 at 4:42 pm

    Can I use an electric mixer with two beaters on it?

    Reply
    • The BakerMama says

      August 18, 2020 at 4:45 pm

      Hi Ange! I haven’t tried it with a hand mixer, but I think it would work great. Certainly worth a try! Enjoy!

      Reply
  15. Greg Hall says

    November 8, 2020 at 2:06 pm

    For the first time in years we were able to recreate the original Blizzard, the Chocolate Covered Cherry Blizzard. DQ stopped sending the ingredients to the stores years ago. I contacted corporate and got the original recipe that I adapted to your recipe.

    Theirs was Cherry Topping with Chocolate Cone Shell.
    Ours is:
    Add 1/3 cup of chopped Maraschino Cherries
    Add a good squirt of Hershey Chocolate Shell
    Mix for a few seconds. You want the shell to break up to little specks, no more.
    First try, WOW! That brings back memories!

    ★★★★★

    Reply
  16. Krystal says

    January 16, 2021 at 5:50 pm

    Holy cow, so easy and delicious!!! This is exactly how we’ll do it from now on!

    ★★★★★

    Reply
  17. Susan says

    May 12, 2021 at 5:29 am

    I am so pleased by the results!
    I followed these directions loosely and got an amazing smooth textured blizzard aside from my Oreos 🤤

    ★★★★★

    Reply
  18. Katie says

    May 22, 2021 at 10:23 pm

    Thanks for sharing this recipe! It was so easy to make and absolutely delicious. I mixed the ice cream with green food colouring and peppermint extract then stirred in some Oreo pieces to make a mint Oreo version. Tastes exactly like the real thing!

    P.S. I used my hand mixer with the beaters attachment and it worked very well!

    ★★★★★

    Reply
  19. Winter Noel Nottingham says

    November 15, 2021 at 2:10 pm

    You sure do have a way with words! Can’t wait to try this at our Bachelorette night tomorrow!! You have inspired us with your creativity and a story that is much the same to our own. ❤🎂🎉🍨🥄🏵

    ★★★★★

    Reply
  20. Maureen says

    May 15, 2022 at 8:07 pm

    Thanks for posting this. Was curious if it would work.

    Reply

Leave a Reply Cancel reply

Your email address will not be published. Required fields are marked *

Recipe rating ★☆ ★☆ ★☆ ★☆ ★☆

Primary Sidebar

NEVER MISS A RECIPE

Sign up to get new recipes via email

Order Now! Spectacular Spreads Cookbook

Spectacular Spreads cookbook by The BakerMama

Beautiful Boards Cookbook

Beautiful Boards cookbook by The BakerMama

Boards by The Bakermama

Hi, I’m Maegan!

Maegan, the BakerMama

Welcome to The BakerMama! I’m so happy you’re here! To learn more about me, click here.

Let’s Socialize

  • Facebook
  • Pinterest
  • Instagram
  • Twitter
  • YouTube
  • RSS

Trending Now

The Perfect Guacamole by The BakerMama

The Perfect Guacamole

Easy Cruffins by The BakerMama

Easy Cruffins

Grilled Brie with Strawberries by The BakerMama

Grilled Brie with Strawberries

Build-Your-Own Ice Cream Sundae Board by The BakerMama

Build-Your-Own Ice Cream Sundae Board

Instagram

thebakermama

Maegan Brown ~ The BakerMama
If you're a fan of classic french toast, you’re If you're a fan of classic french toast, you’re gonna FLIP over these French Toast Roll-Ups! Simply coat them in cinnamon sugar, dip them in syrup and eat them with your hands. They're so easy to make and everyone will go crazy about how fun and delicious they are to eat! Click the link in my profile @thebakermama for the full recipe. ❤️ #TheBakerMama 

https://thebakermama.com/recipes/french-toast-roll-ups/
Quick Saturday night cheese and charcuterie board Quick Saturday night cheese and charcuterie board to go with our wine! 😉🧀🍷❤️ This yummy selection was built on my @boardsbythebakermama 14" Round Walnut Wood Board with a combination of some of our favorite cheeses, meats and accompaniments listed below. #BoardsByTheBakerMama #TheBakerMama

Here’s what’s on the board:
Humboldt Fog aged goat milk cheese
Aged Gouda
Manchego
Blue Cheese
Prosciutto
Salami
Cornichons
Green olives
Honey
Dijon mustard
Apricot preserves
Dried apricots
Dried Montmorency cherries
Dried figs
Marcona almonds
Grapes
Variety of crackers

Click the link in my profile @thebakermama for even more cheese and charcuterie board inspiration! ❤️

https://thebakermama.com/recipes/charcuterie-cheese-board/
"I donut care 'bout anything but youuu!" 🍩🎵😍 These Canned Cinnamon Roll Donuts are a brilliant and tasty twist to your favorite canned cinnamon rolls! Why choose one or the other when you can have the best of both? Click the link in my profile @thebakermama for full recipe. ❤️ #TheBakerMama 

https://thebakermama.com/recipes/canned-cinnamon-roll-donuts/
Summer is the perfect time to picnic! ☀️😋 W Summer is the perfect time to picnic! ☀️😋 We really enjoy spending as much of the day outside as possible (when it's not 100+ degrees!). Any chance we get, we take snack time outside with a Picnic Snack Tray! Such an easy, fun and yummy way to make summer extra special! Click the link in my profile @thebakermama for all the details and more snack tray inspiration. ❤️ #TheBakerMama 

https://thebakermama.com/recipes/summer-picnic-snack-tray/
Load More... Follow on Instagram

Footer

Hi, I’m Maegan!

Maegan, the BakerMama

Welcome to The BakerMama! I’m so happy you’re here! To learn more about me, click here.

  • Facebook
  • Pinterest
  • Instagram
  • Twitter
  • YouTube
  • RSS

NEVER MISS A RECIPE

Sign up to get new recipes via email

Copyright © 2022 The BakerMama, LLC, All Rights Reserved. | Privacy Policy Website by Bright Coconut

3905 shares