
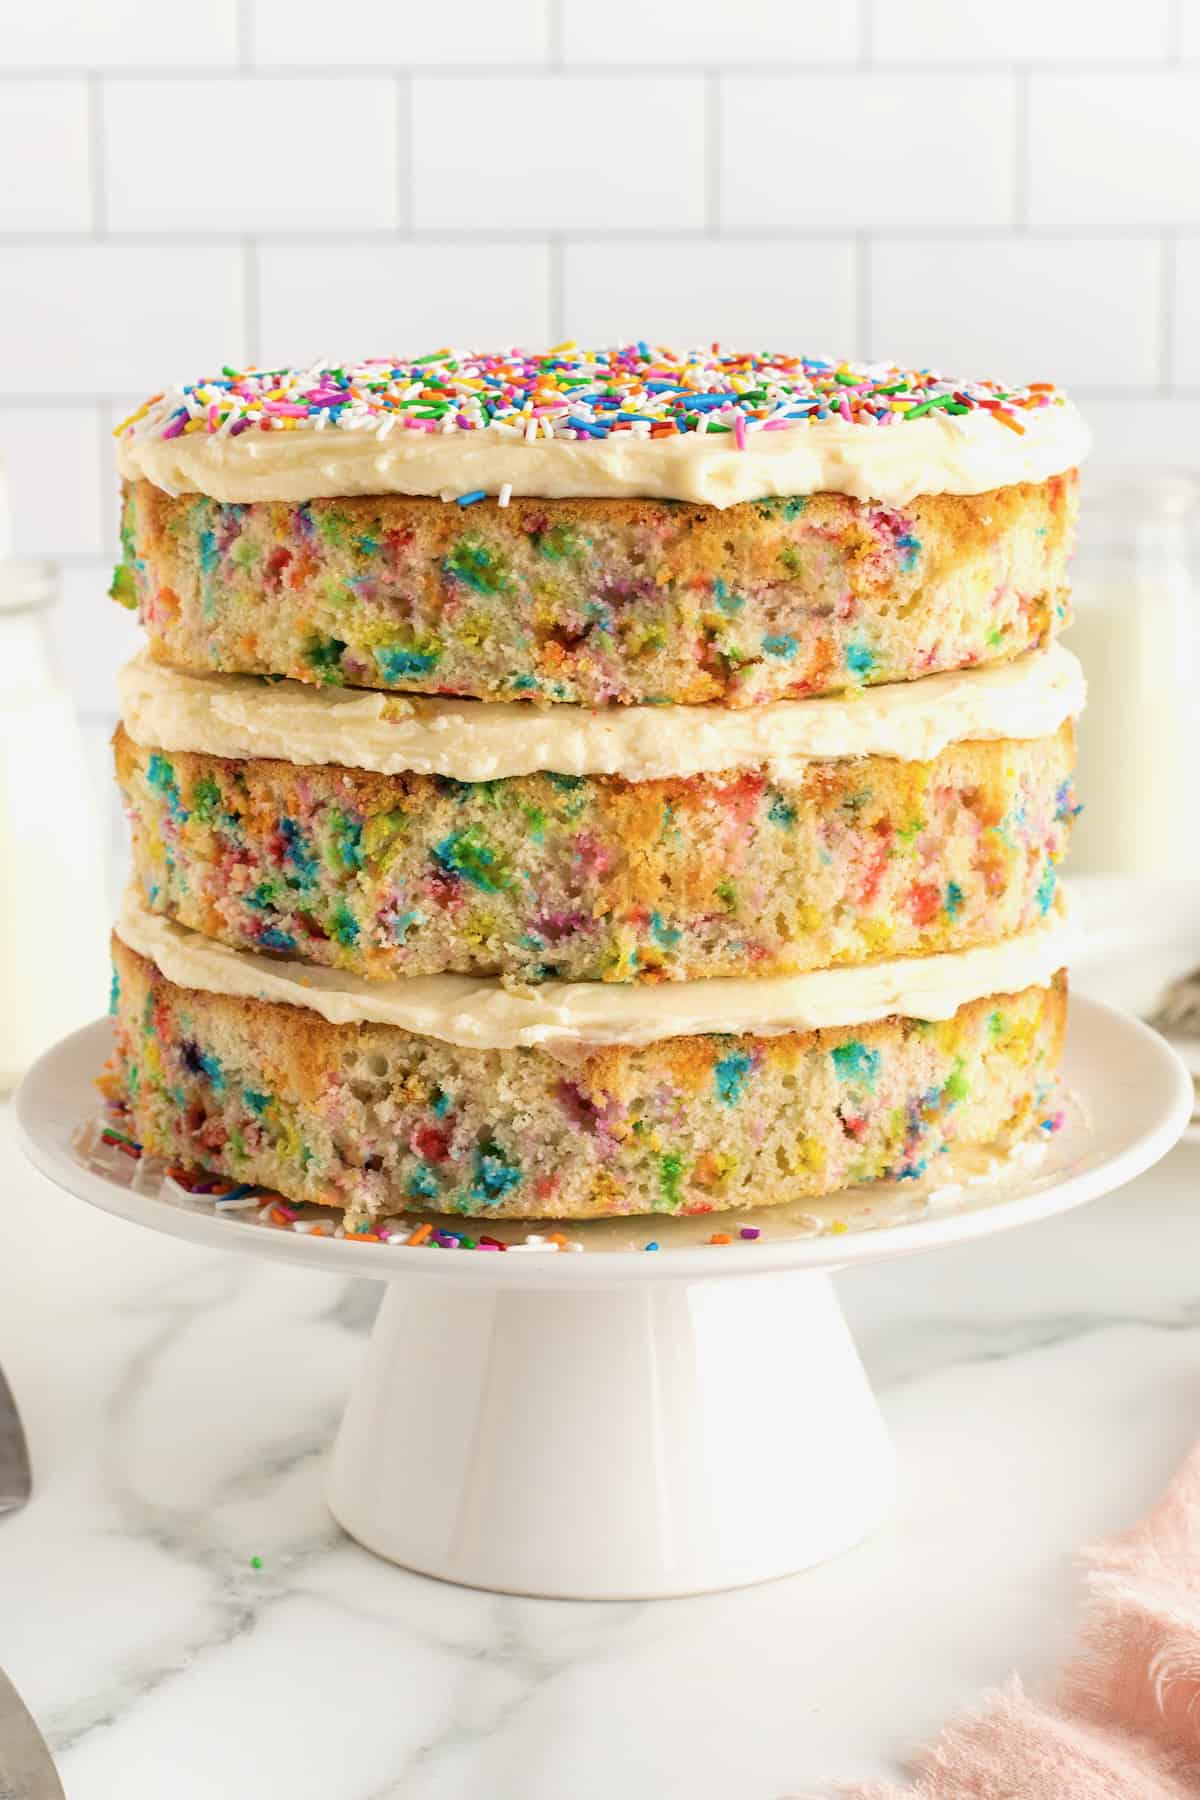
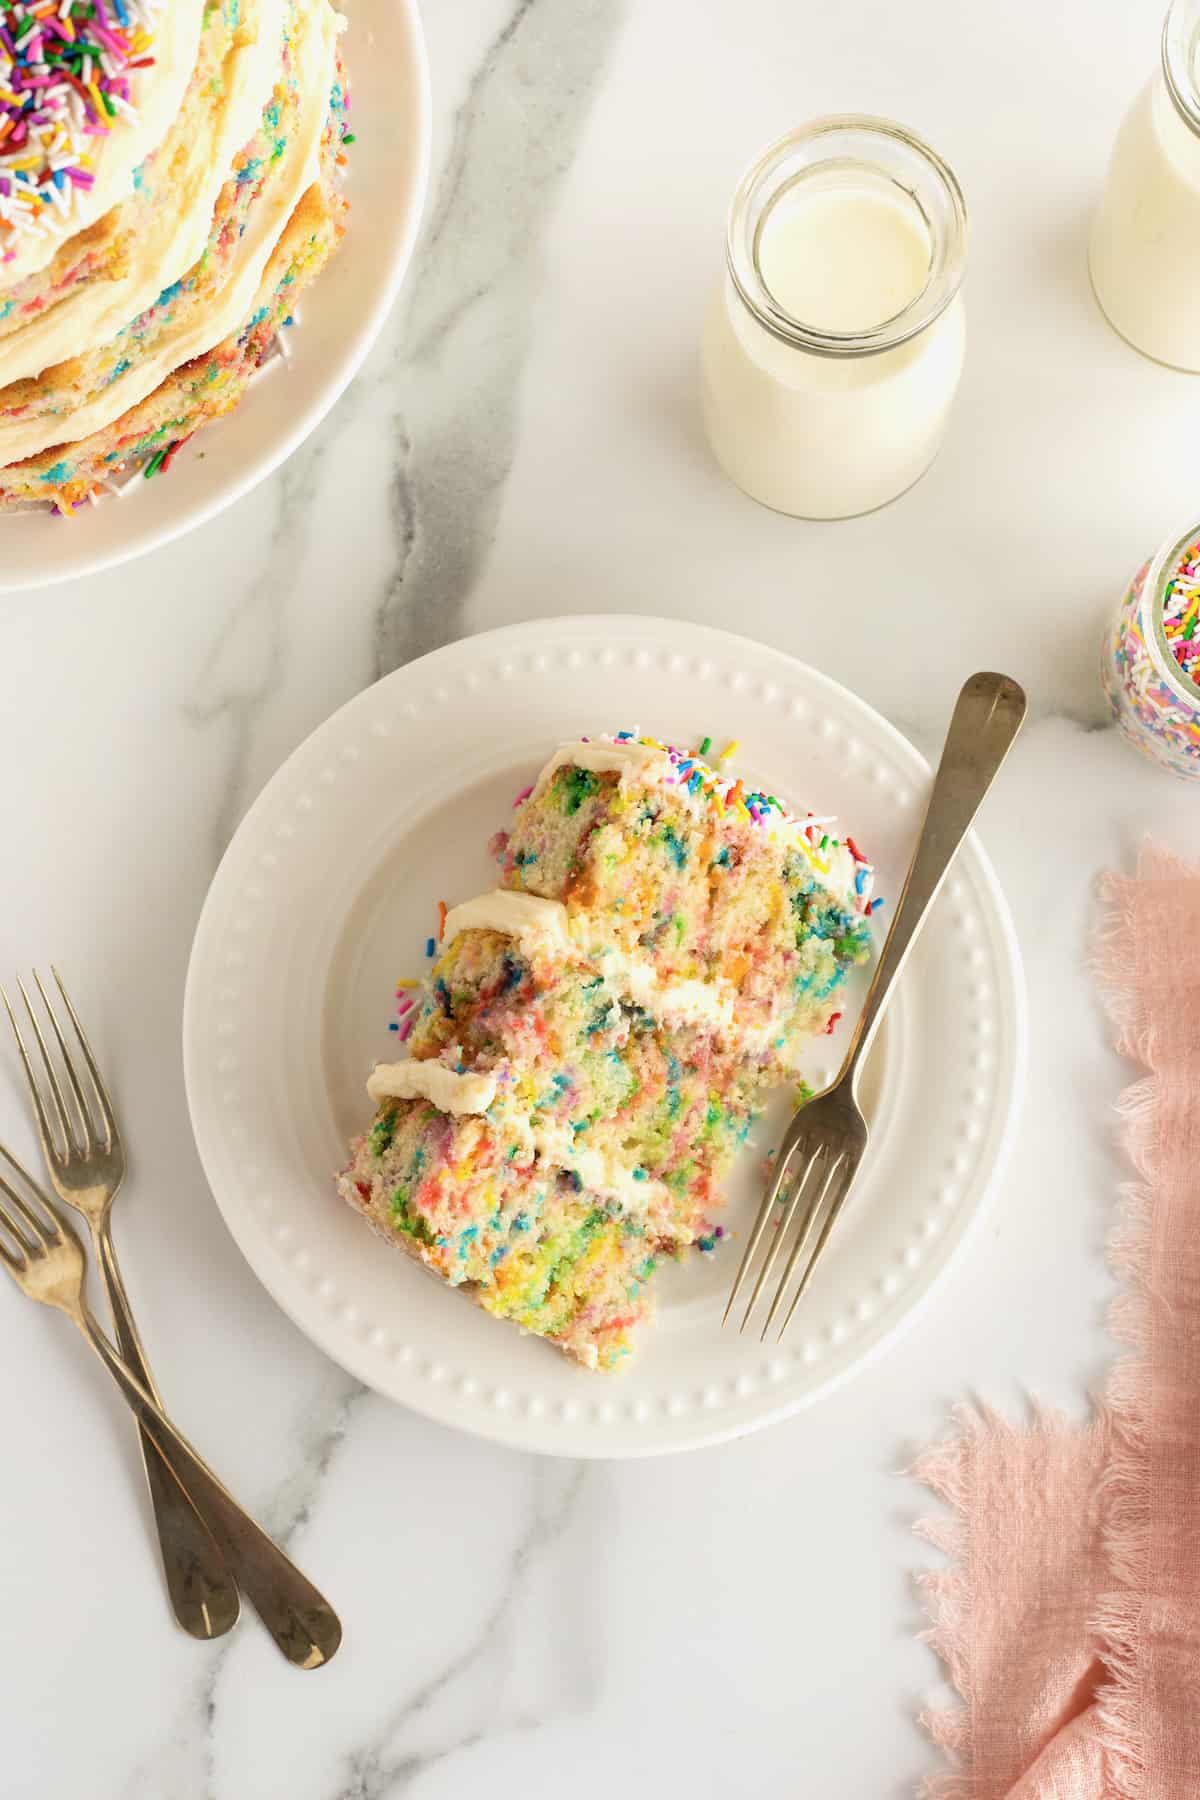
This Birthday Confetti Cake is a celebration in itself! Moist vanilla cake bursting with rainbow sprinkles layered with a creamy vanilla buttercream frosting and topped with even more sprinkles. It’s a party!!
The Un-Decorated Cake
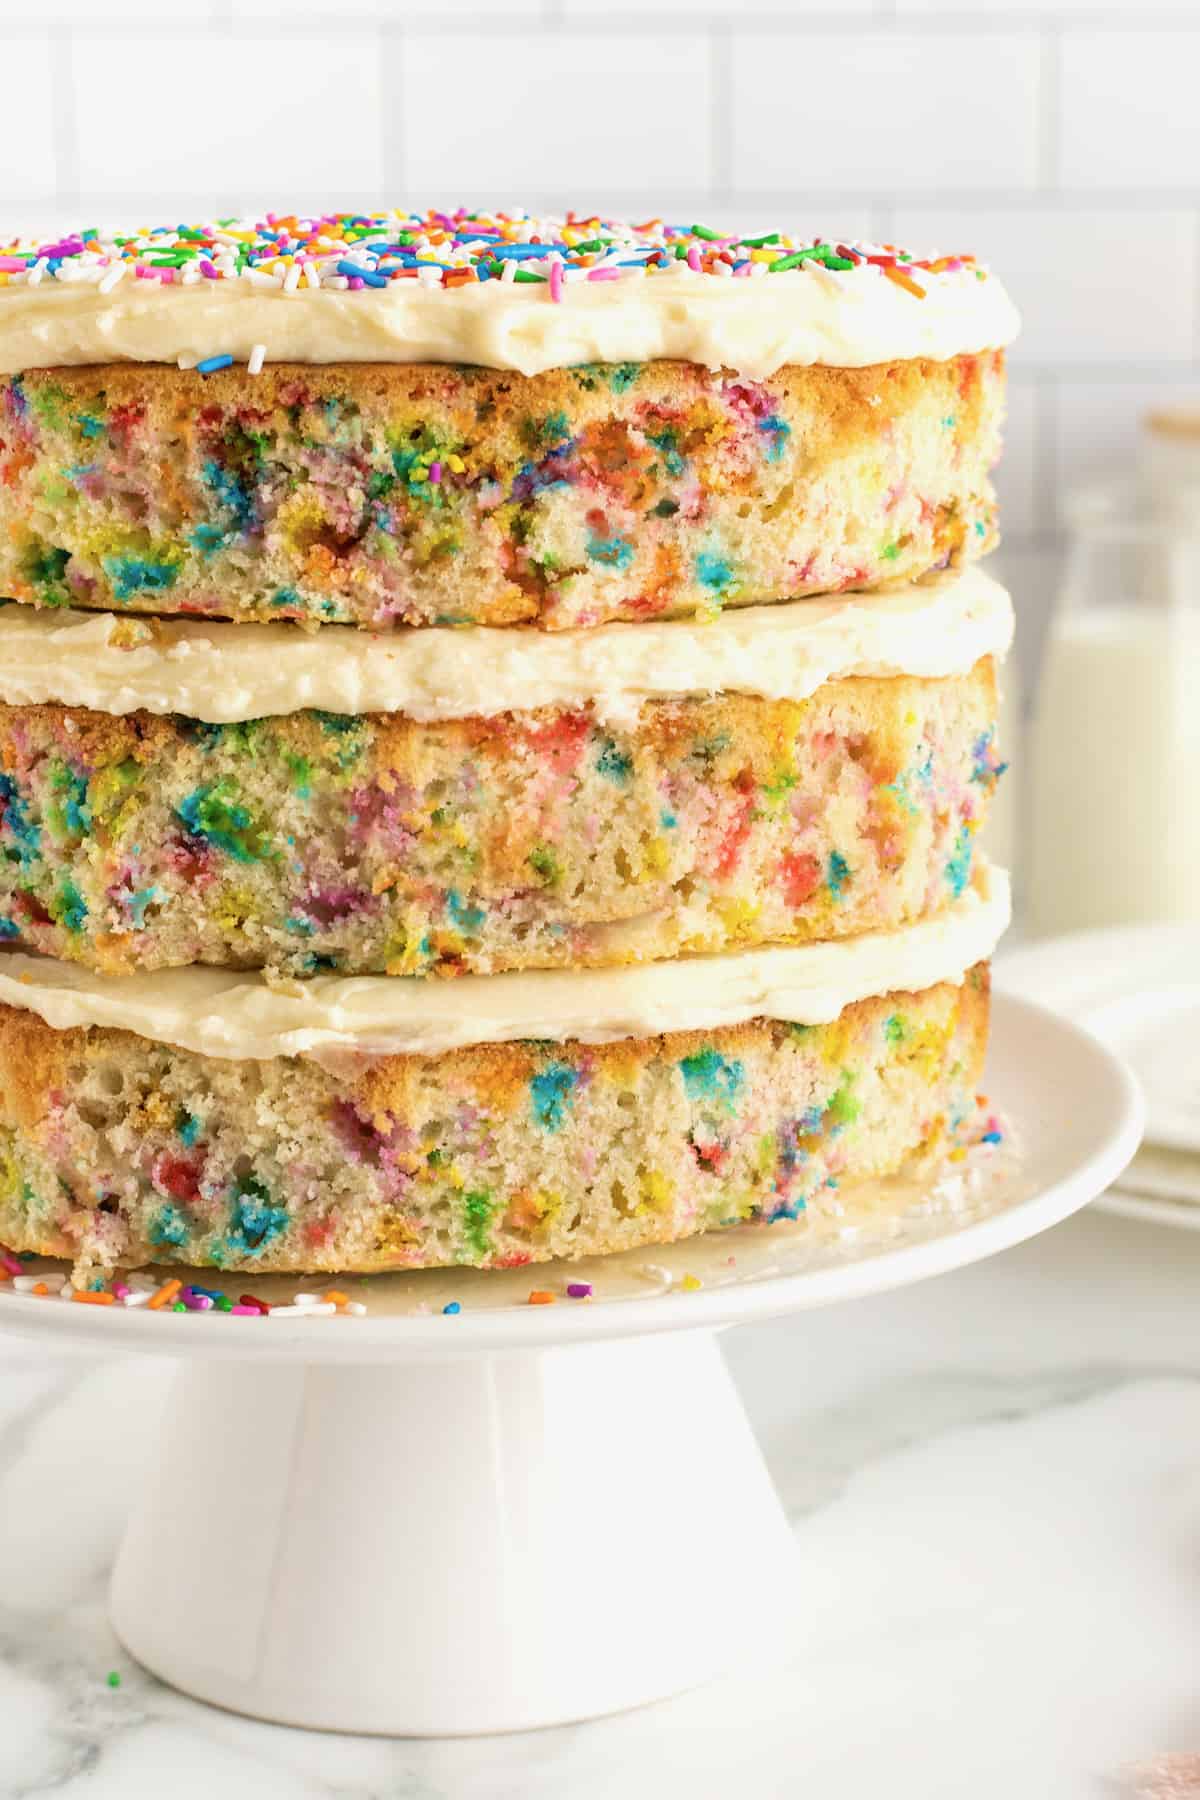
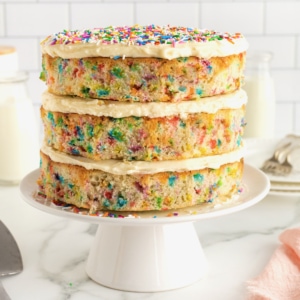
I love baking and of course eating cake, but I’m no professional when it comes to decorating one. That’s what I love so much about this Confetti Cake! No decorating skills needed! It’s amazing how gorgeous a cake can still be by just showcasing it as is. No fuss with frosting the whole cake to make it look fabulous.
A Baked-in Rainbow of Fun
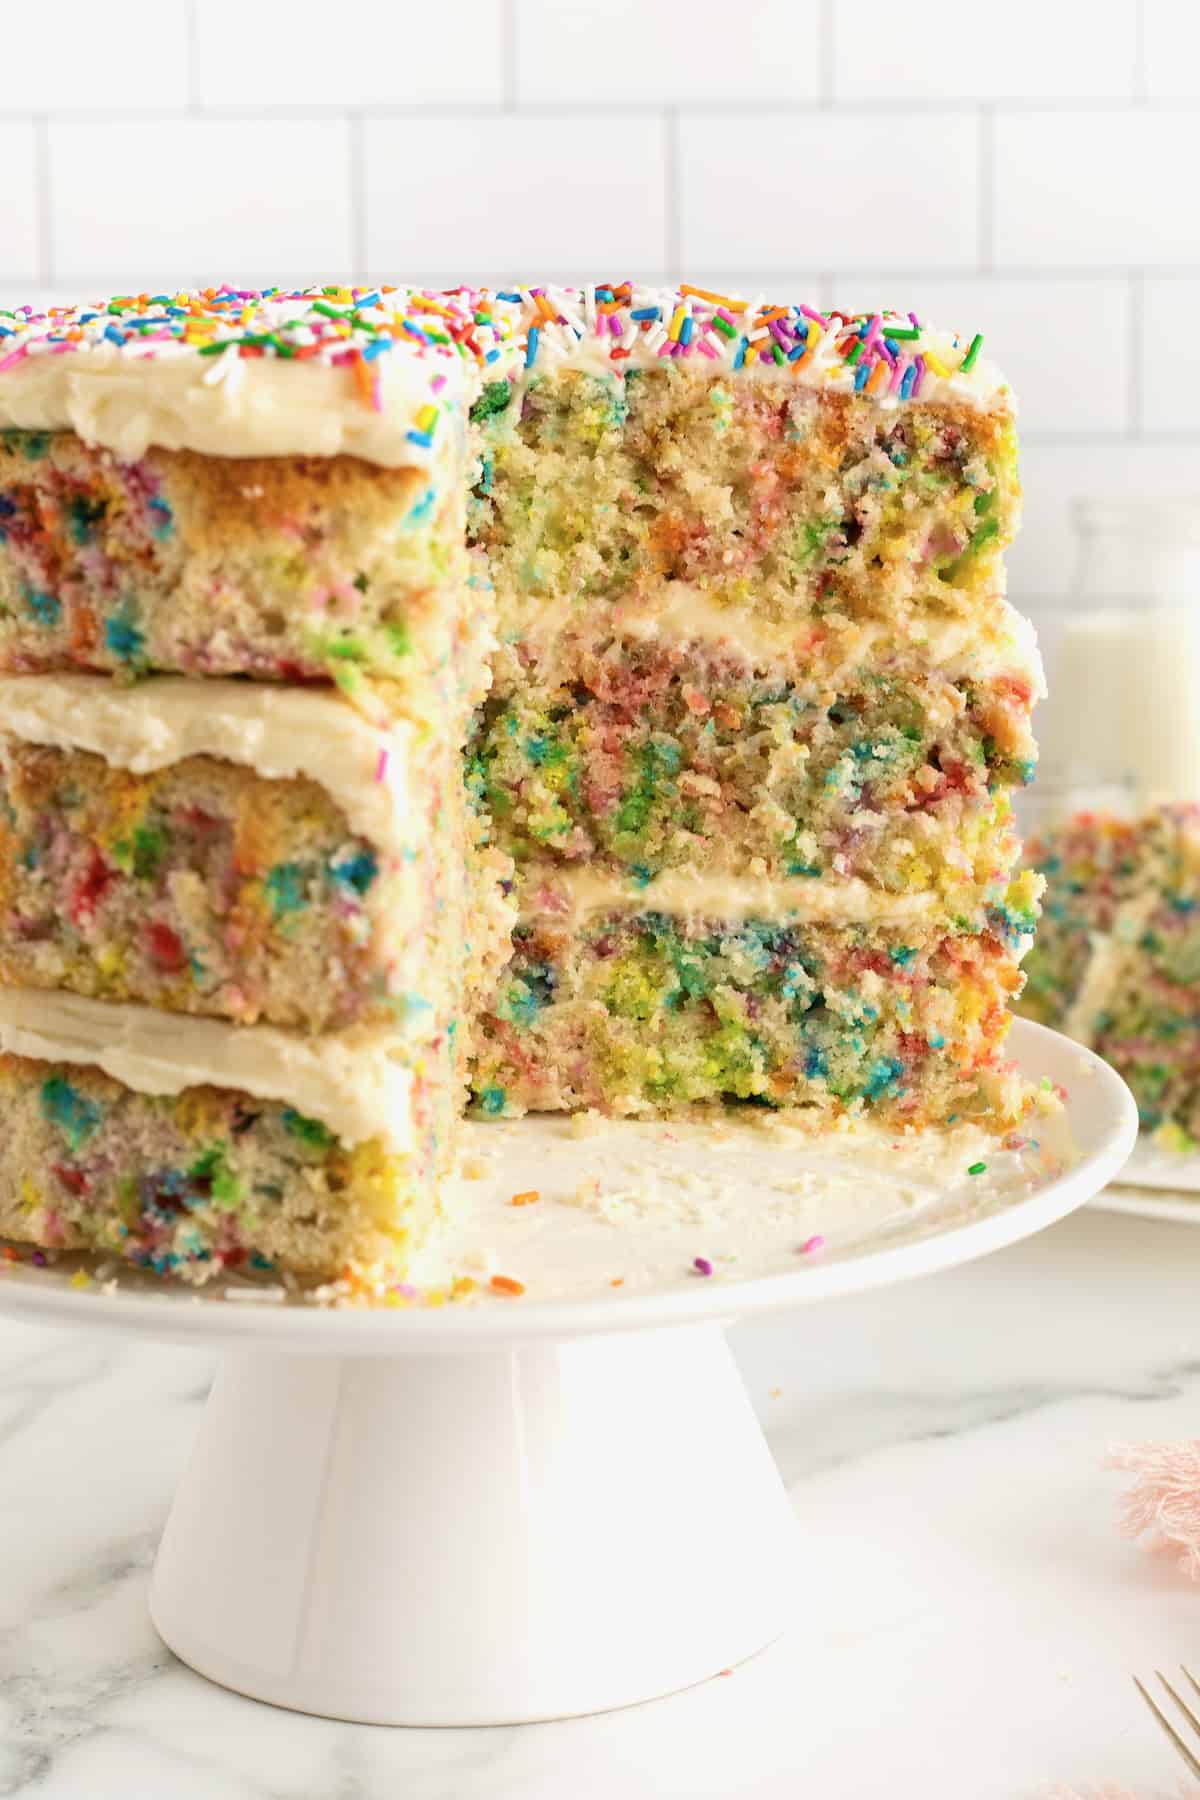
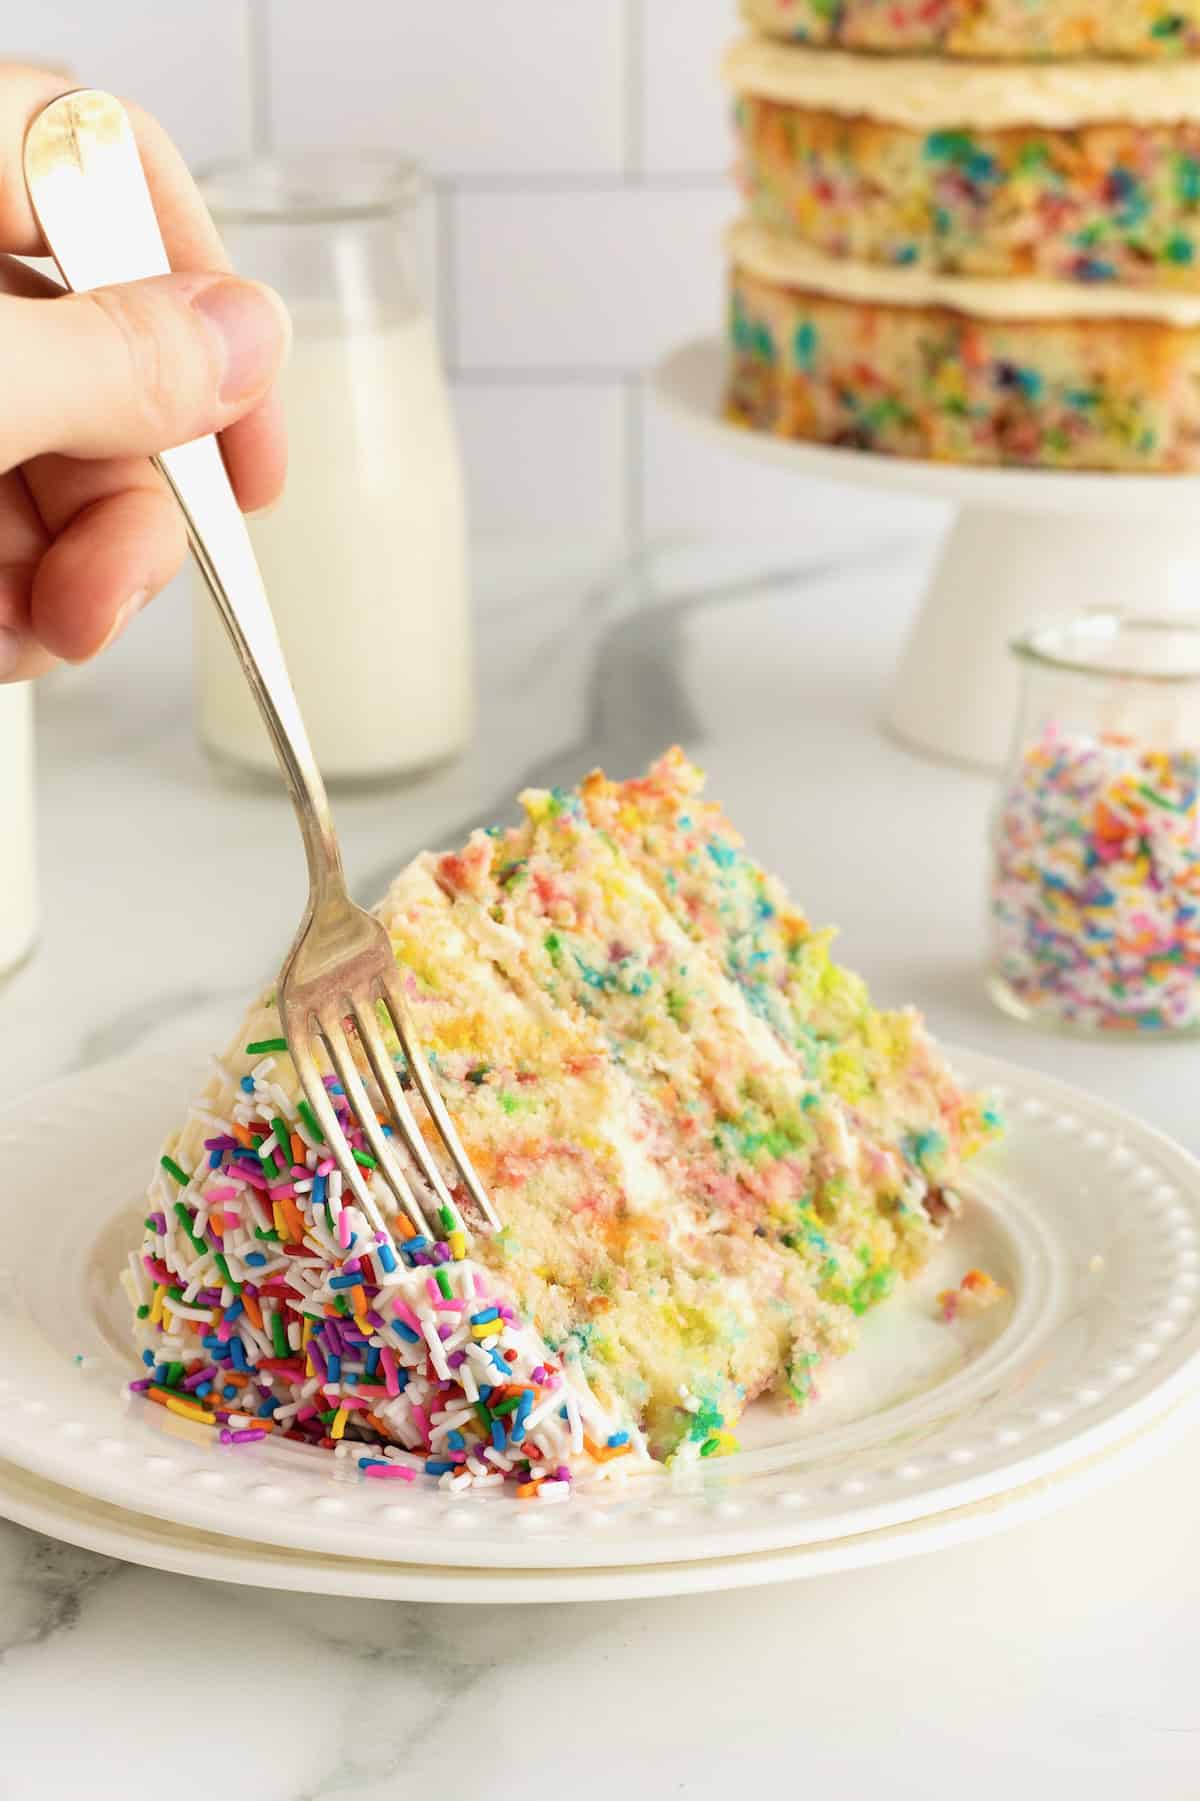
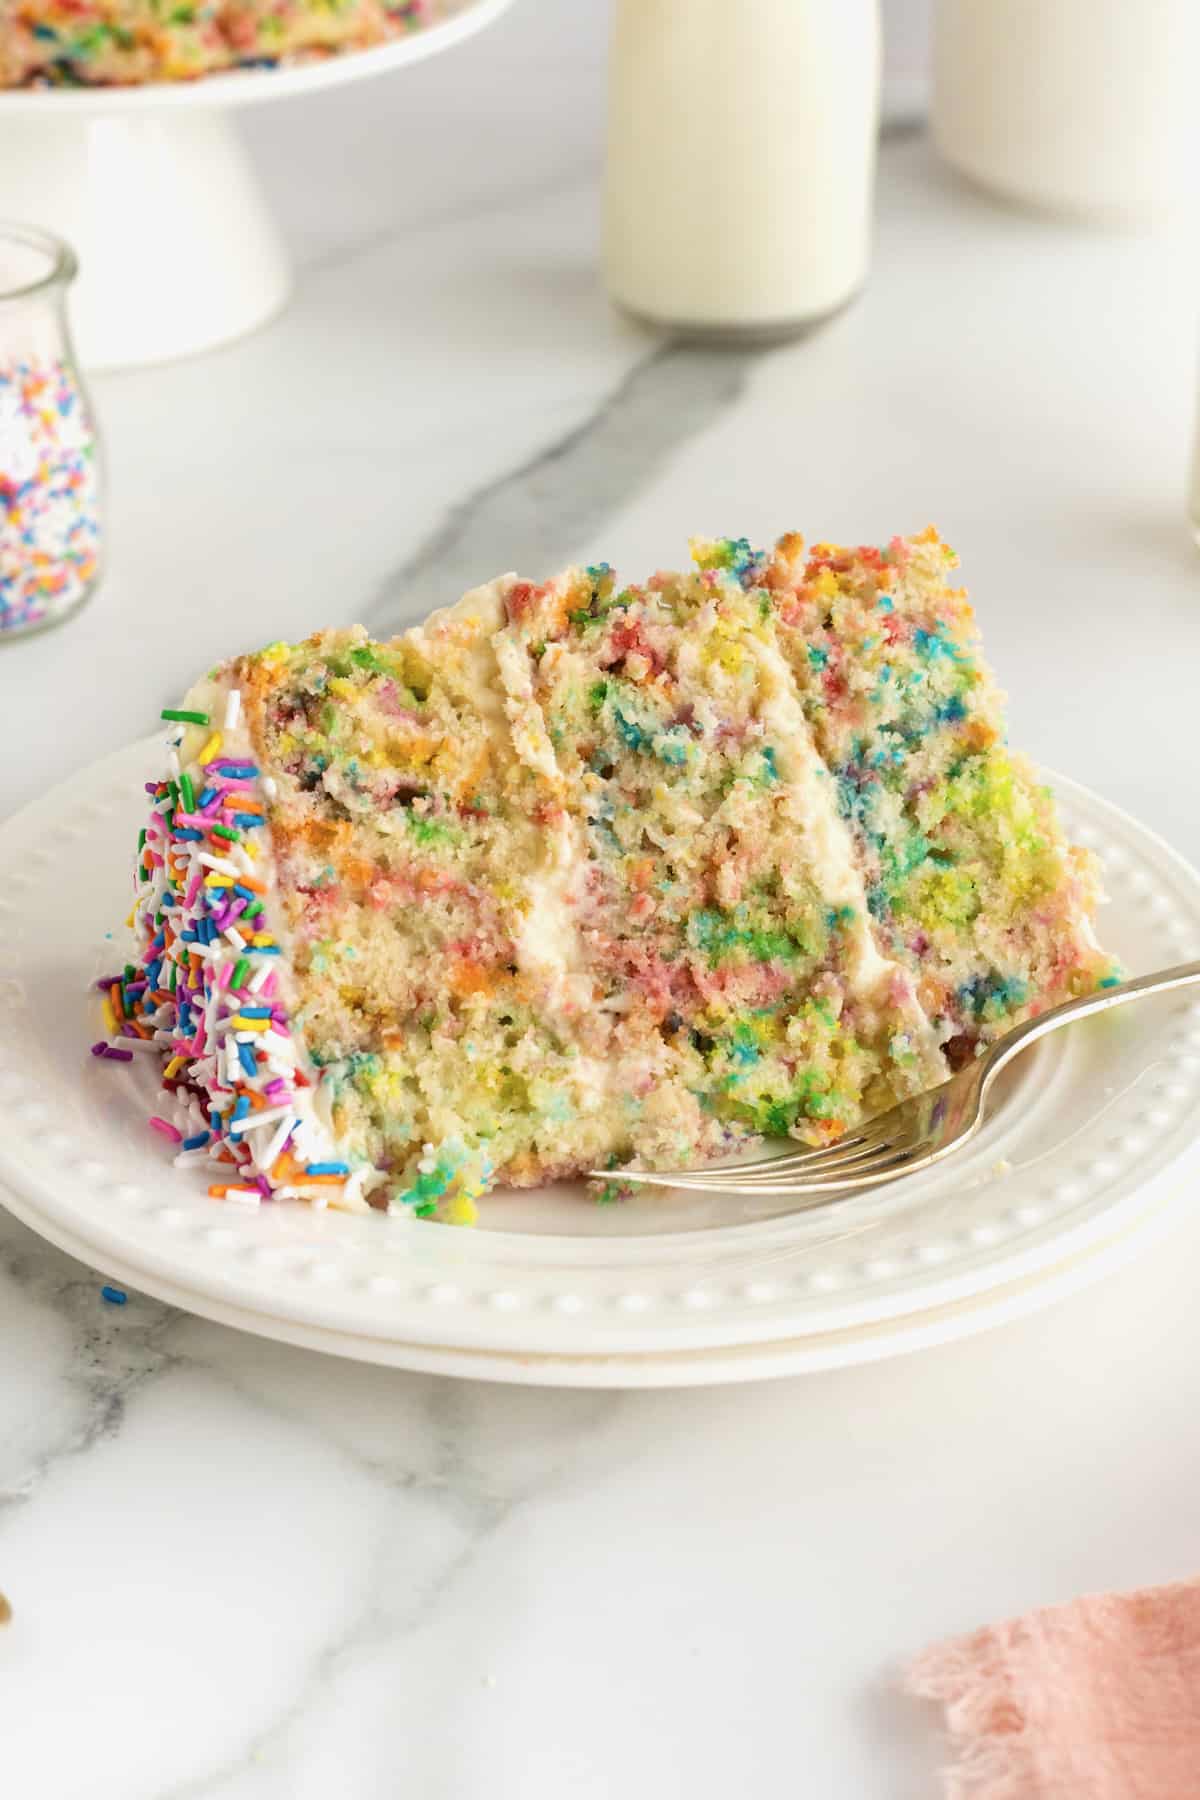
This confetti cake is the perfect cake to leave bare on the exterior because the rainbow sprinkles are baked in decorations. By trimming the outside edges of the cake, the eyes get an exciting glimpse into all the sprinkles inside. And who doesn’t love sprinkles?!
Keep this Recipe Handy!
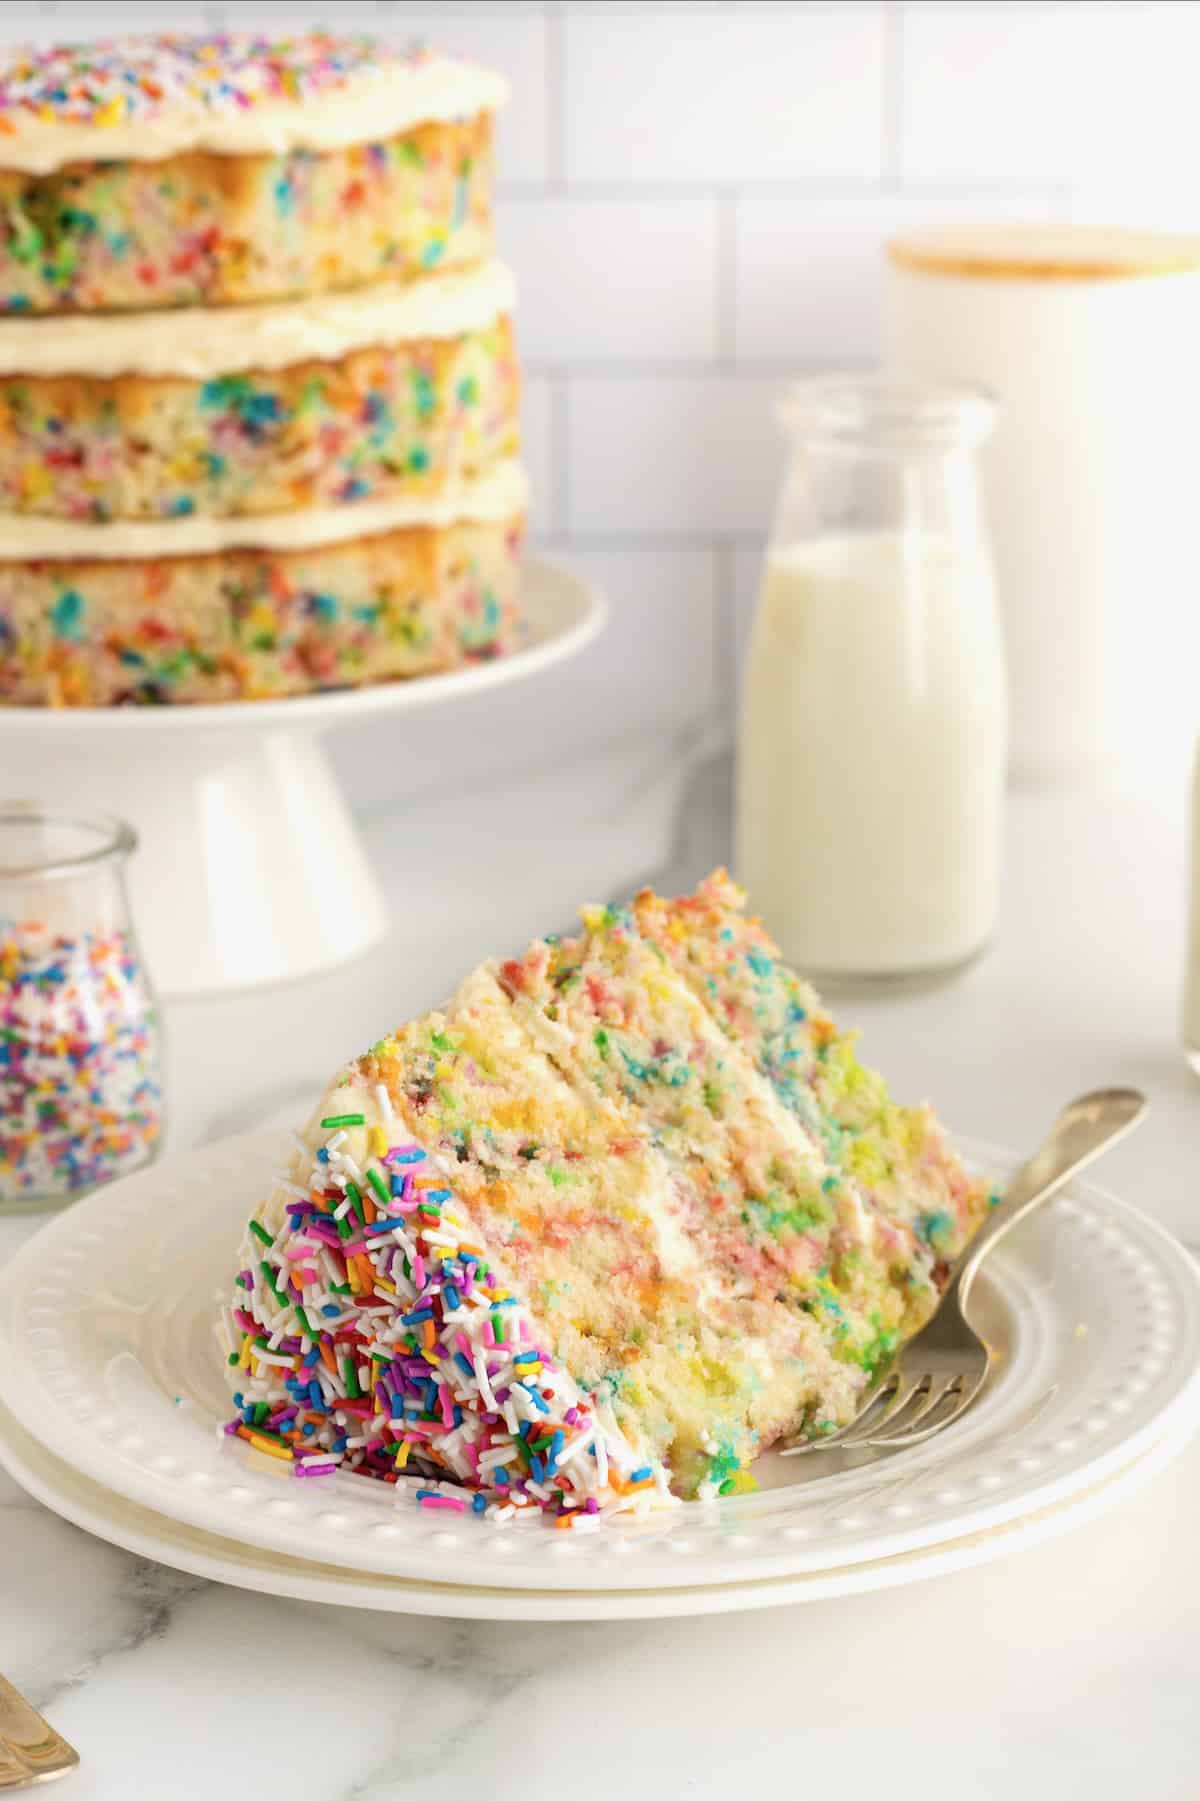
Everybody needs to have a great vanilla-flavored confetti cake recipe up their sleeve for when a birthday celebration rolls around. You just can’t go wrong baking this cake for any celebration. It screams fun and yum! Each bite of this white cake is full of sweet, buttery, vanilla deliciousness.
Delicious Birthday Fun
It was so fun and pretty funny testing this cake. The boys were convinced that we’re celebrating someone’s birthday and they’ve gotten a kick out of taking turns singing to each other as we tried this birthday cake. We might have even blown out a few candles along the way.
We’ve all given this light and fluffy cake two thumbs up and the boys have even asked if I can make one for their next “real” birthday. Best compliment ever! I hope you have a reason to celebrate soon so you can bake and enjoy it ASAP! Trust me, it’s so easy, so fun and most importantly, so delicious!!
Skip the Mix
Skip the mix and let me show you how easy it is to bake a great funfetti cake from scratch that you can be so proud of.
It all starts with a buttery vanilla cake batter that’s loaded with rainbow sprinkles. The batter is baked to moist fluffy cake perfection while the sprinkles stay bright and beautiful. I decided to trim around the edges of each cake layer to expose the sprinkles and I love how fun and festive it turned out.
The layering and frosting literally takes less than 5 minutes. And then, ta-da! A homemade confetti cake that will bring a smile to everyone’s face! There’s just something so fun about a cake filled and topped with sprinkles. Serving it up to your loved ones will be something special!
More Layer Cakes They’ll Love
- The Greatest Chocolate Cake: Layers of rich, moist chocolate cake with a decadent dark chocolate frosting! It truly is the greatest chocolate cake you’ll ever make!
- Red Velvet Cake: A stunning Red Velvet Cake that’s made extra special and scrumptious with a few simple variations!
- Pumpkin Carrot Cake: This incredibly moist and flavorful Pumpkin Carrot Cake gives you the best of so many fall flavors. It screams Thanksgiving!
- Candy Cane Cake: Layers of red and white peppermint flavored cake with a dreamy peppermint marshmallow buttercream frosting. A Candy Cane Cake perfect for the holidays!
- Pumpkin Pineapple Cake: Incredibly moist and flavorful! It would be a marvelous addition to any fall gatherinng!
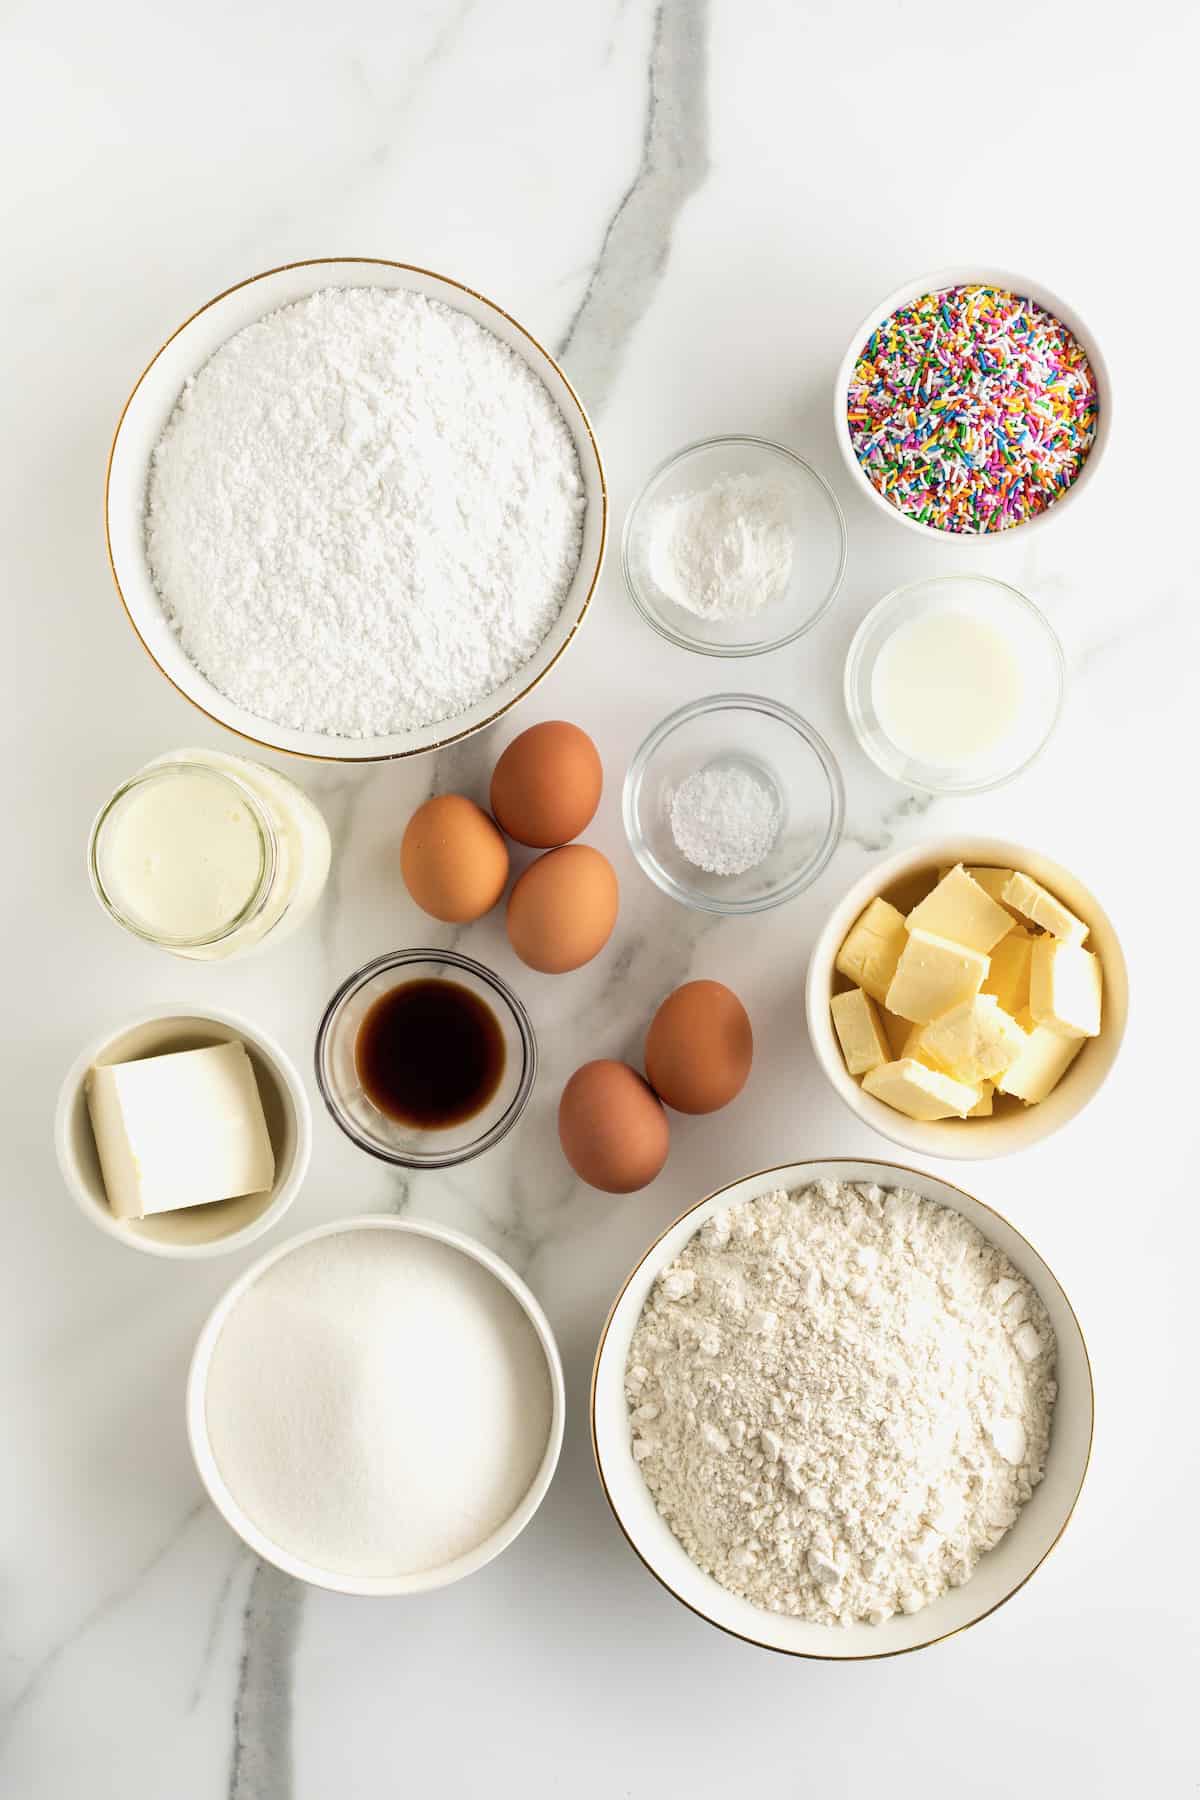
What Do I Need to Make Confetti Cake?
- All-purpose flour
- Baking powder
- Kosher salt
- Unsalted butter, softened
- Granulated sugar
- Large eggs
- Pure vanilla extract
- Whole milk and/or buttermilk
- Rainbow sprinkles
- Cream cheese, softened
- 4 cups powdered sugar (confectioner’s sugar)
- 3 8-inch round cake pans
How to Make Birthday Confetti Cake
- Preheat oven to 350°F. Line the bottom of three 8-inch round cake pans with a piece of parchment paper cut to fit. Lightly grease and flour both cake pans and set aside.
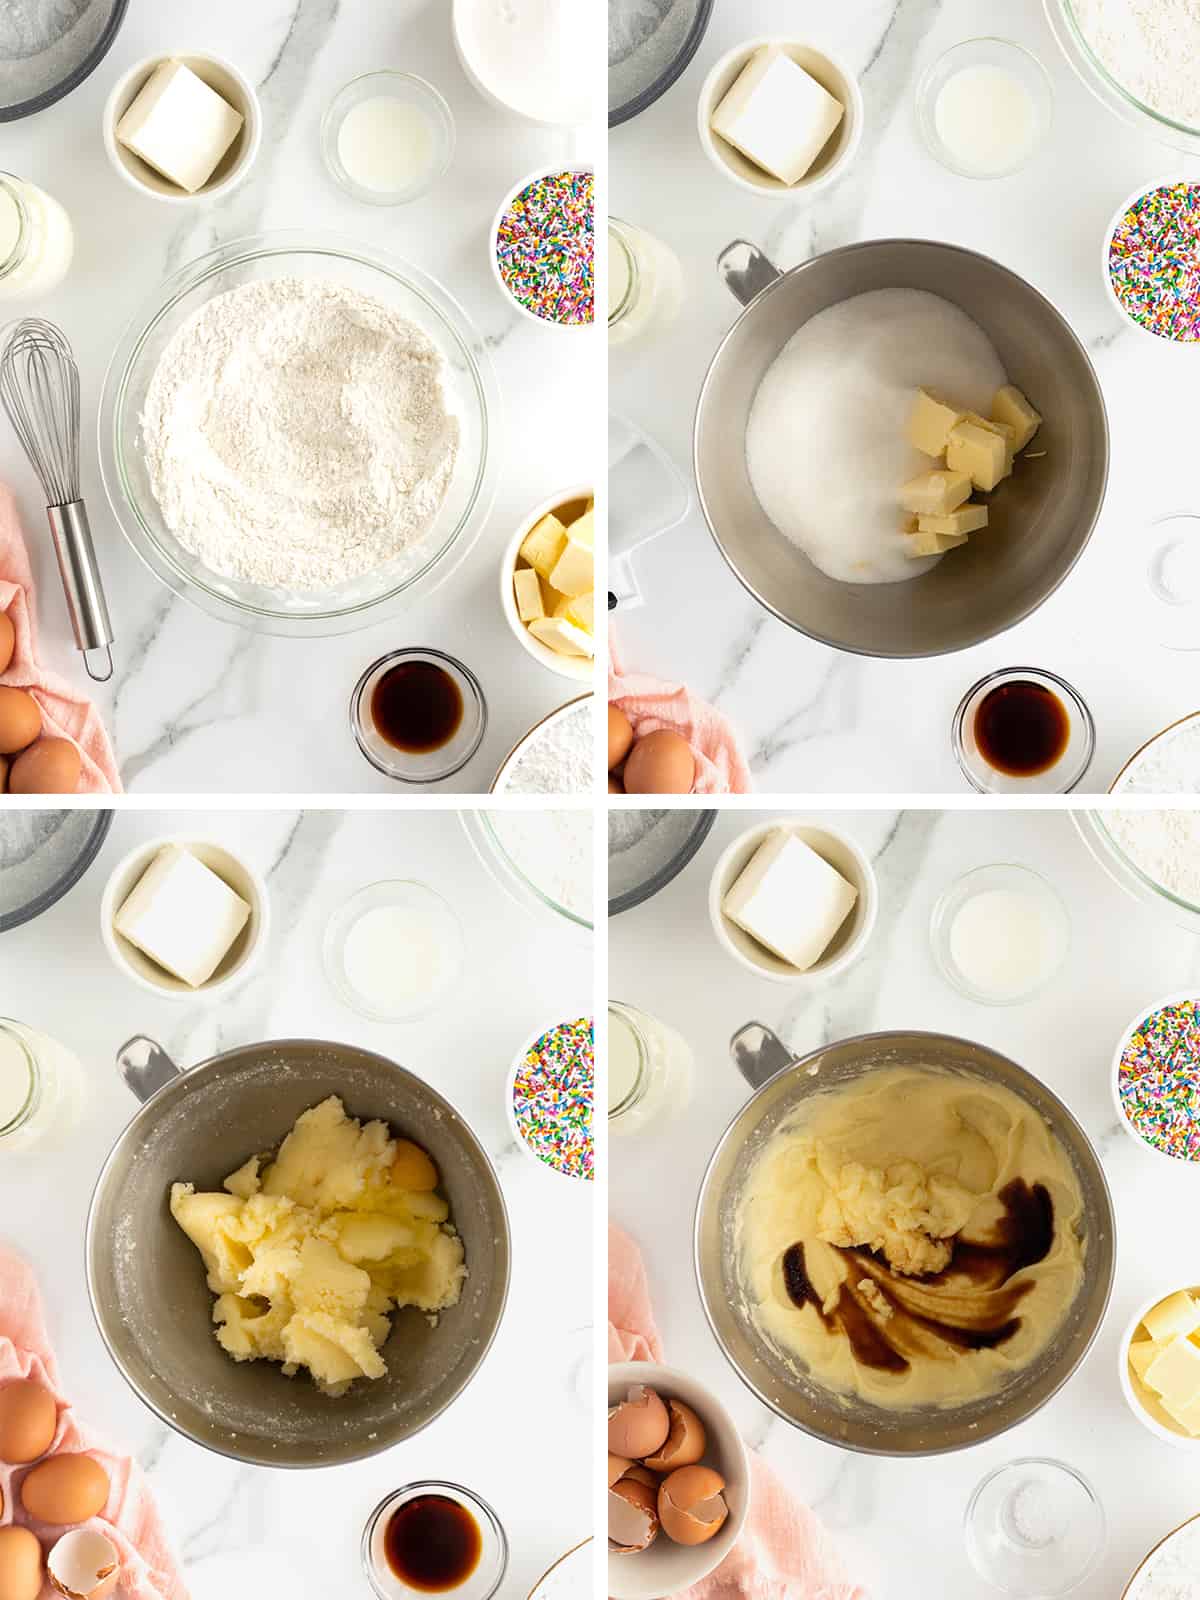
- In a medium bowl, whisk together the flour, baking powder and salt. Set aside.
- In the bowl of an electric mixer fitted with the paddle attachment, beat the butter and sugar until very white and fluffy, about 4 minutes. Beat in the eggs, one at a time, making sure each one is well incorporated before adding another. Mix in the vanilla.
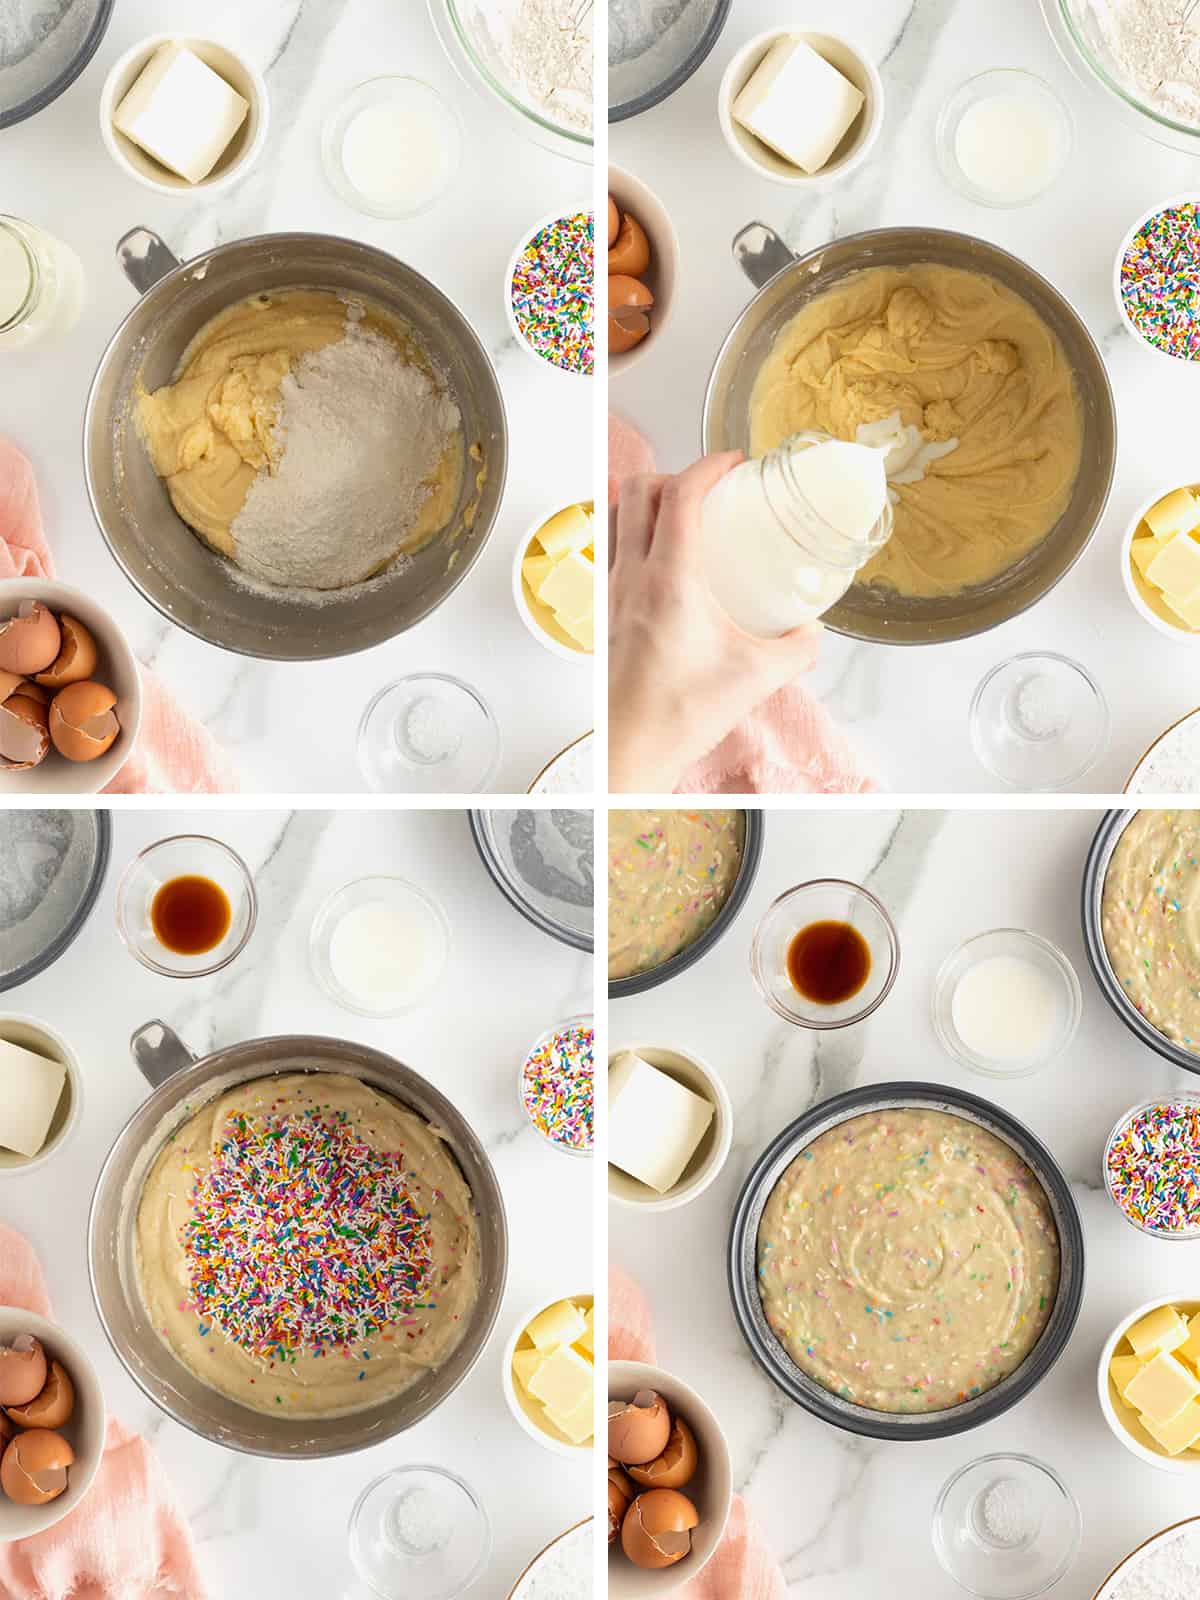
- With the mixer on low speed, alternate adding the flour mixture and the milk, ending with the flour mixture, until batter is smooth.
- Fold in 1 cup rainbow sprinkles with a spatula.
- Divide batter evenly among prepared cake pans.
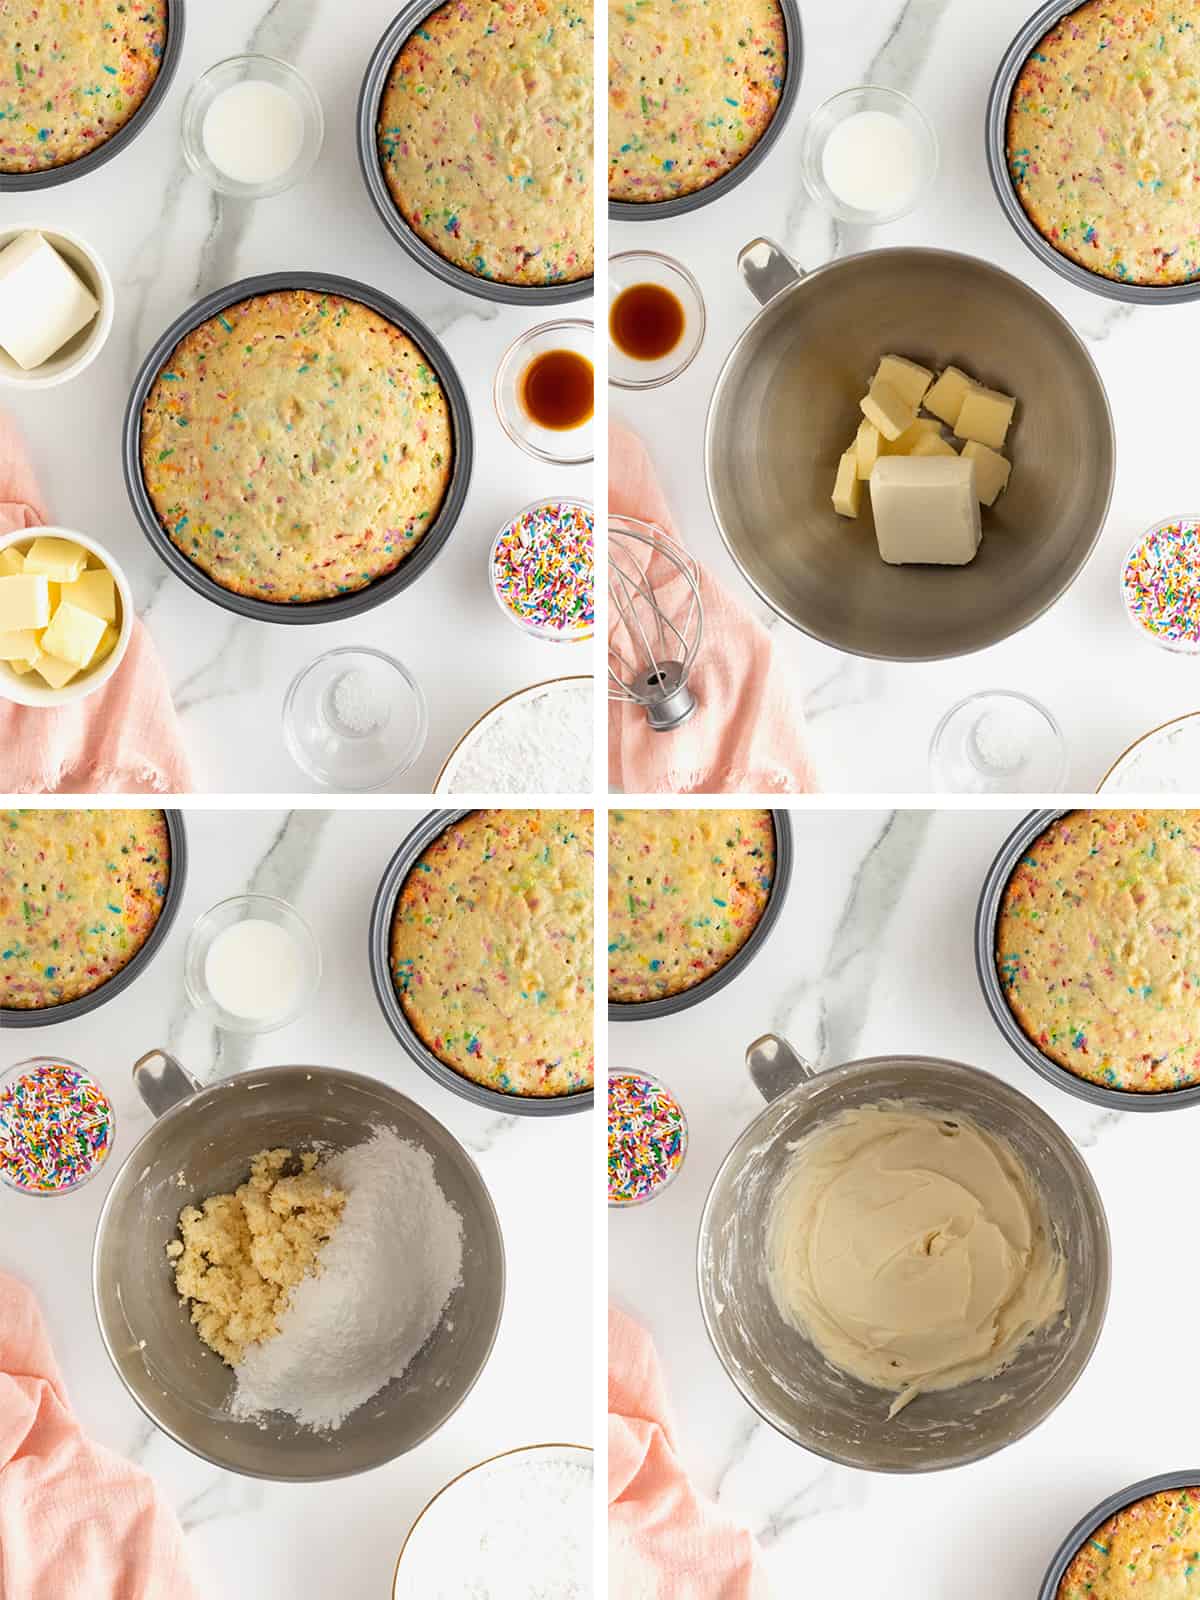
- Bake cakes for 25-30 minutes or until a toothpick inserted in the center of each cake comes out clean. Let cakes cool in pans for 15 minutes before running a sharp knife around the edges turning out onto wire racks to cool completely.
- To make the frosting, beat the butter and cream cheese together in the bowl of an electric mixer fitted with the whisk attachment.
- Add the salt and vanilla.
- Beat in the powdered sugar, 1 cup at a time, until well combined.
- Add 1 tablespoon milk and beat on medium-high speed until frosting is fluffy and of spreading consistency. Add additional milk if the frosting is too thick or additional powdered sugar if the frosting is too thin to spread.
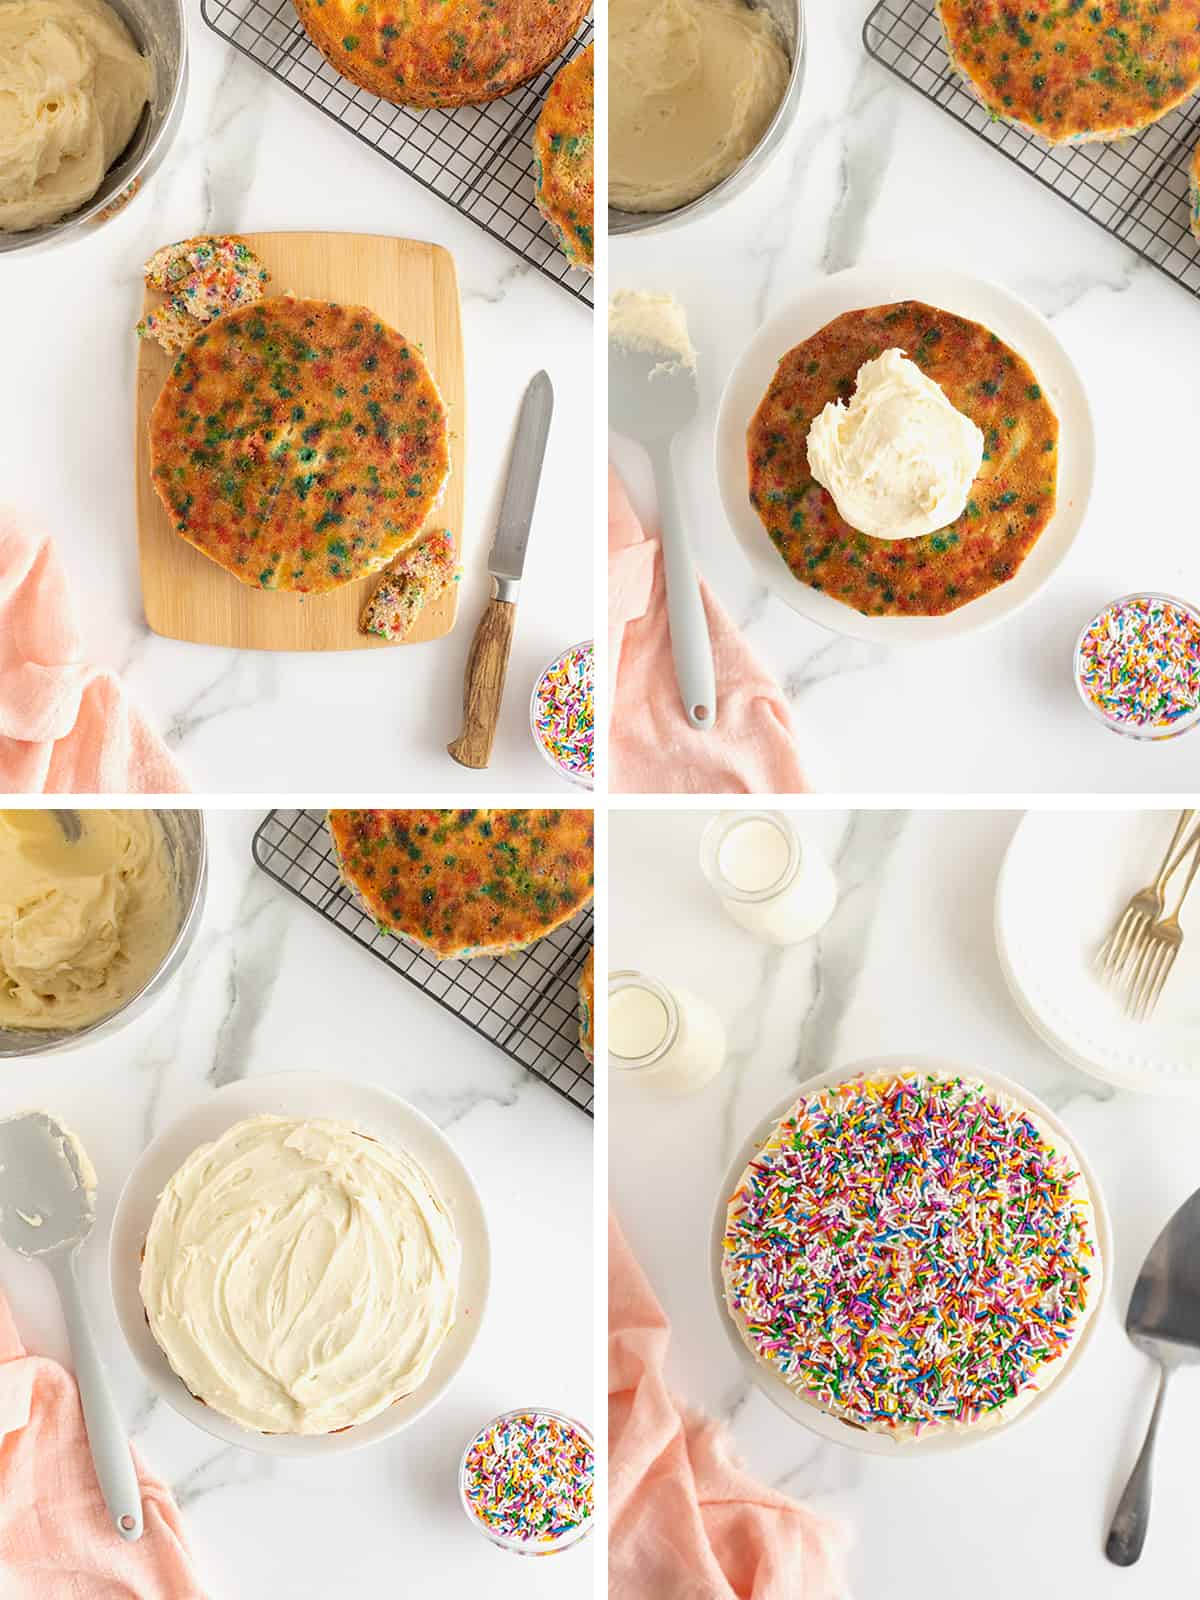
- Once cakes are cooled, use a sharp knife to trim around the edges so the inside of the cake is slightly exposed.
- Spread a small amount of frosting on the bottom of a cake stand or cake plate. Place one cake layer, top side down, on the cake stand.
- Spread a third of the frosting over the first cake layer, spreading it all the way to the edges. Repeat with remaining cakes and frosting.
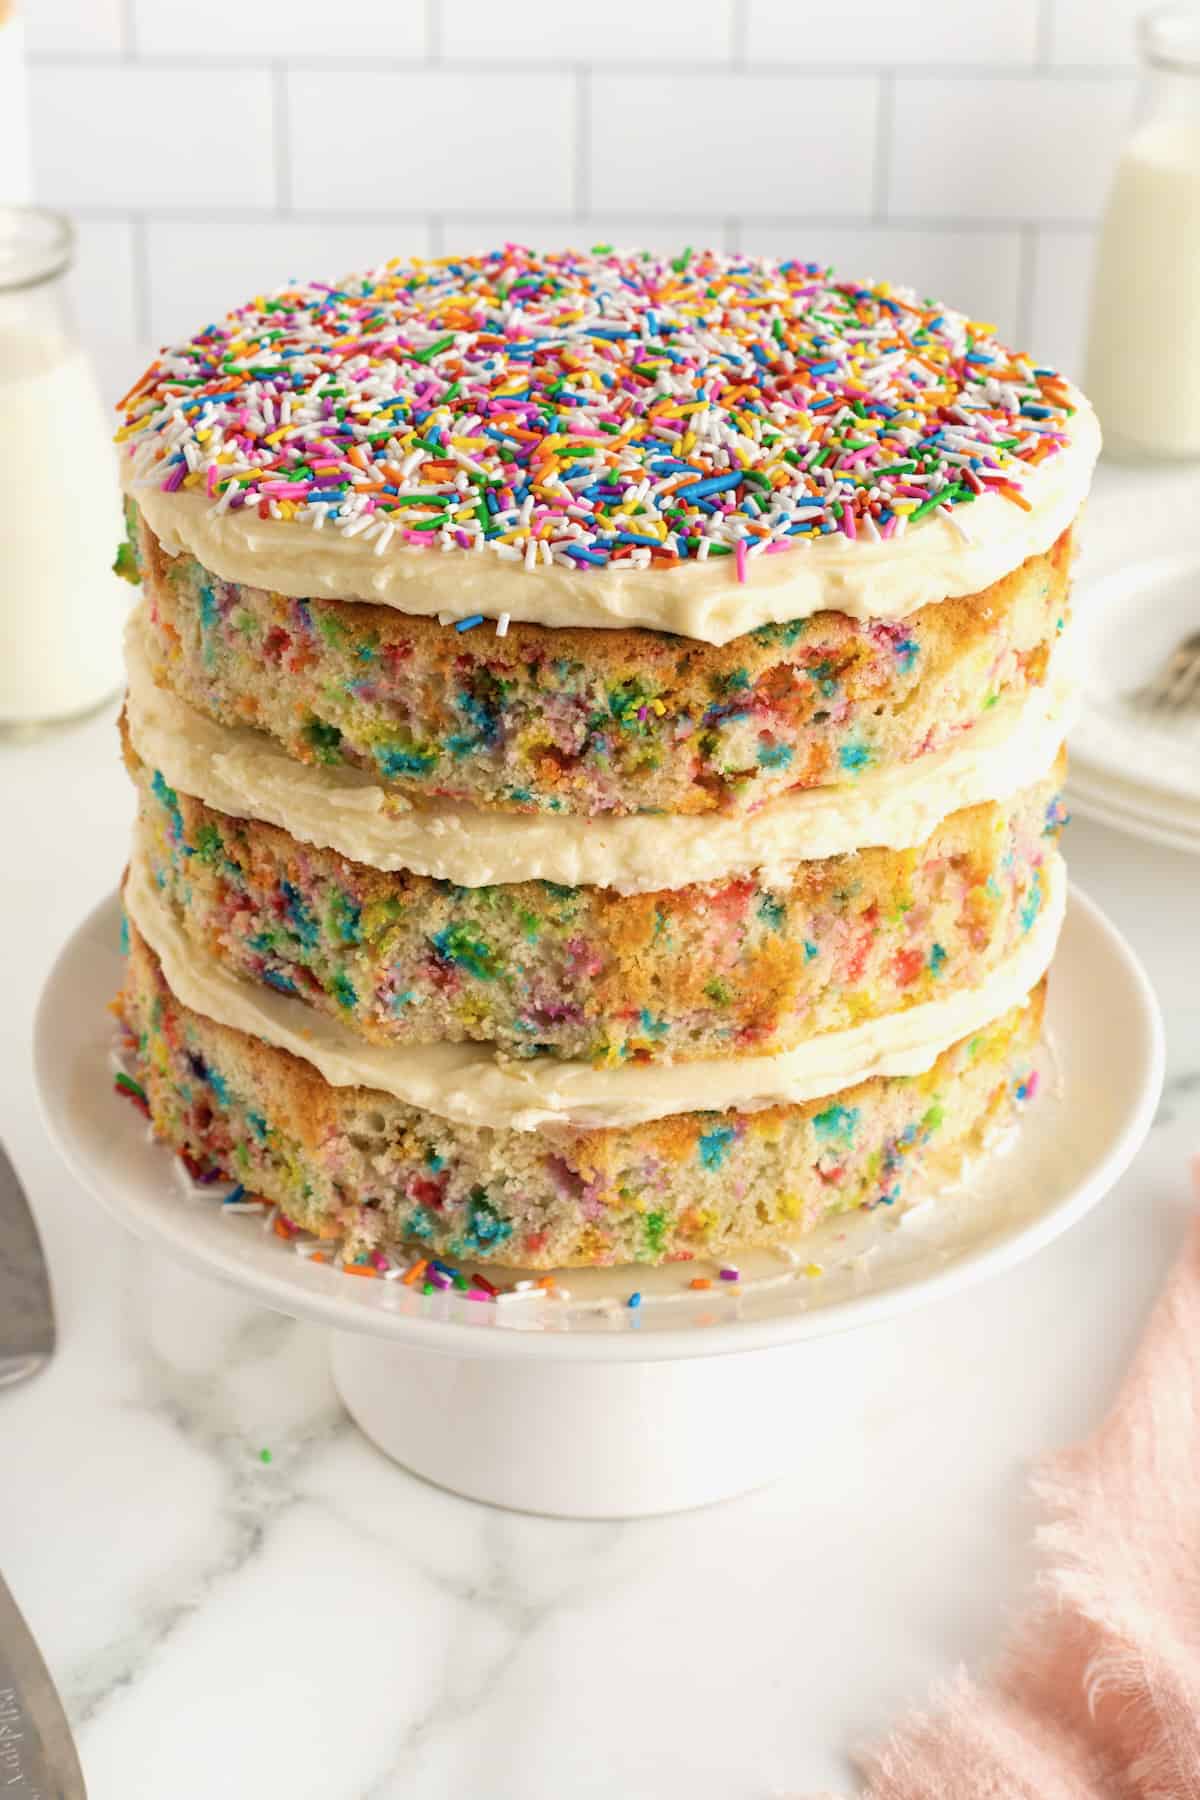
- Cover the top layer of frosting with 1/3 cup rainbow sprinkles, gently pressing them into the frosting.
- Serve, eat and enjoy!
How to Store Birthday Confetti Cake
To store confetti cake: Cover and store at room temperature for up to 2 days. Then store in the refrigerator for up to 3 days.
Freeze leftovers: Once the cake is frosted, slice into slices and wrap each slice in plastic wrap or press and seal and then place in a freezer-safe container or baggie or foil to protect against freezer burn.
Defrost: Remove from container or baggie or foil and let defrost, still wrapped in plastic wrap, in the refrigerator overnight.
Make this cake in advance: Let the cake cool completely. Then wrap each layer tightly in plastic wrap or press and seal and then place in a freezer safe baggie or container, or wrap in foil for extra protection against freezer burn.
One day before serving, remove cake from the container, baggie or foil, and allow to thaw overnight in the refrigerator. You can also store loosely covered at room temperature but you risk it drying out. Frost according to the directions.
If you make this Birthday Confetti Cake, be sure to snap a picture and share it with me or tag me on Instagram @thebakermama so I can see. 😍 I love seeing how inspired and creative y’all get with the recipes I share. Enjoy!
xoxo,

Confetti Cake
- Prep Time: 20 mins
- Cook Time: 30 mins
- Total Time: 50 mins
- Yield: 15
- Category: Dessert
Description
This confetti cake is a celebration in itself! Buttery moist vanilla cake bursting with rainbow sprinkles is layered with a creamy vanilla buttercream frosting and topped with even more sprinkles. Party!!
Ingredients
Cake:
- 3 cups all-purpose flour
- 3 teaspoons baking powder
- 1/2 teaspoon kosher salt
- 1 cup (2 sticks) unsalted butter, softened
- 2 cups granulated sugar
- 5 large eggs
- 1 tablespoon pure vanilla
- 1 and 1/2 cups whole milk or buttermilk
- 1 cup rainbow sprinkles
Frosting:
- 1/2 cup (1 stick) unsalted butter, softened
- 4 ounces cream cheese, softened
- 1/4 teaspoon kosher salt
- 1 teaspoon pure vanilla
- 4 cups powdered sugar
- 1–2 tablespoons milk
- 1/3 cup rainbow sprinkles, for garnishing the top of the cake
Instructions
- Preheat oven to 350°F. Line the bottom of three 8-inch round cake pans with a piece of parchment paper cut to fit. Lightly grease and flour both cake pans and set aside.
- In a medium bowl, whisk together the flour, baking powder and salt. Set aside.
- In the bowl of an electric mixer fitted with the paddle attachment, beat the butter and sugar until very white and fluffy, about 4 minutes. Beat in the eggs, one at a time, making sure each one is well incorporated before adding another. Mix in the vanilla.
- With the mixer on low speed, alternate adding the flour mixture and the milk, ending with the flour mixture, until batter is smooth. Fold in 1 cup rainbow sprinkles with a spatula.
- Divide batter evenly among prepared cake pans. Bake cakes for 25-30 minutes or until a toothpick inserted in the center of each cake comes out clean. Let cakes cool in pans for 15 minutes before running a sharp knife around the edges turning out onto wire racks to cool completely.
- To make the frosting, beat the butter and cream cheese together in the bowl of an electric mixer fitted with the whisk attachment. Add the salt and vanilla. Beat in the powdered sugar, 1 cup at a time, until well combined. Add 1 tablespoon milk and beat on medium-high speed until frosting is fluffy and of spreading consistency. Add additional milk if the frosting is too thick or additional powdered sugar if the frosting is too thin to spread.
- Once cakes are cooled, use a sharp knife to trim around the edges so the inside of the cake is slightly exposed.
- Spread a small amount of frosting on the bottom of a cake stand or cake plate. Place one cake layer, top side down, on the cake stand. Spread a third of the frosting over the first cake layer, spreading it all the way to the edges. Repeat with remaining cakes and frosting. Cover the top layer of frosting with 1/3 cup rainbow sprinkles, gently pressing them into the frosting.
- Serve, eat and enjoy!

Hey, is it really 4 cups of powdered sugar??
Hi! Yes, it’s a large cake with three thick layers of frosting. Enjoy!
O tried this recipe twice , with two different “ confetti” brands and both times ended up with no colors inside . No idea what happened
Hi Yesi! That is so bizarre! I have great success with Betty Crocker and Wilton brand rainbow sprinkles. Hope this helps and that you end up with a colorful cake next time!
Thank you for sharing! Made it yesterday and it came out perfect.
I only have 1 round cake on, would I still cook each one for 25 minutes?
Hi Michelle! Yes, each 8-inch round cake pan should bake for around 25 minutes or until a toothpick inserted in the center comes out clean. Enjoy!
I only have 9 in rounds, do you recommend I just do 2 layers or would 3 9 in rounds still be ok? TIA
Hi Gira! It will still bake great if you use 3 9inch rounds. Each layer will just be a little shorter. Or you could use 2 9inch rounds and cut each round in half for a 4 layer cake. Hope this helps. Enjoy!
This recipe calls for kosher salt. Will regular salt work? Kosher salt is coarser and therefore if I substitute a finer grain salt should I reduce the quantity?
Hi Suzanne! You can substitute the 1/2 teaspoon of kosher salt with 1/4 teaspoon table salt in this recipe. Hope this helps. Enjoy!