
A stunning Red Velvet Cake that’s made extra special and scrumptious with a few simple variations!
Red All Over
It’s the Holidays and we celebrate lots of birthdays in our family this time of year. So I’ve been baking cakes like crazy! My Red Velvet Cake is one of my most requested cakes to bake so I’m so excited to share it with you in hopes that it will become one of your most requested cakes as well!
What is Red Velvet Cake?
A red-colored chocolate cake, traditional red velvet cake got its rusty color from a chemical reaction rather than the food coloring we use today. It’s the perfect cake for any occasion! I’ve baked it for birthdays, Christmas, Valentine’s Day, BBQs, girl’s night in, cooking club, and even a quaint dinner party for four! It’s one of those cakes that I just love to bake because I know everyone will love it
What Do I Need to Make Red Velvet Cake?
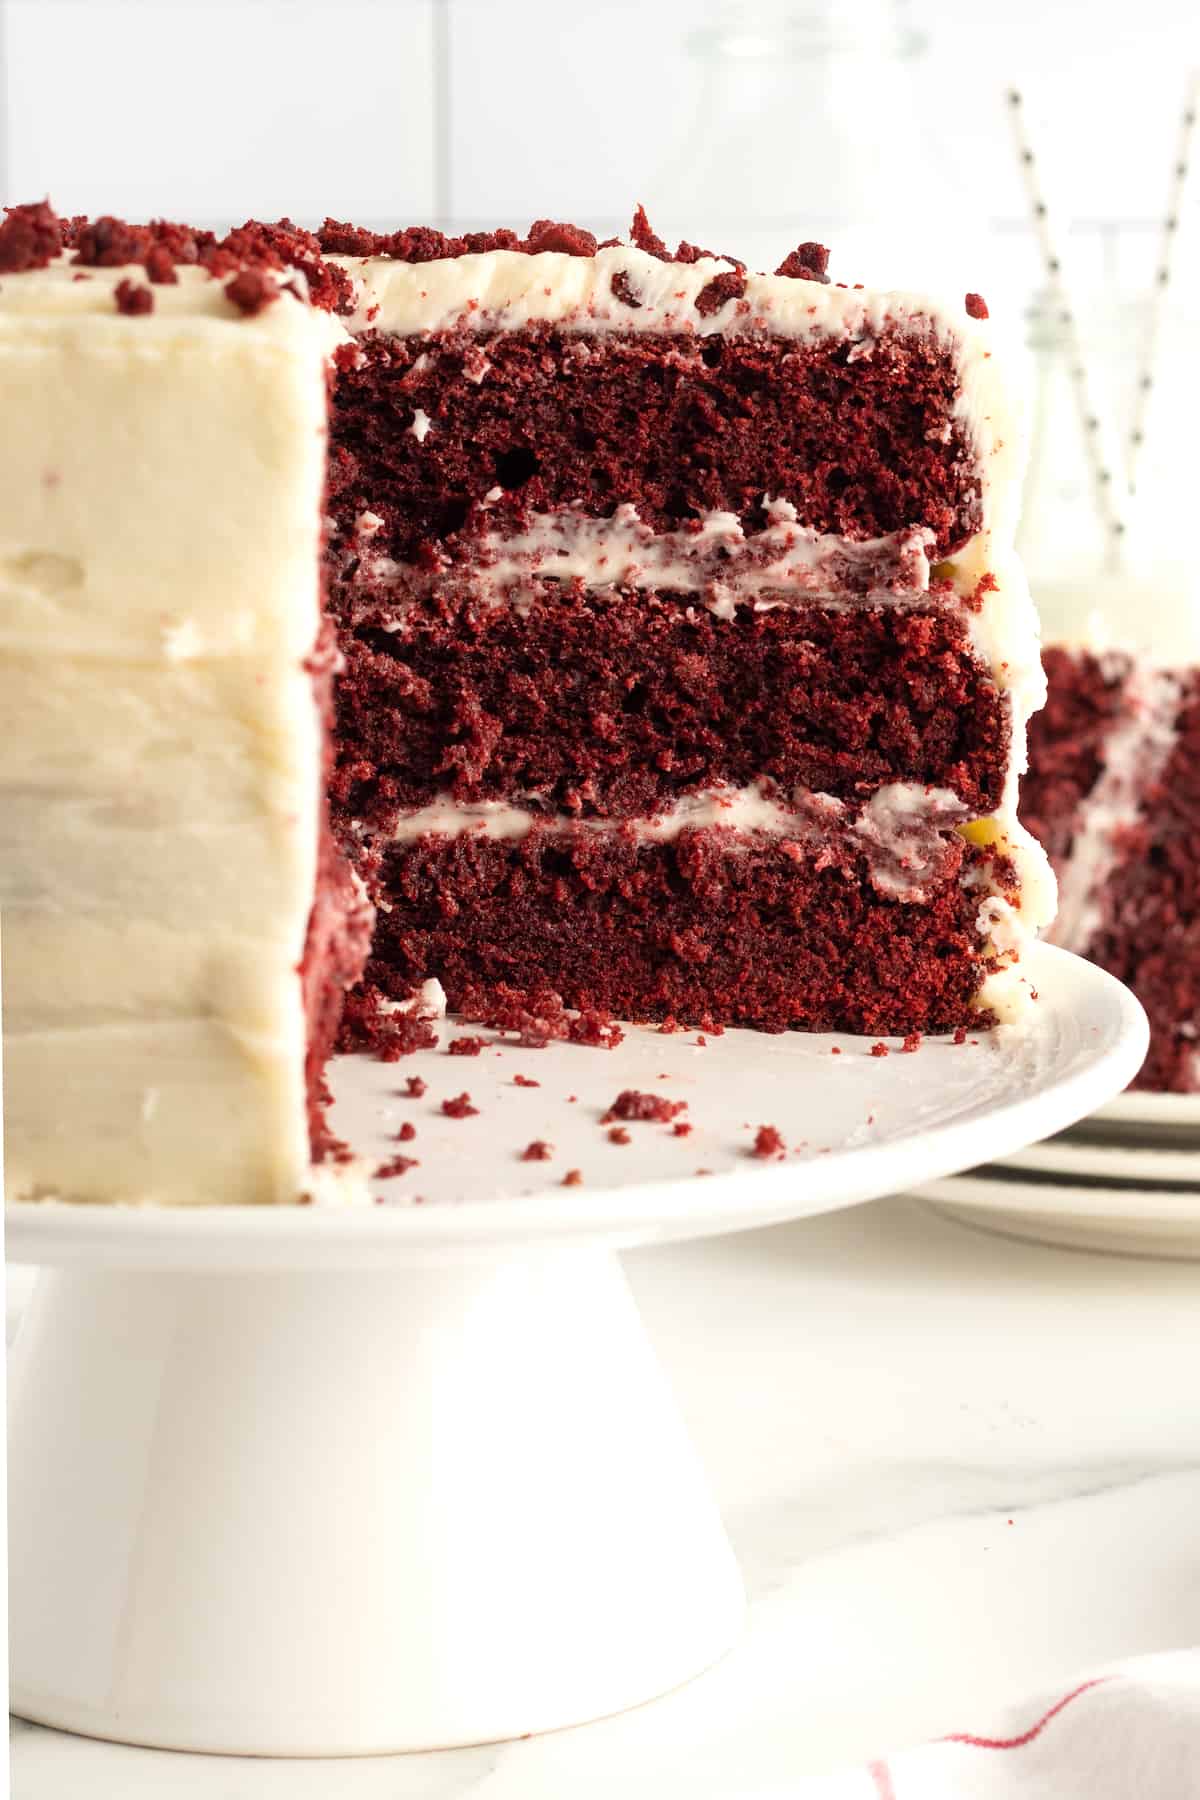
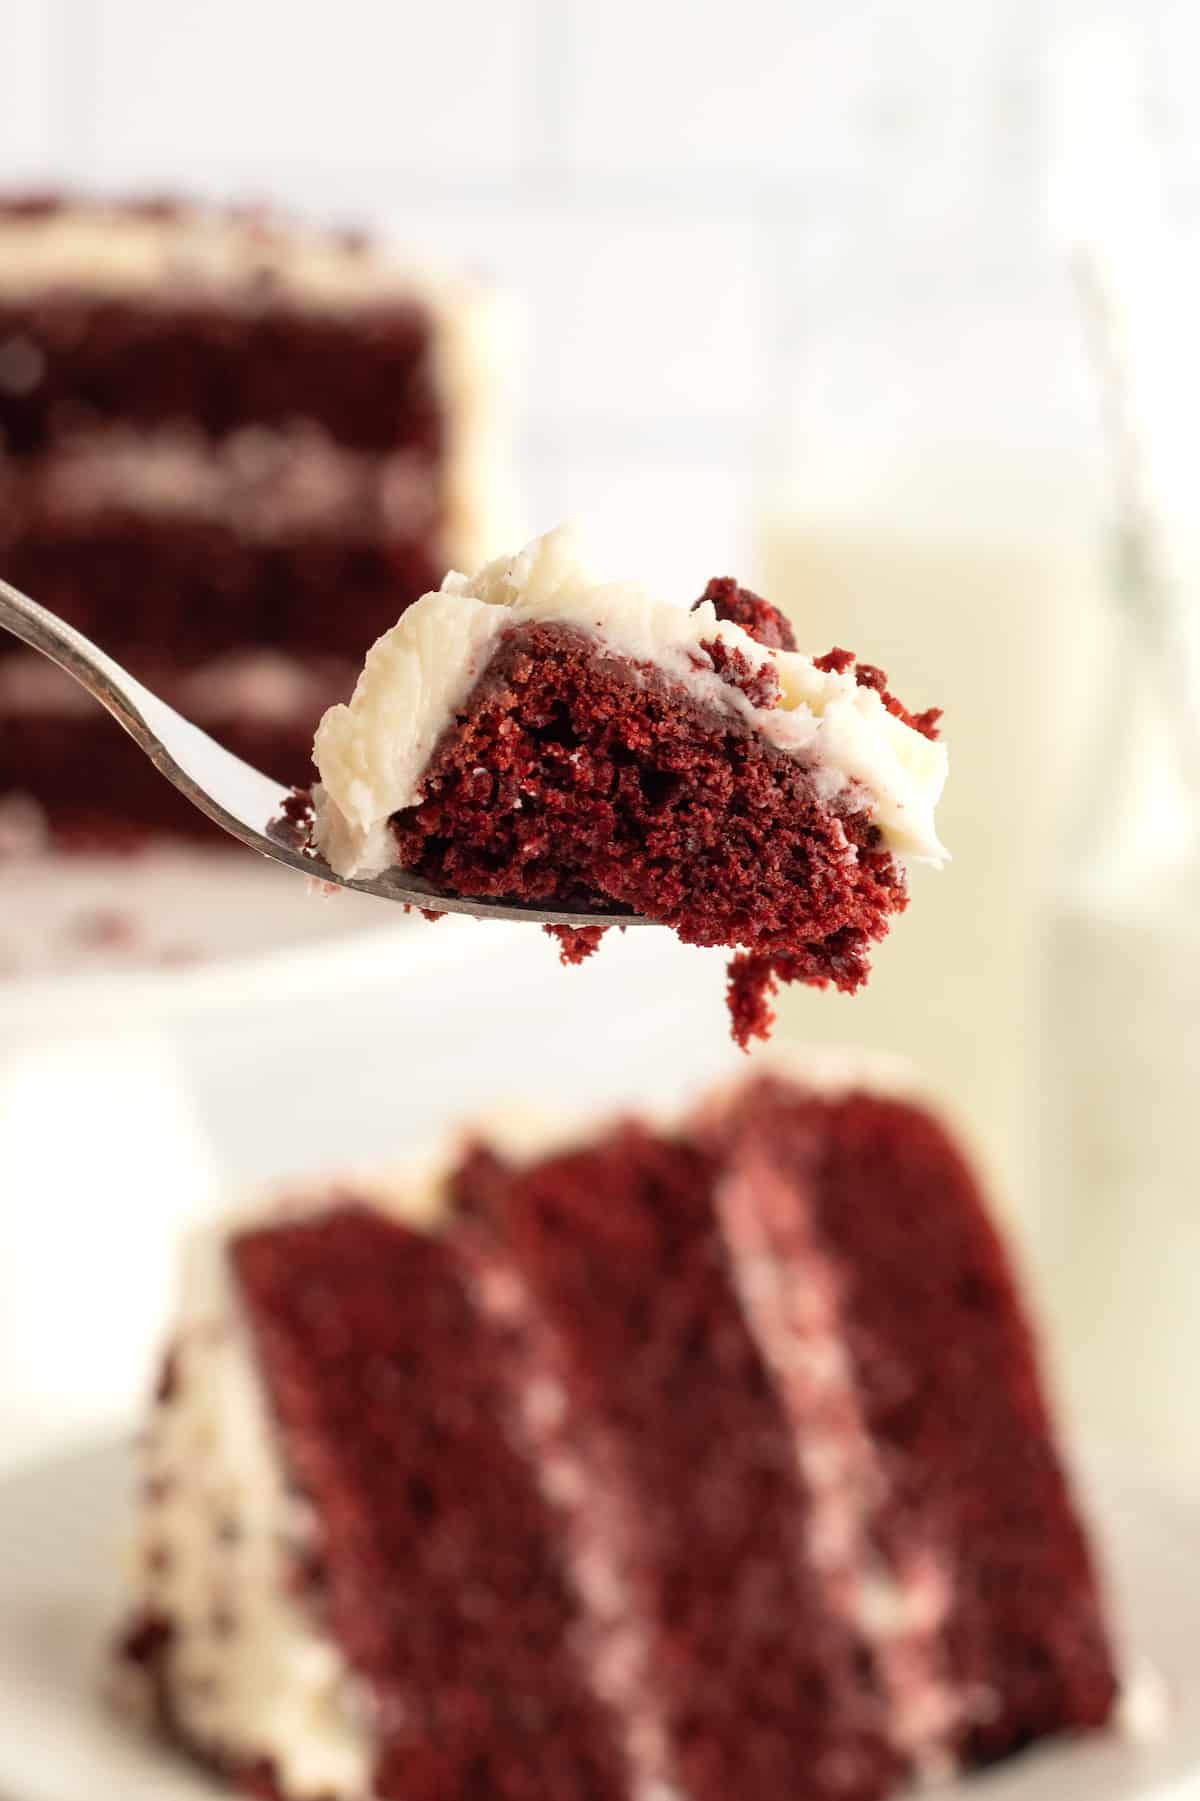
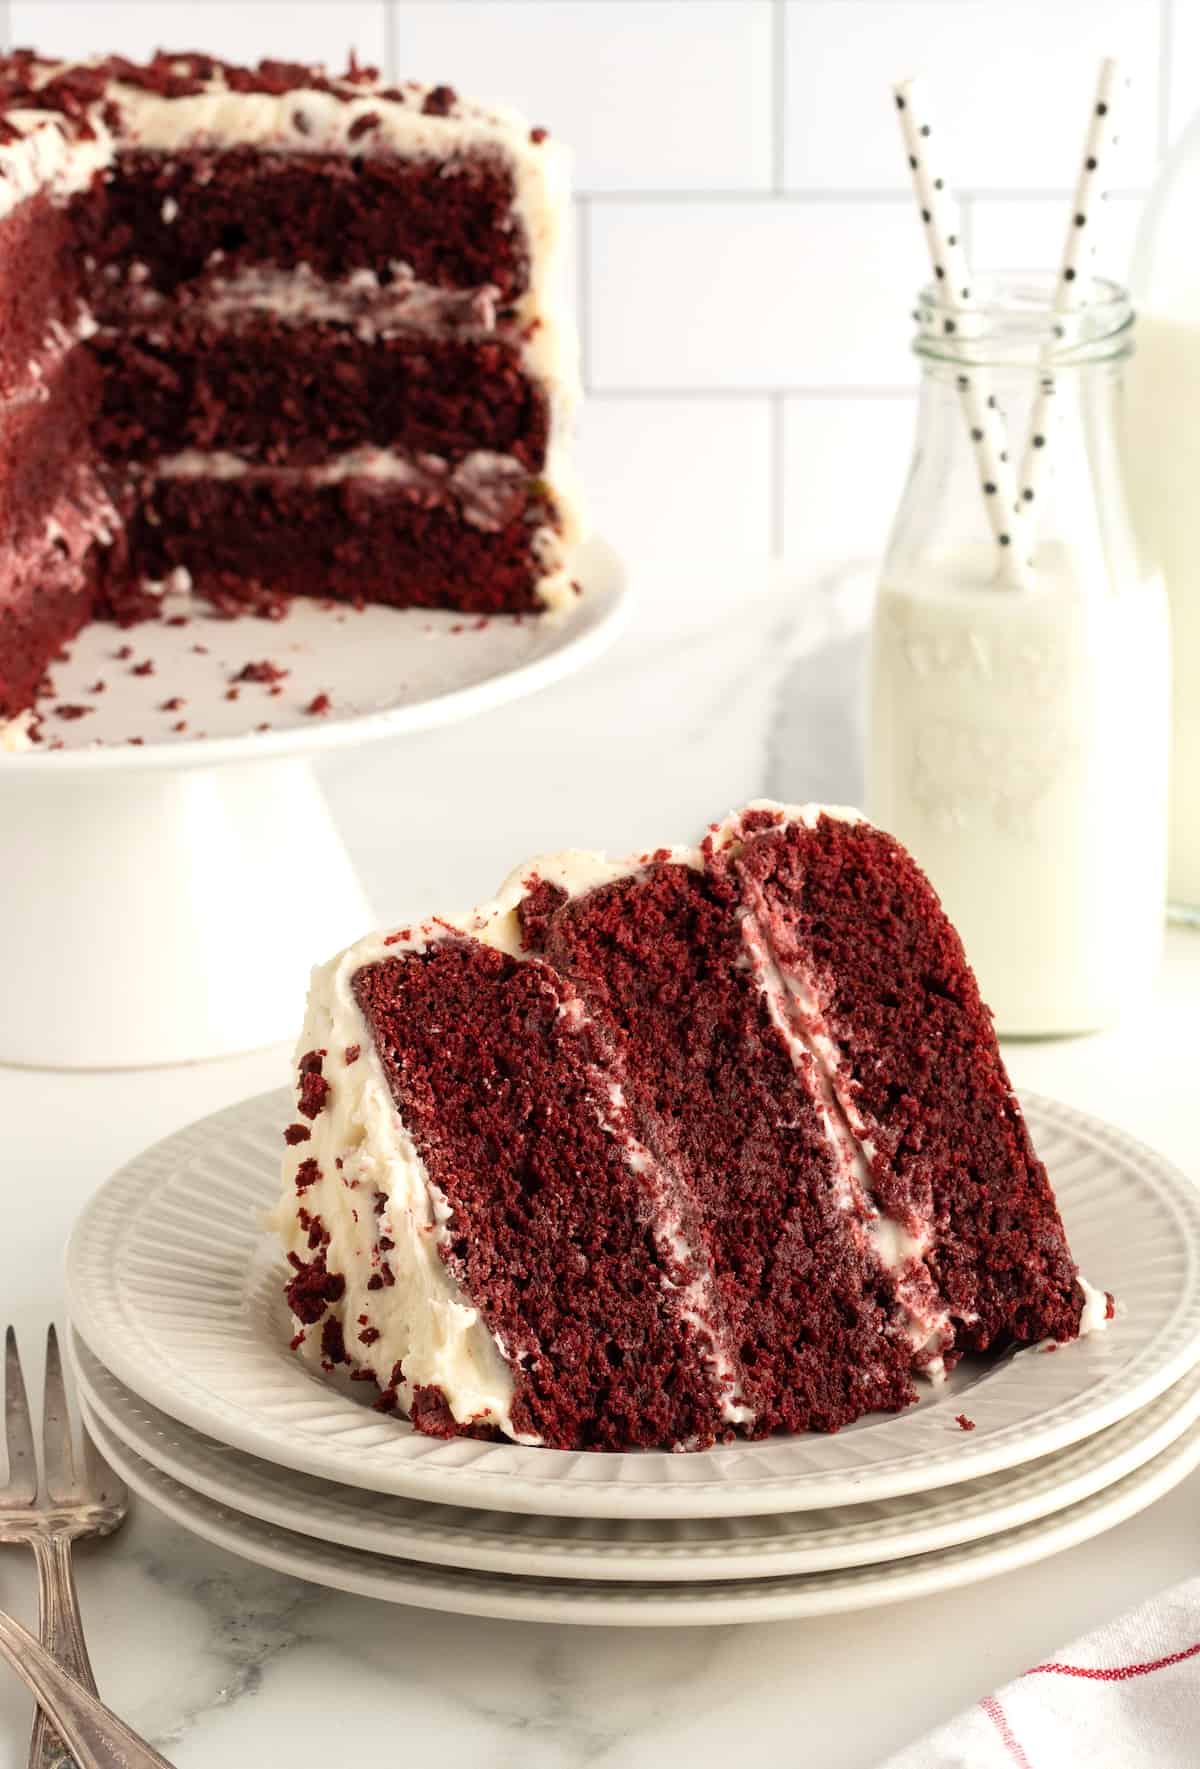
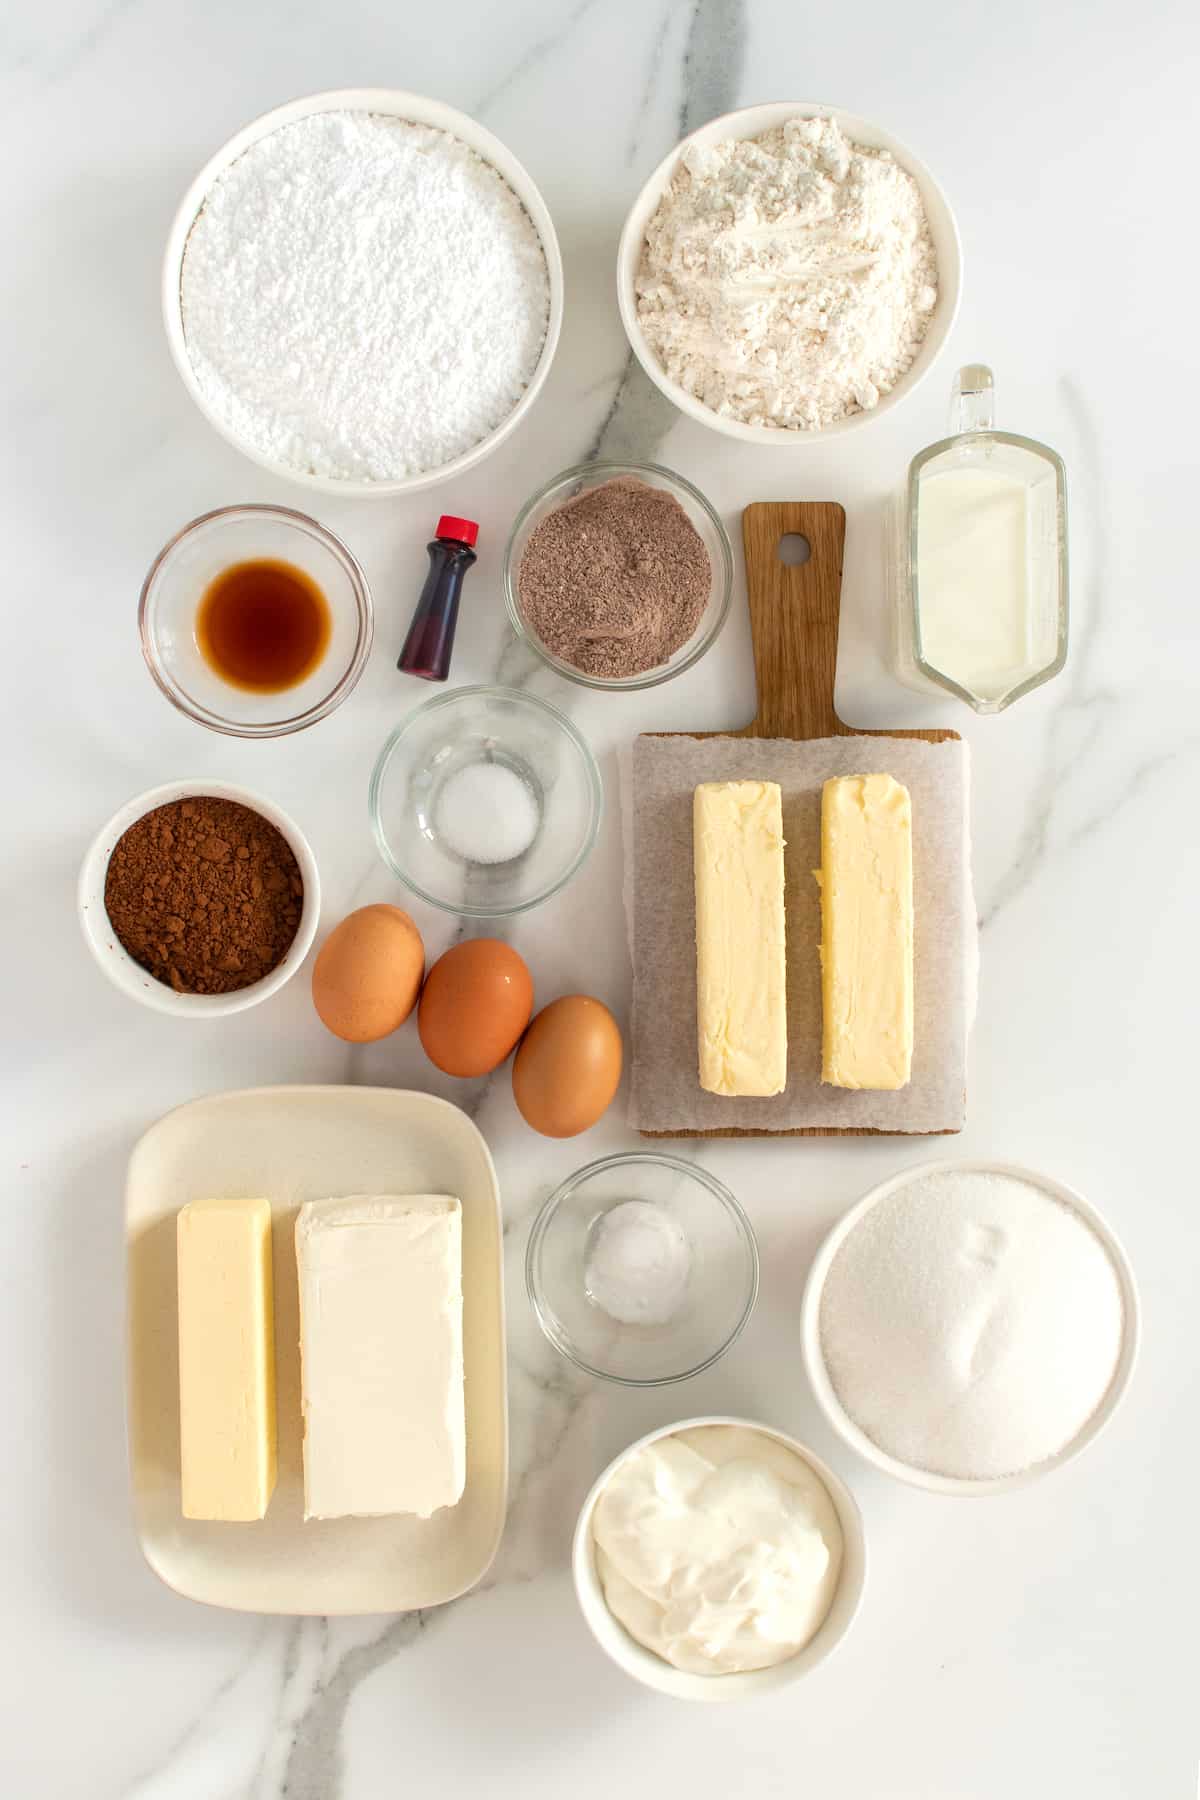
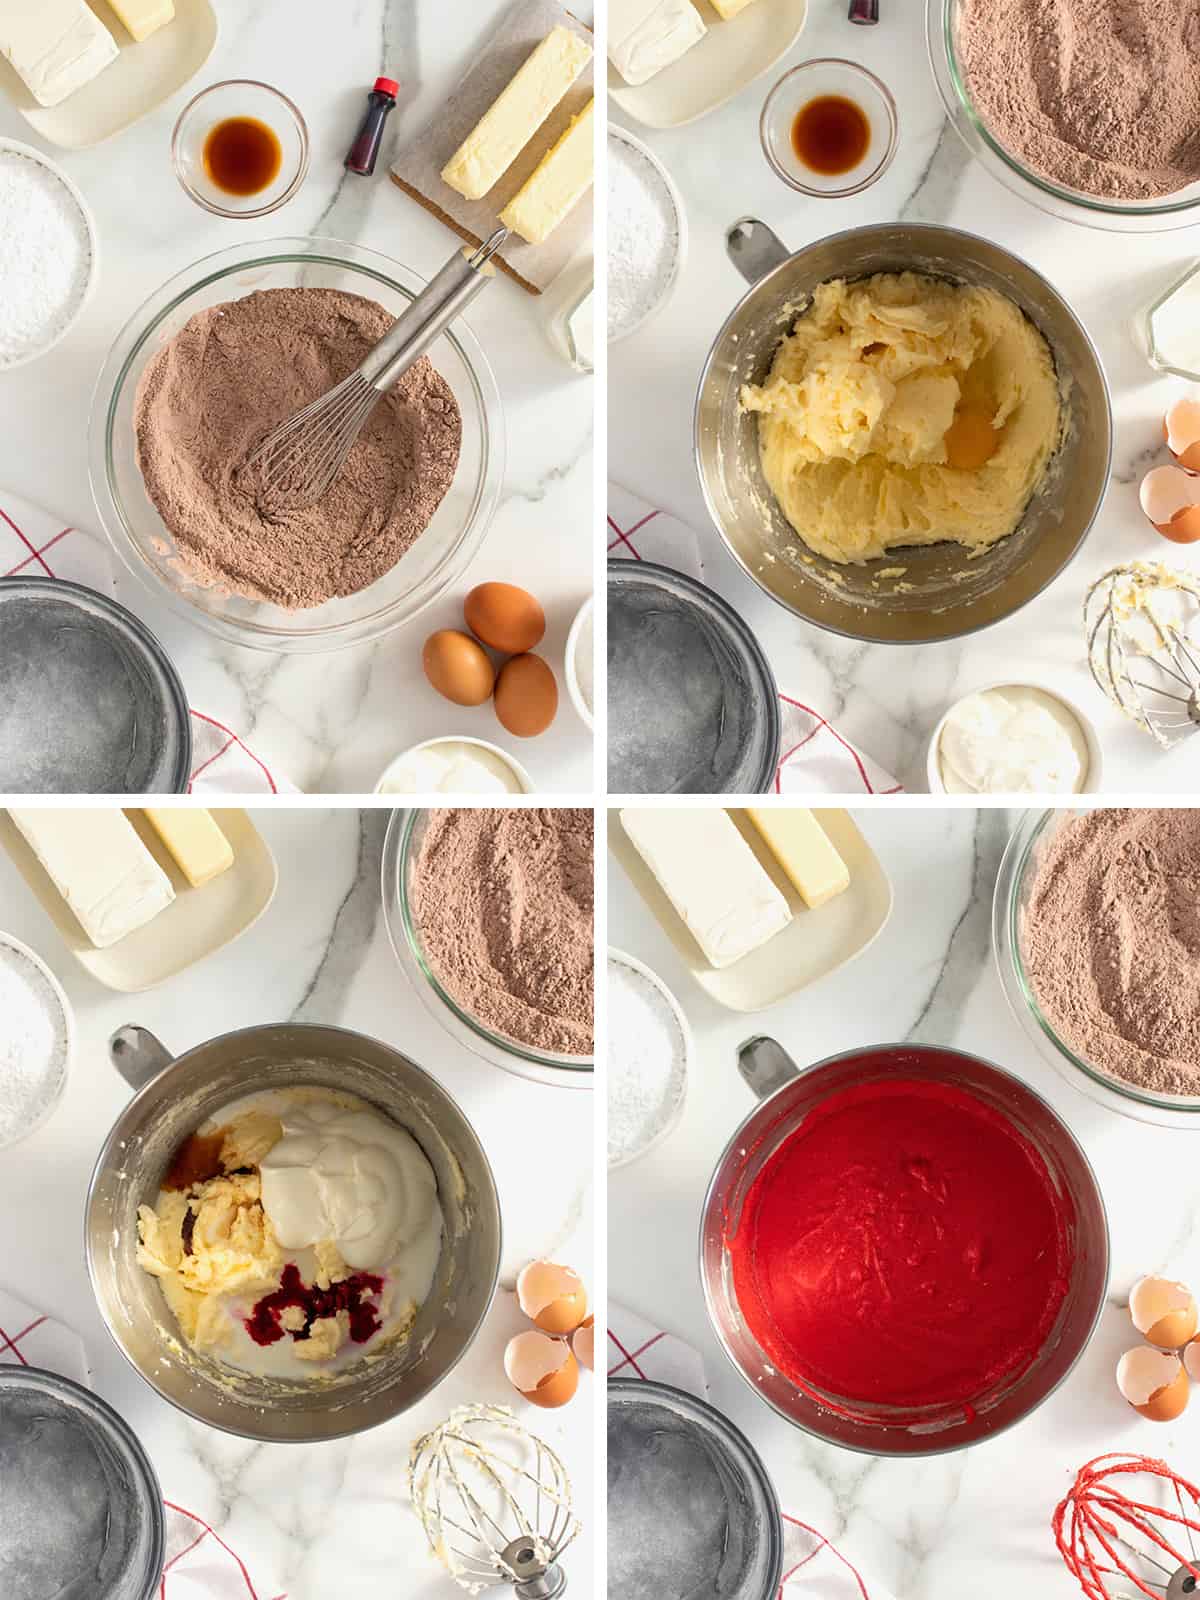
This classic red velvet cake comes with a few variations that make it extra special! The cake itself has lots of chocolate flavor and is very moist from the addition of a little chocolate pudding mix and some sour cream. It’s then covered in a thick and creamy cream cheese icing that makes it simply irresistible! For this red velvet cake, you’ll need:
- All-purpose flour
- Baking soda
- Salt
- Granulated sugar
- Powdered sugar
- Unsweetened cocoa powder
- Instant chocolate pudding mix
- Butter
- 3 large eggs
- Sour cream, whole milk and cream cheese
- Vanilla
- Red food coloring
Watch Me Make Red Velvet Cake
Check out exactly how easy it is to bake this stunning cake!
How to Make Red Velvet Cake
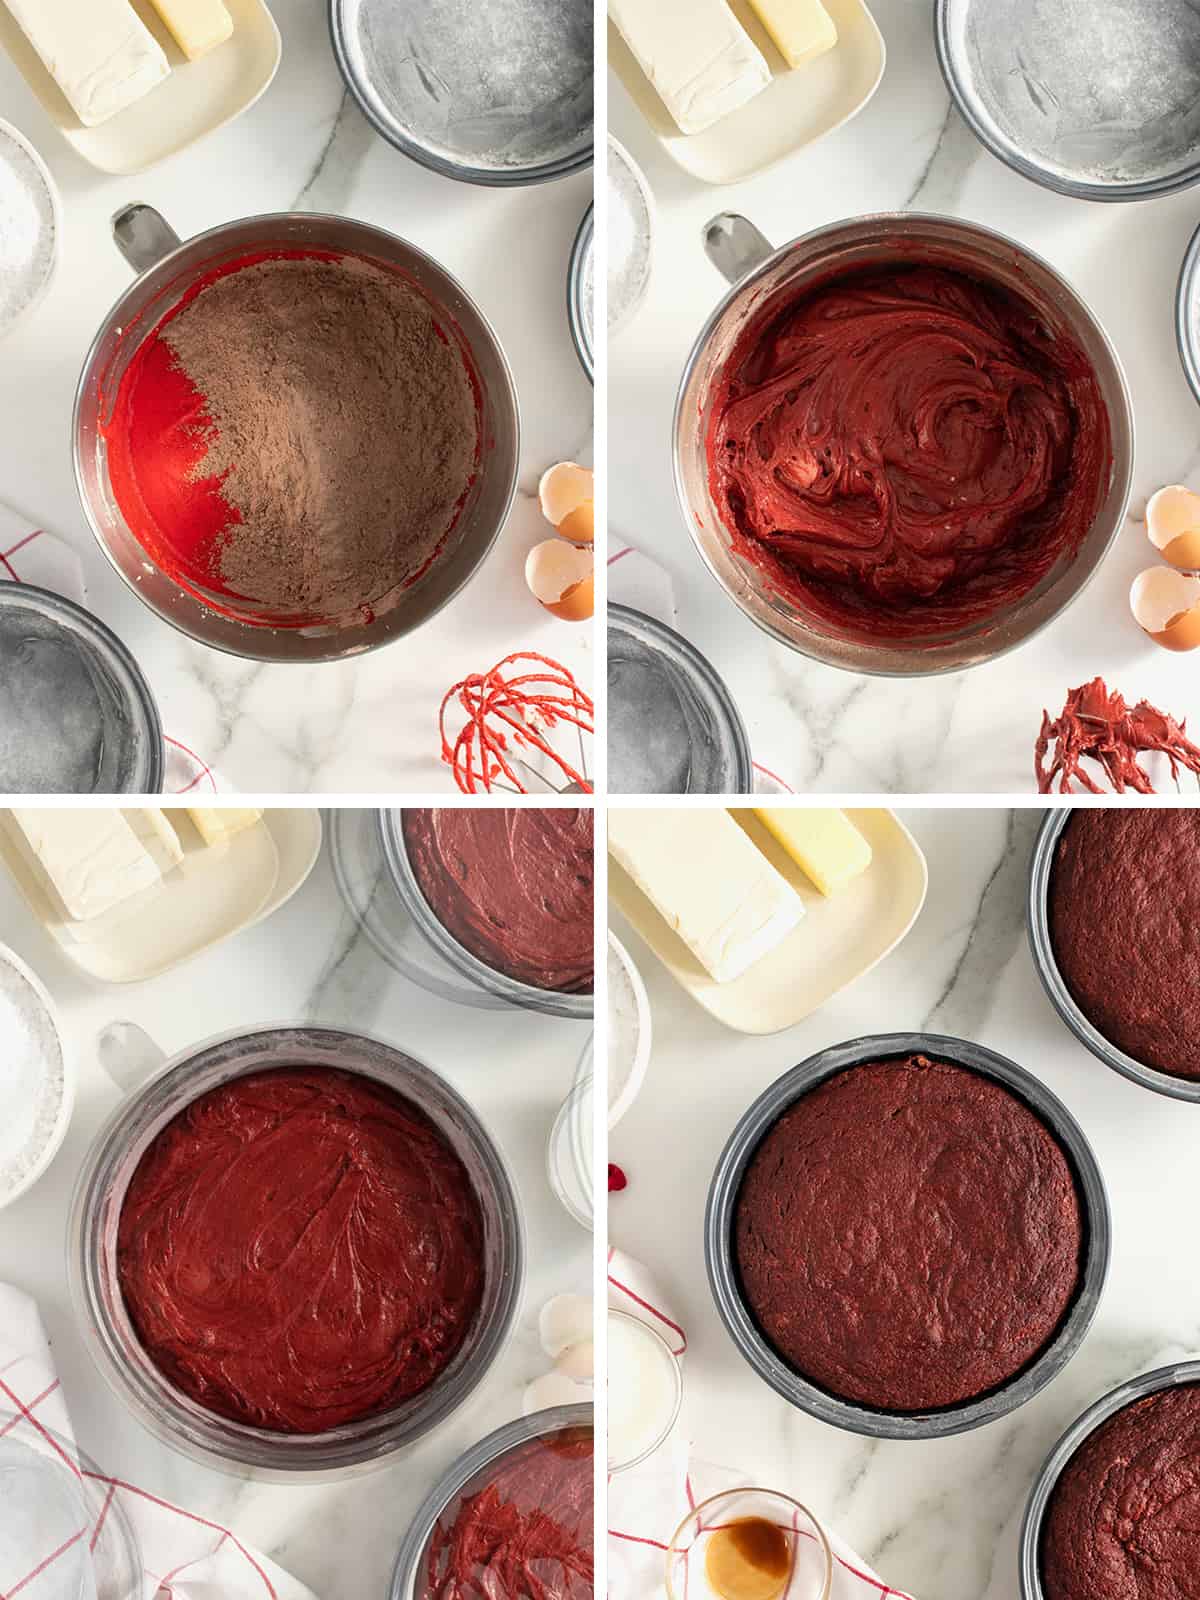
- Preheat oven to 350°F. Lightly grease and flour 3 (8-inch) round or 2 (9-inch) round cake pans or a 9×13-inch baking dish.
- In a medium bowl, whisk together the flour, cocoa, pudding mix, baking soda and salt. Set aside.
- In the bowl of an electric mixer, beat the butter and sugar until light and fluffy. Beat in the eggs, one at a time.
- Add the sour cream, milk, vanilla and food coloring until well combined.
- Gradually beat in the flour and cocoa mixture until just combined.
- Pour evenly into prepared pans.
- Bake about 35-40 minutes or until a toothpick inserted in the center comes out clean.
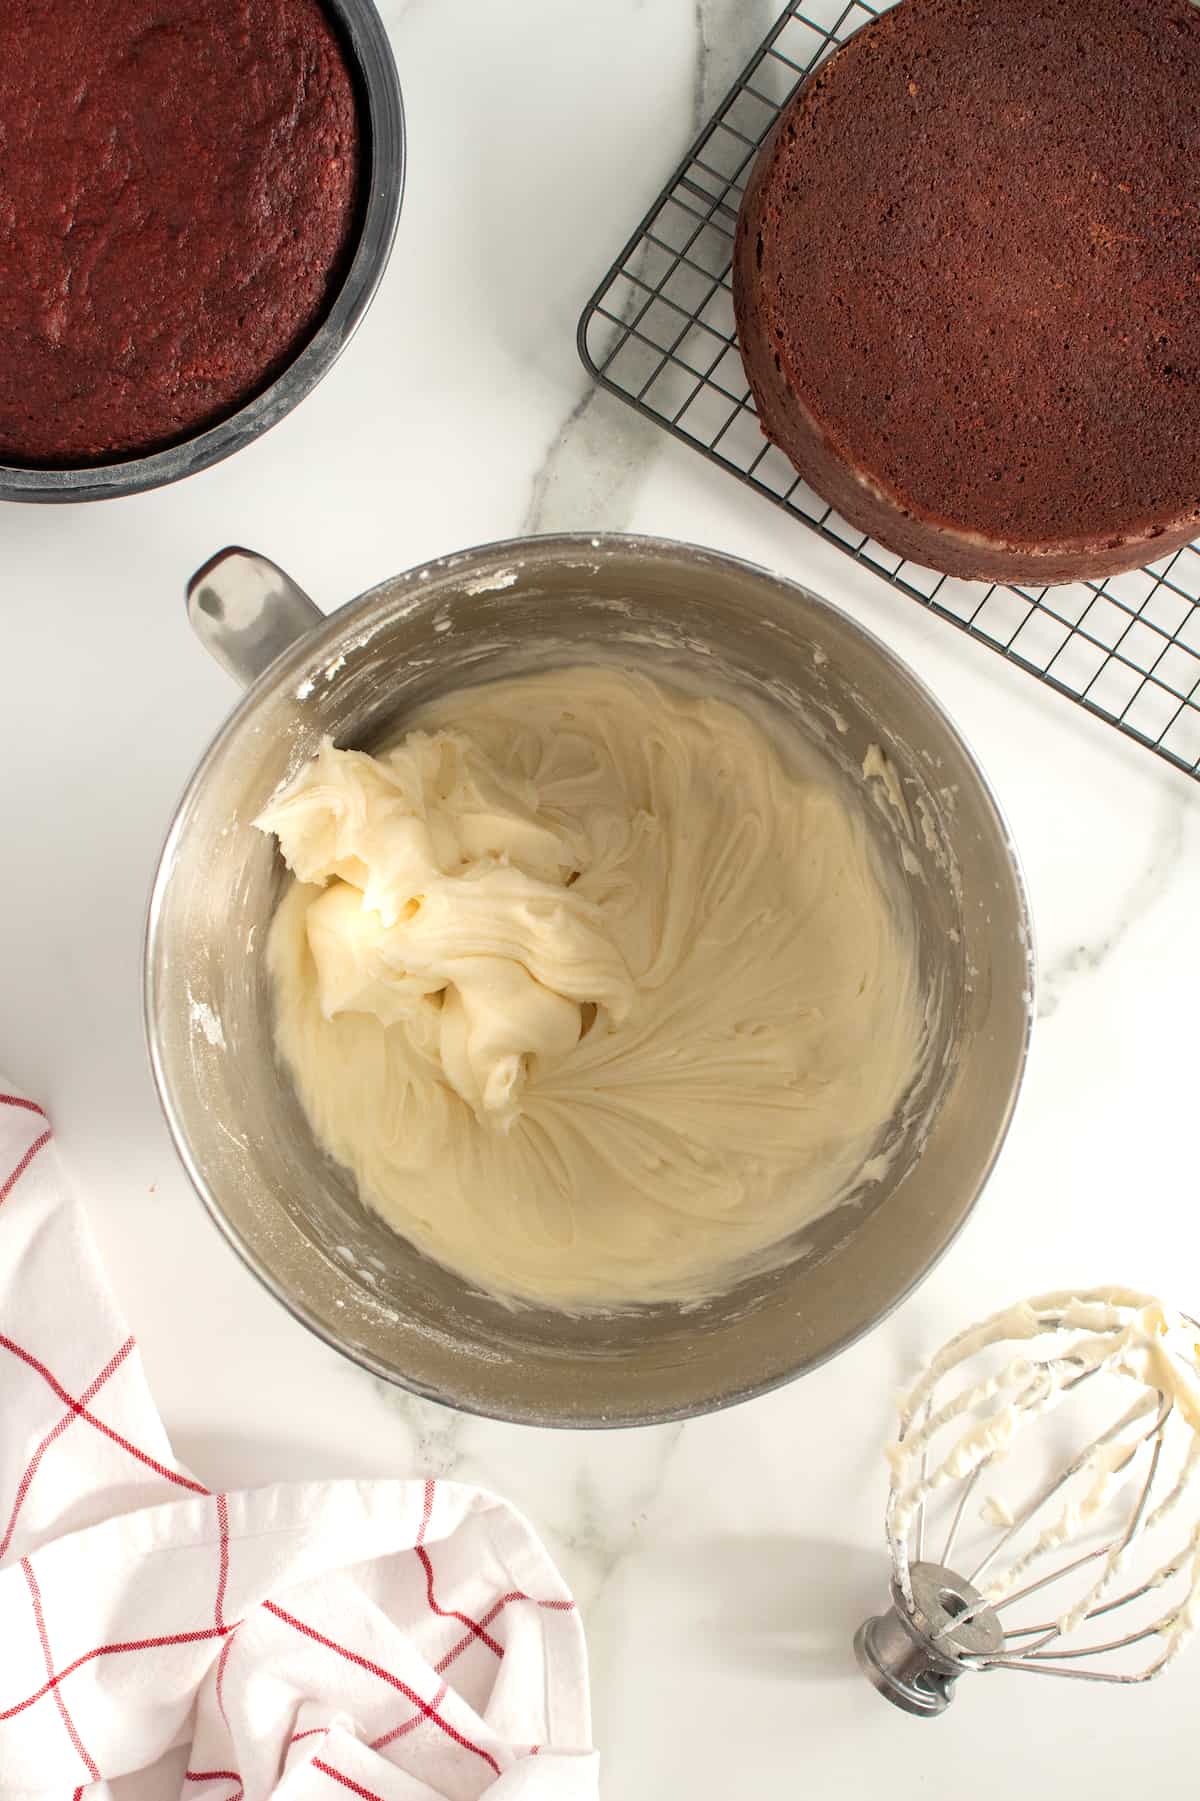
- Cool the cakes in the pans for 20 minutes, then invert them onto a rack to cool completely.
- While cakes are cooling, prepare the frosting. In the bowl of an electric mixer fitted with the whisk attachment, beat the cream cheese and butter until creamy. Beat in the vanilla. Gradually add the powdered sugar until well combined. Increase the speed to high and beat until smooth and spreadable, about 5 minutes, stopping occasionally to scrape down the sides of the bowl.
- If the frosting is too thick to spread, beat in 1 tablespoon of milk at a time until spreadable.
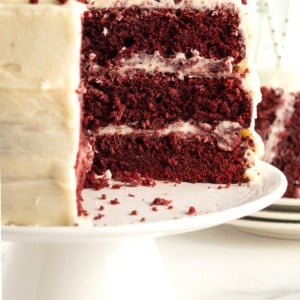
- If your cake layers have a dome on them, level with a leveler or a serrated knife. Reserve the crumbs to garnish the cake once frosted.
- Place one layer on a cake stand or platter and spread with a thin layer of frosting. Repeat with remaining layers. Cover the top and sides with a thin layer of frosting. This is the “crumb coat” so it doesn’t have to be perfect. Chill the cake for 15 minutes then cover with the remaining frosting. Garnish with reserved cake crumbs.

If you make this Red Velvet Cake, be sure to snap a picture and share it with me or tag me on Instagram @thebakermama so I can see.😍 I love seeing how inspired and creative y’all get with the recipes I share. Enjoy!
xoxo,

Red Velvet Cake
- Prep Time: 1 hour 20 mins
- Cook Time: 40 mins
- Total Time: 2 hours
- Yield: 12
- Category: Dessert
Description
A stunning Red Velvet Cake that’s made extra special and scrumptious with a few simple variations!
Ingredients
Cake:
- 2 cups all-purpose flour
- 1/2 cup unsweetened cocoa powder
- 1/4 cup instant chocolate pudding mix
- 1 teaspoon baking soda
- 1/2 teaspoon salt
- 1 cup (2 sticks) unsalted butter, softened
- 2 cups granulated sugar
- 3 large eggs
- 1 cup sour cream
- 1/2 cup whole milk
- 1 teaspoon vanilla
- 1 (1 ounce) bottle red food coloring
Frosting:
- 1 (8 ounce) package cream cheese
- 1/2 cup (1 stick) butter
- 1/2 teaspoon vanilla
- 6 cups powdered sugar
- 2–4 tablespoons whole milk, if needed
Instructions
- Preheat oven to 350°F. Lightly grease and flour 3 (8-inch) round or 2 (9-inch) round cake pans or a 9×13-inch baking dish.
- In a medium bowl, whisk together the flour, cocoa, pudding mix, baking soda and salt. Set aside.
- In the bowl of an electric mixer, beat the butter and sugar until light and fluffy. Beat in the eggs, one at a time. Add the sour cream, milk, vanilla and food coloring until well combined.
- Gradually beat in the flour mixture until just combined. Pour evenly into prepared pans. Bake about 35-40 minutes or until a toothpick inserted in the center comes out clean. Cool the cakes in the pans for 20 minutes, then invert them onto a rack to cool completely.
- While cakes are cooling, prepare the frosting. In the bowl of an electric mixer fitted with the whisk attachment, beat the cream cheese and butter until creamy. Beat in the vanilla. Gradually add the powdered sugar until well combined. Increase the speed to high and beat until smooth and spreadable, about 5 minutes, stopping occasionally to scrape down the sides of the bowl. If the frosting is too thick to spread, beat in 1 tablespoon of milk at a time until spreadable.
- If your cake layers have a dome on them, level with a leveler or a serrated knife. Reserve the crumbs to garnish the cake once frosted.
- Place one layer on a cake stand or platter and spread with a thin layer of frosting. Repeat with remaining layers. Cover the top and sides with a thin layer of frosting. This is the “crumb coat” so it doesn’t have to be perfect. Chill the cake for 15 minutes then cover with the remaining frosting. Garnish with reserved cake crumbs.
Good recipe. I made about 42 cupcakes with this recipe and I needed to bake at 325F because they sank at 350F.
Love the addition of both pudding and sour cream. These ingredients are things I look for in all my good cake recipes!
Hi, Zinnia! I’ve never had mine sink at 350. I wonder if that’s an altitude difference? Either way, I’m so glad you liked them.
never heard of pudding power in this cake with the cocoa. sounds good but I would use cook frosting
I am going to try this recipe and how it goes on sunday for church luncheon and valentines
Thanks for the recipe. I made this for a family get-together and got so many compliments.