
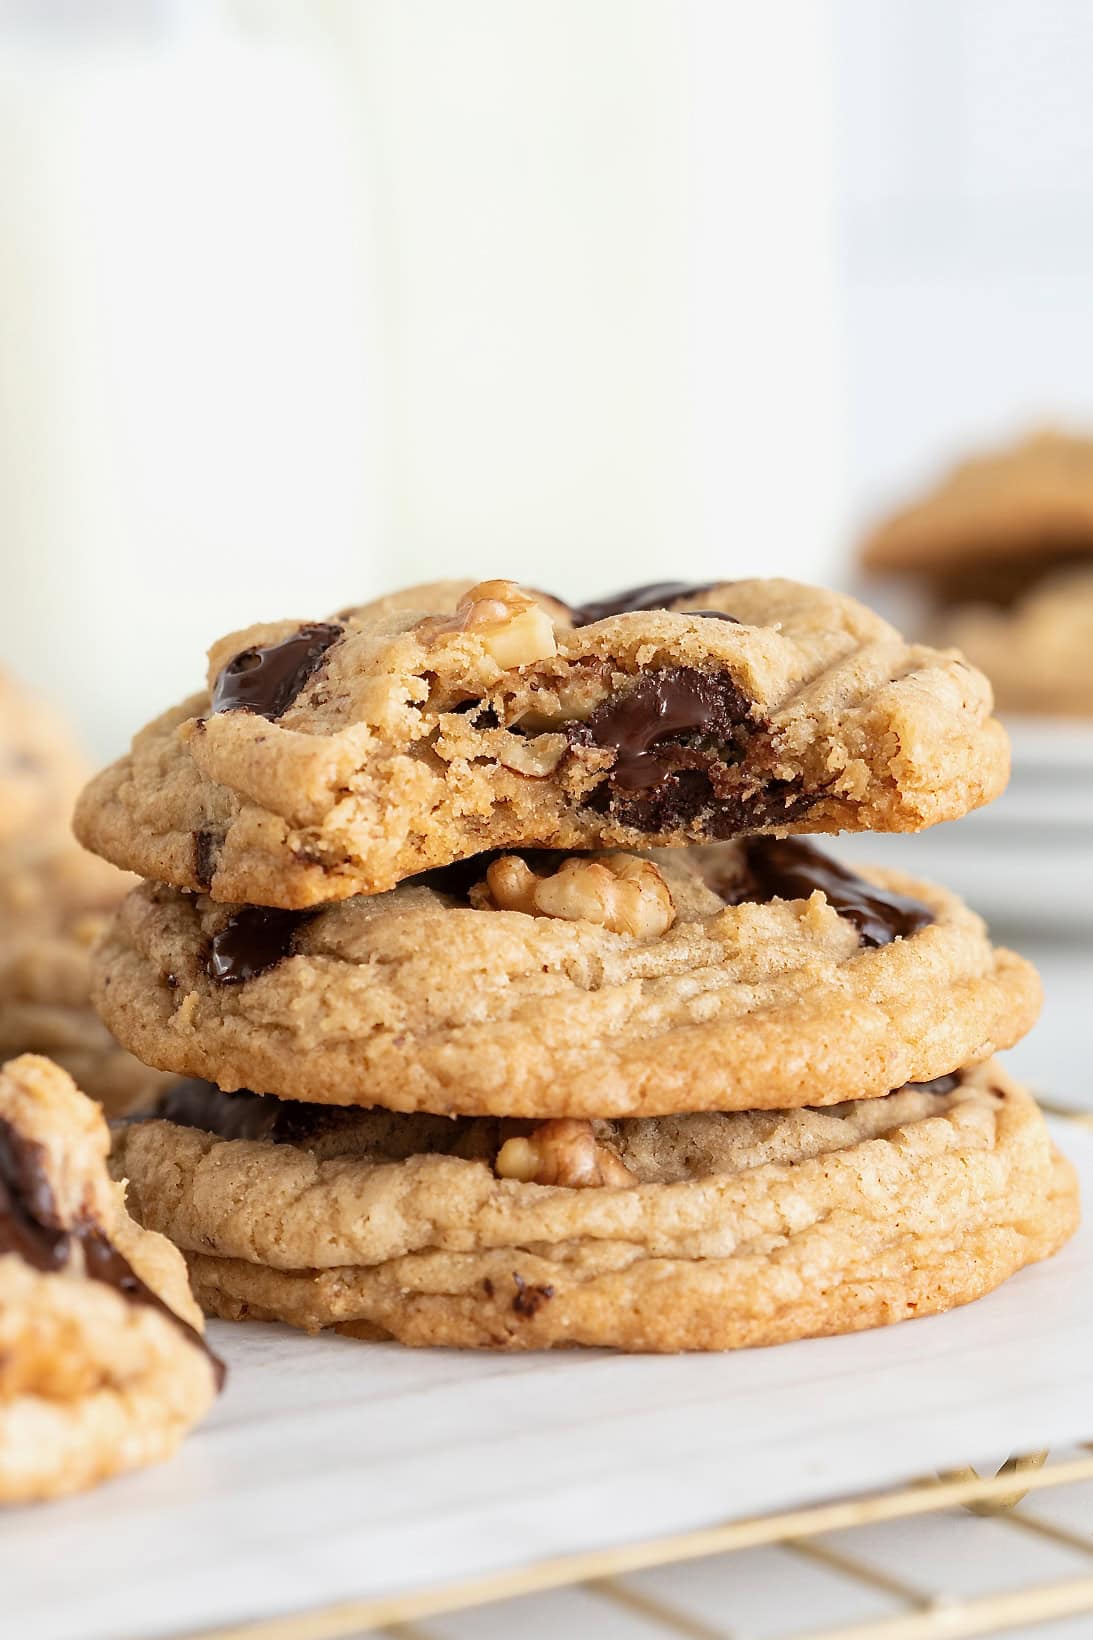
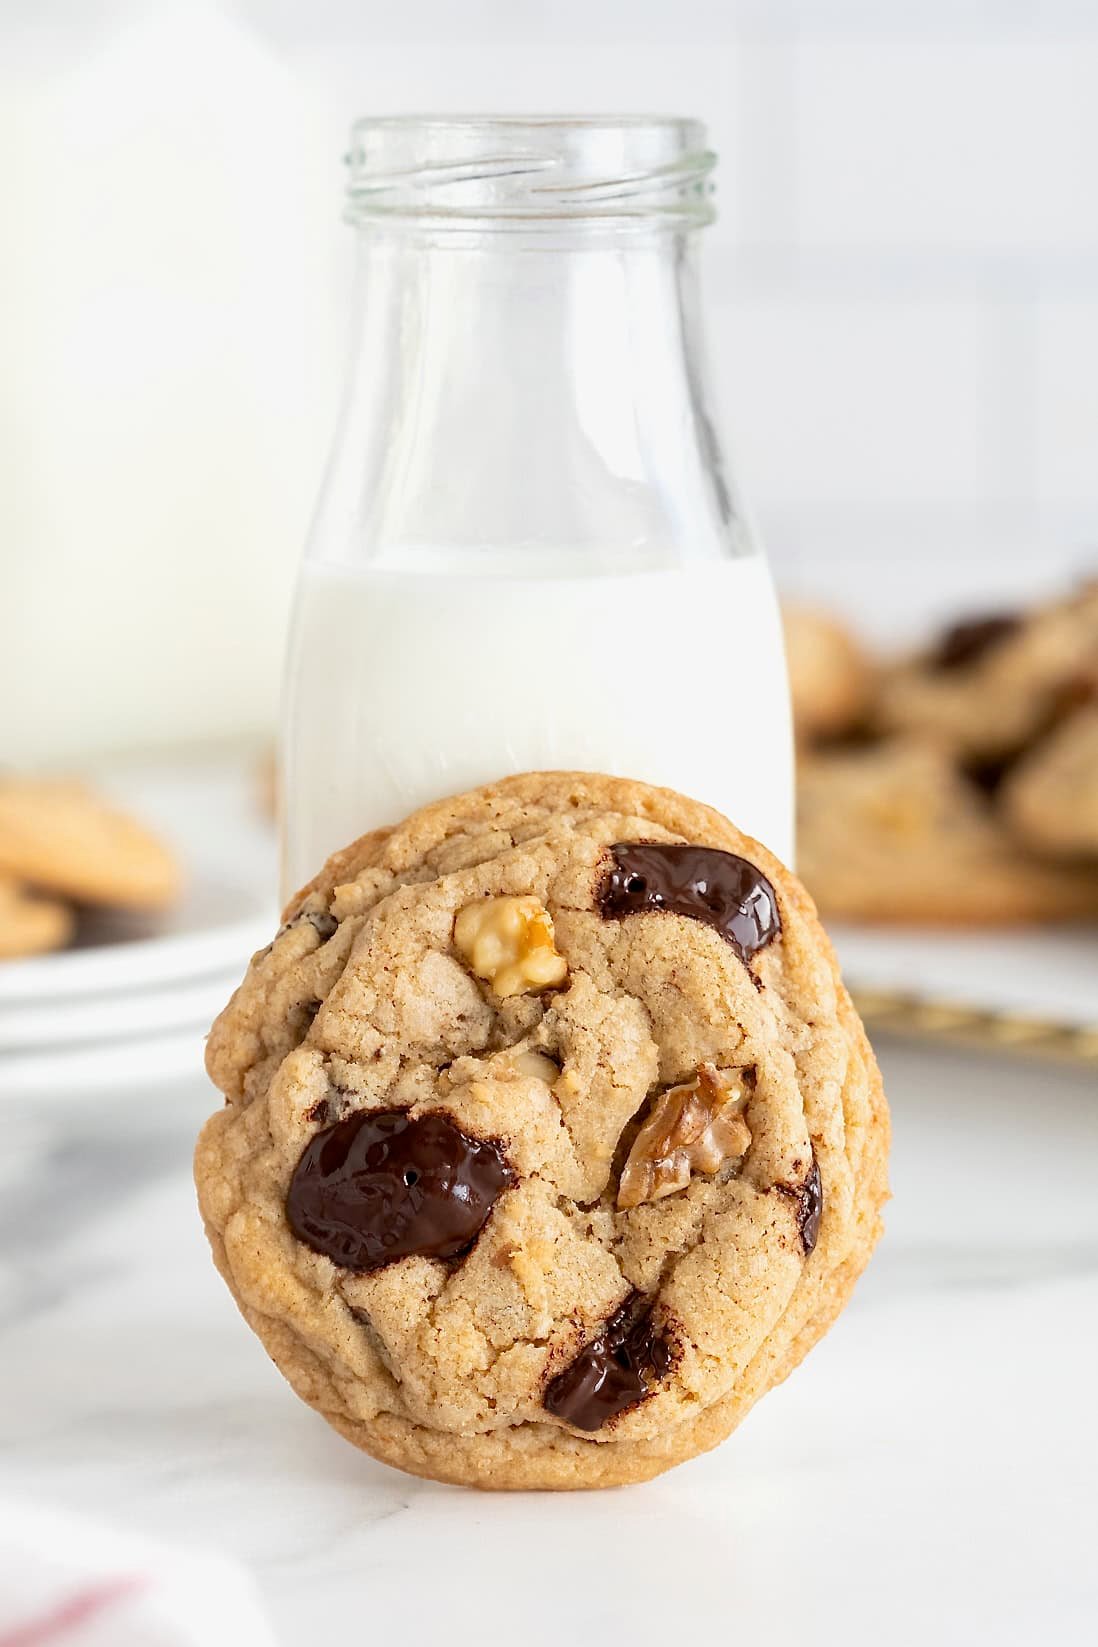
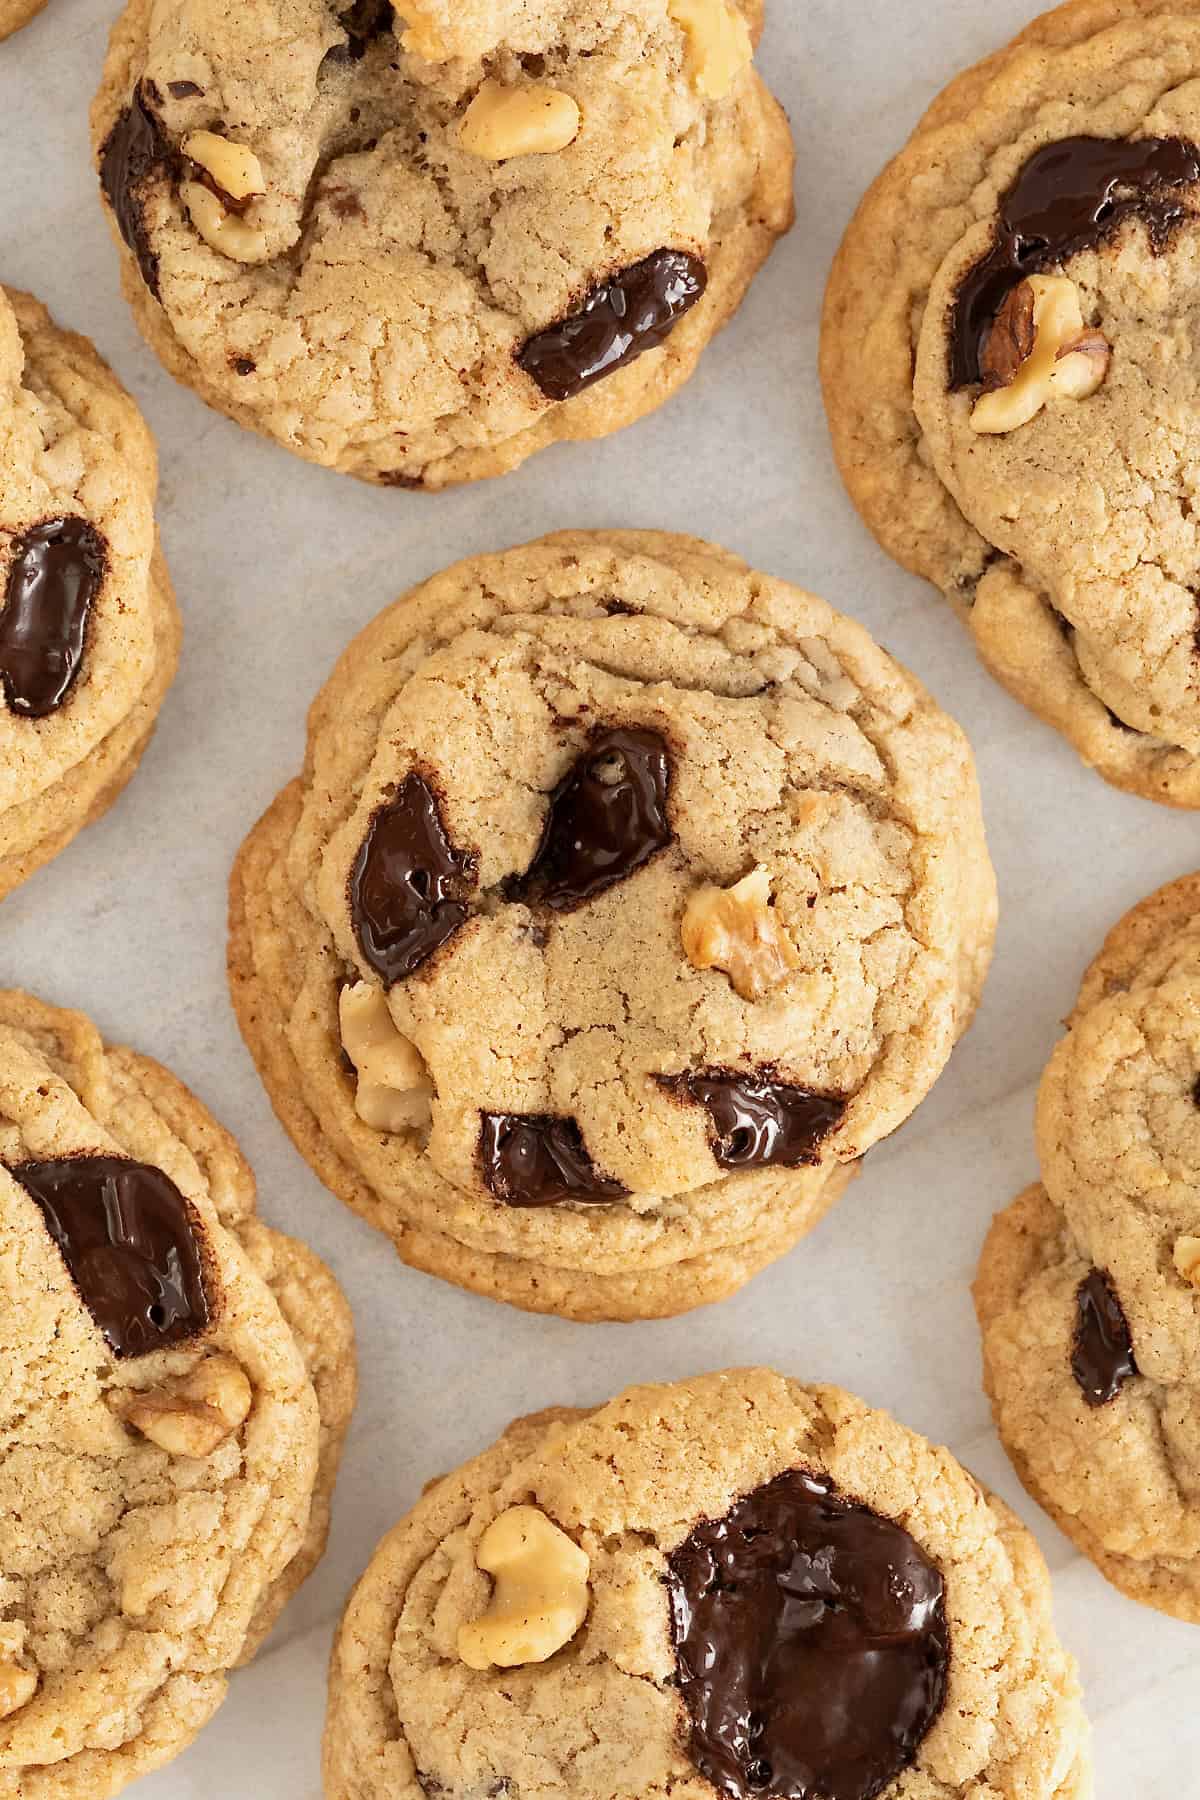
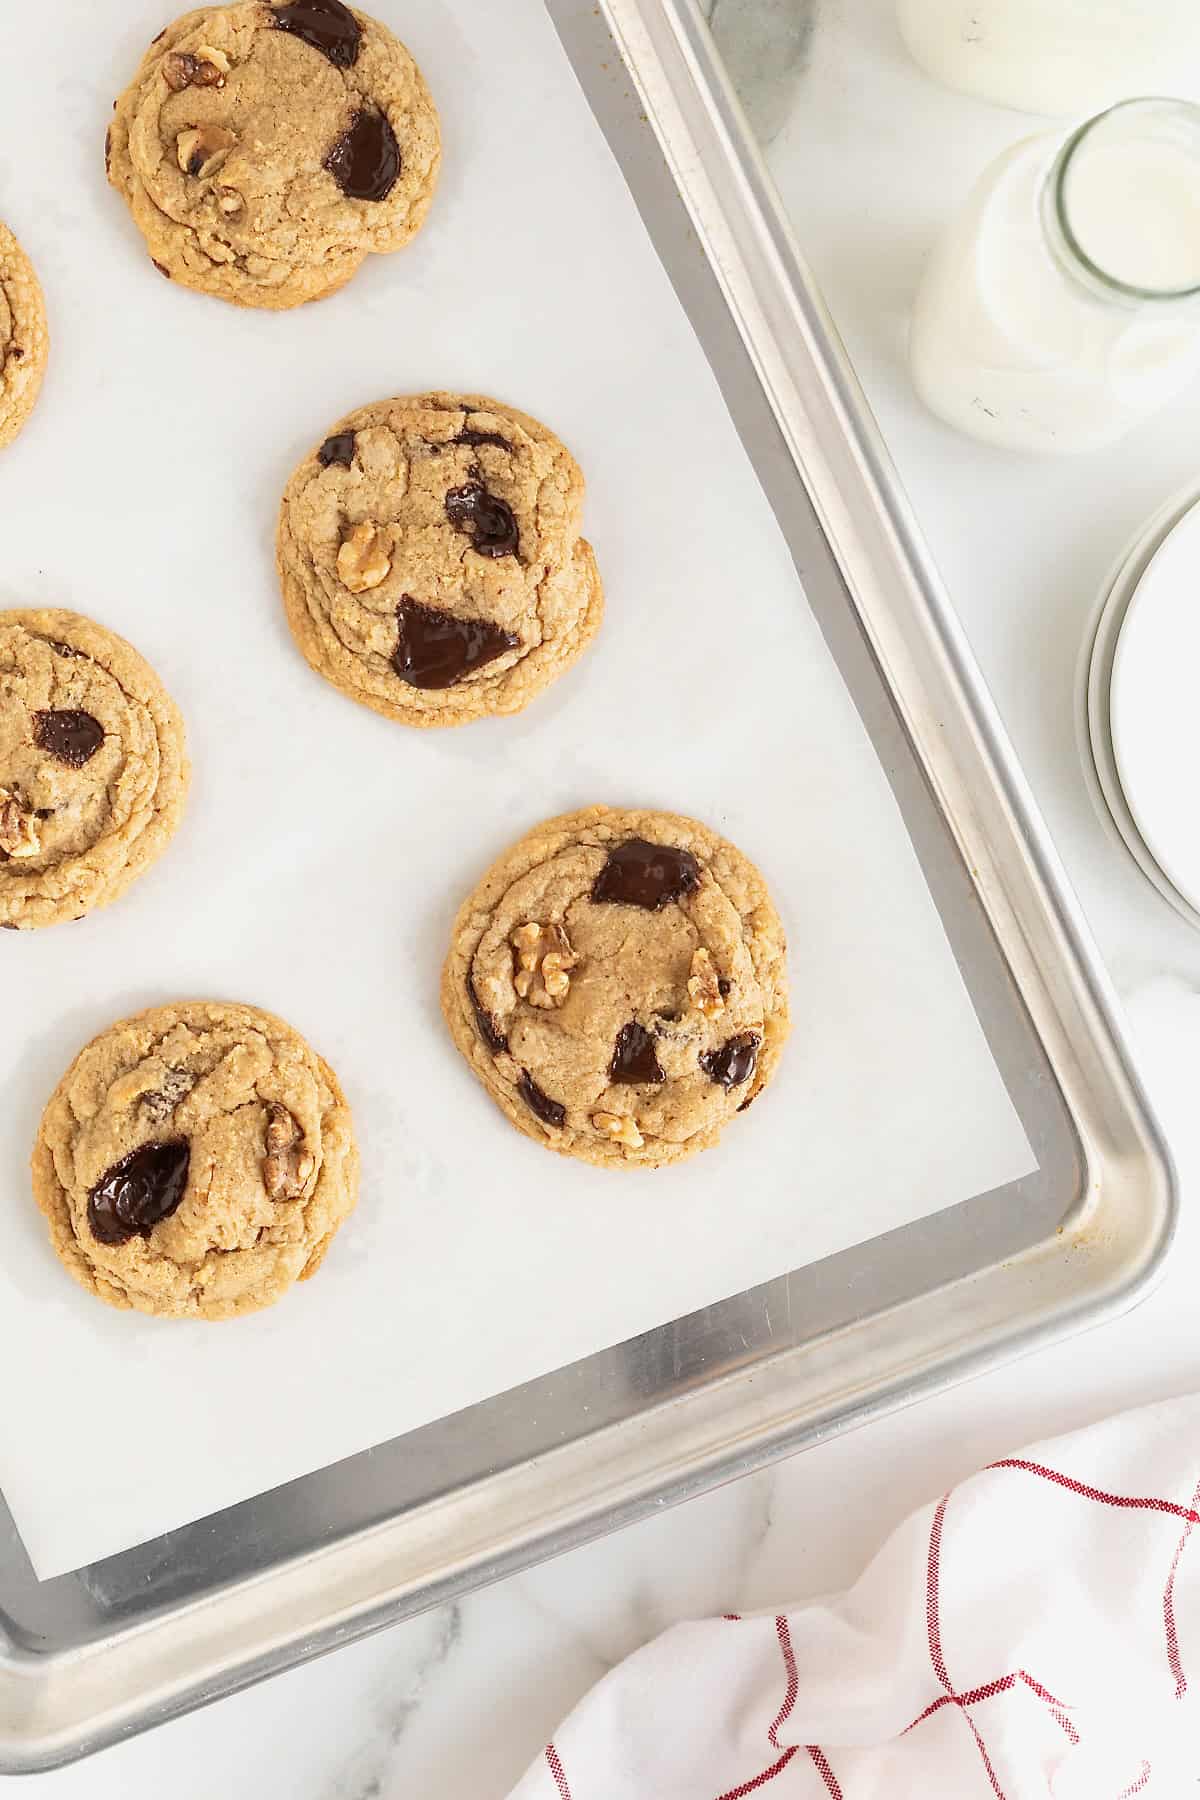
Dark Chocolate Chunk Walnut Cookies are amazingly chewy cookies loaded with rich melting dark chocolate chunks and crunchy walnuts. A cookie you’re sure to crave!

Crazy About Cookies
Here I go again! I’m crazy about cookies and I’m always on a mission to bake and eat the best! These Dark Chocolate Chunk Walnut Cookies are chewy on the inside, chocolaty all throughout, crunchy on occasion, and a little crispy all around. They’re the total package for cookie perfection.
Totally Inspired
We were in Houston a few weeks ago and I had heard that Common Bond Café had amazing cookies, so I just had to pick a few up before heading home. One bite and I knew I had to recreate these cookies ASAP. As soon as we got the boys tucked in bed, I headed to the store to get the key ingredients: dark chocolate and walnuts.
I tried them a few different ways with varying ingredients, refrigerating/freezing times, oven temps, etc. and finally got them just right…
Skip the Chips
Avoid using chocolate chips in these cookies if you can! The keys to this recipe are the chunks of high quality dark chocolate for optimal melting and taste, along with placing the cookie dough in the freezer for at least 30 minutes before baking them. Easy enough, right?!
I could go on and on about how amazing these cookies are, but I’ll be quiet so you can bake and taste them for yourself. Prepare to be amazed!
I love using chocolate chunks to bake, as evidenced by my Chocolate Chunk Scones, Sea Salt Chocolate Chunk Cookies, Peanut Butter Chocolate Chunk Cookies and so on! Just the right amount of melting chocolate in every bite.
Ingredients and Supplies
(see recipe card at the bottom of this post for measurements and details. To learn more about specific baking ingredients and how they function in baking recipes, reference my Complete Guide to Baking Ingredients)
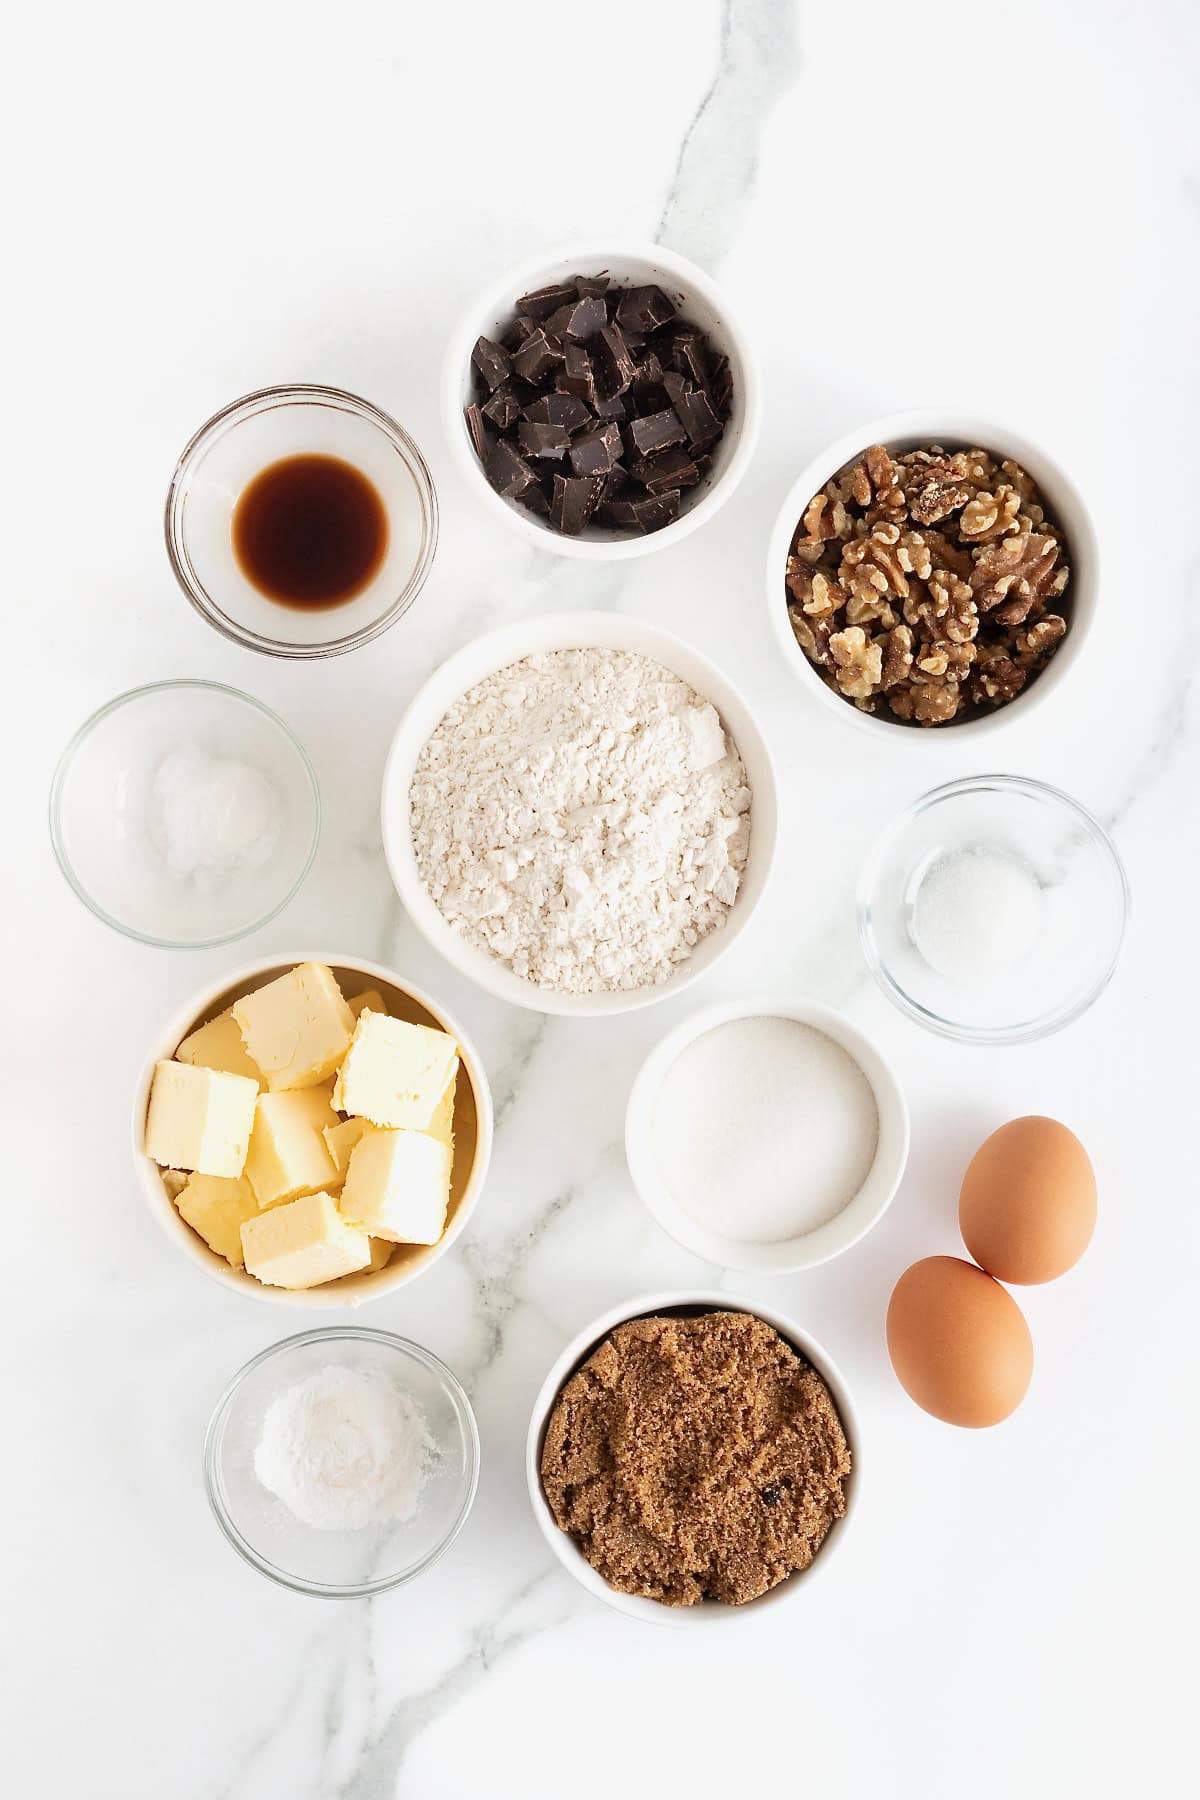
Ingredients:
- Softened unsalted butter
- Dark brown sugar
- Granulated sugar
- Larges eggs
- Pure vanilla extract
- All-purpose flour
- Baking powder
- Baking soda
- Kosher salt
- High quality dark chocolate bar, cut into chunks (try to refrain from using chocolate chips as the chopped chocolate chunks melting throughout are key to these cookies)
- Walnuts
Supplies:
- Two cookie sheets
- Parchment paper
- Electric stand mixer or hand mixer
- Large bowl
- Large 3-tablespoon cookie scoop
How to Make Dark Chocolate Chunk Walnut Cookies
- Line two cookie sheets with parchment paper and set aside.
- In the bowl of an electric mixer fitted with the paddle attachment, beat the butter and sugars until smooth. Add the eggs, one at a time, until well incorporated. Beat in the vanilla.
- In a separate bowl, whisk together the flour, baking powder, baking soda and salt.

- Add the dry ingredients to the wet ingredients, 1 cup at a time, until well combined.
- Stir in the chocolate chunks and walnuts.

- Scoop the cookie dough into large (3 tablespoon sized) mounds and place them a few inches apart on the prepared cookie sheets (do not press down). Place the cookie sheets in the freezer for at least 30 minutes.

- Meanwhile, preheat the oven to 350°F.
- Remove cookie sheets from freezer and bake for about 14-16 minutes or until cookies start to turn light brown on top and slightly crisp around the edges. Rotate cookie sheets halfway through the baking time.
- Let cool on cookie sheets 10 minutes before transferring to a wire rack or enjoying warm right away.

Storage
Store cookies in an airtight container for up to 4 days.
To freeze baked cookies: Let cookies cool completely. Wrap each cookie in plastic wrap. Then place in a freezer-safe container or in individual freezer-safe baggies. To defrost, let them set at room temperature, uncovered.
To freeze the cookie dough for baking later: Line a rimmed baking sheet with parchment paper. Scoop portions of dough onto the baking sheet. Scoops of dough can be close together at this point.
Place baking sheet in the freezer to flash freeze for at least 30 minutes. Take the cookie dough out of the freezer and transfer to a freezer-safe plastic container or plastic bag. Return the dough to the freezer and store until ready to bake. Cookie dough can be stored in the freezer for up to 3 months.
To Bake Frozen Cookie Dough: When craving a cookie, simply remove the number of cookies you want from the freezer and place a few inches apart on a parchment-lined baking sheet. Bake at 350°F for 16-18 minutes or until cookies start to light brown on top and crisp around the edges.
More of My Favorite Cookie Recipes
I am crazy about cookies! So I could not be more excited to share My Favorite Cookie Recipes. Crafted by a true cookie-lover, these treats are absolute cookie perfection.
- Loaded M&M Cookies: A mouthful of mini chocolate candies in every bite! These Loaded M&M Cookies are chewy, chocolatey and totally delicious!
- My Perfect Chocolate Chip Cookies: Crispy, chewy, sweet, salty, nutty and oh-so chocolatey! My Perfect Chocolate Chip Cookies are cookie perfection!
- Classic Peanut Butter Cookies: With their famous criss-cross pattern and soft, chewy bite, these Classic Peanut Butter cookies are everything a perfect cookie should be. You’ll be hooked at first bite!
- Carrot Cake Cookies: Topped with a white chocolate drizzle, these Carrot Cake Cookies are so delicious and perfect for anytime baking!
- And more!

If you make these Dark Chocolate Chunk Walnut Cookies, be sure to snap a picture and share it with me on Instagram @thebakermama so I can see. If you’re on Facebook, be sure to join my Friends of The BakerMama group to connect and share all the fun and yummy recipes of mine that you make!  I just love seeing how inspired and creative y’all get with the ideas I share. Enjoy!
xoxo,


Dark Chocolate Chunk Walnut Cookies
- Prep Time: 10 mins
- Cook Time: 16 mins
- Total Time: 26 mins
- Yield: 18
- Category: Dessert
Description
Amazingly chewy Dark Chocolate Chunk Walnut Cookies loaded with rich melting dark chocolate chunks and crunchy walnuts. A cookie you’re sure to crave!
Ingredients
- 1 cup (2 sticks) unsalted butter, softened
- 1 cup dark brown sugar
- 1/2 cup granulated sugar
- 2 larges eggs
- 1 teaspoon vanilla
- 2 and 1/4 cups all-purpose flour
- 1 teaspoon baking powder
- 1/2 teaspoon baking soda
- 1/2 teaspoon salt
- 8 ounces high quality dark chocolate, cut into chunks (try to refrain from using chips as the chopped chocolate chunks melting throughout are key to these cookies)
- 1 cup walnuts
Instructions
- Line two cookie sheets with parchment paper and set aside.
- In the bowl of an electric mixer fitted with the paddle attachment, beat the butter and sugars until smooth. Add the eggs, one at a time, until well incorporated. Beat in the vanilla.
- In a separate bowl, whisk together the flour, baking powder, baking soda and salt.
- Add the dry ingredients to the wet ingredients, 1 cup at a time, until well combined.
- Stir in the chocolate chunks and walnuts.
- Scoop the cookie dough into large (3 tablespoon sized) mounds and place them a few inches apart on the prepared cookie sheets (do not press down). Place the cookie sheets in the freezer for at least 30 minutes.
- Meanwhile, preheat the oven to 350°F.
- Remove cookie sheets from freezer and bake for about 14-16 minutes or until cookies start to turn light brown on top and slightly crisp around the edges. Rotate cookie sheets halfway through baking time.
- Let cool on cookie sheets 10 minutes before transferring to a wire rack or enjoying warm right away.

Hello! These cookies look wonderful,but Iam wondering if you used a cookie scoop and what size was the cookie scoop? Thank you,Elizabeth Glass
Hi Elizabeth! Yes, I used a large 3-tablespooon cookie scoop from this set to measure out the dough. I hope this helps. Enjoy!
Are there any adjustments needed for high altitude? 5,280 ft. (1 mile) above sea level.
Hi, Janet! I am just learning about high altitude baking. But based on my limited experience, I would drop the temp by 15-25 degrees and bake for an extra 2-3 minutes — just check for browning! Hope this helps! Enjoy!
I tried this and was disappointed.
size of cookie dough to be dropped not indicated. 12 large mounds are huge cookies. tasted ok, but cooking time was too long for my oven. bottoms got burned. Also, walnuts should have been doubled.going to try again tomorrow with more nuts, smaller spoon fulls, less baking time
Hi Deb! Thanks for your feedback. They are huge cookies, but you can certainly adjust the recipe and make them the size that you want. You would just need to adjust the baking time. If the bottoms of your cookies burnt while baking, you might consider moving them up a rack in your oven. I hope the adjustments you make this next time result in the cookie you’re desiring. Enjoy!
My Family Loved it. I am definitely sharing Guys, Thanks For sharing this Great Recipe. this recipe and this website with my friend. Hope they also love it. Thank you again for sharing such a great recipe.