
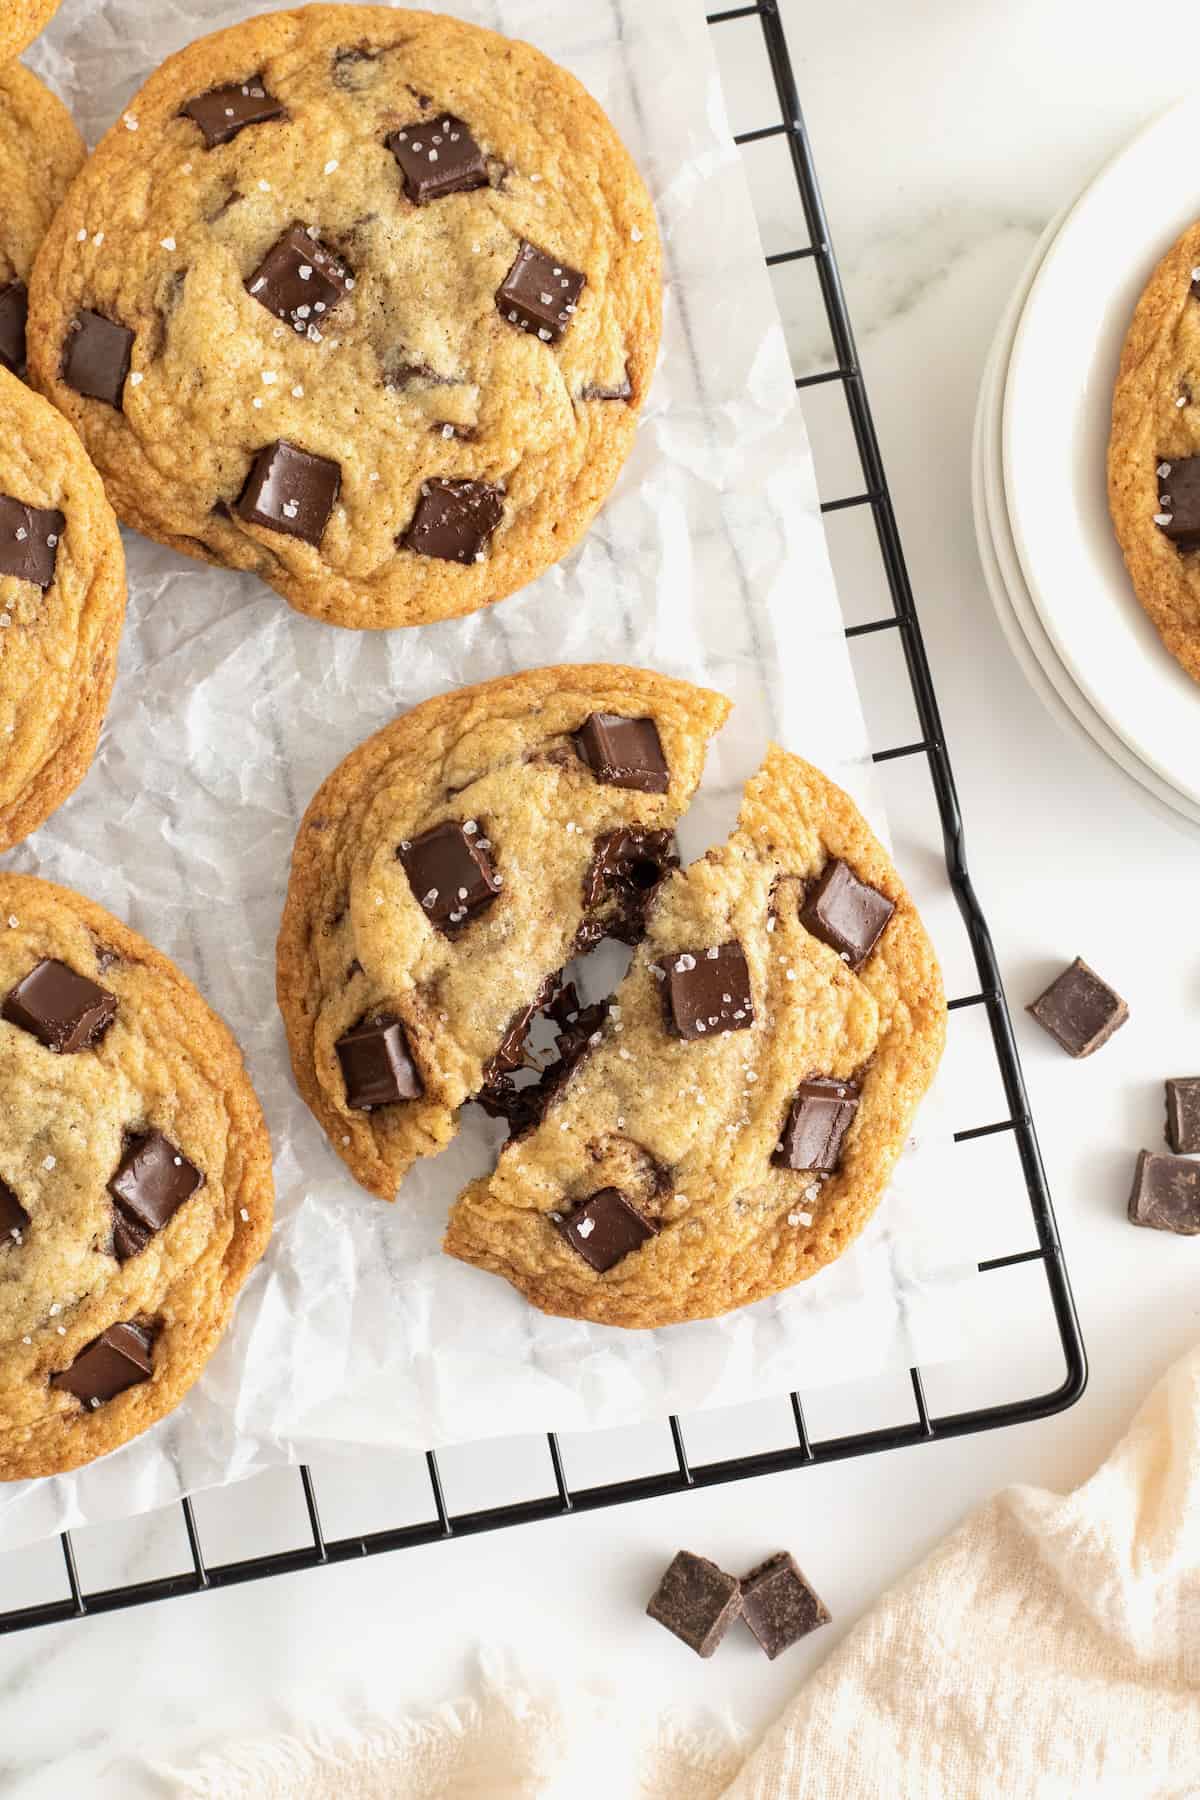
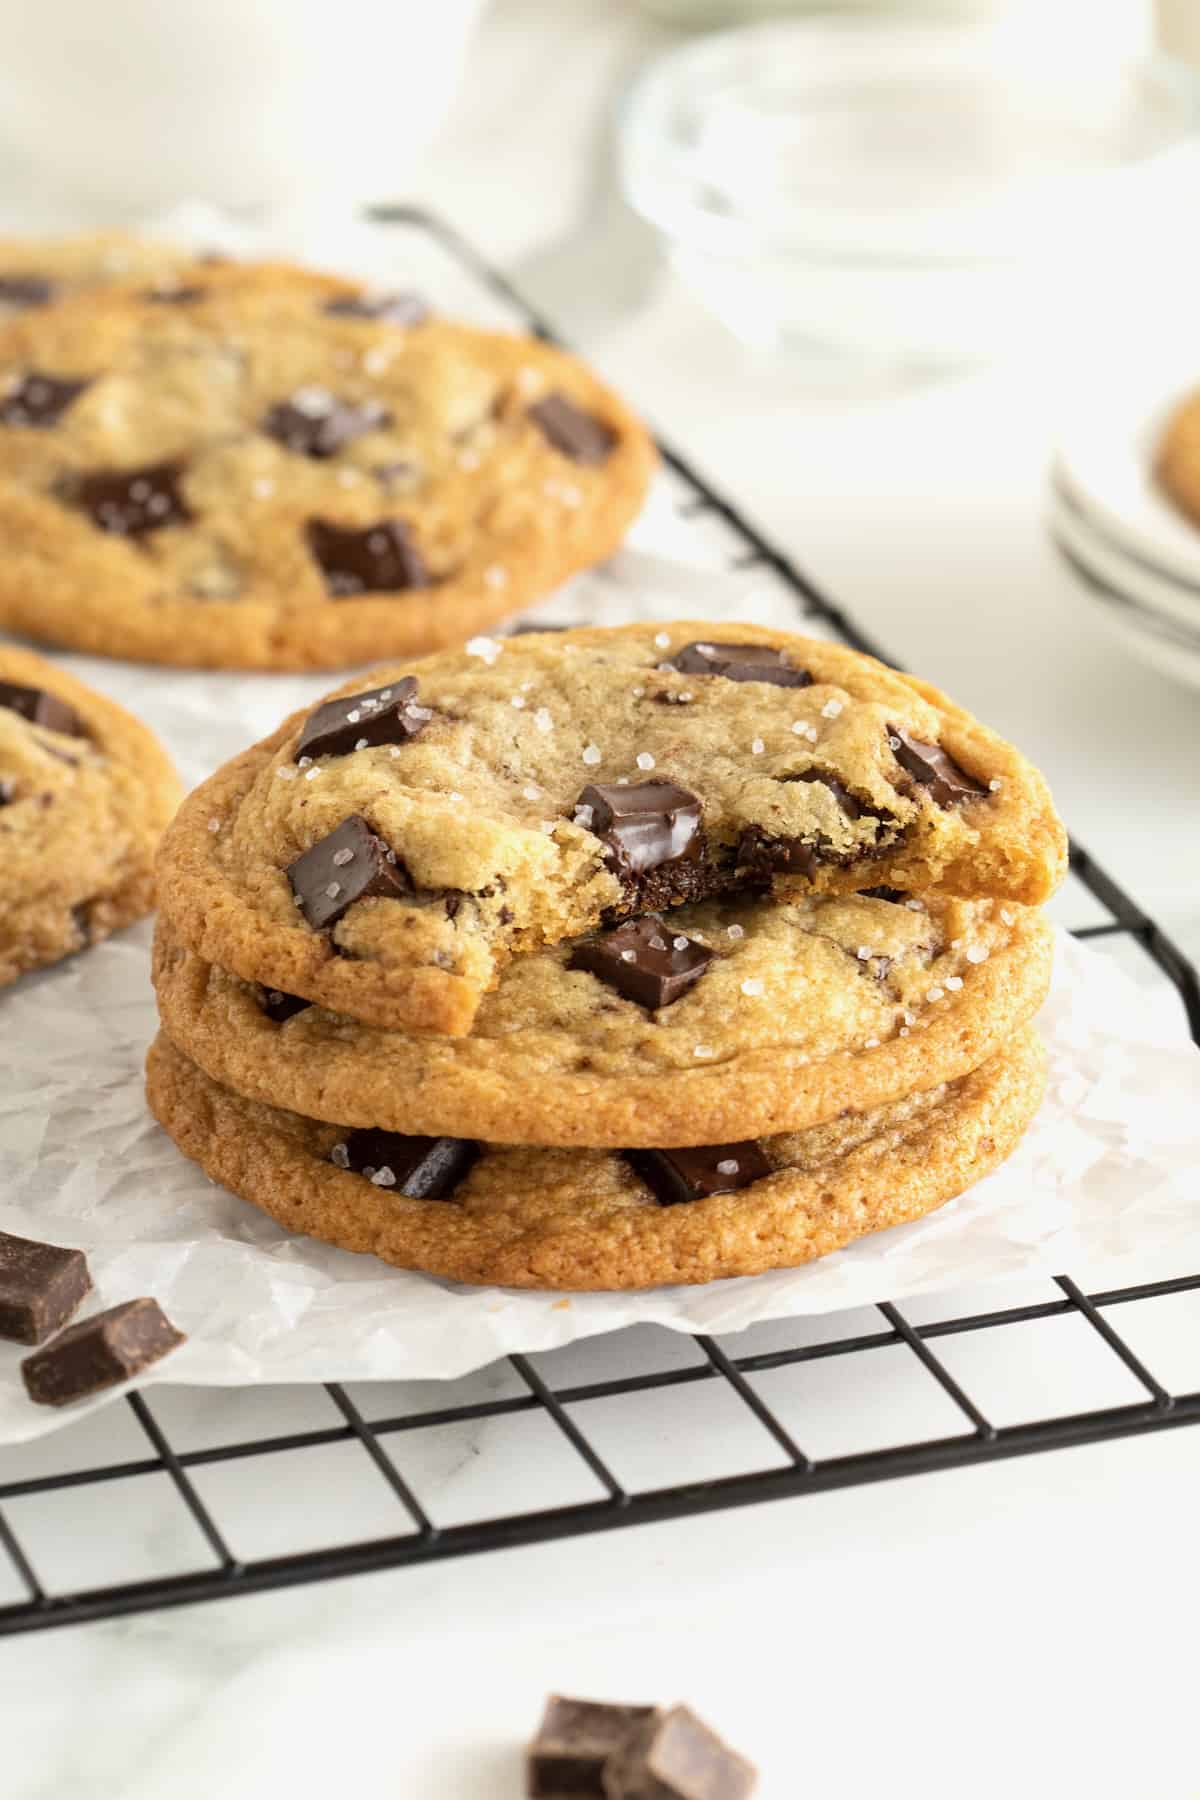
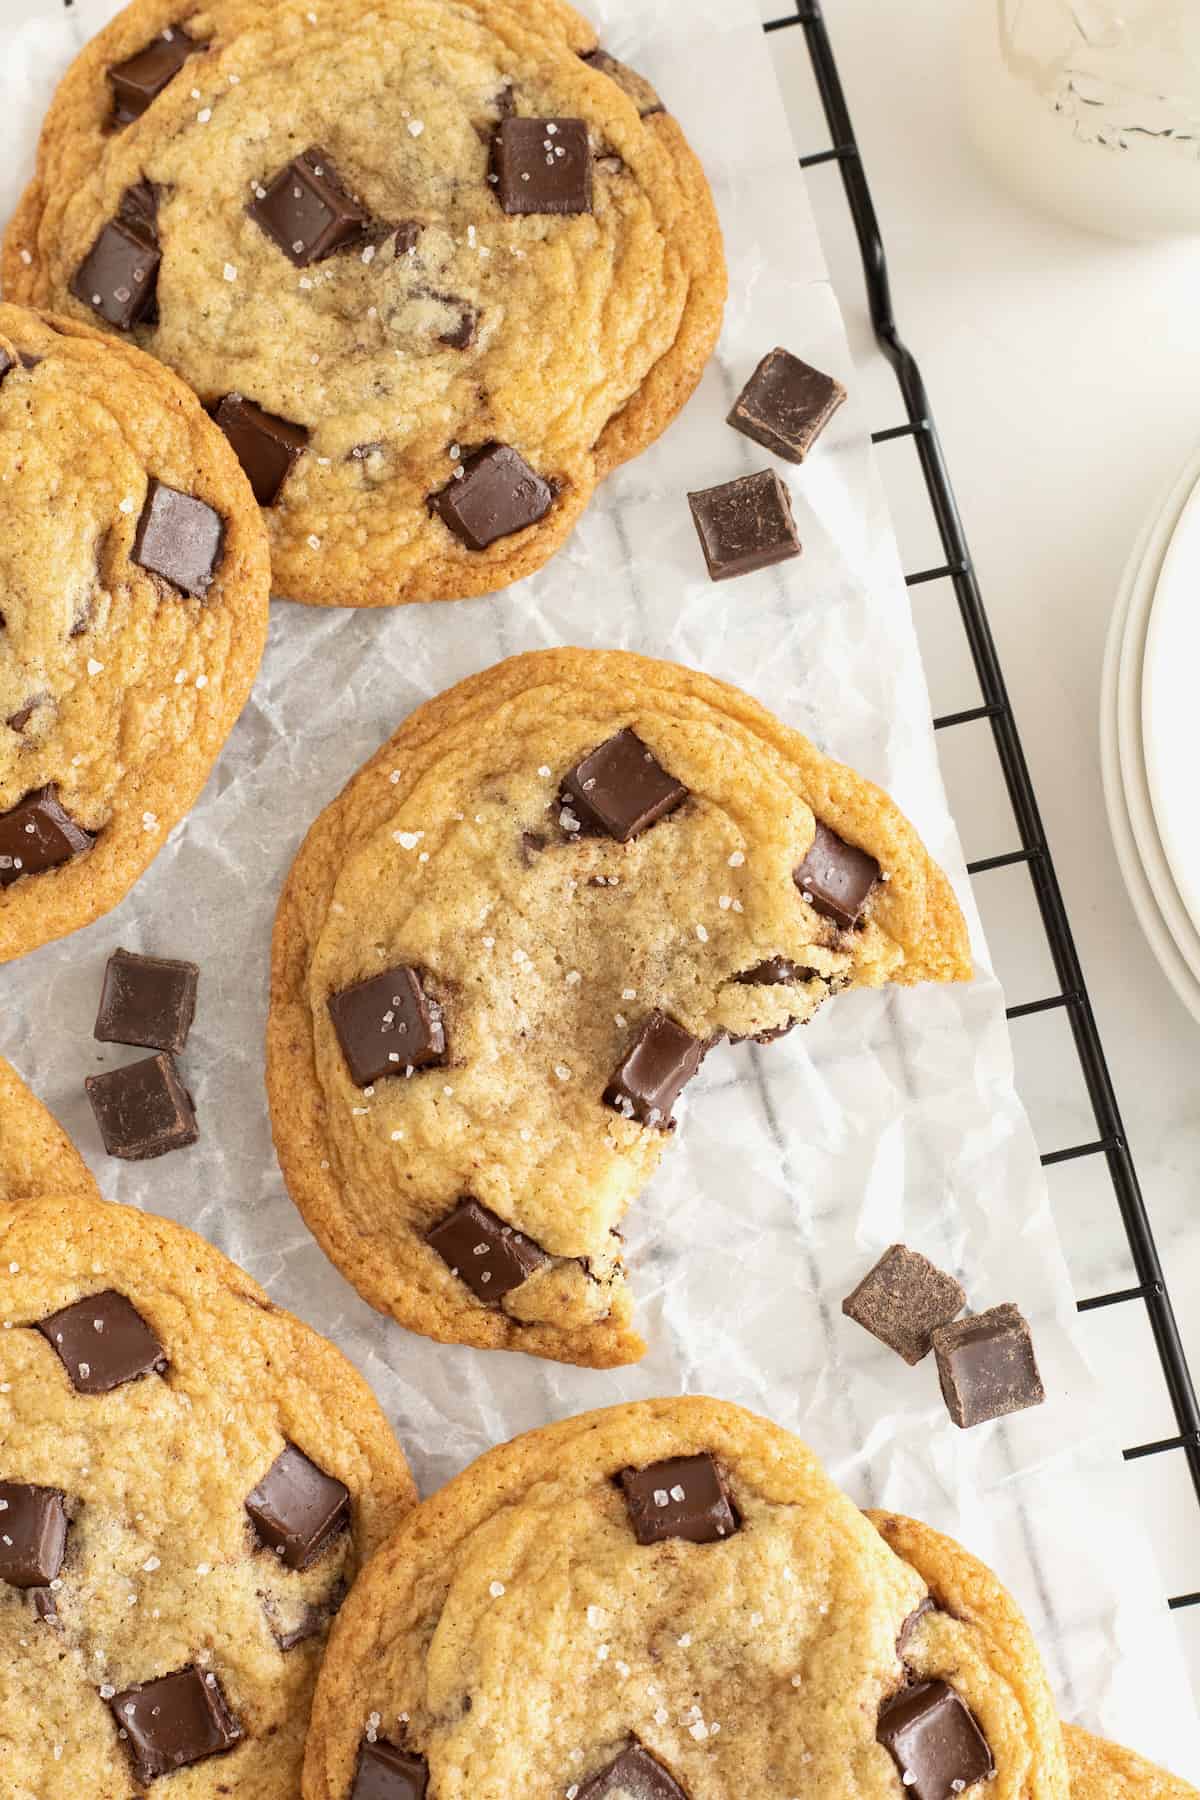
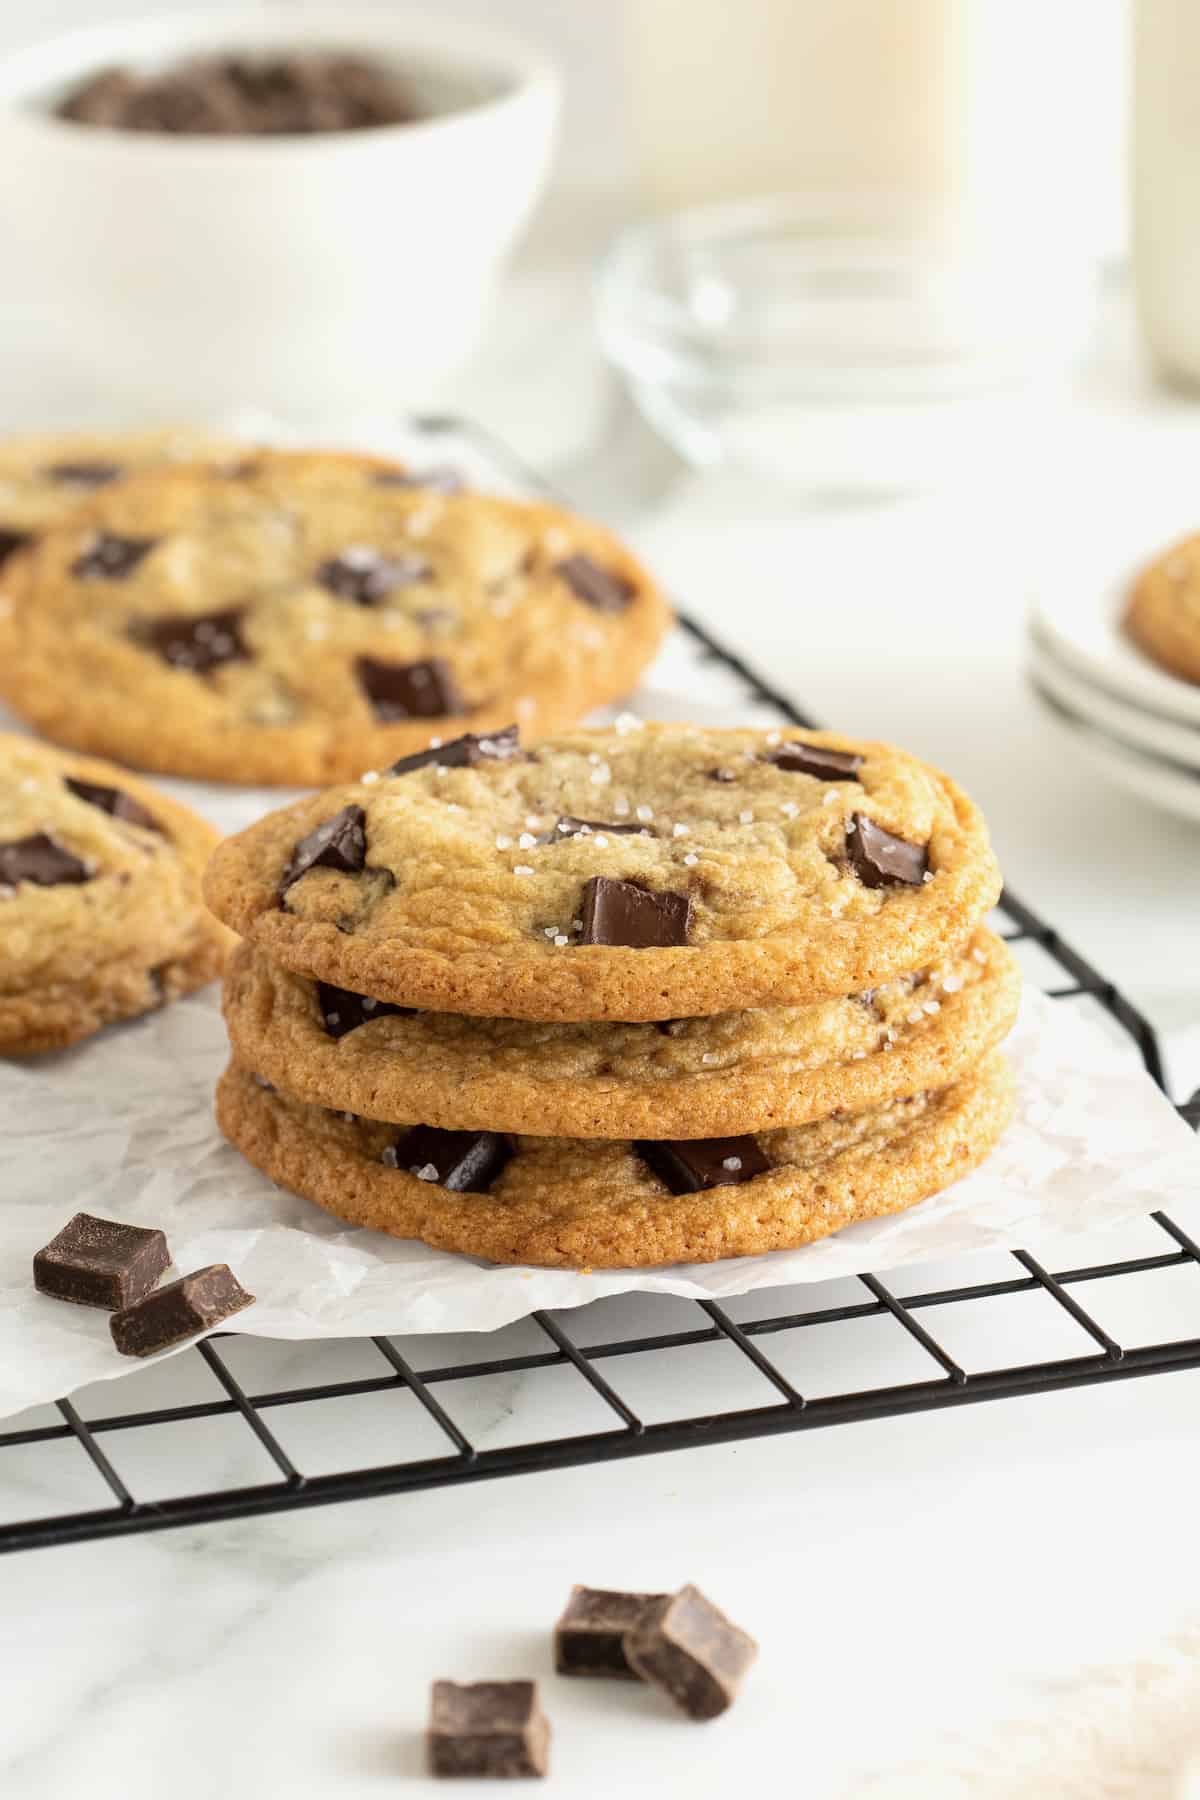
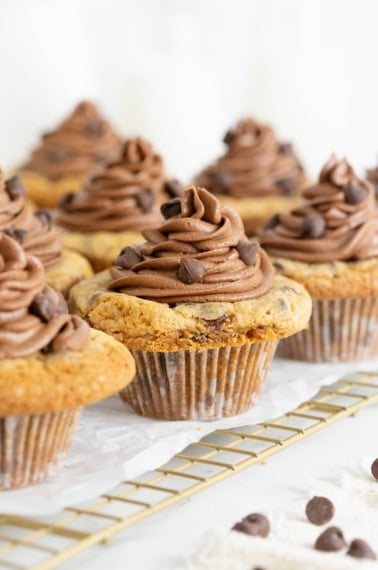
A pinch of sea salt completes these perfectly chewy, chocolatey, crisp around the edges, chocolate chunk cookies. You better sit down when you eat one because they’ll make you weak at the knees and wanting more!
Heavenly Cookies
Because you can never have too many cookie recipes up your sleeve, can you?! My constant craving for cookies came up with yet another one and they are TO DIE FOR! No really, I would die a happy happy woman if these Sea Salt Chocolate Chunk Cookies were the last cookies I ever ate here on earth.
I wouldn’t be surprised if they’re served in Heaven cause they’re just that amazing!
Delicious Simplicity
I think the simpleness of them is what makes them so scrumptious. A special sprinkle of sea salt just as they’re coming out of the oven is what puts them into their own class of cookie greatness.
Oh me! Oh my! I nearly die every time I eat one.

Hot Tip: Chill Your Dough
I highly recommend you refrigerate the dough at least 30 minutes or even overnight. Cold dough is what helps bake them to that perfect chew in the middle and crisp around the edges. It helps prevent them from spreading too much as they bake and certainly enhances the overall flavor of the dough because it has time to rest before being baked.
Top Them Off
I like to press some additional chocolate chunks into the tops of my cookies before they refrigerate and bake because you just can’t go wrong with more chocolate. Am I right or am I right?!
You also want to make sure you sprinkle each cookie with a pinch of coarse sea salt immediately after removing them from the oven so the salt sticks to the top of the cookie and the chocolate chunks as they cool.
Sweet, Salty, Chewy & Crispy
I’ve baked these cookies so many times and they just never get old. I’ve had friends literally knocking on my door asking if I have any on hand and begging for the recipe so they can bake them for themselves and their families. You just can’t go wrong with a classic chocolate chunk cookie with the perfect ratios of sweet to salty and chewy to crisp.
What Do I Need to Make Sea Salt Chocolate Chunk Cookies?
(see recipe card for measurements and details)
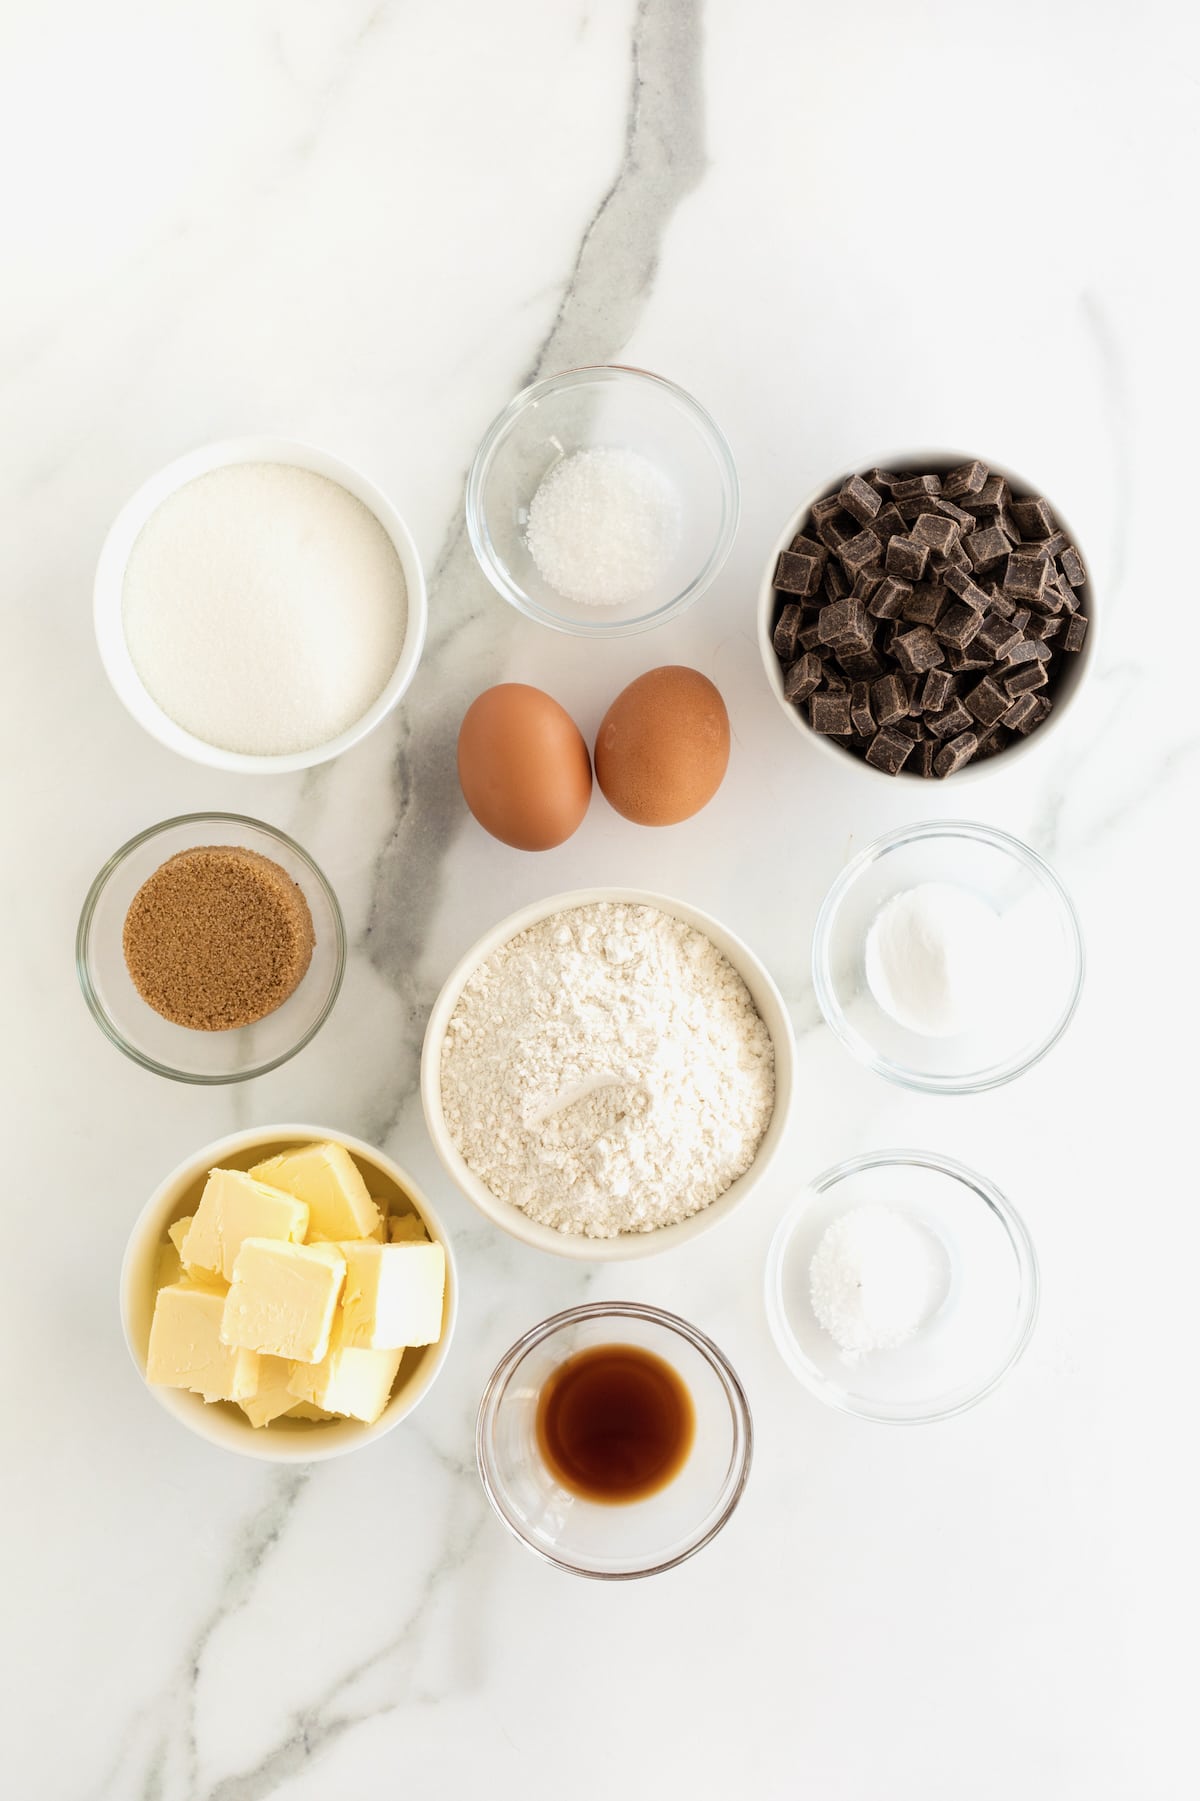
- Unsalted butter, softened
- Granulated sugar
- Dark brown sugar
- Large eggs
- Vanilla extract
- All-purpose flour
- Baking soda
- Kosher salt
- Chocolate chunks
- Coarse sea salt, for garnishing
- Cookie baking sheets
- Parchment paper
- Cooling rack
How to Make Sea Salt Chocolate Chunk Cookies
- Line a cookie sheet with parchment paper and set aside.
- In the bowl of an electric mixer fitted with the paddle attachment, beat the butter, sugar and brown sugar until smooth. Add the eggs, one at a time, until well combined. Beat in the vanilla.
- In a medium bowl, whisk together the flour, baking soda and kosher salt.
- Add the flour mixture to the butter mixture in the electric mixer.
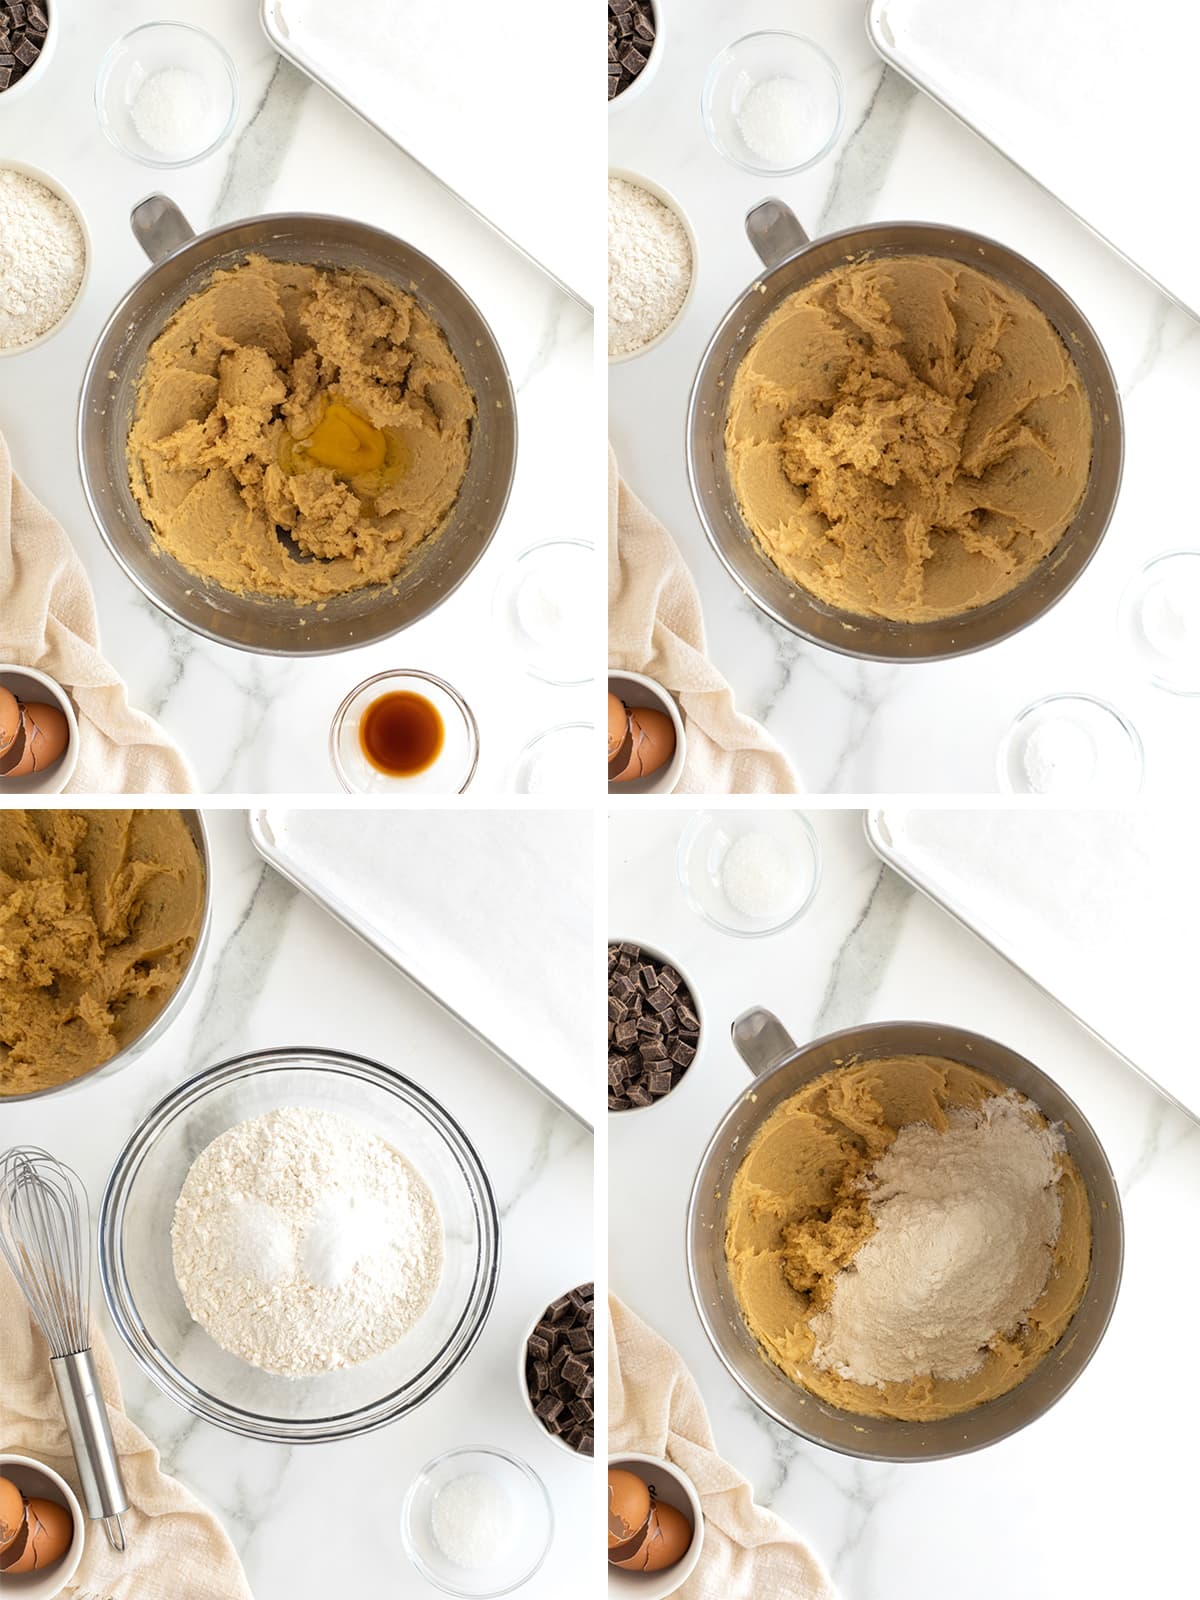
- Beat on low speed until just combined, scraping down the sides of the bowl at least once to ensure all ingredients are mixed together.
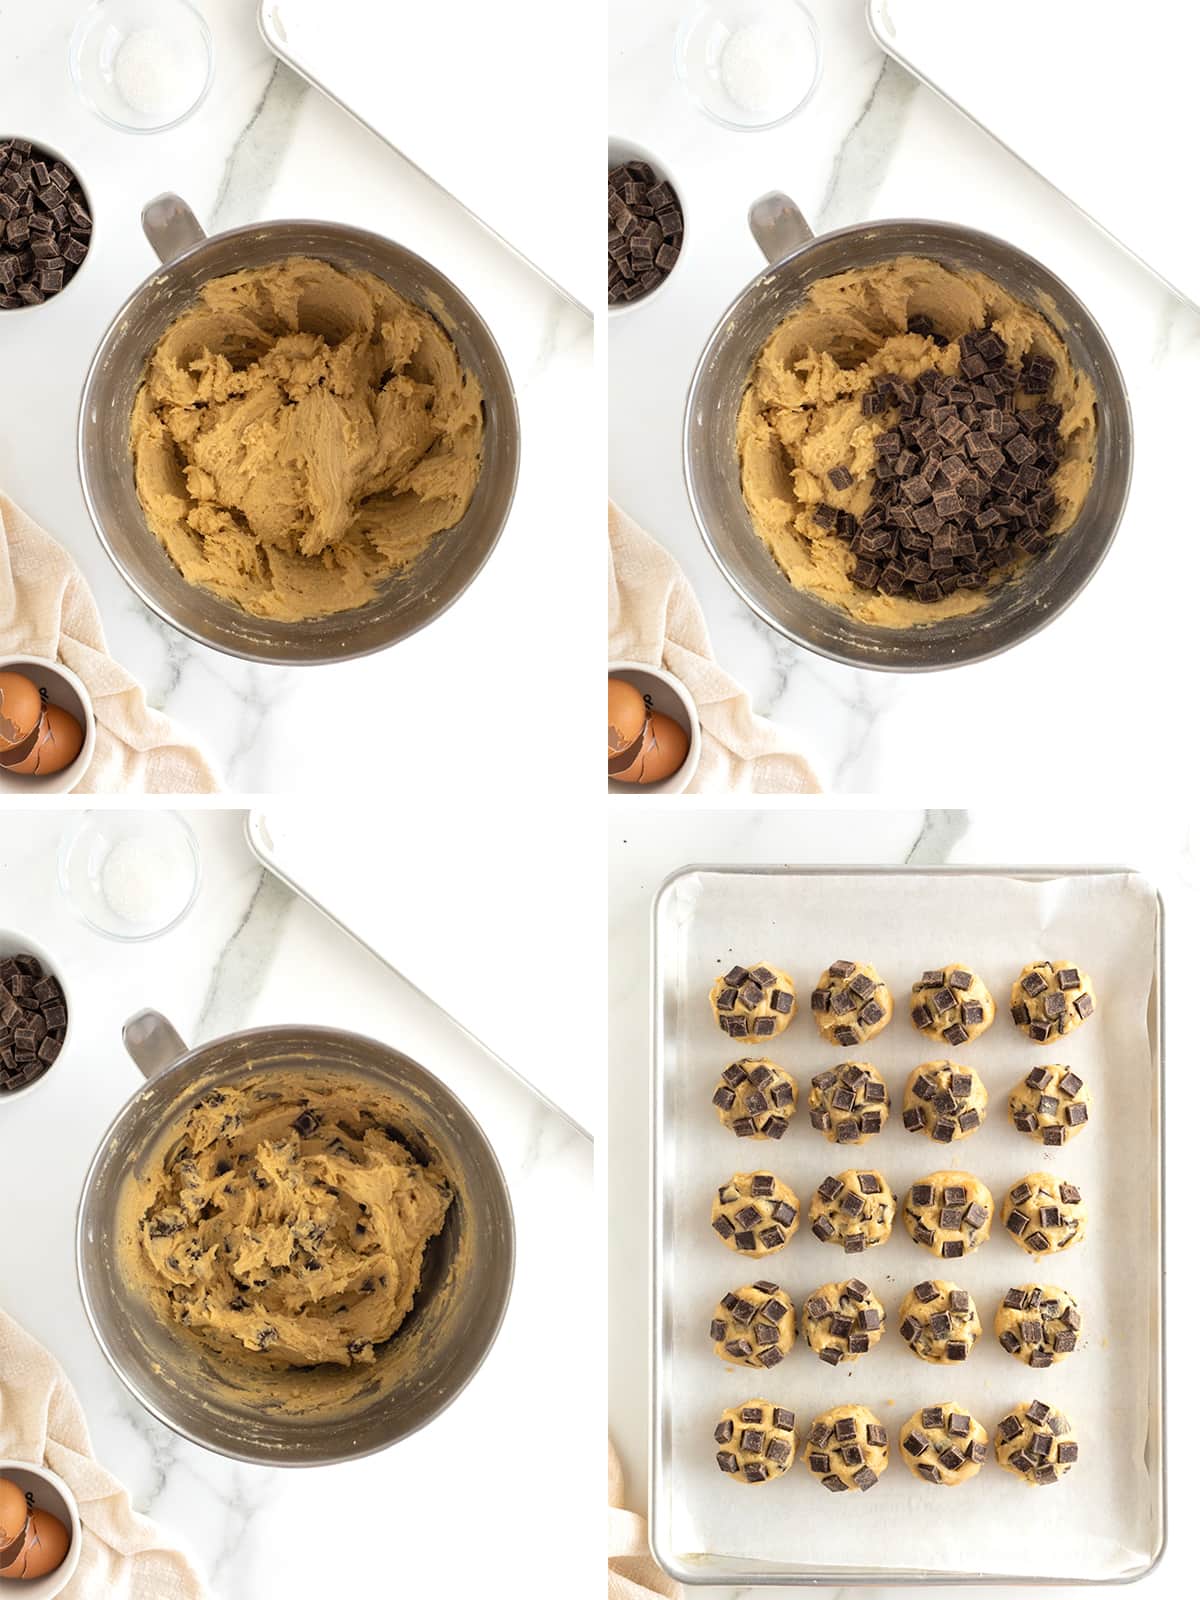
- Stir in 1 and 1/2 cups of the chocolate chunks.
- Using a 2-tablespoon cookie scoop, scoop dough into about 20 balls on the parchment-lined baking sheet.
- Press a few of the remaining chocolate chunks into the top of each ball of cookie dough. Press down on the top of each ball of cookie dough gently with the palm of your hand to flatten slightly. Cover with plastic wrap and refrigerate the cookie dough scoops for at least 30 minutes.
- Preheat oven to 350°F. Line two more baking sheets with parchment paper or spray with non-stick cooking spray. Once cookie dough has refrigerated for at least 30 minutes, place balls of cookie dough a few inches apart on the prepared baking sheets.

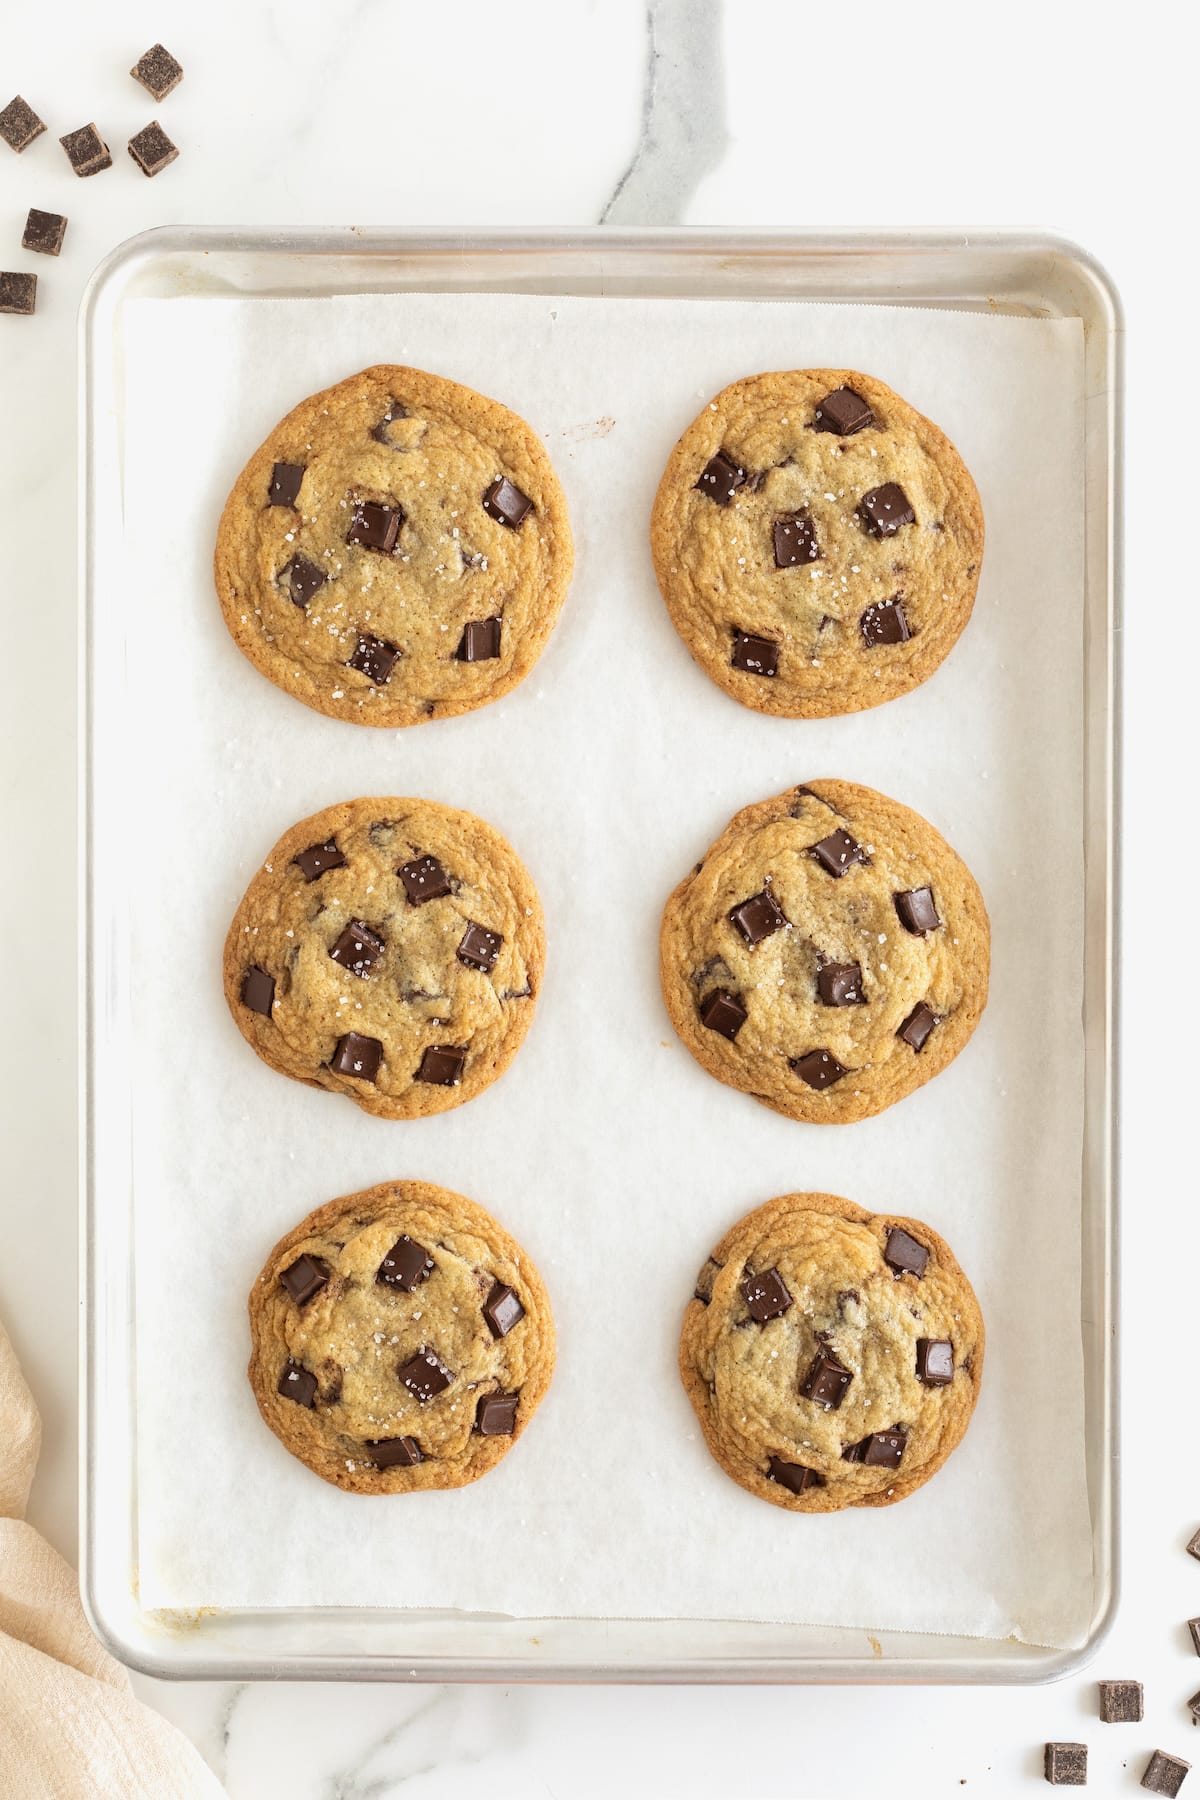
- Bake for 13-15 minutes or until cookies start to turn golden brown and crisp around the edges, but still a little under-baked/doughy in the middle. Rotate the cookie sheets after 8 minutes of baking. Once the cookies are done baking, remove them from the oven and immediately sprinkle each cookie with a pinch of coarse sea salt.
- Let cookies cool at least 10 minutes on the cookie sheets before transferring to a cooling rack or enjoying them warm with a cold glass of milk. Repeat with remaining cookie dough and enjoy!
More Cookie Recipes
I am crazy about cookies! So I could not be more excited to share My Favorite Cookie Recipes. Crafted by a true cookie-lover, these treats are absolute cookie perfection.

How to Store Sea Salt Chocolate Chunk Cookies
To store the baked cookies, let the baked cookies cool completely and then place in an airtight container, with parchment paper between each layer, at room temperature for up to 5 days.
Make Ahead Directions
To store the prepared cookie dough, make the cookie dough and store it in an airtight container in the refrigerator for up to 5 days. When ready to bake, proceed with scooping the chilled cookie dough onto parchment-lined baking sheets and baking the dough straight from the refrigerator.
To freeze the cookie dough, scoop the dough into balls and placing them in a single layer on a sheet pan in the freezer for one hour to flash freeze them before transferring them to a freezer-safe container or plastic bag, with parchment paper between each layer of cookie dough balls, to store in the freezer for up to 3 months.
Frozen cookie dough balls can be defrosted in the refrigerator overnight, defrosted at room temperature for a few hours, or baked straight from frozen. Baking the cookie dough straight from frozen is what I would recommend for the best texture. When baking cookies from frozen, just add 3-5 minutes to the instructed baking time.
I hope you love them as much as we do and enjoy baking them over and over and over again! If you make these Sea Salt Chocolate Chunk Cookies and post a pic to social, be sure to tag me on Instagram @thebakermama so I can see! 😍 I just love seeing how inspired and creative y’all get with the ideas I share. Enjoy!
xoxo,


Sea Salt Chocolate Chunk Cookies
- Prep Time: 10 mins
- Dough Chilling Time: 30 minutes
- Cook Time: 15 mins
- Total Time: 55 mins
- Yield: 20
- Category: Cookies
Description
A pinch of sea salt completes these perfectly chewy, chocolaty, crisp around the edge chocolate chunk cookies.
Ingredients
- 1 cup (2 sticks) unsalted butter, softened
- 1 cup granulated sugar
- 1/3 cup dark brown sugar
- 2 large eggs
- 1 teaspoon vanilla
- 2 cups all-purpose flour
- 1 teaspoon baking soda
- 1 teaspoon kosher salt
- 2 cups chocolate chunks, divided
- coarse sea salt, for garnishing
Instructions
- Line a rimmed cookie sheet with parchment paper and set aside.
- In the bowl of an electric mixer fitted with the paddle attachment, beat the butter, sugar and brown sugar until smooth. Add the eggs, one at a time, until well combined. Beat in the vanilla.
- In a medium bowl, whisk together the flour, baking soda and kosher salt. Add to the butter mixture in the electric mixer and beat on low speed until just combined, scraping down the sides of the bowl at least once to ensure all ingredients are mixed together. Stir in 1 and 1/2 cups of the chocolate chunks.
- Using a 2-tablespoon cookie scoop, scoop dough into about 20 balls on the parchment-lined cookie sheet. Press a few of the remaining chocolate chunks into the top of each ball of cookie dough. Press down on the top of each ball of cookie dough gently with the palm of your hand to flatten slightly. Cover with plastic wrap and refrigerate cookie dough for at least 30 minutes.
- Preheat oven to 350°F. Line two more cookie sheets with parchment paper or spray with non-stick cooking spray. Once cookie dough has refrigerated for at least 30 minutes, place balls of cookie dough a few inches apart on the prepared cookie sheets.
- Bake for 13-15 minutes or until cookies start to turn golden brown and crisp around the edges, but still a little under-baked/doughy in the middle. You’ll want to rotate the cookie sheets after 8 minutes of baking. Once the cookies are done baking, remove them from the oven and immediately sprinkle each cookie with a pinch of coarse sea salt.
- Let cookies cool at least 10 minutes on the cookie sheets before transferring to a cooling rack or enjoying them warm with a cold glass of milk. Repeat with remaining cookie dough and enjoy!

our oven doesn’t have 350°F shall I use 250°F?
Hi Miz! I’ve never baked them at 250°F, but from experience I know that they will take longer to bake and they will be more uniform in shape and texture at a lower temperature. They are less likely to have the crisp edges and chewy center that these cookies bake into at 350°F. They should still taste delicious though. Enjoy!
Hi,
Would it be possible to get the ingredients in gram measurements, I’m British and cups and sticks confuse me lol.
Hi Louise! Here’s a great conversion chart that I would recommend using: https://addapinch.com/cooking-conversion-charts/
Just a quick one- how do you get your cookies so flat? Mine are thicker and smaller… should I use a rolling pin?
Hi Chlo! I think that has to do with the modifications you made to the recipe. The lower the amount of sugar in a cookie, the less they spread. Enjoy!
I made these at home for my family (they’re currently out), and trying not to eat more than one is far too difficult than it should be! I used normal salt instead of the kosher salt that was recommended, but they still came out great. I wasn’t sure how much salt I should put on the top so i just sprinkled it all over the tray (sparsely I might add) and it still worked.
Modification I made to the mixture:
I did 100 grams of granulated sugar
I used 70-90 grams of brown sugar
Why did I chose these modifications?
I chose these specific things because I find that when baking, using too much sugar makes me feel sick and far too full, so I usually almost half the amount, it was nothing personal towards this specific recipe as I do this for all. I recommend experimenting with the recipe to find your perfect amount as everyone is different.
Thanks
Do you think I can use 1:1 gluten free flour in same ration you note?
Hi Michelle! I couldn’t say for sure as I haven’t tested the recipe with gluten free flour. I think it’s certainly worth a try though as long as you’re using an all-purpose gluten free flour that is recommended for baking. I hope this helps and that they turn out just as great. Enjoy!