
Whole Wheat Greek Yogurt Pizza Crust is a healthy thin crust pizza recipe that’s made with 100% whole wheat flour, Greek yogurt and a hint of honey.

The Personal Pizza is Back
Crisp around the edges with a slight bubble throughout and a soft chew in every bite, this Whole Wheat Greek Yogurt Pizza Crust is perfect for personalizing. This healthy thin crust is made with 100% whole wheat flour, Greek yogurt and honey. Cutting the dough into small rounds makes them perfect for pizza night so everyone can top their own.

Kid Approved!
Almost every time I ask the kids what they wants for dinner, the answer is pizza! I can’t blame the kids, I could eat pizza every night for dinner too! Pizza is perfect in so many ways because you can make it a million different ways. From the thickness of the crust to your choice of toppings, the options are endless.
Brandon makes the best pizza, but his dough takes days to rise and special Italian flour to create the perfect crust. So one day when Baker requested pizza for dinner, I decided to create a healthier crust that I could quickly make and would be easy for everyone to eat and enjoy.
We were all so pleased with how tasty these individual whole wheat Greek yogurt pizza crusts baked up. Healthy and everyone’s happy! What more could you ask for?!

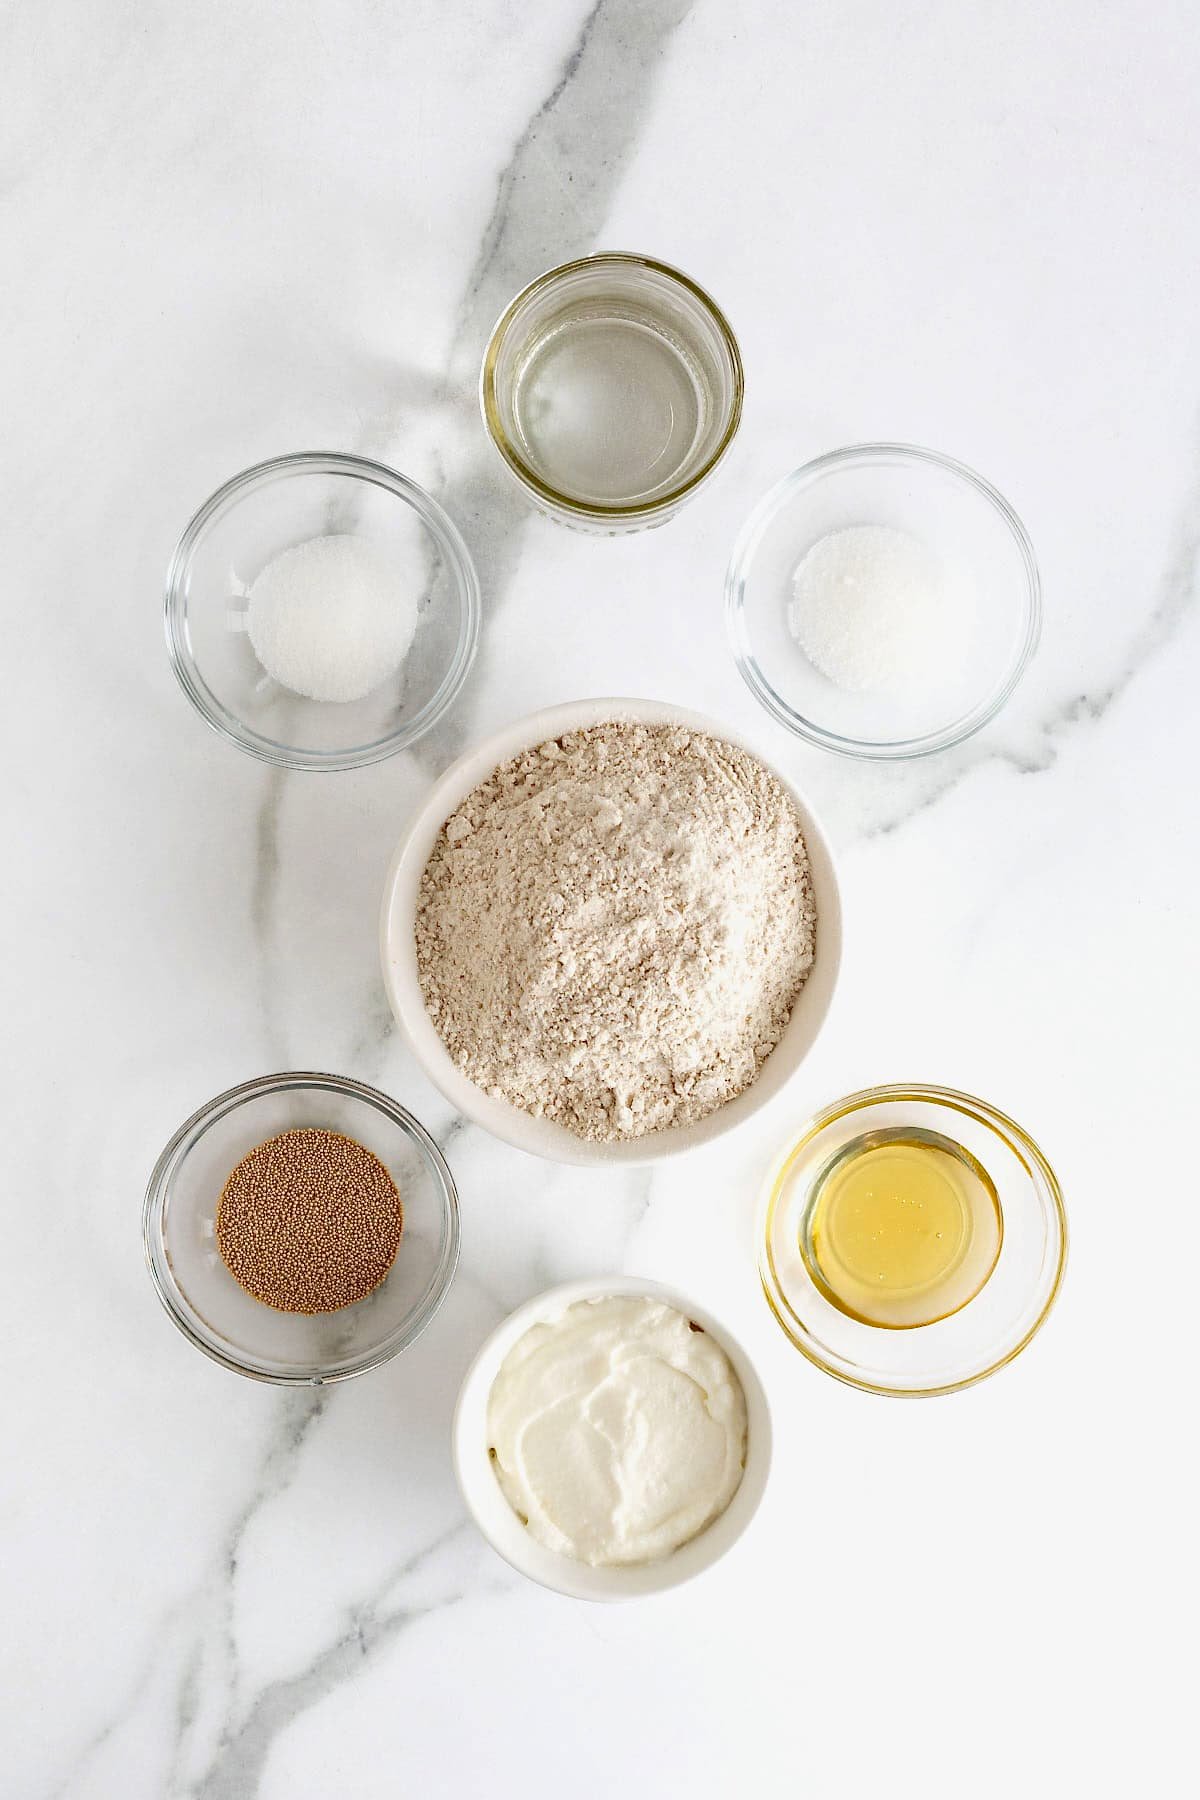
Ingredients and Supplies
(see recipe card at the bottom of this post for measurements and details)
Ingredients:
- Active dry yeast
- Granulated sugar
- Warm water
- Whole wheat flour
- Salt
- Honey
- Plain Greek yogurt
- Toppings of your choice!
Supplies:
How to Make Whole Wheat Greek Yogurt Pizza Crust
- In a small bowl, stir together the yeast, sugar and warm water. Let proof 5-10 minutes.
- In a large bowl, whisk together the flour and salt.
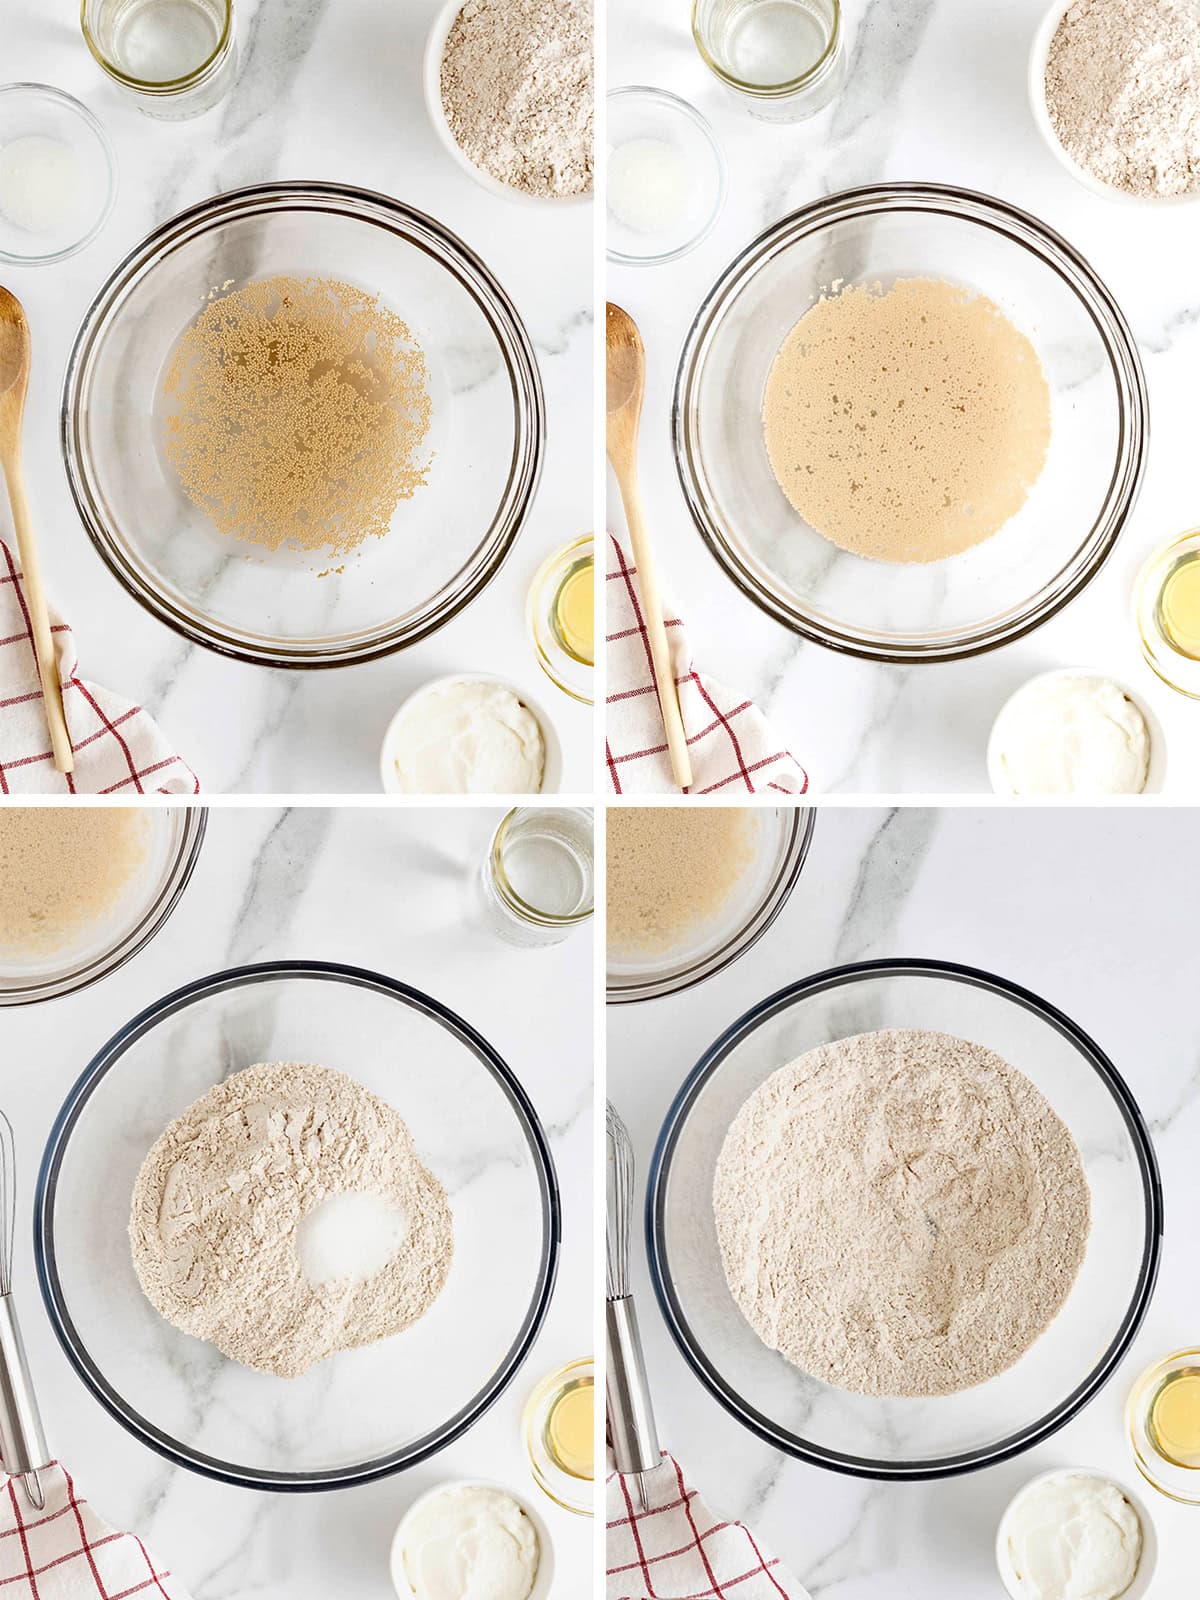
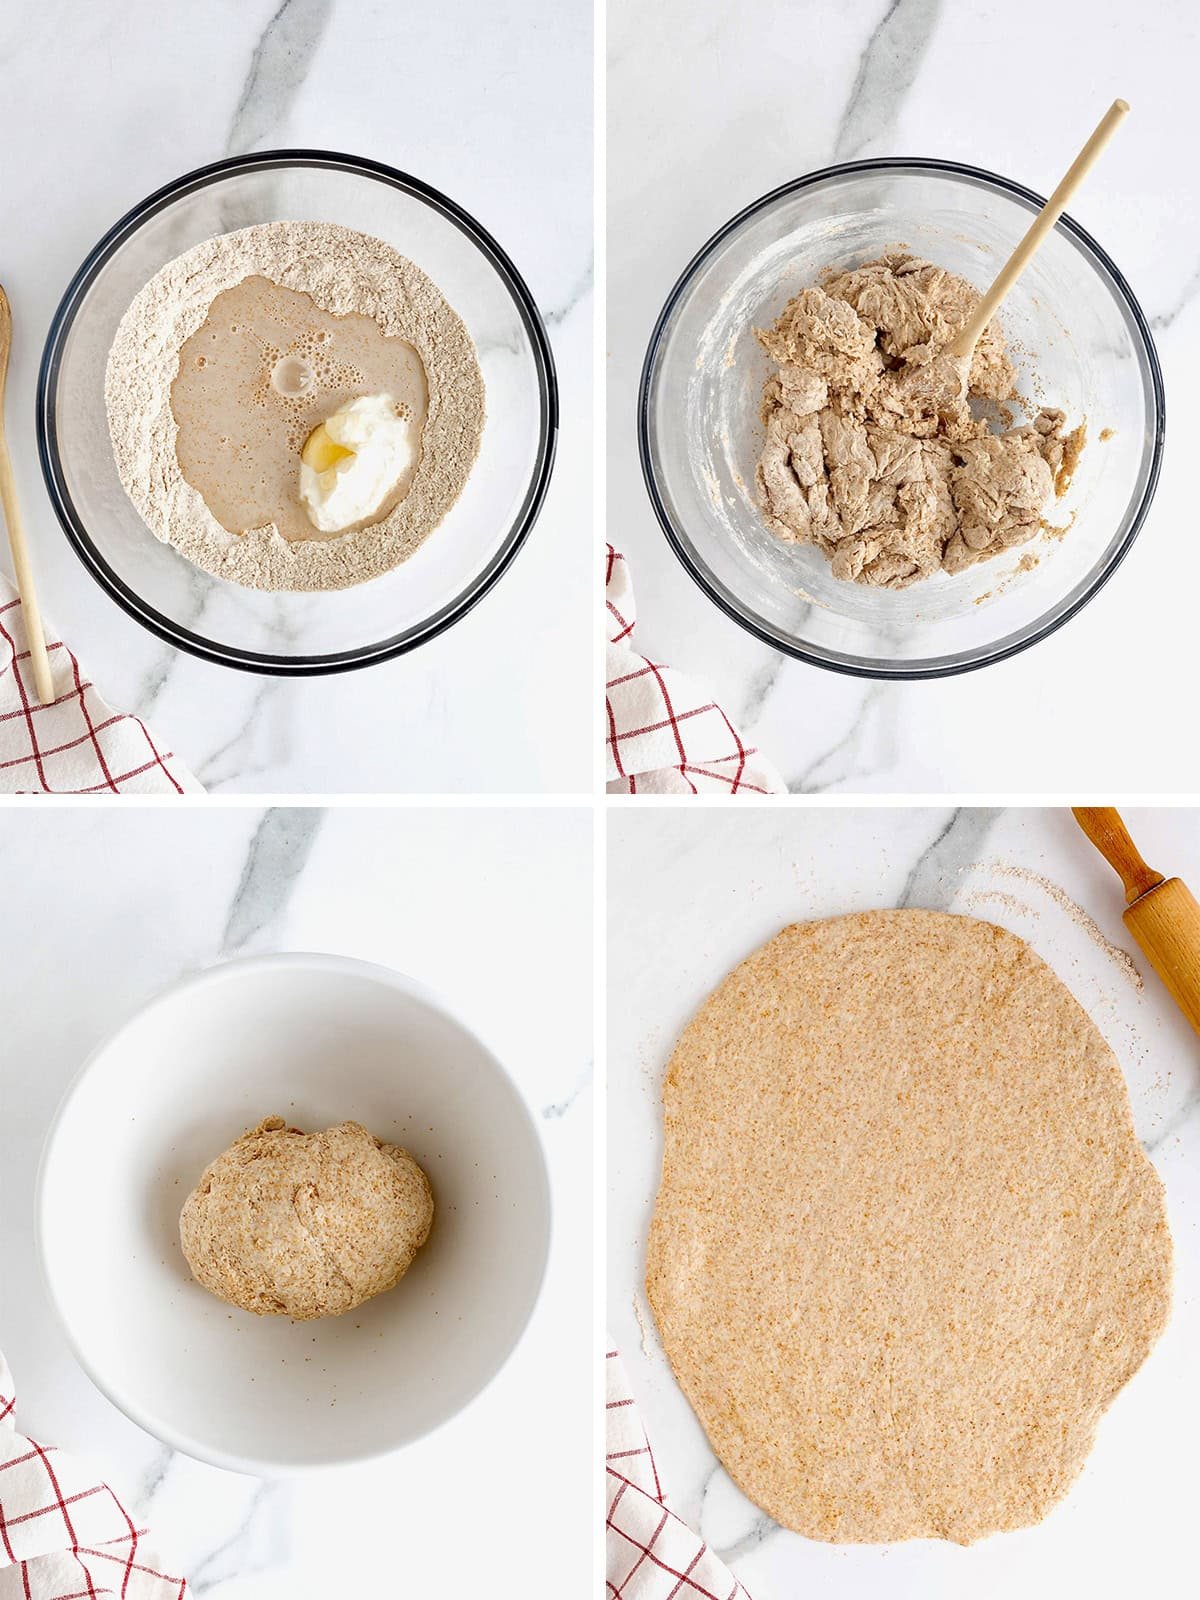
- Make a well in the center and add the yeast mixture, honey and yogurt.
- Stir together with a wooden spoon and then knead with your hands until a smooth ball forms, about 2-4 minutes.
- Place in an oiled bowl and cover with a towel for about 30 minutes.
- Preheat oven to 450°F. Once dough has rested, roll out to 1/4-inch thickness on a lightly floured surface.
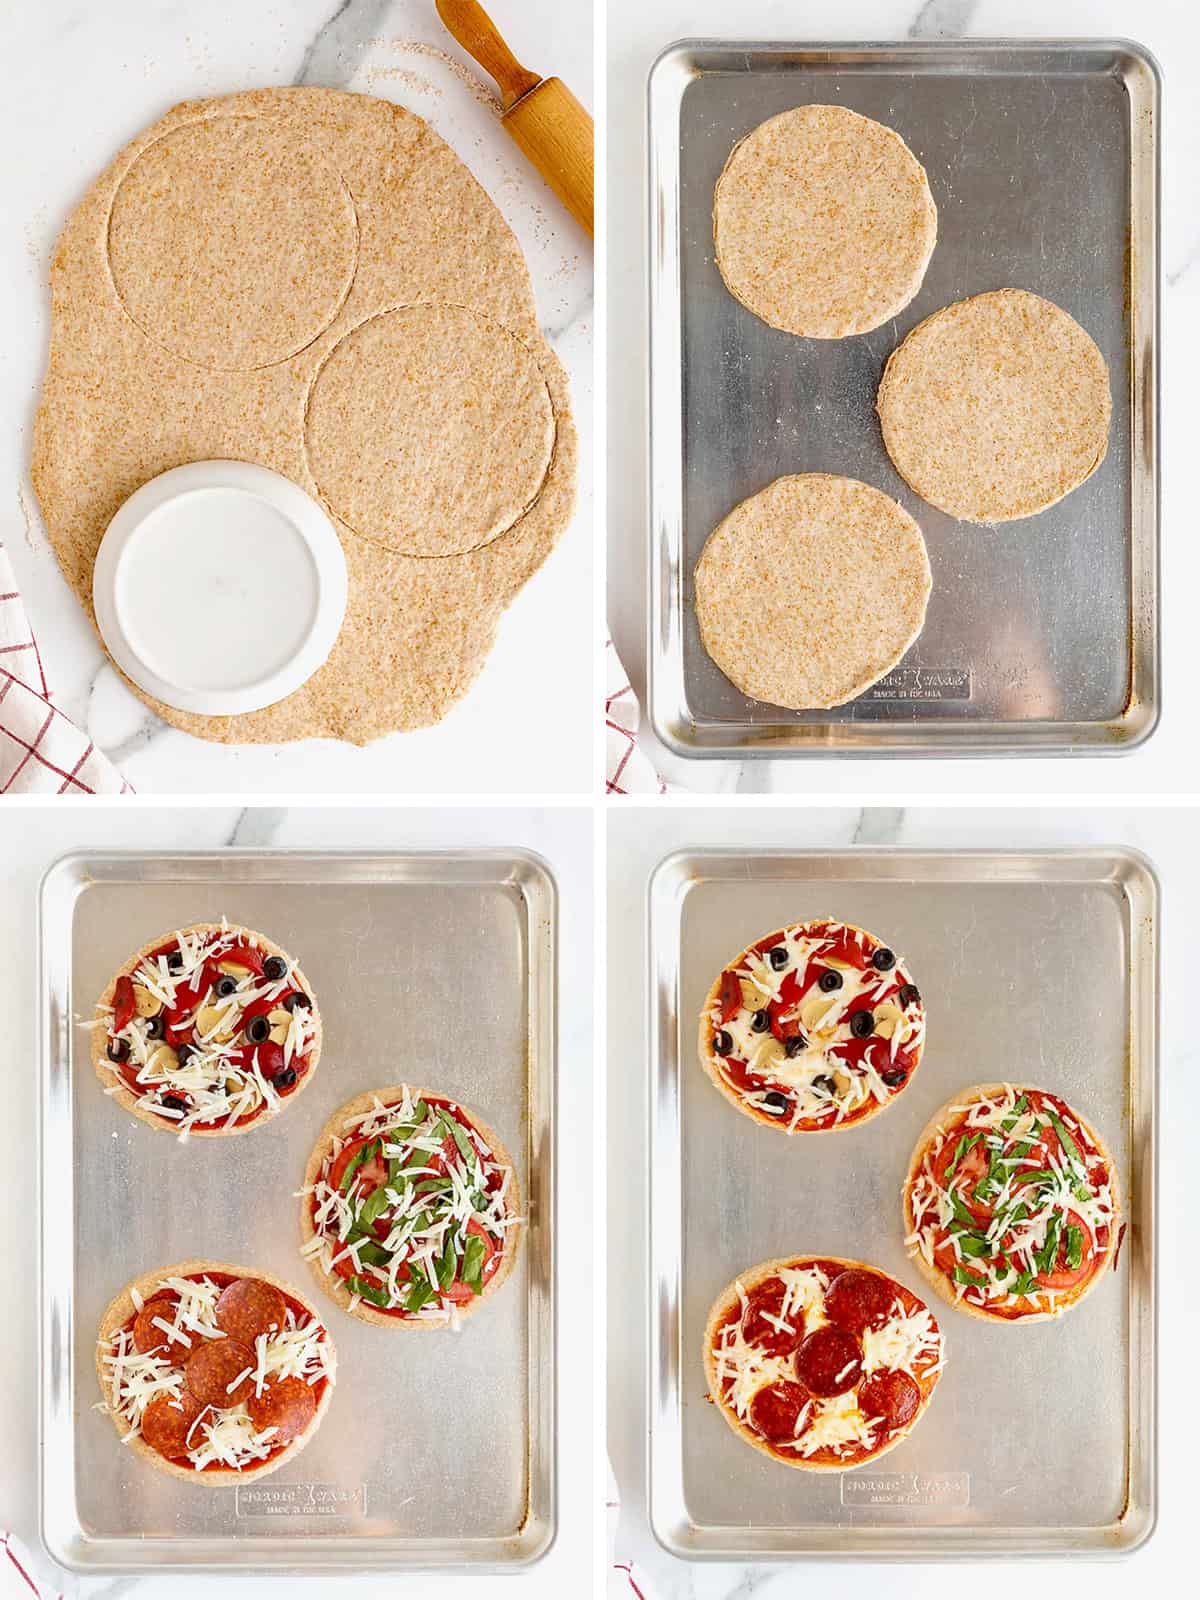
- Cut dough into 6-inch round circles. I trace around a small plate with a knife. Gather remaining dough and roll out again to cut out additional circles. You should have 6 rounds.
- Place dough rounds on lightly greased baking sheets and top each one with a tablespoon of pizza sauce, a sprinkle of cheese, your chosen toppings and more cheese.
- Bake for 15-20 minutes or until crust is crisp around the edges and cheese is bubbly and browned on top. Serve as an individual pizza or cut into 4 slices each and serve to a crowd.
Pizza Perfection
From easy snacks to homemade pizza dough and creative meal ideas, My Favorite Pizza Recipes answer that pizza craving deliciously and without the delivery fee!

If you make this Whole Wheat Greek Yogurt Pizza Crust, be sure to snap a picture and share it with me on Instagram @thebakermama so I can see. If you’re on Facebook, be sure to join my Friends of The BakerMama group to connect and share all the fun and yummy recipes of mine that you make! 😍 I just love seeing how inspired and creative y’all get with the ideas I share. Enjoy!
xoxo,


Whole Wheat Greek Yogurt Pizza Crust
- Prep Time: 15 mins
- Dough Resting Time: 30 mins
- Cook Time: 20 mins
- Total Time: 1 hour 5 mins
- Yield: 6
- Category: Main
Description
Whole Wheat Greek Yogurt Pizza Crust is a healthy thin crust pizza recipe that’s made with 100% whole wheat flour, Greek yogurt and a hint of honey.
Ingredients
- 1 envelope (2 and 1/4 teaspoons) active dry yeast
- 1 teaspoon granulated sugar
- 3/4 cup warm water
- 2 and 1/2 cups whole wheat flour
- 1 teaspoon salt
- 1 tablespoon honey
- 1/2 cup plain Greek yogurt
- Toppings of your choice!
Instructions
- In a small bowl, stir together the yeast, sugar and warm water. Let proof 5-10 minutes.
- In a large bowl, whisk together the flour and salt. Make a well in the center and add the yeast mixture, honey and yogurt. Stir together with a wooden spoon and then knead with your hands until a smooth ball forms, about 2-4 minutes. Place in an oiled bowl and cover with a towel for about 30 minutes.
- Preheat oven to 450°F. Once dough has rested, roll out to 1/4-inch thickness on a lightly floured surface. Cut dough into 6-inch round circles. Gather remaining dough and roll out again to cut out additional circles. You should have 6 rounds.
- Place dough rounds on lightly greased baking sheets and top each one with the toppings of your choice.
- Bake for 15-20 minutes or until the crust is crisp around the edges and cheese is bubbly and browned on top. Serve as an individual pizza or cut into 4 slices each and serve to a crowd.
Hi Maegan….Would this work with fat free yogurt, or does it have to be full fat?
Hi Diane! Yes, as long as it’s a thicker fat free yogurt. Runnier yogurt could make the dough too sticky. If so, you would need to an add a little more flour to get that smooth dough consistency. I hope this helps and that you enjoy!
Would this work to just shape into a 16 or 18” pizza pan and just make one large pizza?
Hi Sue! Absolutely, it should bake up beautifully as one big pizza. Enjoy!
Can I sub with GF flour?
Hi Mo! If it’s an all-purpose gluten free flour, it should work well. Certainly worth a try. Enjoy!
This is the pizza that I am going to have and serve my friend’s kids, tomorrow morning. This is the best recipe that I found today.
These were absolutely perfect and easy to make! My boyfriend loved them, I am using this recipe from now on, thank you!
[…] Get a recipe from The Baker Mama. […]
Just curious, do you have a recipe for the pizza sauce or what would you recommend using?
Hi Jenny! We most often use just crushed San Marzano tomatoes from a can as the sauce. I sometimes use Muir Glen canned pizza sauce too. Both are great! Enjoy!
Do you think these could freeze well? I love homemade crust, but want quick and easy!
Hi Traci! I haven’t tried to freeze them yet, but they should freeze great. I’d go ahead and roll out the dough and then freeze them in resealable freezer bags. Great idea! I think I’ll try it soon so we have a stock in the freezer for last-minute meals. Enjoy!