Take the mystery out of making pies once and for all with The Complete Guide to Pie Crust! I’ll take you step-by-step from making the dough to baking picture-perfect pies.
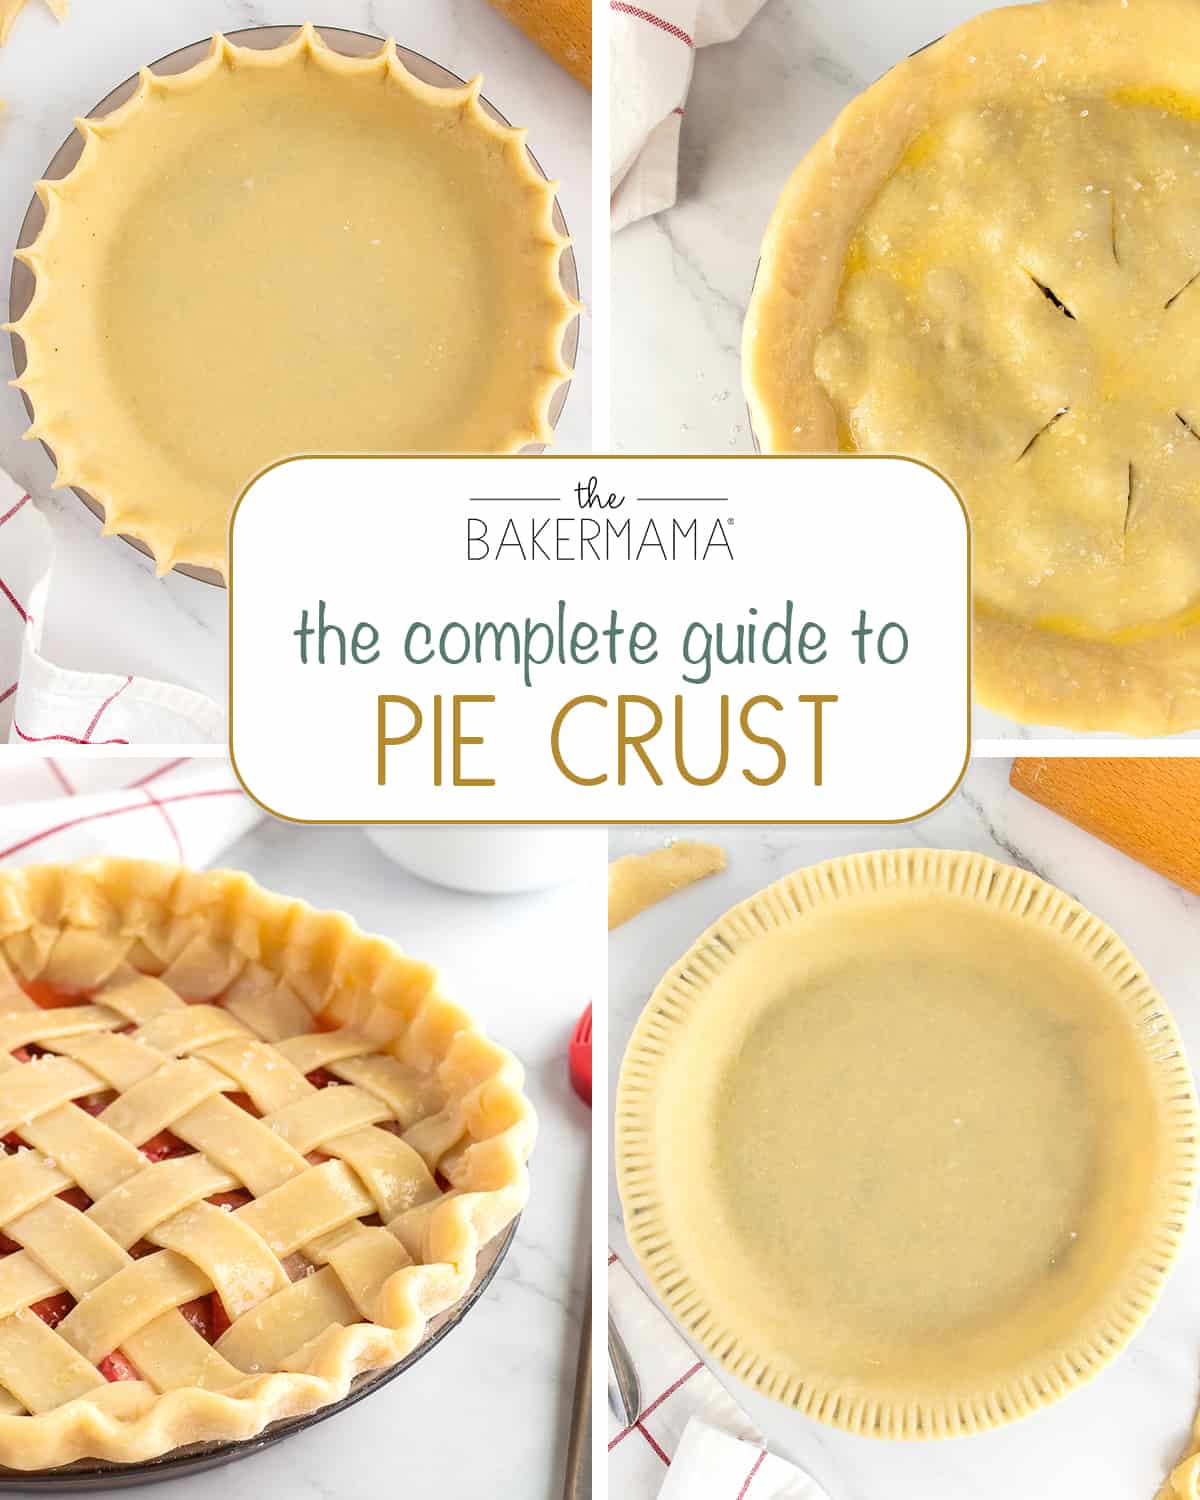
Your Guide to From-Scratch Crust
Y’all, I love pie so much. Almost as much as I love cookies, and that’s saying a lot! There’s just something about fresh pie with a from-scratch crust that makes my mouth water. Of course, I have nothing against frozen pie shells. They make quick work of pie-making! But when I want to serve a from-scratch pie, there are some tried-and-true methods to making and decorating truly gorgeous pies. And my Complete Guide to Pie Crust has everything from a great crust recipe to the finishing touches that make a pie crust look and taste amazing.
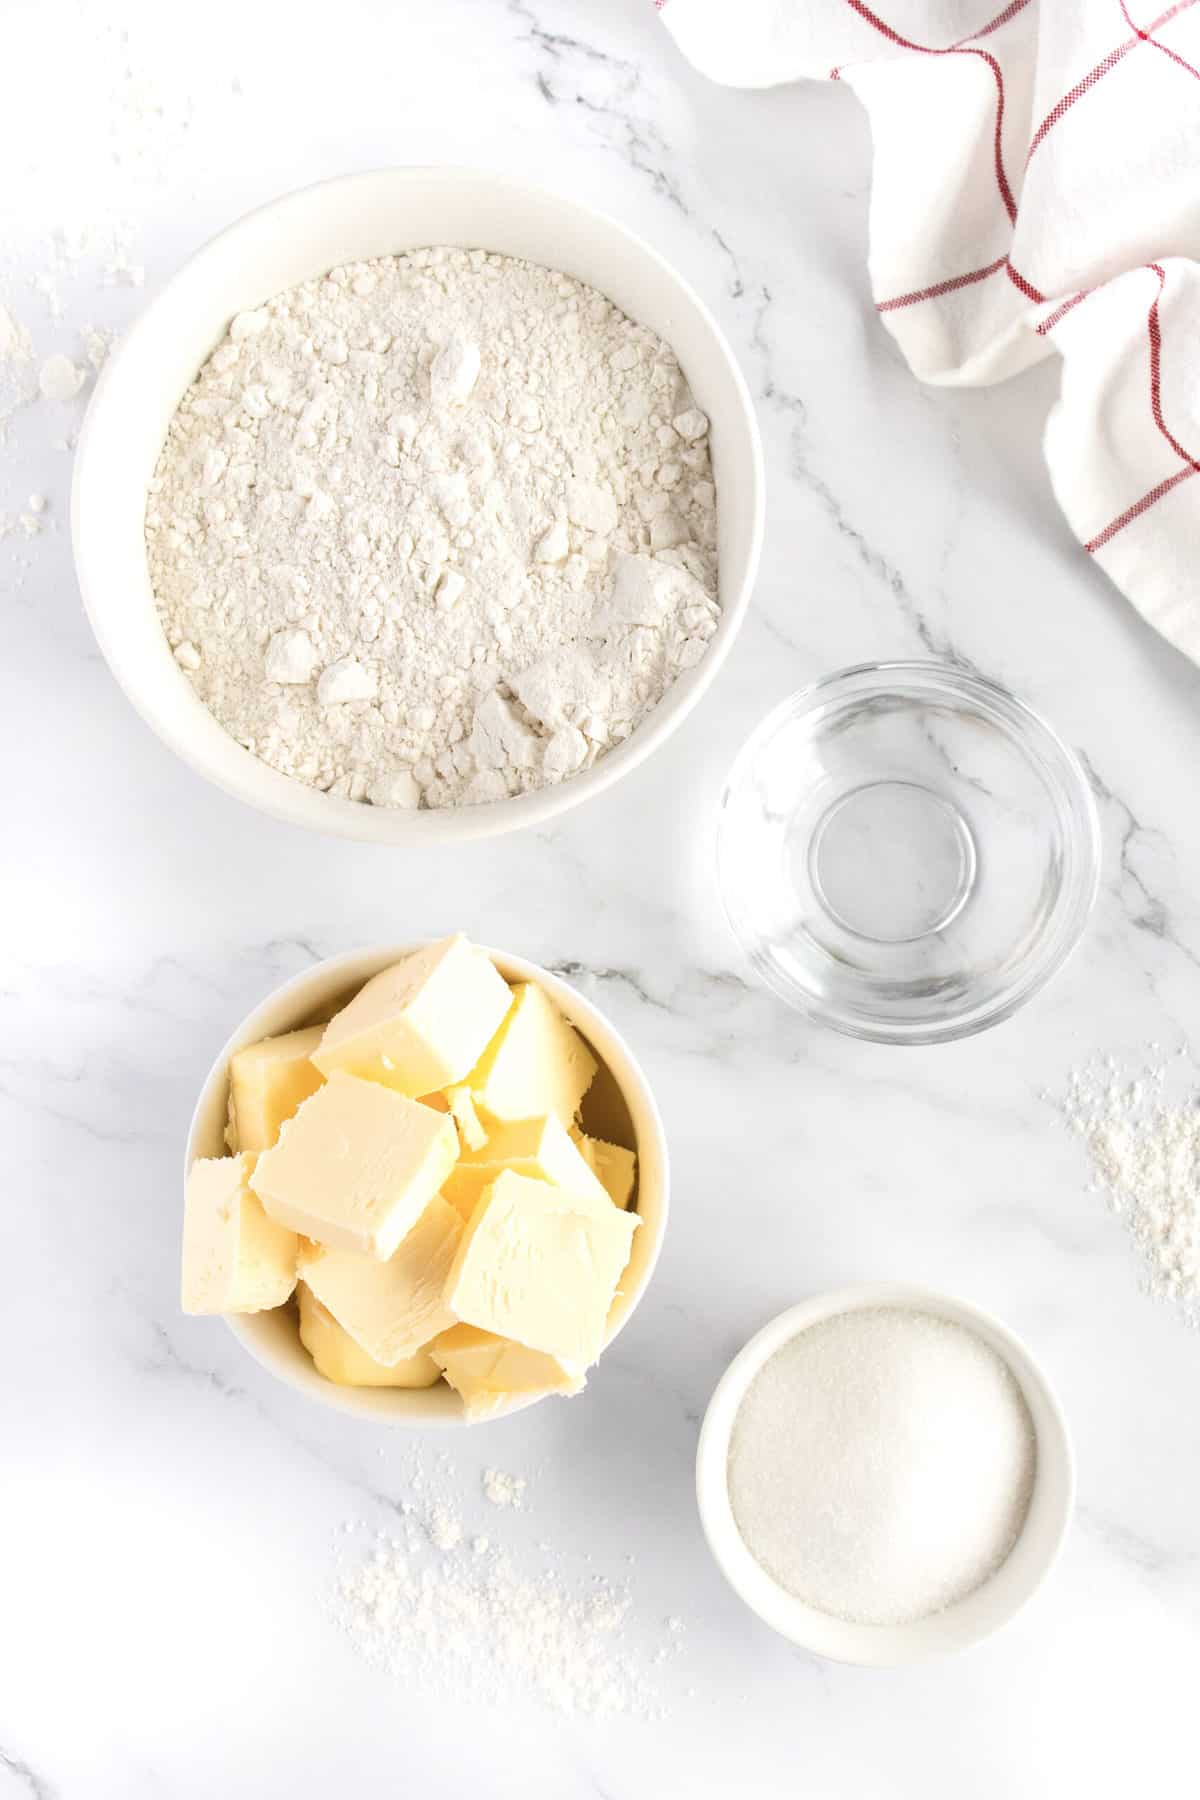
Most recipes for dessert pies have the same basic ingredients: Flour, sugar, water and butter or shortening. Aaaand that brings us to the great pie crust debate, folks! And I’m not here to say what’s right or wrong, but I’m a butter gal, myself. I prefer the rich flavor it brings to the pie. Oh! And it’s important to note that this recipe is for dessert pie crusts. For savory pies, eliminate the sugar and add 1/2 teaspoon of salt. Other than that, the process is exactly the same. If you’re looking for a graham cracker crust recipe, I’ve got you covered there, too! Ready to get started? Let’s make some pies!
How to Make Great Pie Crust Dough
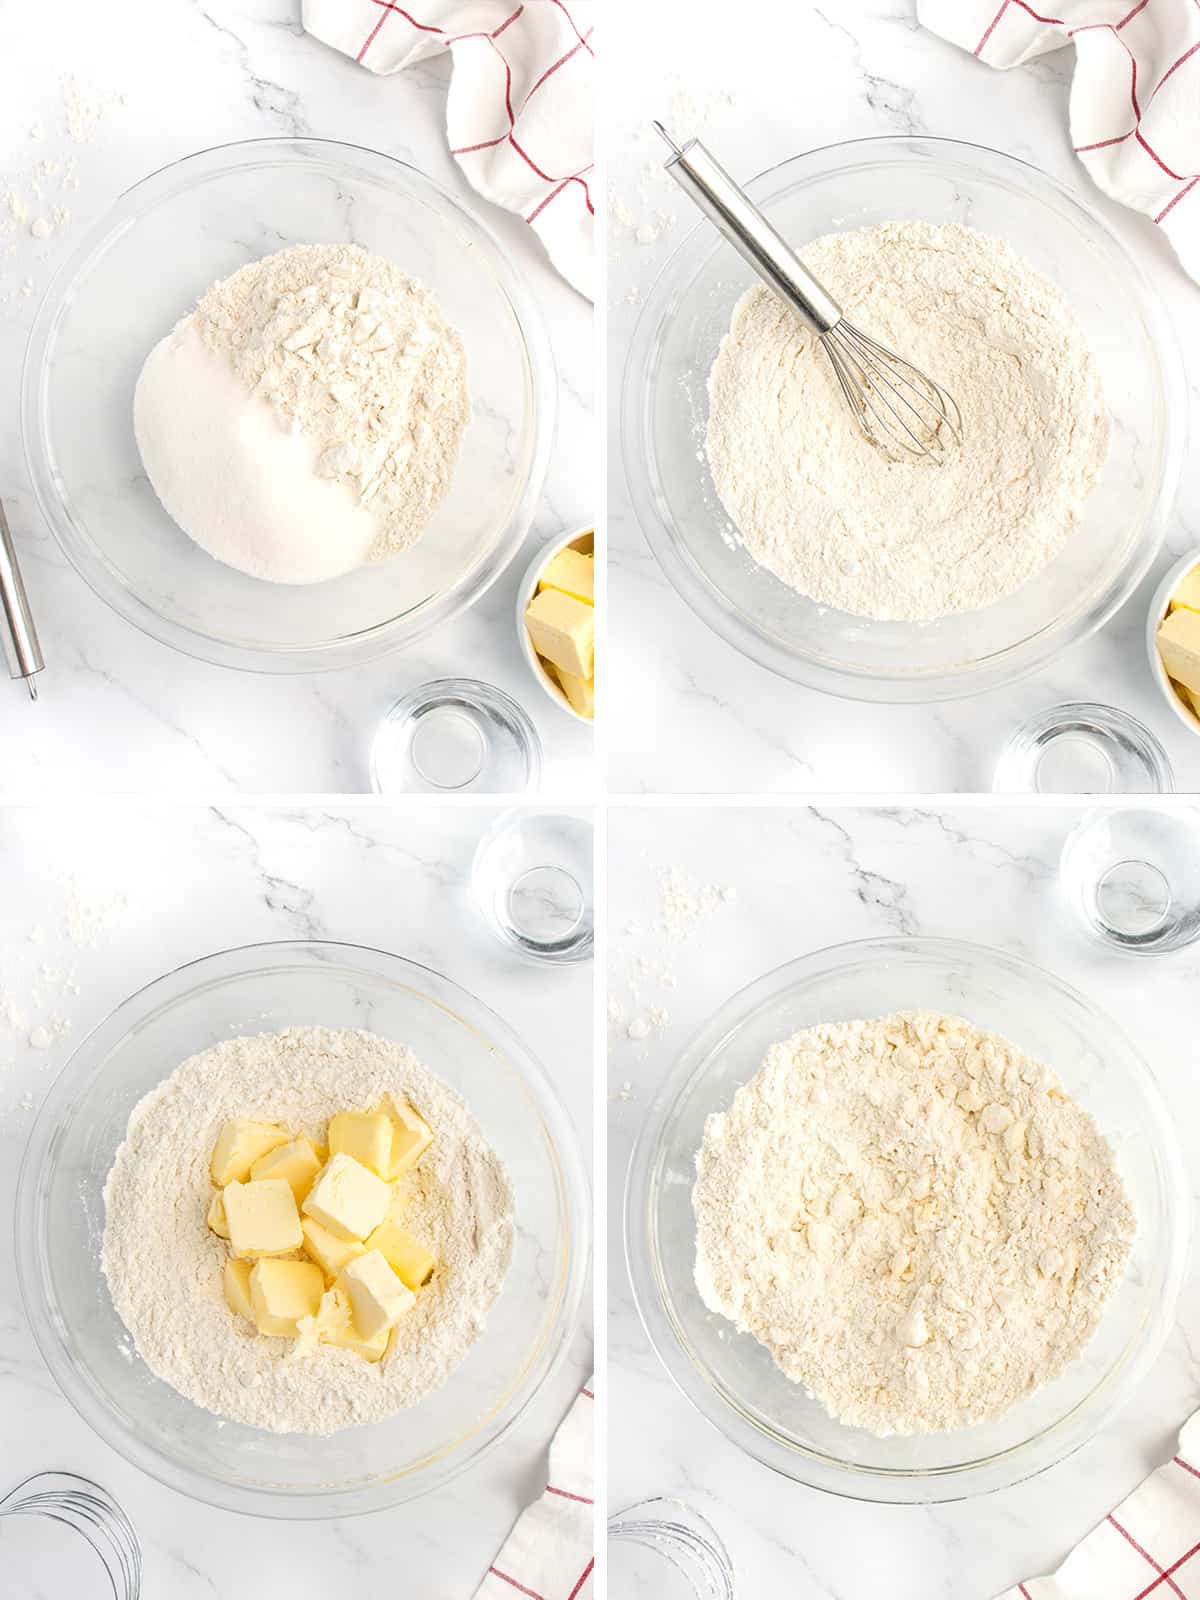
First, generously butter two 9-inch pie plates and set aside. In a large bowl, whisk together the flour and sugar. Cut in the butter with a pastry blender or two knives until the mixture is crumbly. Add the water and knead with your hands until well combined.
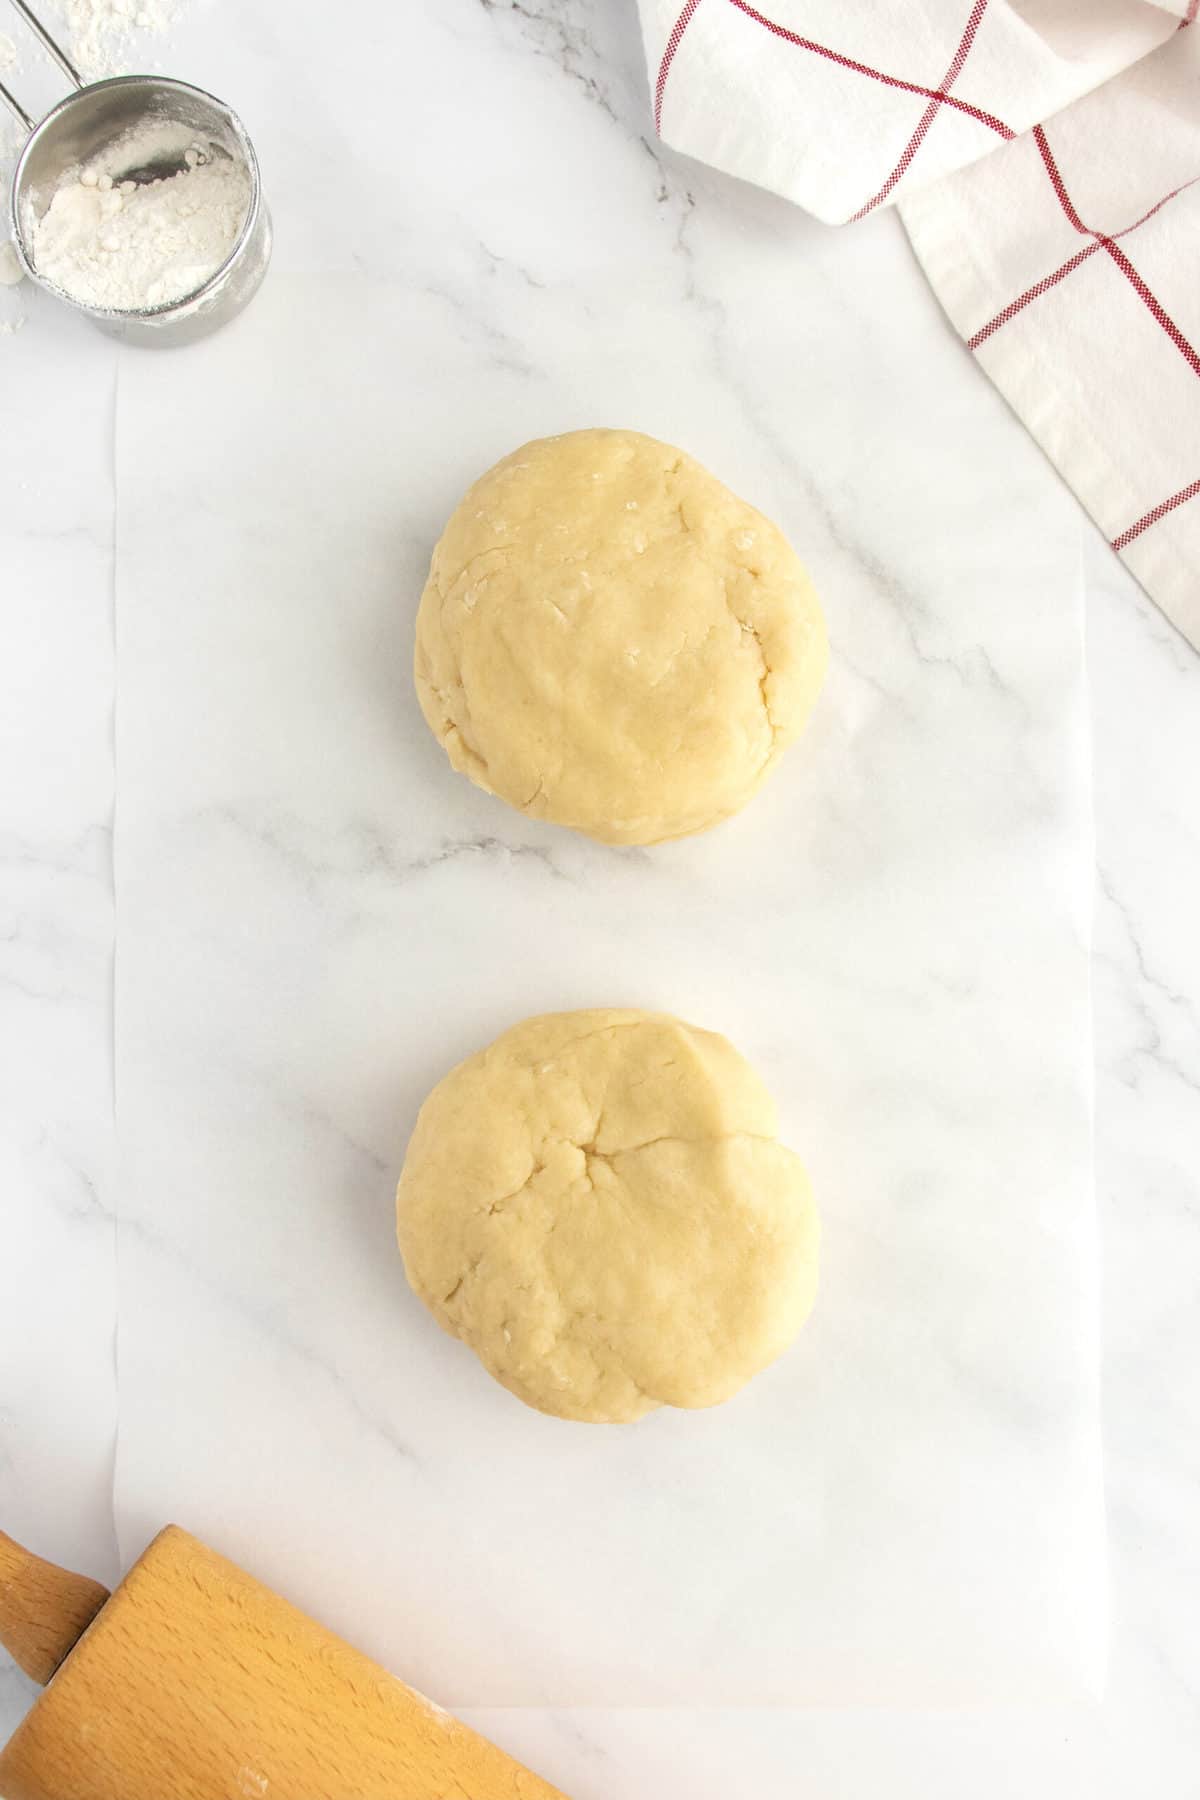
Next, divide dough into two equal balls. Flatten each ball of dough slightly and wrap with plastic wrap. Place in the refrigerator for 30 minutes.
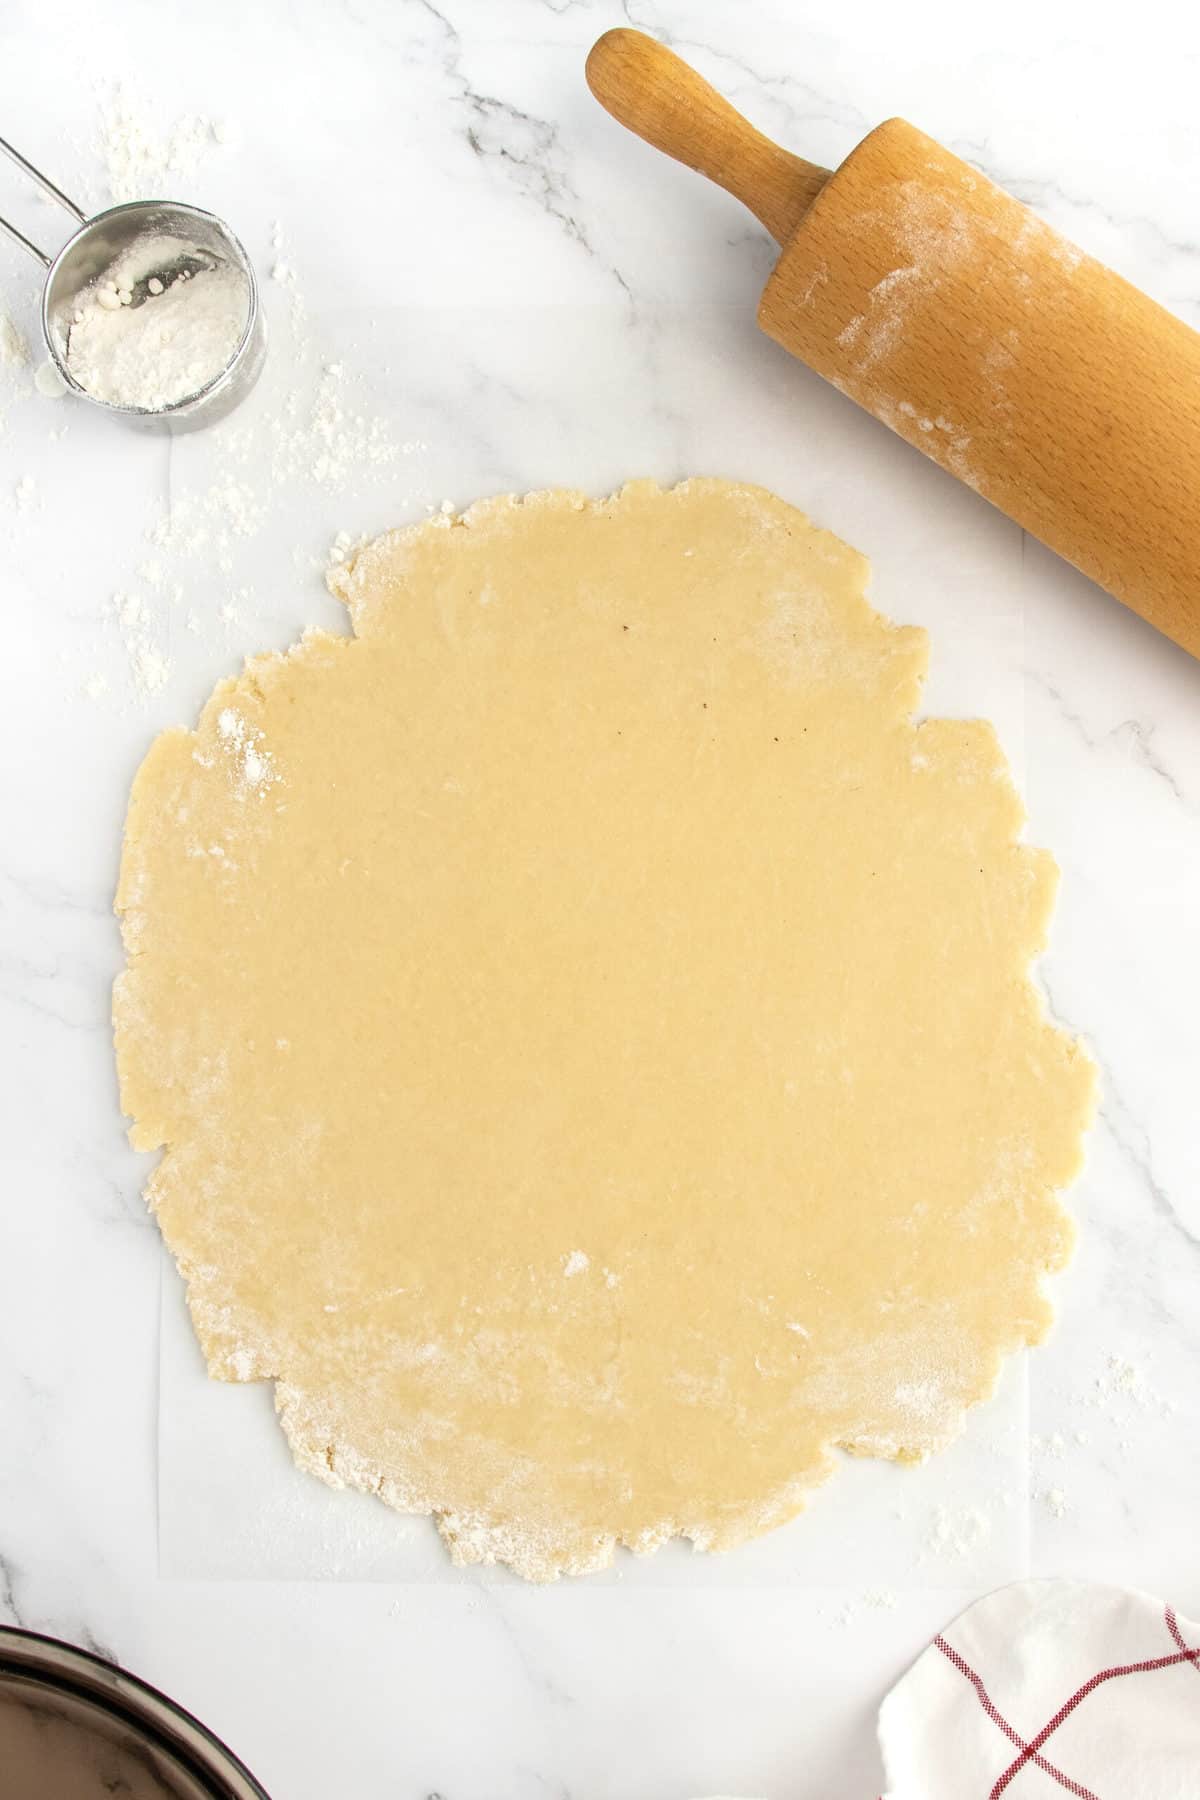
After 30 minutes, remove the dough from the refrigerator and let set while you prep the work surface. On a lightly floured surface, using a floured rolling pin, roll each ball of dough into a disc that is about 1-inch larger than the pie plates. Check for size by inverting the pie plate over the rolled out disc of dough to measure for a 1-inch edge surrounding the pie plate. The disc should be about 1/8-inch thick.
Transfer the dough to the pie plate by gently rolling the dough up around your rolling pin and then placing the rolling pin on one side of the pie plate and rolling it into the plate. Press down and around to make the dough fit the pie plate and hang over the sides.
To decorate your pie crust, follow the directions for the pie crust you wish to make (see detailed instructions below).
Note! If you’re not going to bake the pies right away, you can keep the plastic-wrapped discs of dough in the refrigerator for 2-3 days. You can also freeze them for 2-3 months (just thaw the wrapped dough overnight in the refrigerator before using it).
How to Decorate Picture-Perfect Pies
Pie is as much about how it tastes as how it looks. Half of the fun is in serving a truly gorgeous pie to your family and friends. It can be a little intimidating–especially if it’s your first pie! But don’t worry! I’ve got you! Here are my fool-proof, step-by-step directions for baking fluted crust pies, pinched crust pies, forked crust pies, lattice crust pies and double crust pies. I’ve also included directions for pre-baking and par-baking pie crusts so you can turn out a picture-perfect pie!
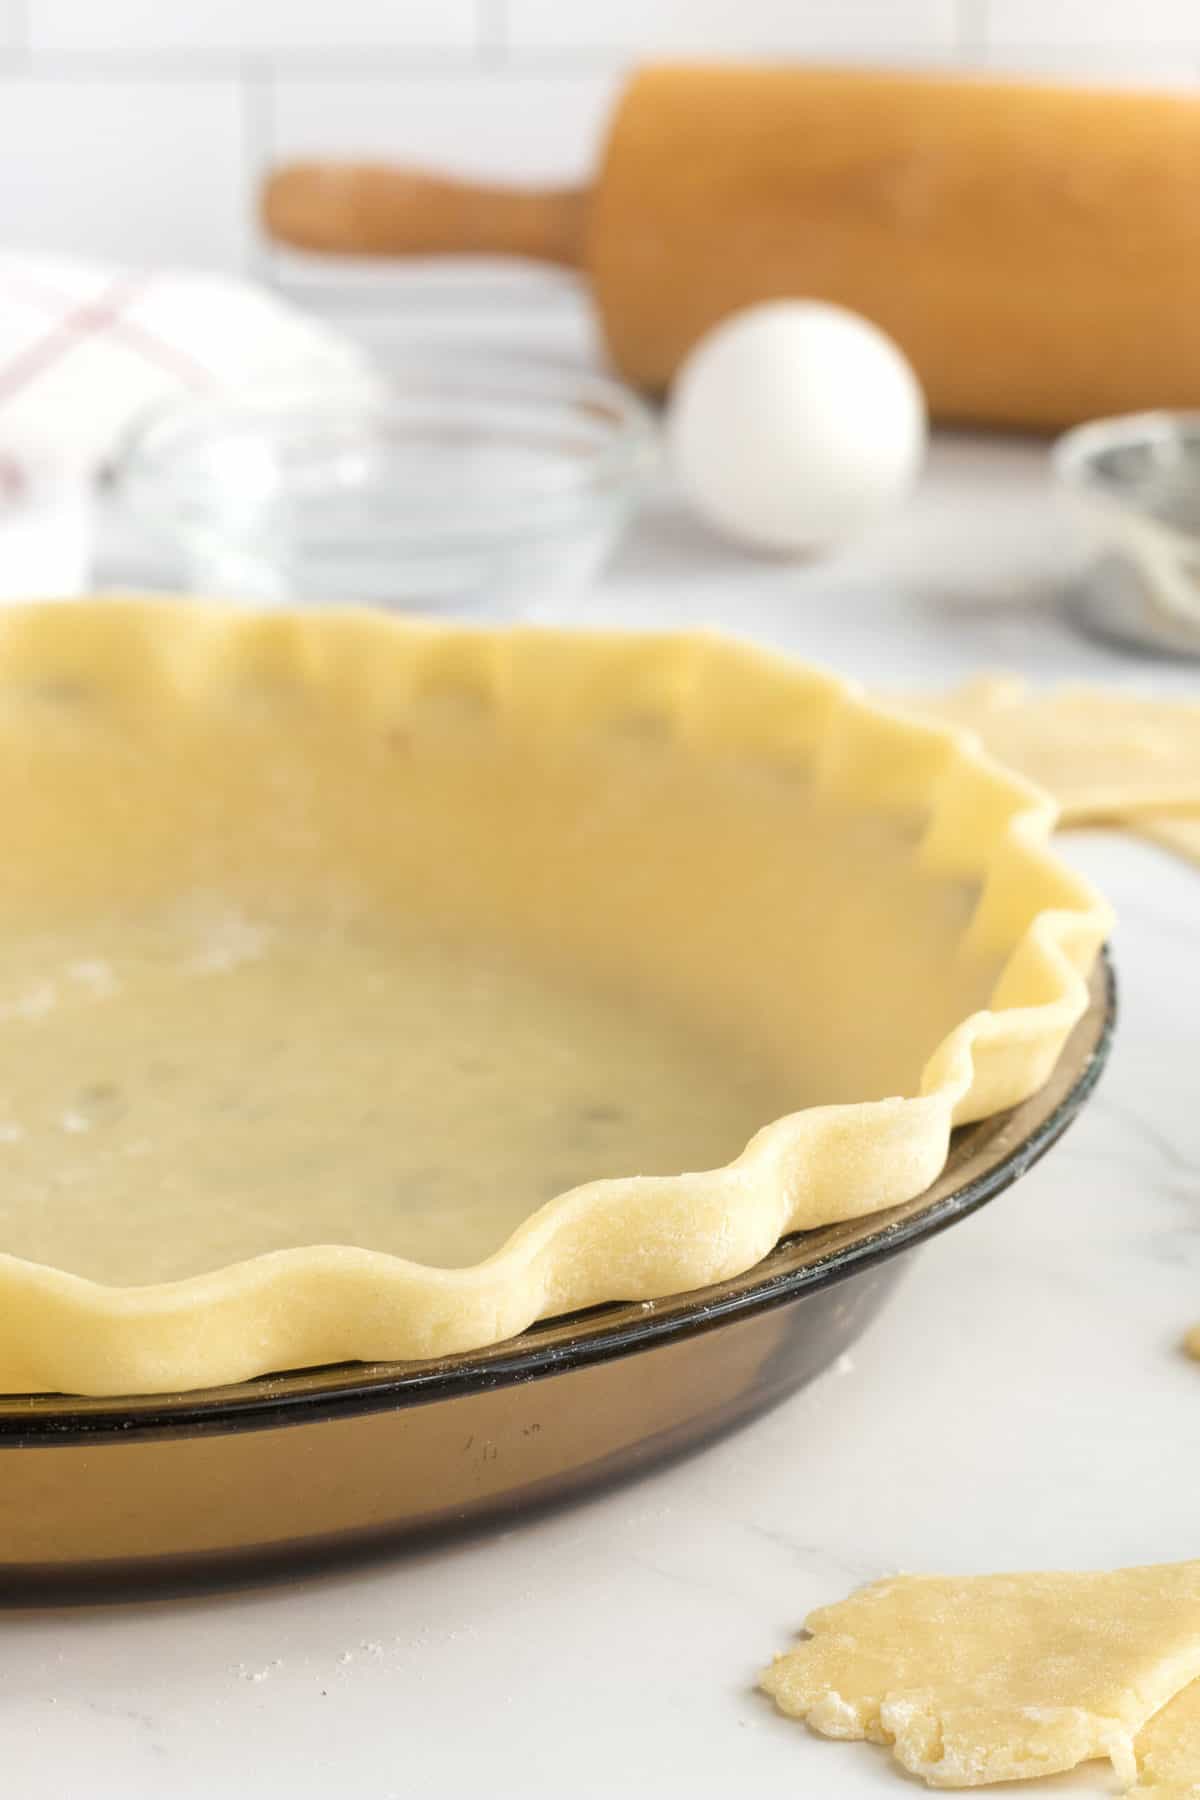
Fluted Crust
Trim the dough even with the edge of the pie plate and form a stand-up rim that extends up by ½-inch. Place your thumb and index finger about 1 inch apart on the outside of the raised crust edge. With your other index finger, push the dough from the inside of the pie plate toward the outside to form a fluted edge. Continue all around the edge of the dough.

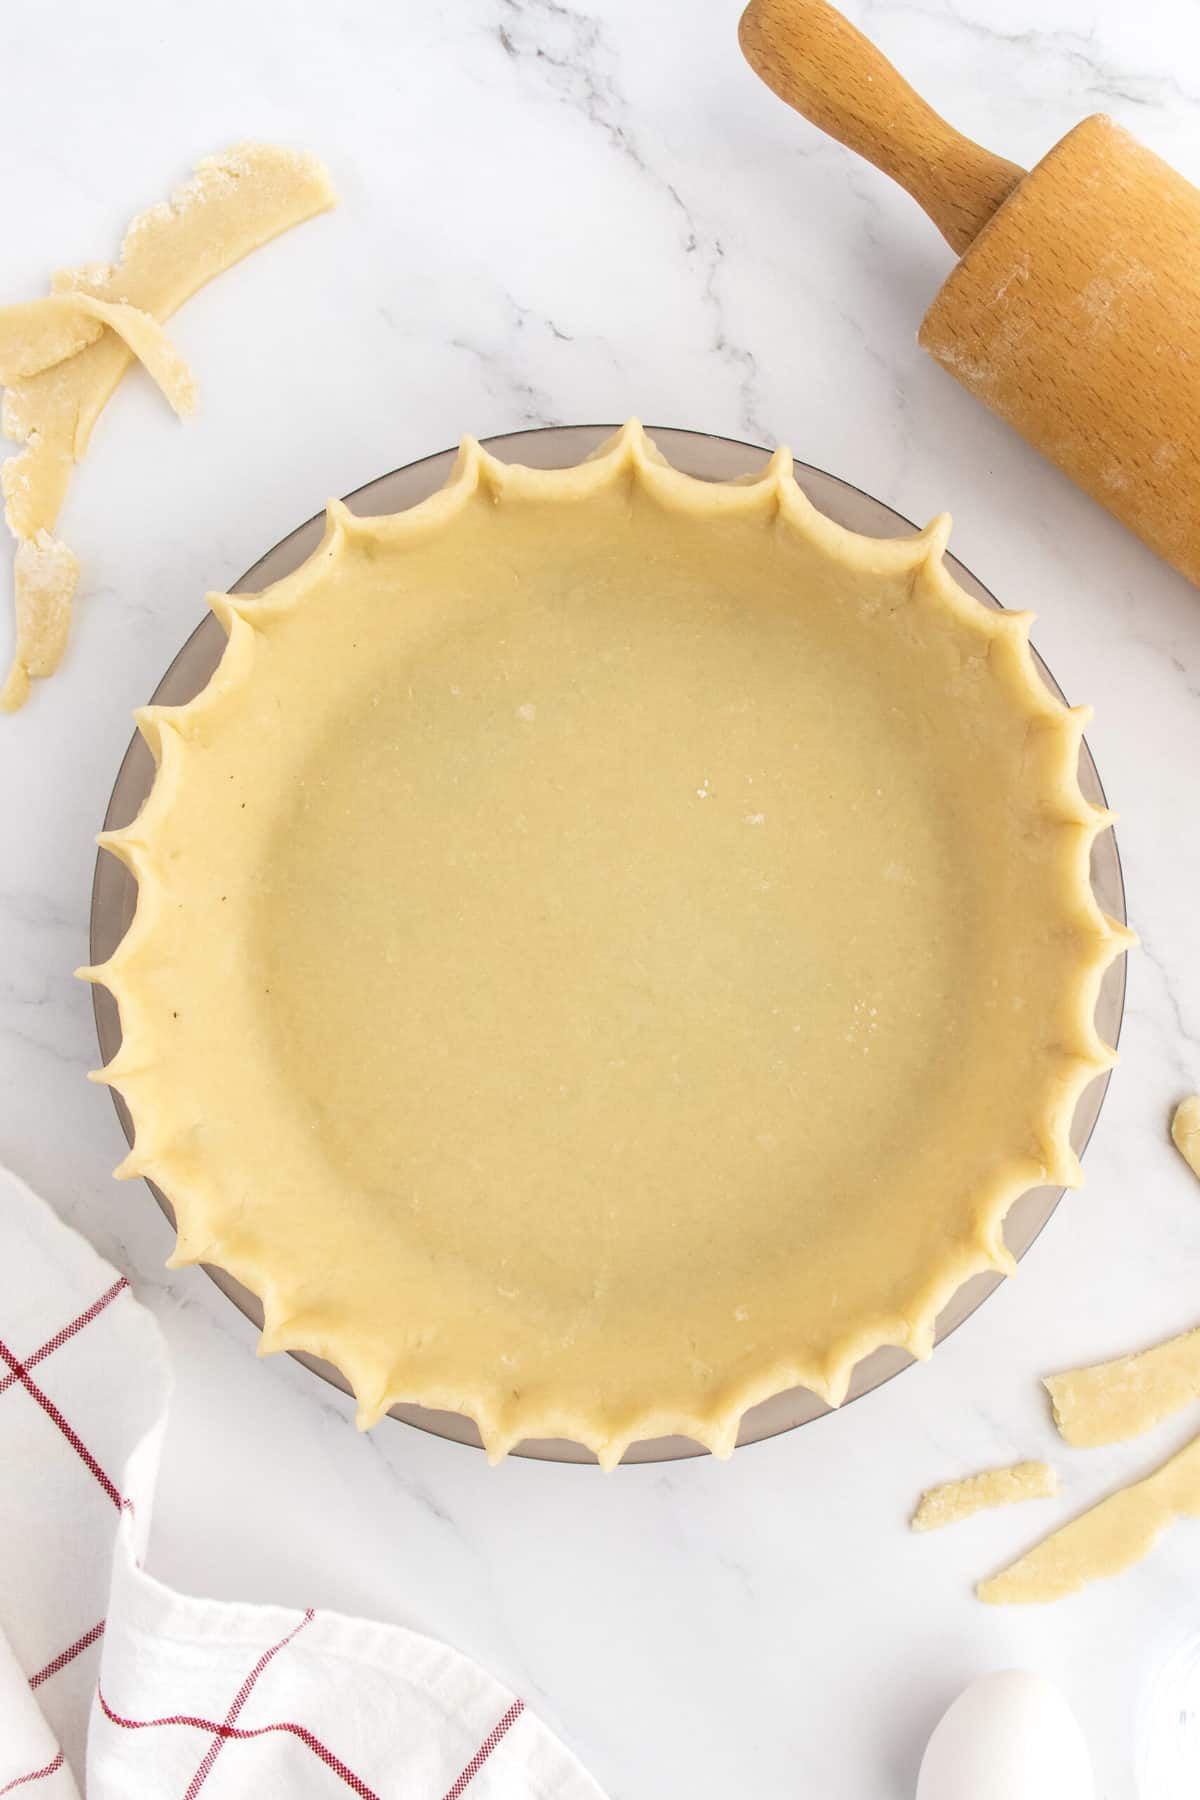
Pinched Crust
Trim the dough even with the edge of the pie plate and form a stand-up rim with the dough that extends up by ½-inch. Place your thumb and index finger about 1-inch apart on the outside of the raised dough edge. With your other index finger, push the dough from the inside of the pie plate toward the outside and then pinch your other index finger and thumb together to form a point. Continue all around the edge of the dough.
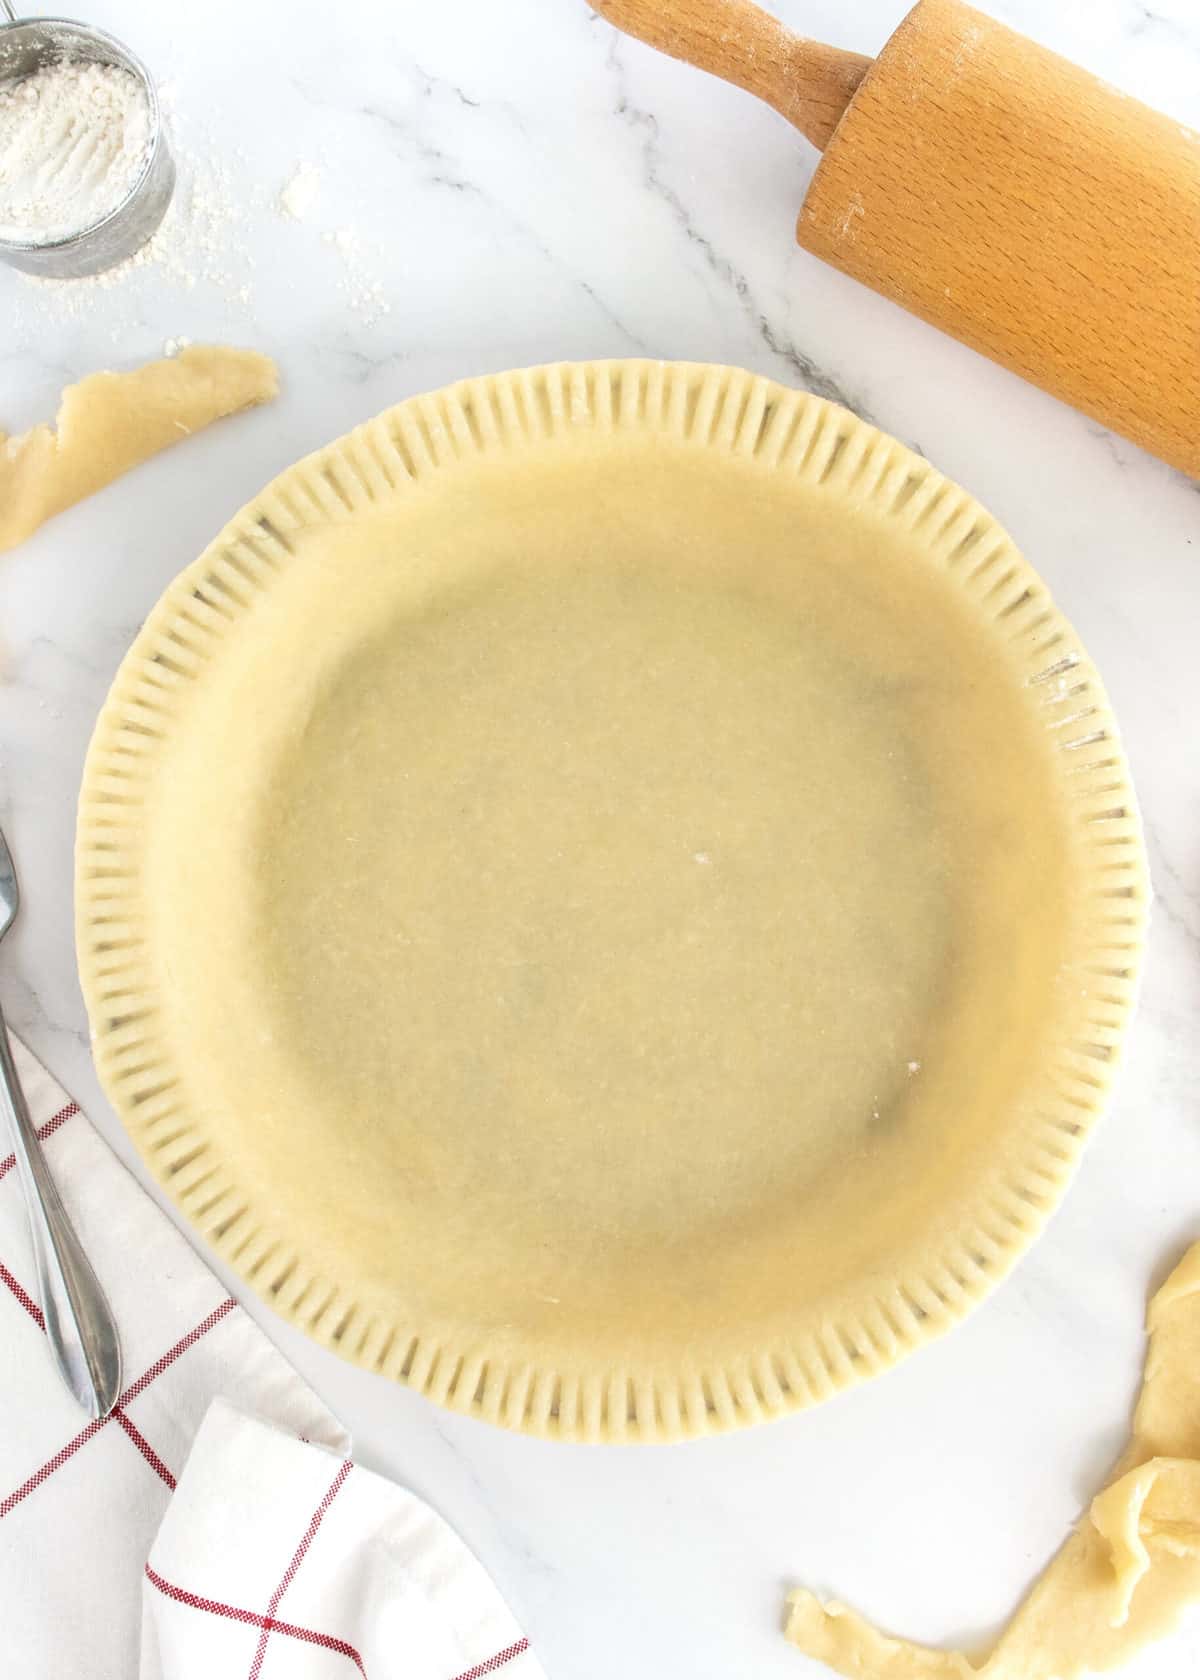
Forked Crust
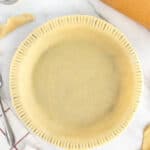
Trim the dough even with the edge of the pan. Dip fork tines in flour, then press the fork straight onto the crust edge, without pressing all the way through the dough. Continue along the edge of the dough, pressing right next to the first set of marks. Continue all around the edge of the dough.
Lattice Crust
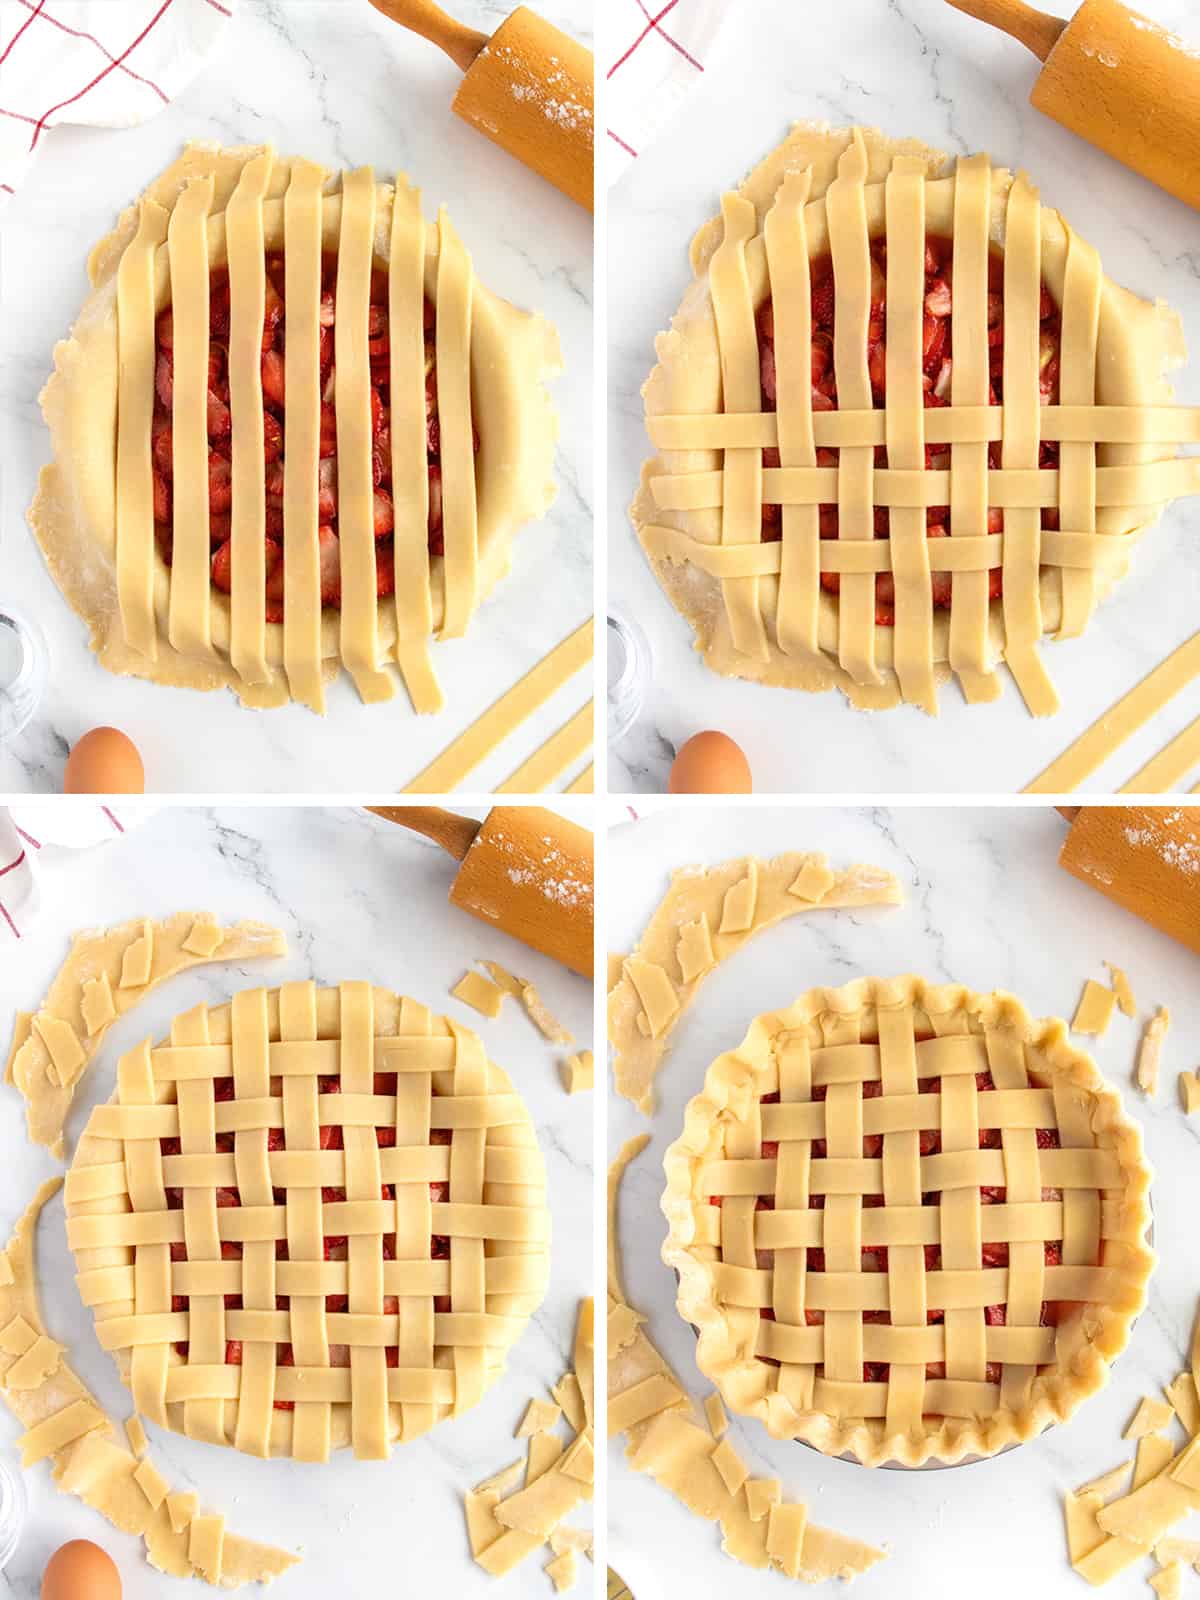
How to make a lattice crust: After placing the first crust in the pie plate and filling it, cut the second rolled out crust into about 1/2-inch wide strips (you should get about 12 strips). Lay half of the strips across the top of the pie filling, leaving about 1/2-inch between each strip. Try to place the longer strips in the middle of the pie.
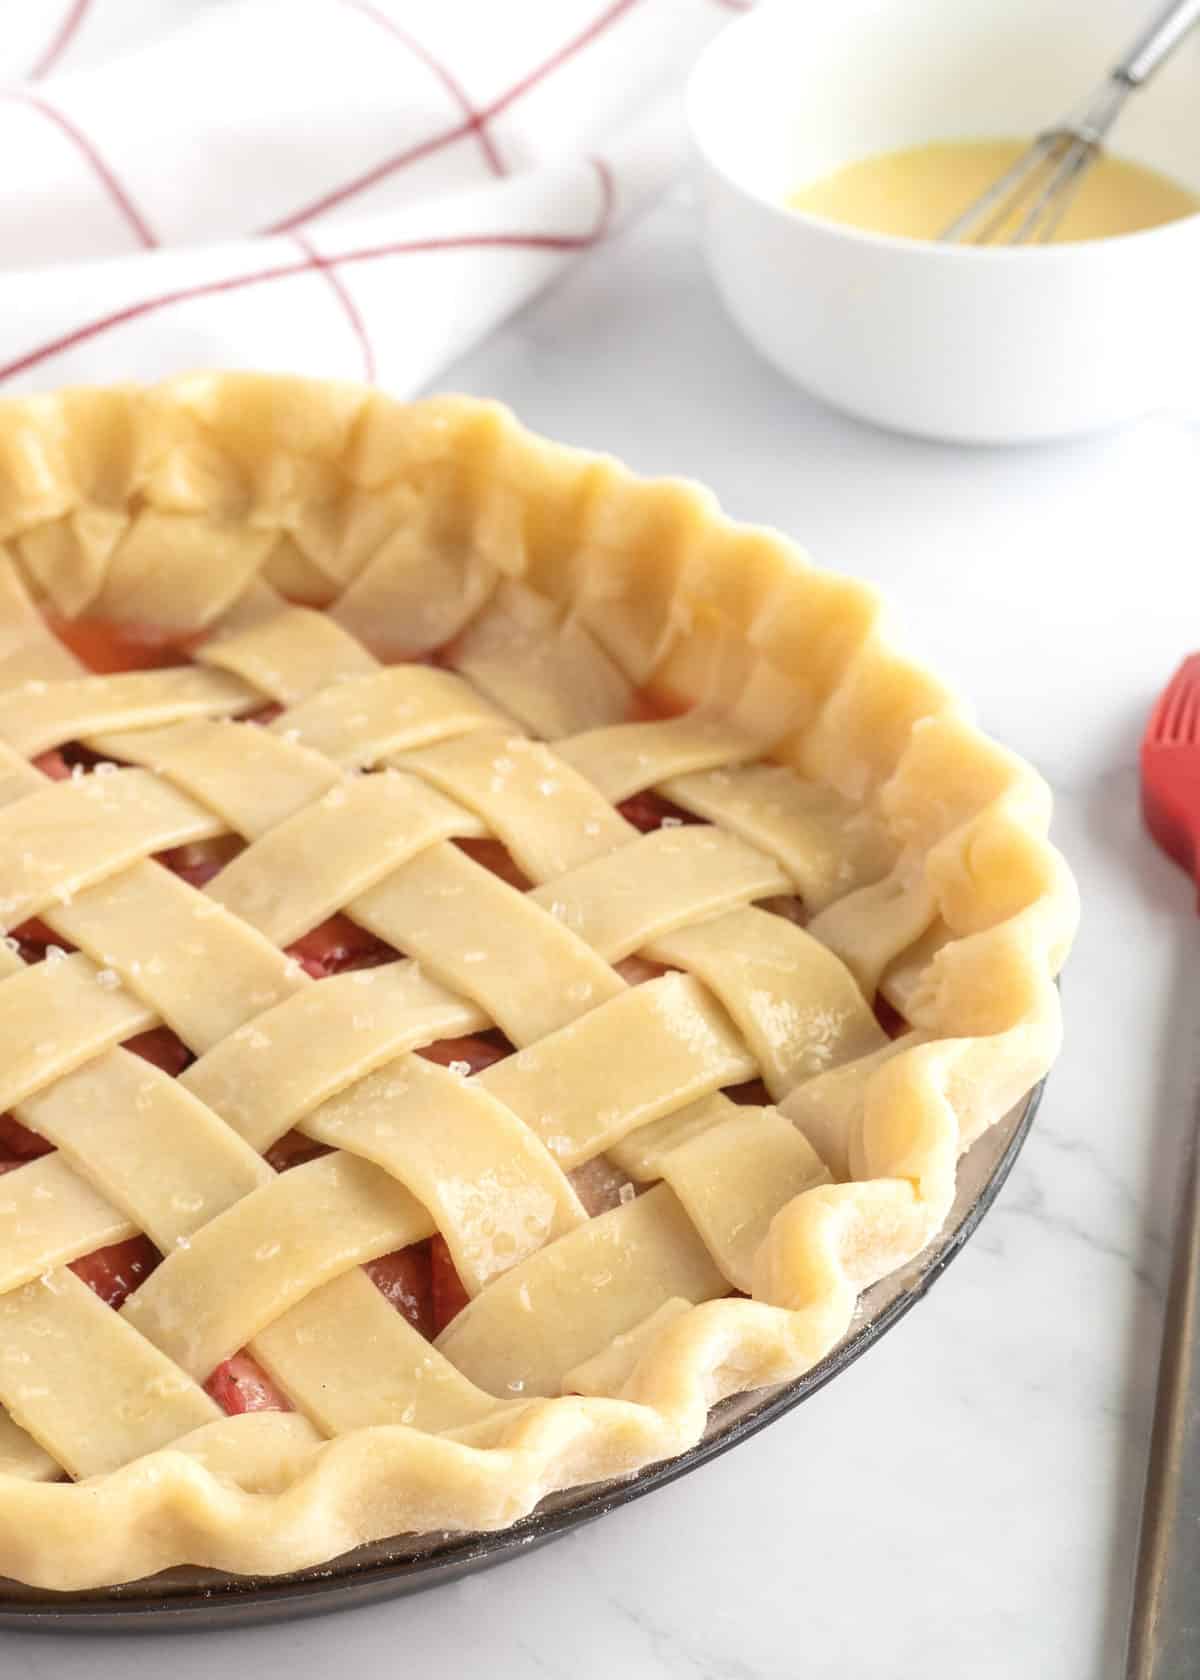
Weave the remaining strips, one at a time, with the first set of strips to form the lattice. Start on one side of the pie and work your way to the other side, spacing each strip about 1/2-inch apart. Trim the ends of each strip even with the edge of the pie plate. Fold over the hanging dough from the first crust to cover the ends of the strips. Then flute, pinch or fork the edges to seal and secure them.
Finally, in a small bowl, whisk together the egg and 1 tablespoon water. Brush over the top and edges of the lattice or double crusted pie. Sprinkle evenly with sugar.
Double Crust
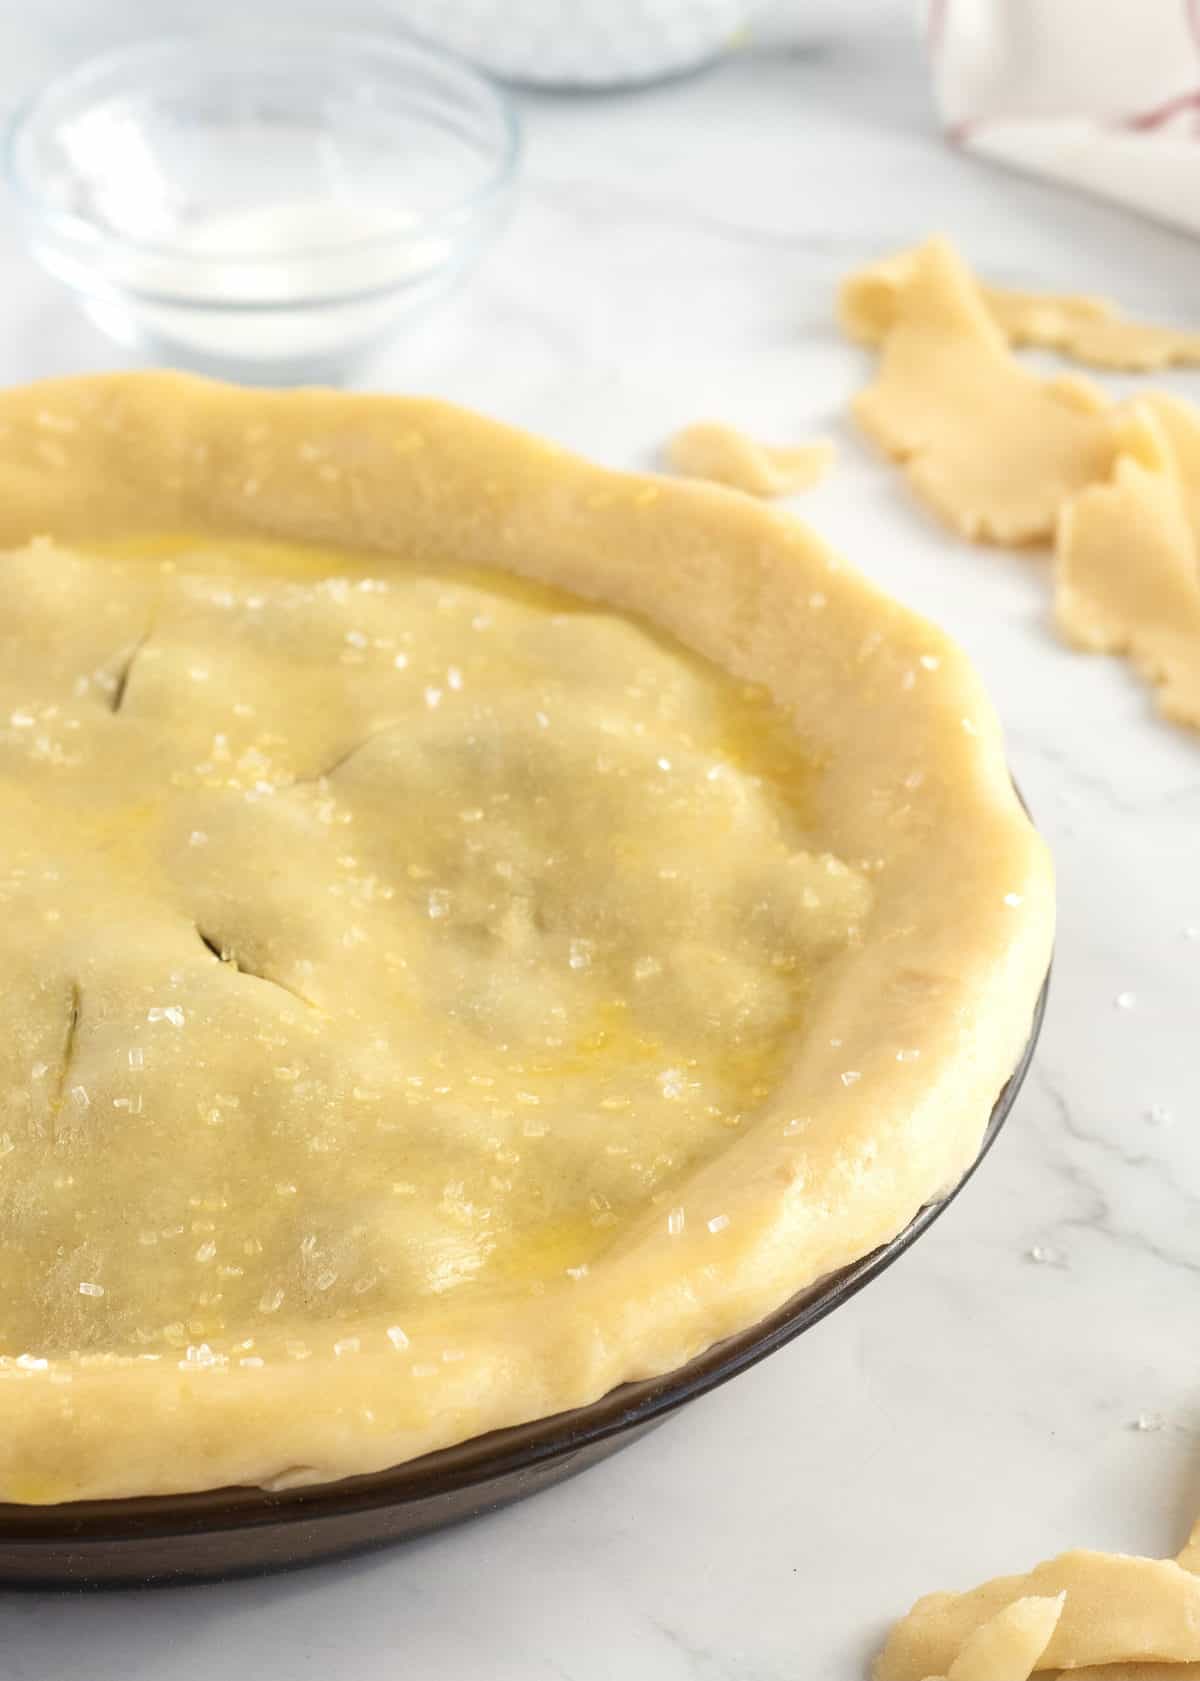
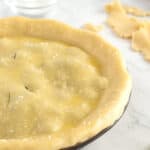
Fill the dough in the pie plate with desired filling. Place the other disc of dough over the top of the filling in the pie plate. Trim the dough all around the rim of the pie plate and then decorate (flute, pinch or fork) the crusts together or just gently press the top and the bottom crusts together around the edges. With a sharp knife, make six small slits in a circle pattern in the middle of the top crust.
Finally, in a small bowl, whisk together the egg and 1 tablespoon water. Brush over the top and edges of the lattice or double crusted pie. Sprinkle evenly with sugar.
How to Bake a Pie Crust
Once the pie crust is ready, cover the fluted, pinched or forked pie crust with plastic wrap and place it in the refrigerator while you prepare the filling or for at least 30 minutes. While the pie crust is chilling, preheat the oven to 375°F*. For lattice and double pie crusts, follow recipe instructions.
Note! *oven temperature and bake time will vary depending on pie recipe.
Once the pie is filled and ready to bake: Place pie on a rimmed baking sheet and bake for about 20 to 30 minutes, depending on the recipe. Remove from the oven and cover the edges of the crust with foil or a silicone pie protector to protect them if turning to brown. Return to the oven for 20 to 30 minutes longer or until golden brown.
How to Pre-Bake a Pie Crust (for cream pies, no-bake fillings, etc.):
Prepare and transfer one disc of pie dough to the pie plate by gently rolling the dough up around your rolling pin and then placing the rolling pin on one side of the pie plate and rolling it into the plate. Press down and around to make the dough fit the pie plate and hang over the sides. Decorate the pie crust (flute, pinch or fork).
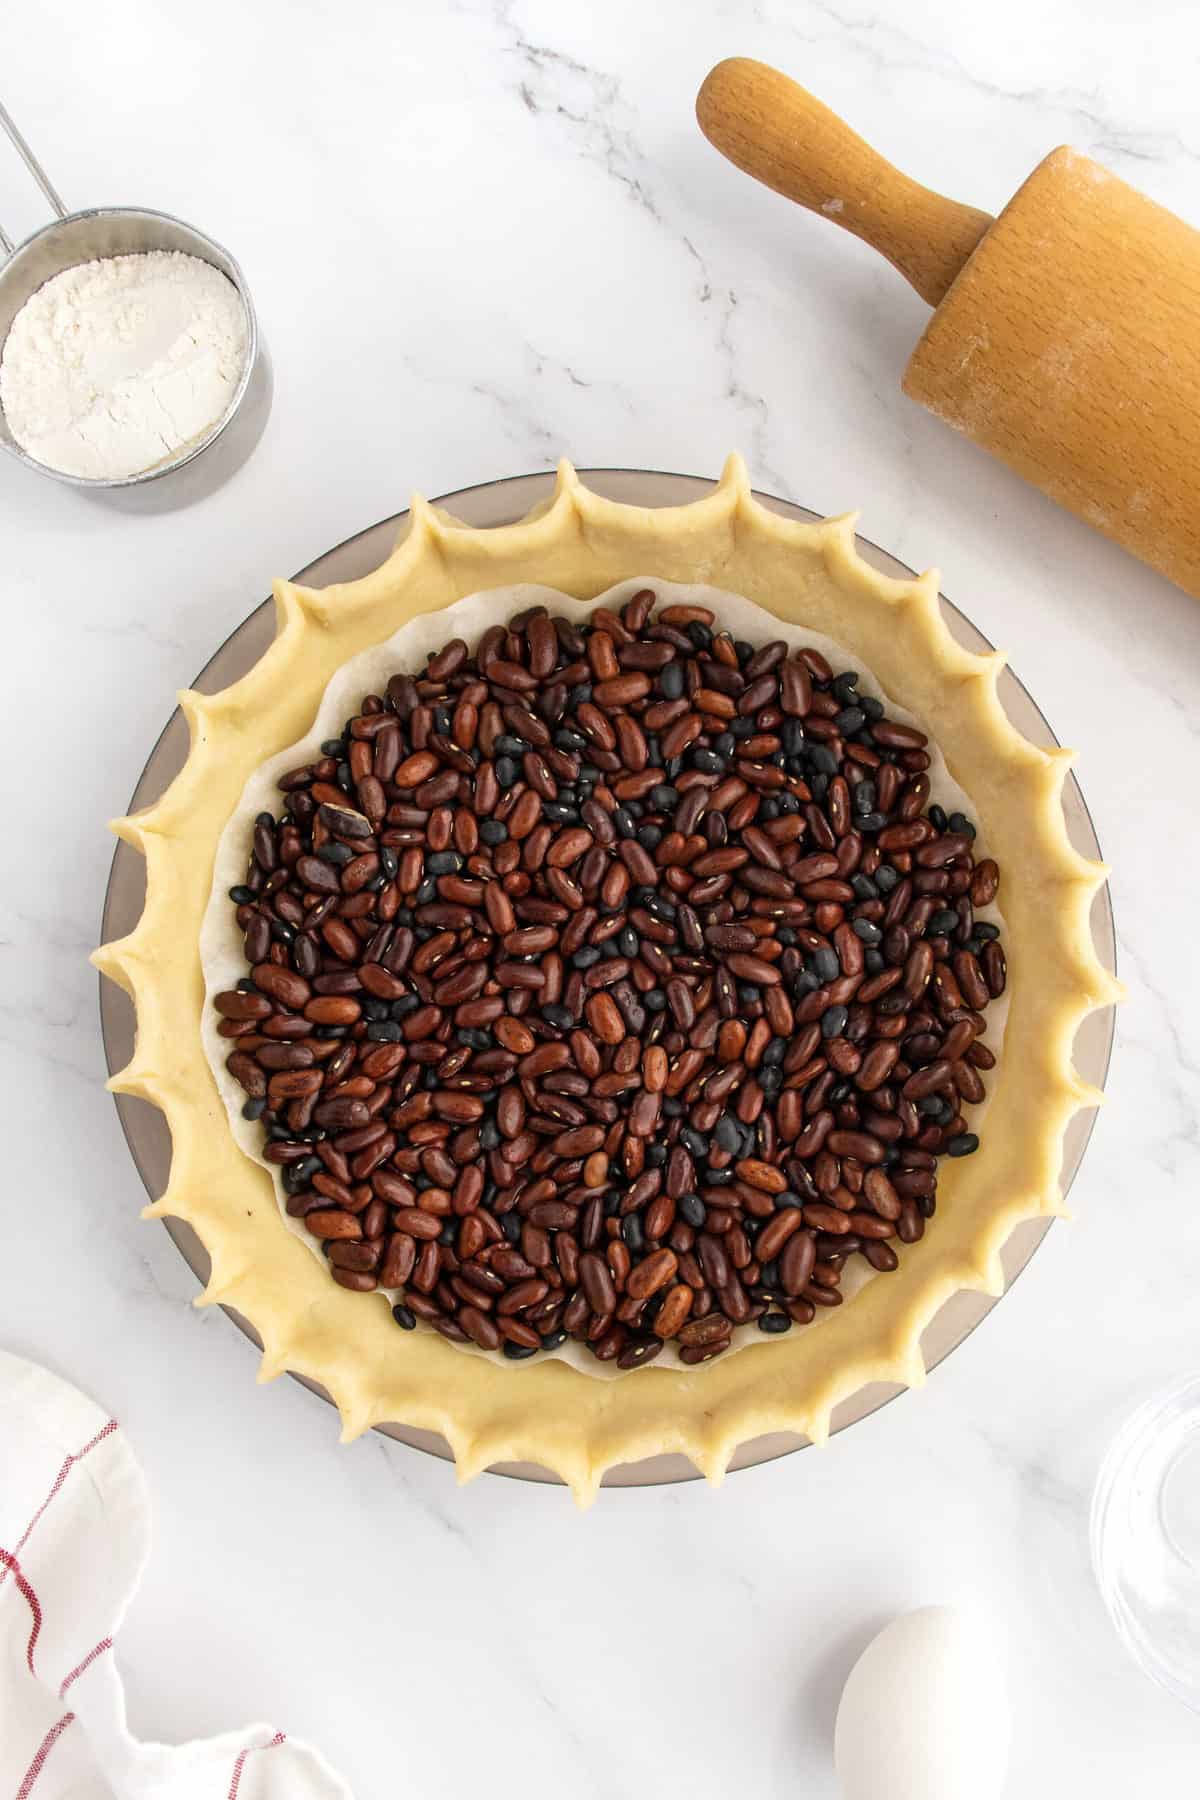
Line the bottom and up just the sides of the crust with parchment paper or foil, being sure to push the parchment paper against the crust. Fill the crust with dried beans or pie weights.
Cover with plastic wrap and refrigerate for 30 minutes. While the pie crust is chilling, preheat the oven to 375°F. Place pie crust on a baking sheet and bake on the middle rack of the oven for 15 minutes or until the edges of the crust start to turn golden brown. Remove from the oven and let set while you make the egg wash. To make the egg wash, whisk together one egg and 1 tablespoon of water in a small bowl.
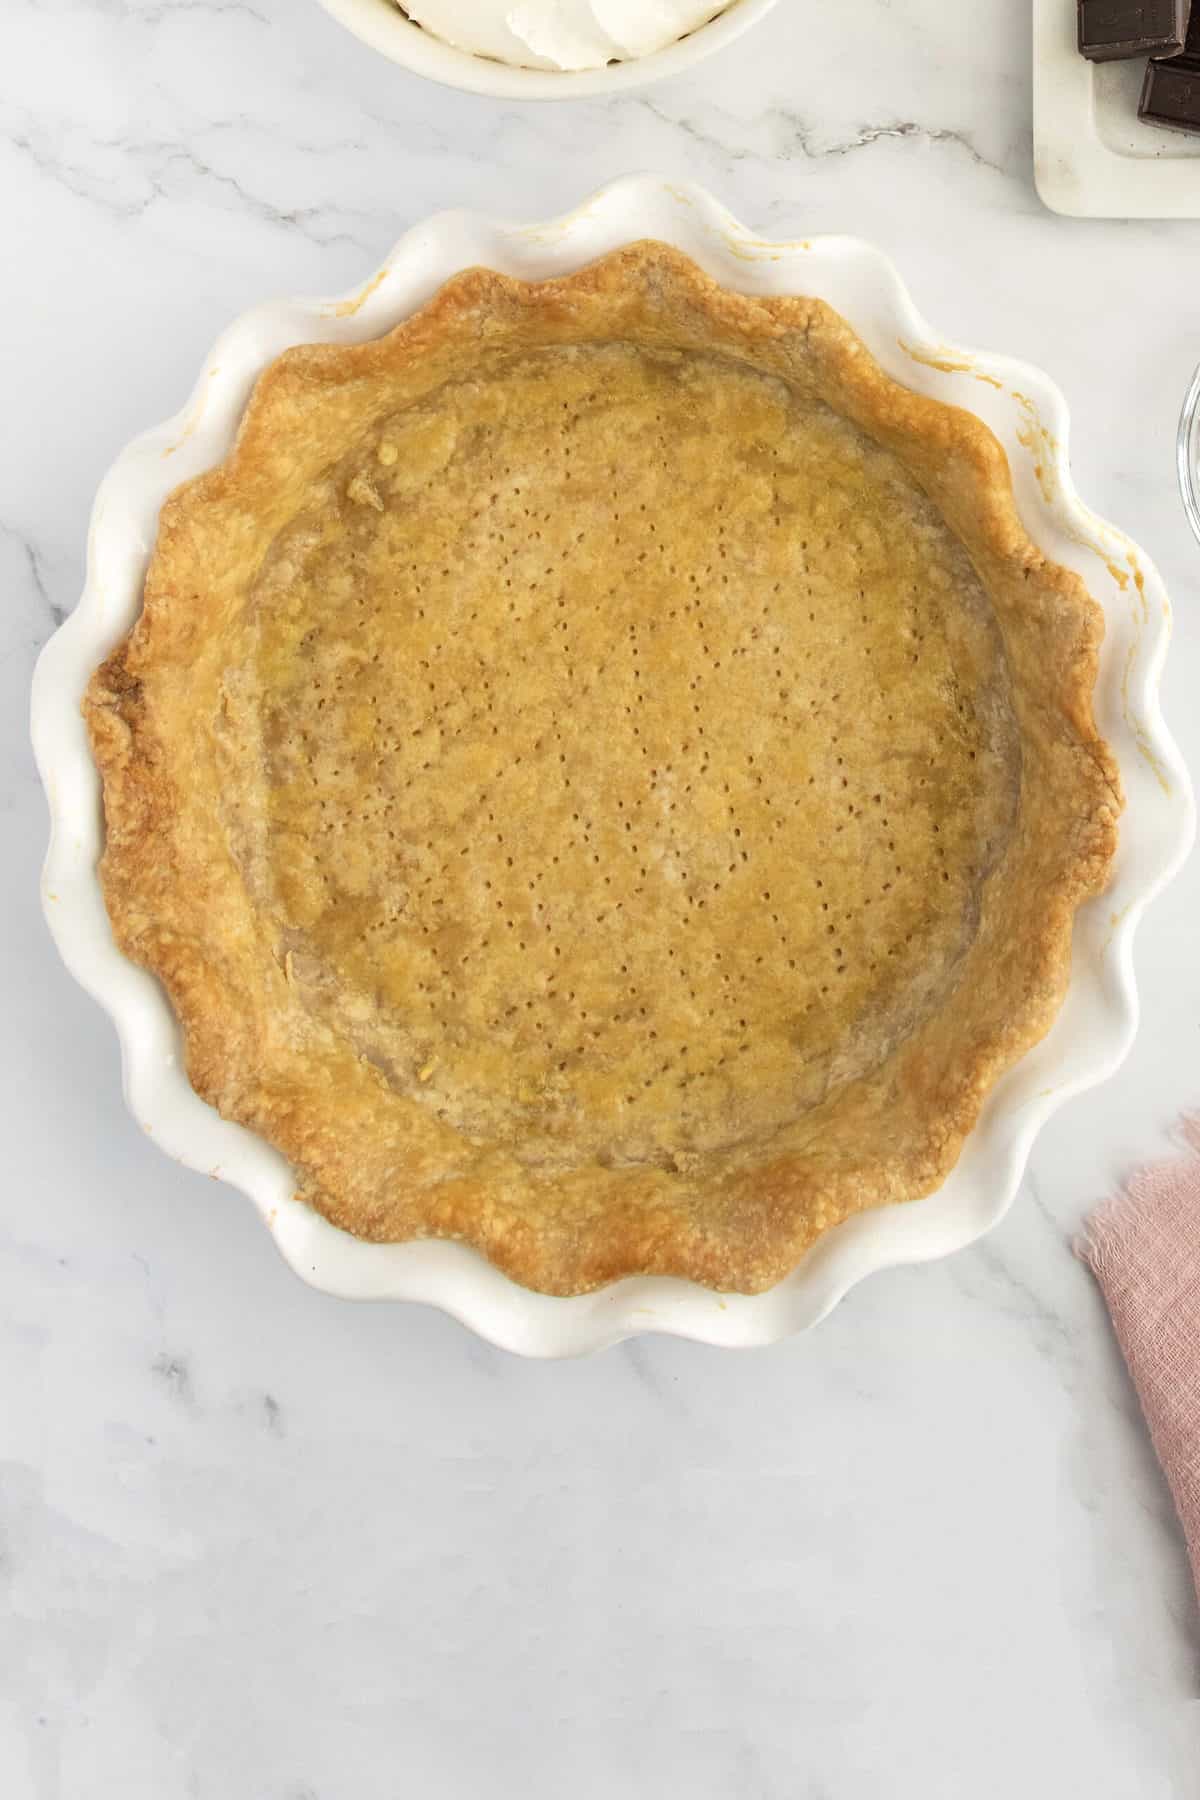
Carefully lift the parchment paper and pie weights from the pie crust. Pierce the bottom of the crust with a fork (this prevents air pockets from forming while the crust finishes baking). Brush the crust all over with the egg wash.
Return the crust to the oven and bake until the egg wash is dry and shiny and the bottom of the crust has turned golden brown, about 10-15 minutes longer. Cool crust completely before filling.
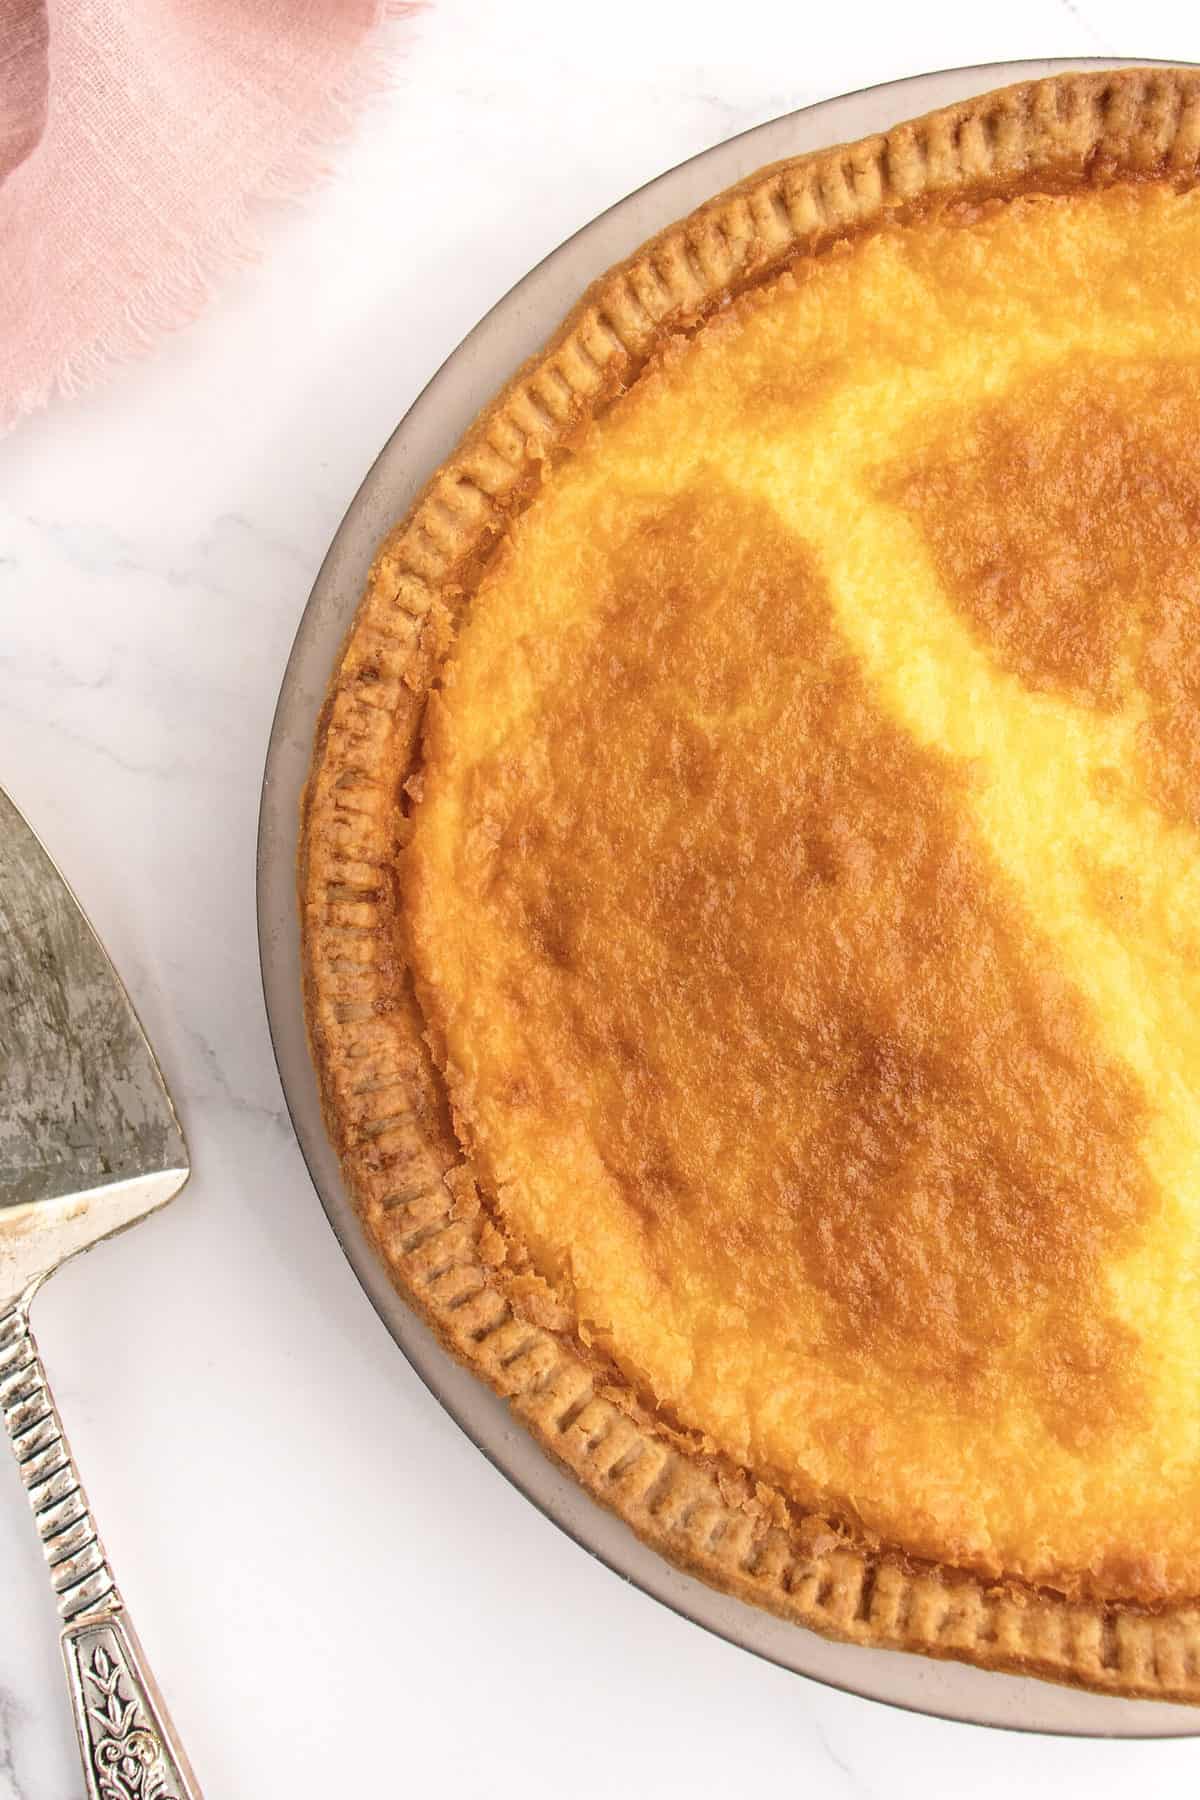
How to Par-Bake a Pie Crust (for quiche, custard pie, etc.)
Prepare and transfer one disc of pie dough to the pie plate by gently rolling the dough up around your rolling pin and then placing the rolling pin on one side of the pie plate and rolling it into the plate. Press down and around to make the dough fit the pie plate and hang over the sides. Decorate the pie crust (flute, pinch or fork).
Line the bottom and up just the sides of the crust with parchment paper (or foil), being sure to push parchment paper against the crust. Fill the crust with dried beans or pie weights.
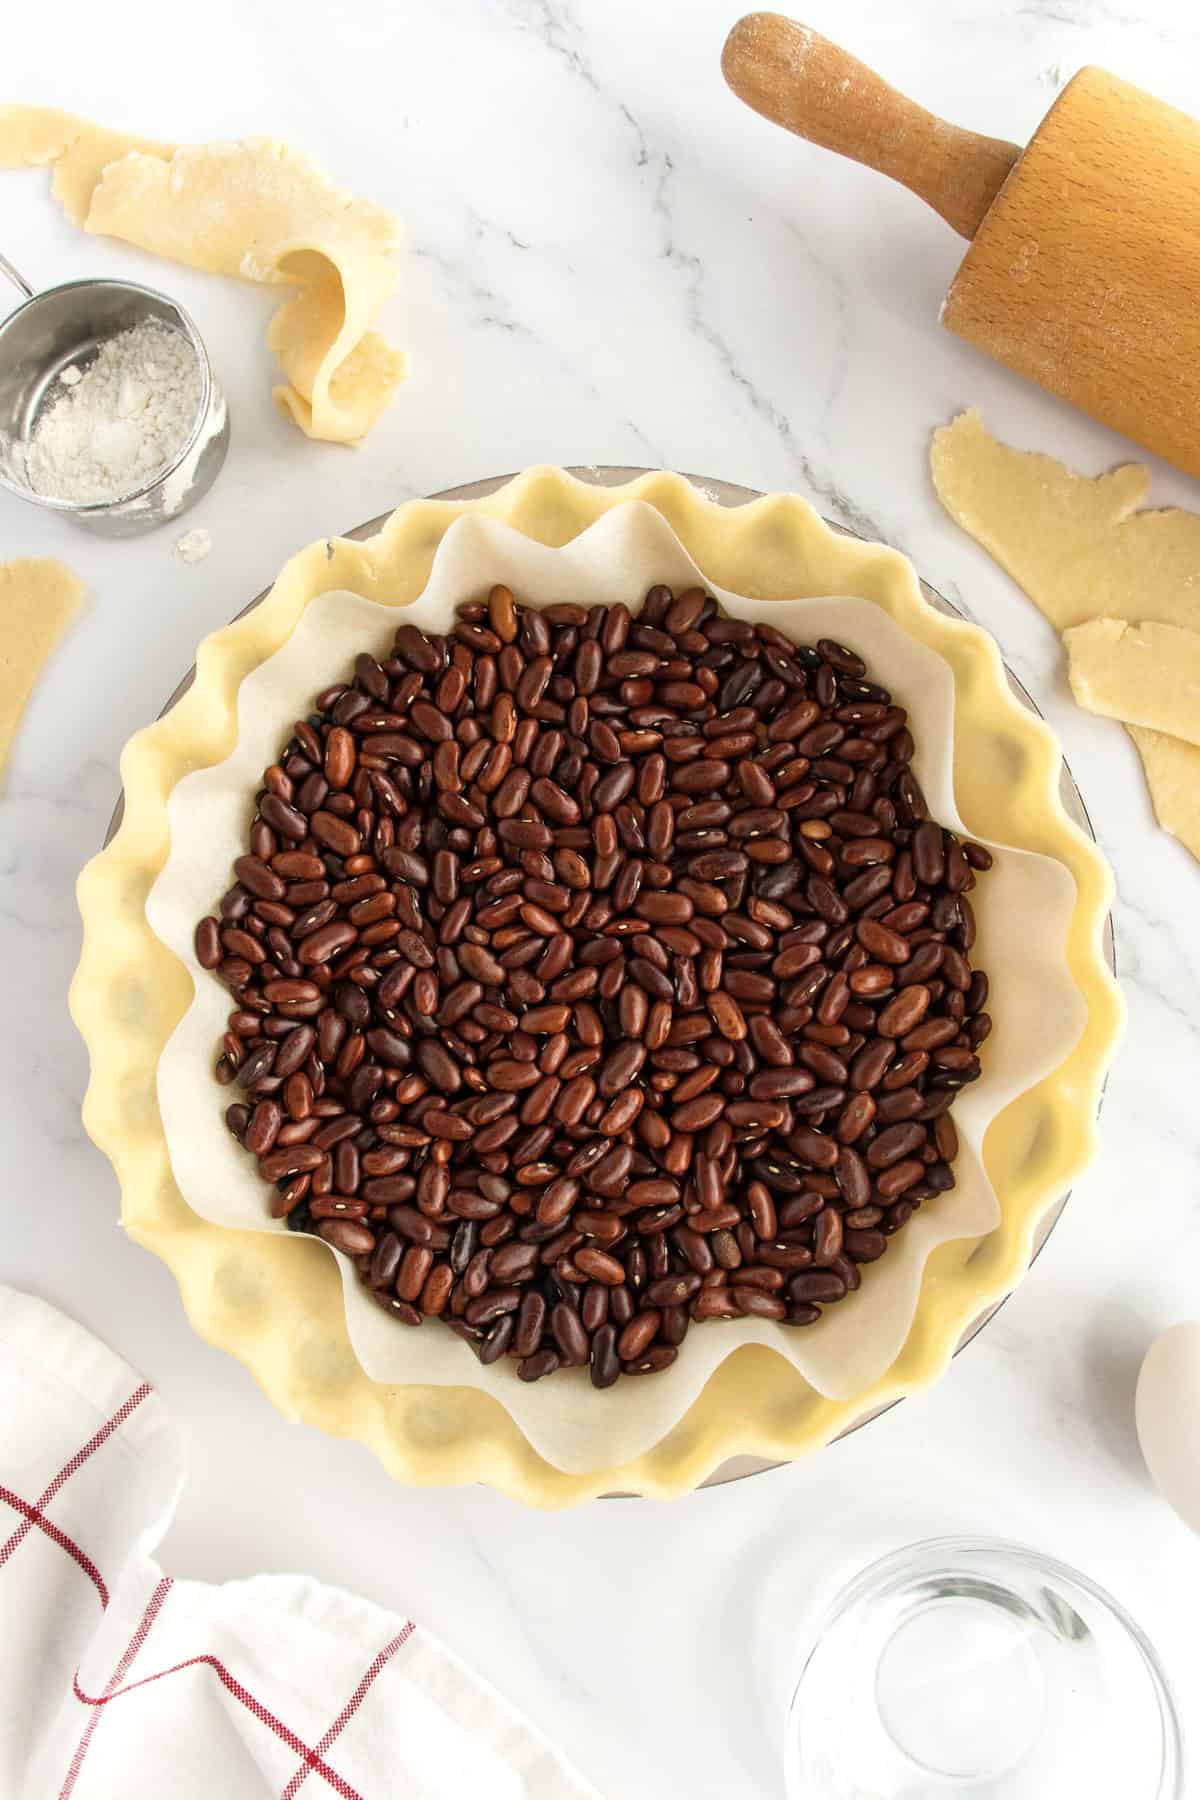
Cover with plastic wrap and refrigerate for 30 minutes. While the crust is chilling, preheat the oven to 375°F. Place pie crust on a baking sheet and bake on the middle rack of the oven for about 10 minutes or until the edges of the crust are just starting to brown. Remove pie from the oven and let set while you make the egg wash. To make the egg wash, whisk together one egg and 1 tablespoon of water in a small bowl.
Carefully lift the parchment paper and pie weights from the pie crust. Pierce the bottom of the crust with a fork (this prevents air pockets from forming while the crust finishes par-baking). Brush the crust all over with the egg wash.
Return the crust to the oven and bake until the egg wash is dry and the bottom of the crust is just starting to brown, about 5 minutes. Remove the crust from the oven and proceed with filling the pie (for a quiche or custard pie) to then finish baking it.
More Pies You’re Sure to Love
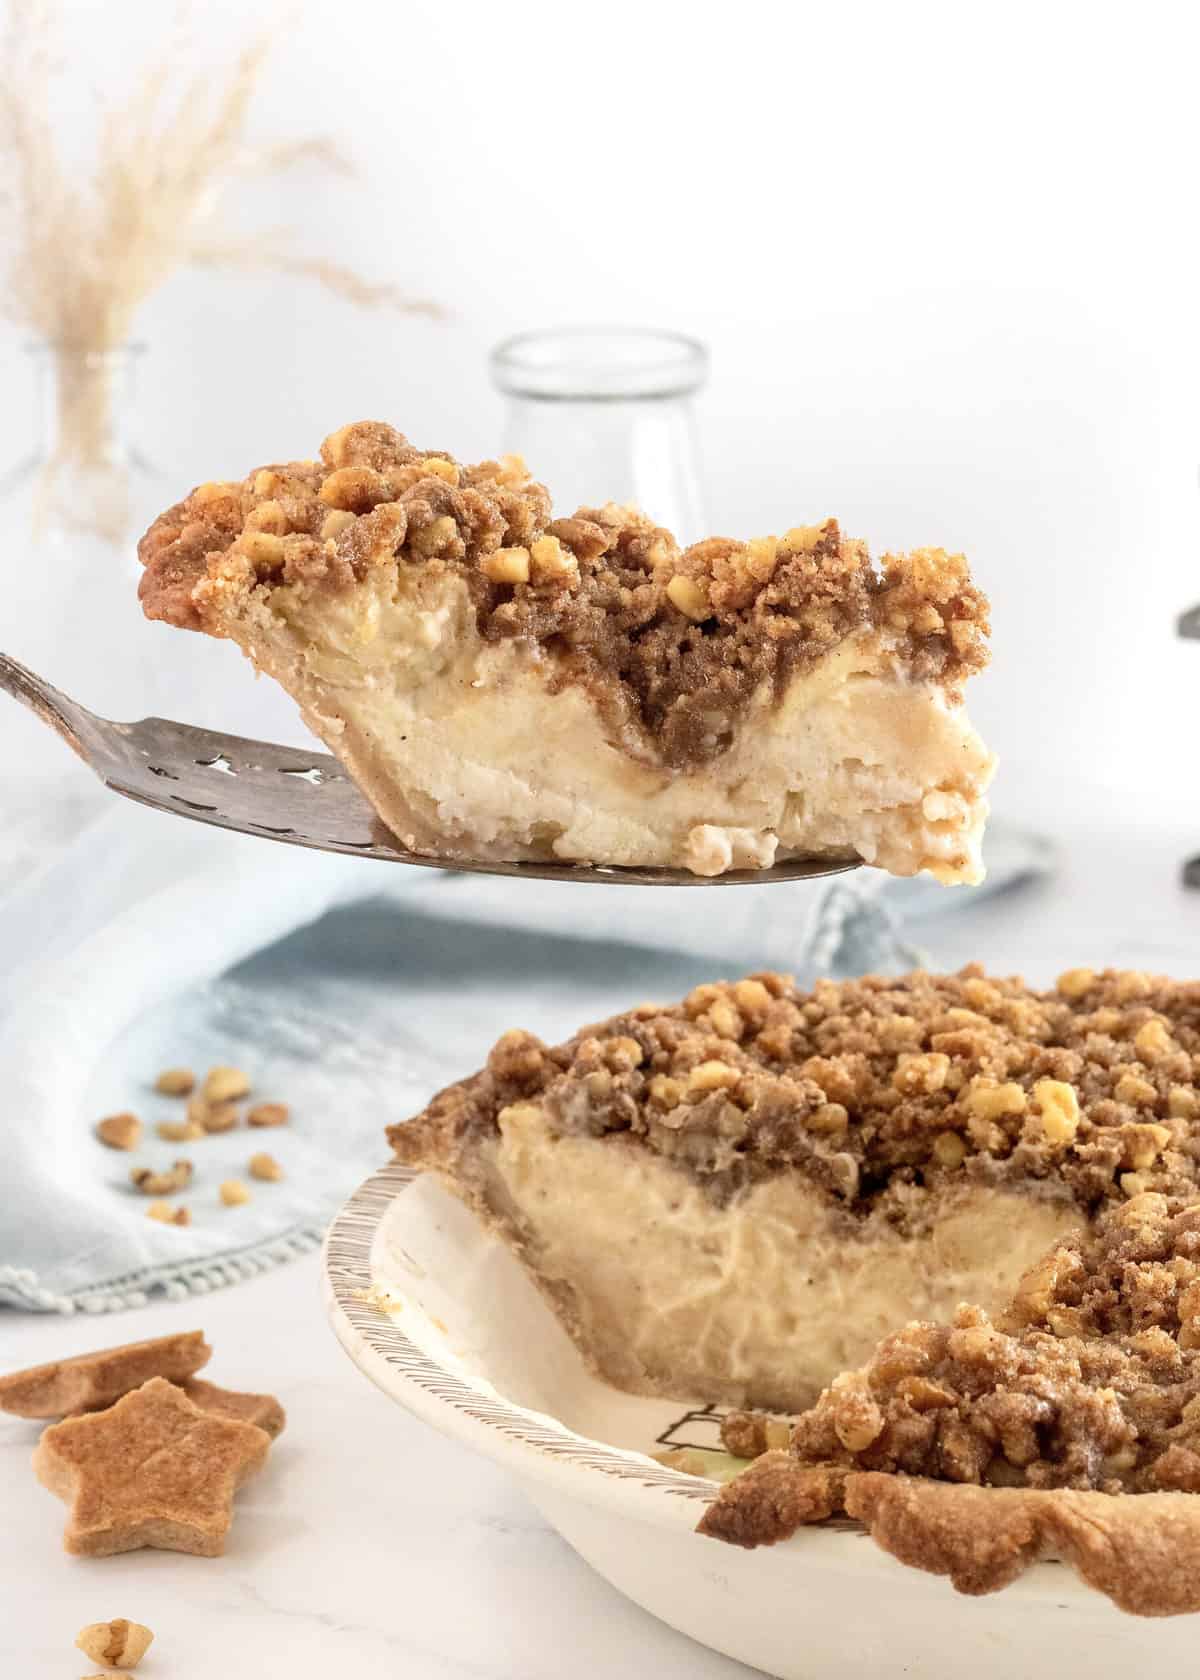
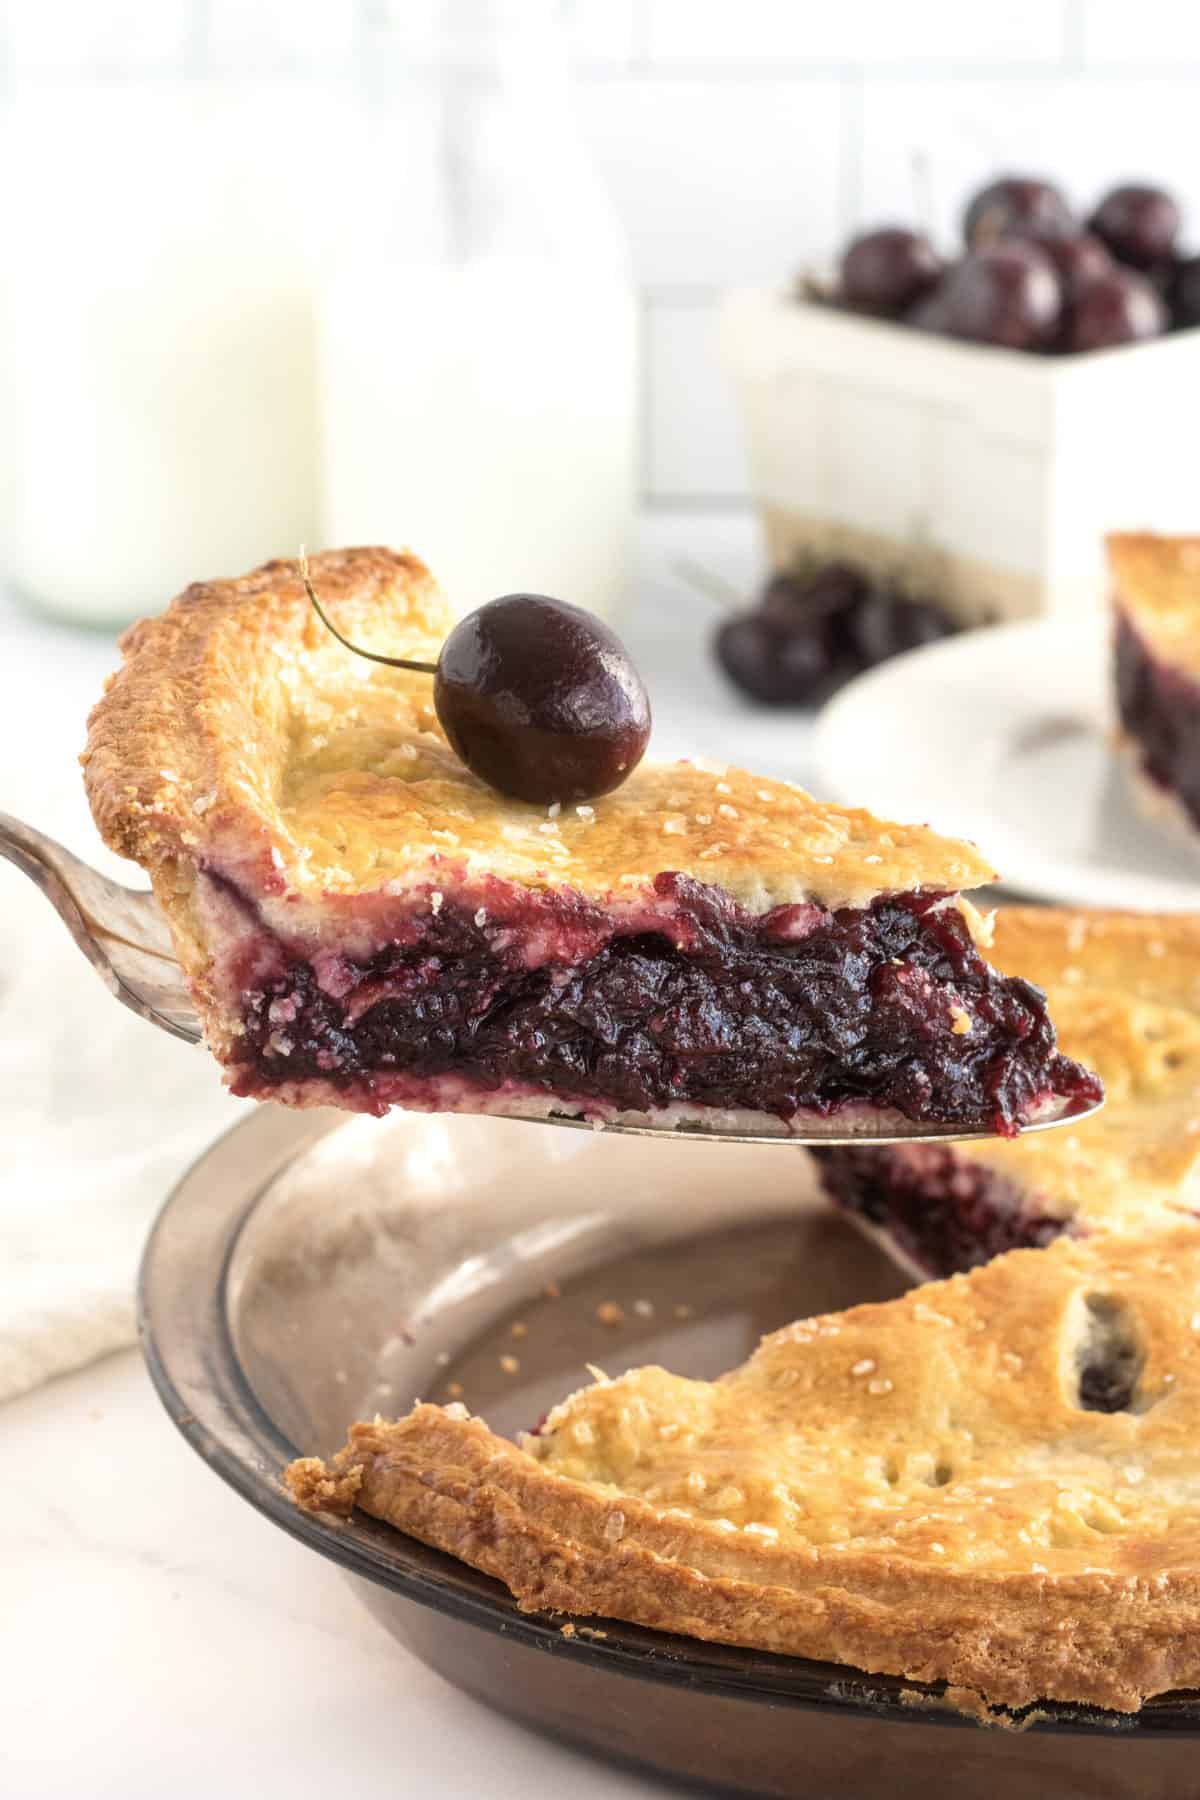
A scratch baked Pumpkin Cream Pie that really is as “easy as pie” and would be the perfect ending to your Thanksgiving feast! A stunning double-crusted Fresh Cherry Pie for a show-stopping summer dessert! Deliciously sweet apples are mounded in a flaky crust and topped with an irresistible nutty streusel. It’s homemade goodness at its very best in Mom’s Special Apple Pie!
Whew! I think we’ve covered it all! I hope my Complete Guide to Pie Crust helpful! If you bake a pie using these tips, be sure to snap a picture and share it with me or tag me on Instagram @thebakermama so I can see.  I love seeing how inspired and creative y’all get with the recipes I share. Enjoy!
xoxo,

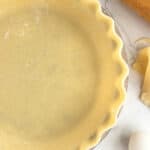
Fluted Pie Crust
- Yield: 2 (9-inch) pie crusts
Description
Step-by-step guide to from making picture-perfect fluted pie crust.
Ingredients
- 2 and 1/2 cups all-purpose flour
- 1/2 cup granulated sugar
- 1 cup (2 sticks) unsalted butter, cold & cubed
- 1/4 cup cold water
Instructions
- Generously butter two 9-inch pie plates and set aside.
- In a large bowl, whisk together the flour and sugar. Cut in the butter with a pastry blender or two knives until mixture is crumbly. Add the water and knead with your hands until well combined. Divide dough into two equal balls.
- Flatten each ball of dough slightly and wrap with plastic wrap. Place in the refrigerator for 30 minutes.
- Remove the dough from the refrigerator and let set while you prep the work surface. On a lightly floured surface using a floured rolling pin, roll each ball of dough into a disc that is about 1-inch larger than the pie plates. Check for size by inverting the pie plate over the rolled out disc of dough to measure for a 1-inch edge surrounding the pie plate. The disc should be about 1/8-inch thick.
- Transfer the dough to the pie plate by gently rolling the dough up around your rolling pin and then placing the rolling pin on one side of the pie plate and rolling it into the plate. Press down and around to make the dough fit the pie plate and hang over the sides.
- Trim the dough even with the edge of the pie plate and form a stand-up rim that extends up by ½-inch. Place your thumb and index finger about 1 inch apart on the outside of the raised crust edge. With your other index finger, push the dough from the inside of the pie plate toward the outside to form a fluted edge. Continue all around the edge of the dough.
- Cover the fluted pie crust with plastic wrap and place it in the refrigerator while you prepare the filling or for at least 30 minutes.
- While the pie crust is chilling, preheat the oven to 375°F. *oven temperature and bake time will vary depending on pie recipe
- Place filled pie on a rimmed baking sheet and bake for 20 to 30 minutes. Remove from the oven and cover the edges of the crust with foil to protect them if turning to brown. Return to the oven for 20 to 30 minutes longer or until golden brown.
- See blog post above for detailed instructions on how to Par-Bake a Pie Crust (for quiche, custard pie, etc.) and Pre-Bake a Pie Crust (for cream pies, no-bake fillings, etc.)

Pinched Pie Crust
- Yield: 2 (9-inch) pie crusts
Description
Step-by-step guide to from making picture-perfect pinched pie crust.
Ingredients
- 2 and 1/2 cups all-purpose flour
- 1/2 cup granulated sugar
- 1 cup (2 sticks) unsalted butter, cold & cubed
- 1/4 cup cold water
Instructions
- Generously butter two 9-inch pie plates and set aside.
- In a large bowl, whisk together the flour and sugar. Cut in the butter with a pastry blender or two knives until mixture is crumbly. Add the water and knead with your hands until well combined. Divide dough into two equal balls.
- Flatten each ball of dough slightly and wrap with plastic wrap. Place in the refrigerator for 30 minutes.
- Remove the dough from the refrigerator and let set while you prep the work surface. On a lightly floured surface using a floured rolling pin, roll each ball of dough into a disc that is about 1-inch larger than the pie plates. Check for size by inverting the pie plate over the rolled out disc of dough to measure for a 1-inch edge surrounding the pie plate. The disc should be about 1/8-inch thick.
- Transfer the dough to the pie plate by gently rolling the dough up around your rolling pin and then placing the rolling pin on one side of the pie plate and rolling it into the plate. Press down and around to make the dough fit the pie plate and hang over the sides.
- Trim the dough even with the edge of the pie plate and form a stand-up rim with the dough that extends up by ½-inch. Place your thumb and index finger about 1-inch apart on the outside of the raised dough edge. With your other index finger, push the dough from the inside of the pie plate toward the outside and then pinch your other index finger and thumb together to form a point. Continue all around the edge of the dough.
- Cover the pinched pie crust with plastic wrap and place it in the refrigerator while you prepare the filling or for at least 30 minutes.
- While the pie crust is chilling, preheat the oven to 375°F. *oven temperature and bake time will vary depending on pie recipe.
- Place the filled pie on a rimmed baking sheet and bake for 20 to 30 minutes. Remove from the oven and cover the edges of the crust with foil to protect them if turning to brown. Return to the oven for 20 to 30 minutes longer or until golden brown.
- See blog post above for detailed instructions on how to Par-Bake a Pie Crust (for quiche, custard pie, etc.) and Pre-Bake a Pie Crust (for cream pies, no-bake fillings, etc.)
Forked Pie Crust
- Yield: 2 (9-inch) pie crusts
Description
Step-by-step guide to from making picture-perfect forked pie crust.
Ingredients
- 2 and 1/2 cups all-purpose flour
- 1/2 cup granulated sugar
- 1 cup (2 sticks) unsalted butter, cold & cubed
- 1/4 cup cold water
Instructions
- Generously butter two 9-inch pie plates and set aside.
- In a large bowl, whisk together the flour and sugar. Cut in the butter with a pastry blender or two knives until mixture is crumbly. Add the water and knead with your hands until well combined. Divide dough into two equal balls.
- Flatten each ball of dough slightly and wrap with plastic wrap. Place in the refrigerator for 30 minutes.
- Remove the dough from the refrigerator and let set while you prep the work surface. On a lightly floured surface using a floured rolling pin, roll each ball of dough into a disc that is about 1-inch larger than the pie plates. Check for size by inverting the pie plate over the rolled out disc of dough to measure for a 1-inch edge surrounding the pie plate. The disc should be about 1/8-inch thick.
- Transfer the dough to the pie plate by gently rolling the dough up around your rolling pin and then placing the rolling pin on one side of the pie plate and rolling it into the plate. Press down and around to make the dough fit the pie plate and hang over the sides.
- Trim the dough even with the edge of the pan. Dip fork tines in flour, then press the fork straight onto the crust edge, without pressing all the way through the dough. Continue along the edge of the dough, pressing right next to the first set of marks. Continue all around the edge of the dough.
- Cover the forked pie crust with plastic wrap and place it in the refrigerator while you prepare the filling or for at least 30 minutes.
- While the pie crust is chilling, preheat the oven to 375°F. *Oven temperature and bake time will vary depending on pie recipe.
- Place the filled pie on a rimmed baking sheet and bake for 20 to 30 minutes. Remove from the oven and cover the edges of the crust with foil to protect them if turning to brown. Return to the oven for 20 to 30 minutes longer or until golden brown.
- See blog post above for detailed instructions on how to Par-Bake a Pie Crust (for quiche, custard pie, etc.) and Pre-Bake a Pie Crust (for cream pies, no-bake fillings, etc.)

Lattice Pie Crust
- Yield: 1 (9-inch) pie
Description
Step-by-step guide to from making picture-perfect lattice pie crust.
Ingredients
- 2 and 1/2 cups all-purpose flour
- 1/2 cup granulated sugar
- 1 cup (2 sticks) unsalted butter, cold & cubed
- 1/4 cup cold water
Egg Wash and Topping
- 1 large egg
- 1 tablespoon water
- 1 teaspoon granulated sugar
Instructions
- Generously butter a 9-inch pie plate and set aside.
- In a large bowl, whisk together the flour and sugar. Cut in the butter with a pastry blender or two knives until mixture is crumbly. Add the water and knead with your hands until well combined. Divide dough into two equal balls.
- Flatten each ball of dough slightly and wrap with plastic wrap. Place in the refrigerator for 30 minutes.
- Remove the dough from the refrigerator and let set while you prep the work surface. On a lightly floured surface using a floured rolling pin, roll each ball of dough into a disc that is about 1-inch larger than the pie plates. Check for size by inverting the pie plate over the rolled out disc of dough to measure for a 1-inch edge surrounding the pie plate. The disc should be about 1/8-inch thick.
- Transfer the dough to the pie plate by gently rolling the dough up around your rolling pin and then placing the rolling pin on one side of the pie plate and rolling it into the plate. Press down and around to make the dough fit the pie plate and hang over the sides.
- After placing the first crust in the pie plate and filling it, cut the second rolled out crust into about 1/2-inch wide strips (you should get about 12 strips). Lay half of the strips across the top of the pie filling, leaving about 1/2-inch between each strip. Try to place the longer strips in the middle of the pie. Weave the remaining strips, one at a time, with the first set of strips to form the lattice. Start on one side of the pie and work your way to the other side, spacing each strip about 1/2-inch apart. Trim the ends of each strip even with the edge of the pie plate. Fold over the hanging dough from the first crust to cover the ends of the strips. Then flute, pinch or fork the edges to seal and secure them.
- In a small bowl, whisk together the egg and 1 tablespoon water. Brush over the top and edges of the lattice or double crusted pie. Sprinkle evenly with sugar.
- Place pie on a rimmed baking sheet and bake according to recipe instructions. If the top or edges of the crust are starting to brown before the filling is bubbling, tint the pie with foil and continue to bake until the crust is golden brown and the filling is bubbling.
- Remove from the oven and let pie cool on a wire rack for at least 1 hour before slicing and serving.
Double Pie Crust
- Yield: 1 (9-inch) pie
Description
Step-by-step guide to from making picture-perfect double pie crust.
Ingredients
- 2 and 1/2 cups all-purpose flour
- 1/2 cup granulated sugar
- 1 cup (2 sticks) unsalted butter, cold & cubed
- 1/4 cup cold water
Egg Wash and Topping
- 1 large egg
- 1 tablespoon water
- 1 teaspoon granulated sugar
Instructions
- Generously butter a 9-inch pie plate and set aside.
- In a large bowl, whisk together the flour and sugar. Cut in the butter with a pastry blender or two knives until mixture is crumbly. Add the water and knead with your hands until well combined. Divide dough into two equal balls.
- Flatten each ball of dough slightly and wrap with plastic wrap. Place in the refrigerator for 30 minutes.
- Remove the dough from the refrigerator and let set while you prep the work surface. On a lightly floured surface using a floured rolling pin, roll each ball of dough into a disc that is about 1-inch larger than the pie plates. Check for size by inverting the pie plate over the rolled out disc of dough to measure for a 1-inch edge surrounding the pie plate. The disc should be about 1/8-inch thick.
- Transfer the dough to the pie plate by gently rolling the dough up around your rolling pin and then placing the rolling pin on one side of the pie plate and rolling it into the plate. Press down and around to make the dough fit the pie plate and hang over the sides.
- Fill the dough in the pie plate with desired filling. Place the other disc of dough over the top of the filling in the pie plate. Trim the dough all around the rim of the pie plate and then decorate (flute, pinch or fork) the crusts together or just gently press the top and the bottom crusts together around the edges. With a sharp knife, make six small slits in a circle pattern in the middle of the top crust.
- In a small bowl, whisk together the egg and 1 tablespoon water. Brush over the top and edges of the lattice or double crusted pie. Sprinkle evenly with sugar.
- Place pie on a rimmed baking sheet and bake according to recipe instructions. If the top or edges of the crust are starting to brown before the filling is bubbling, tint the pie with foil and continue to bake until the crust is golden brown.
- Remove from the oven and let pie cool on a wire rack for at least 1 hour before slicing and serving.