
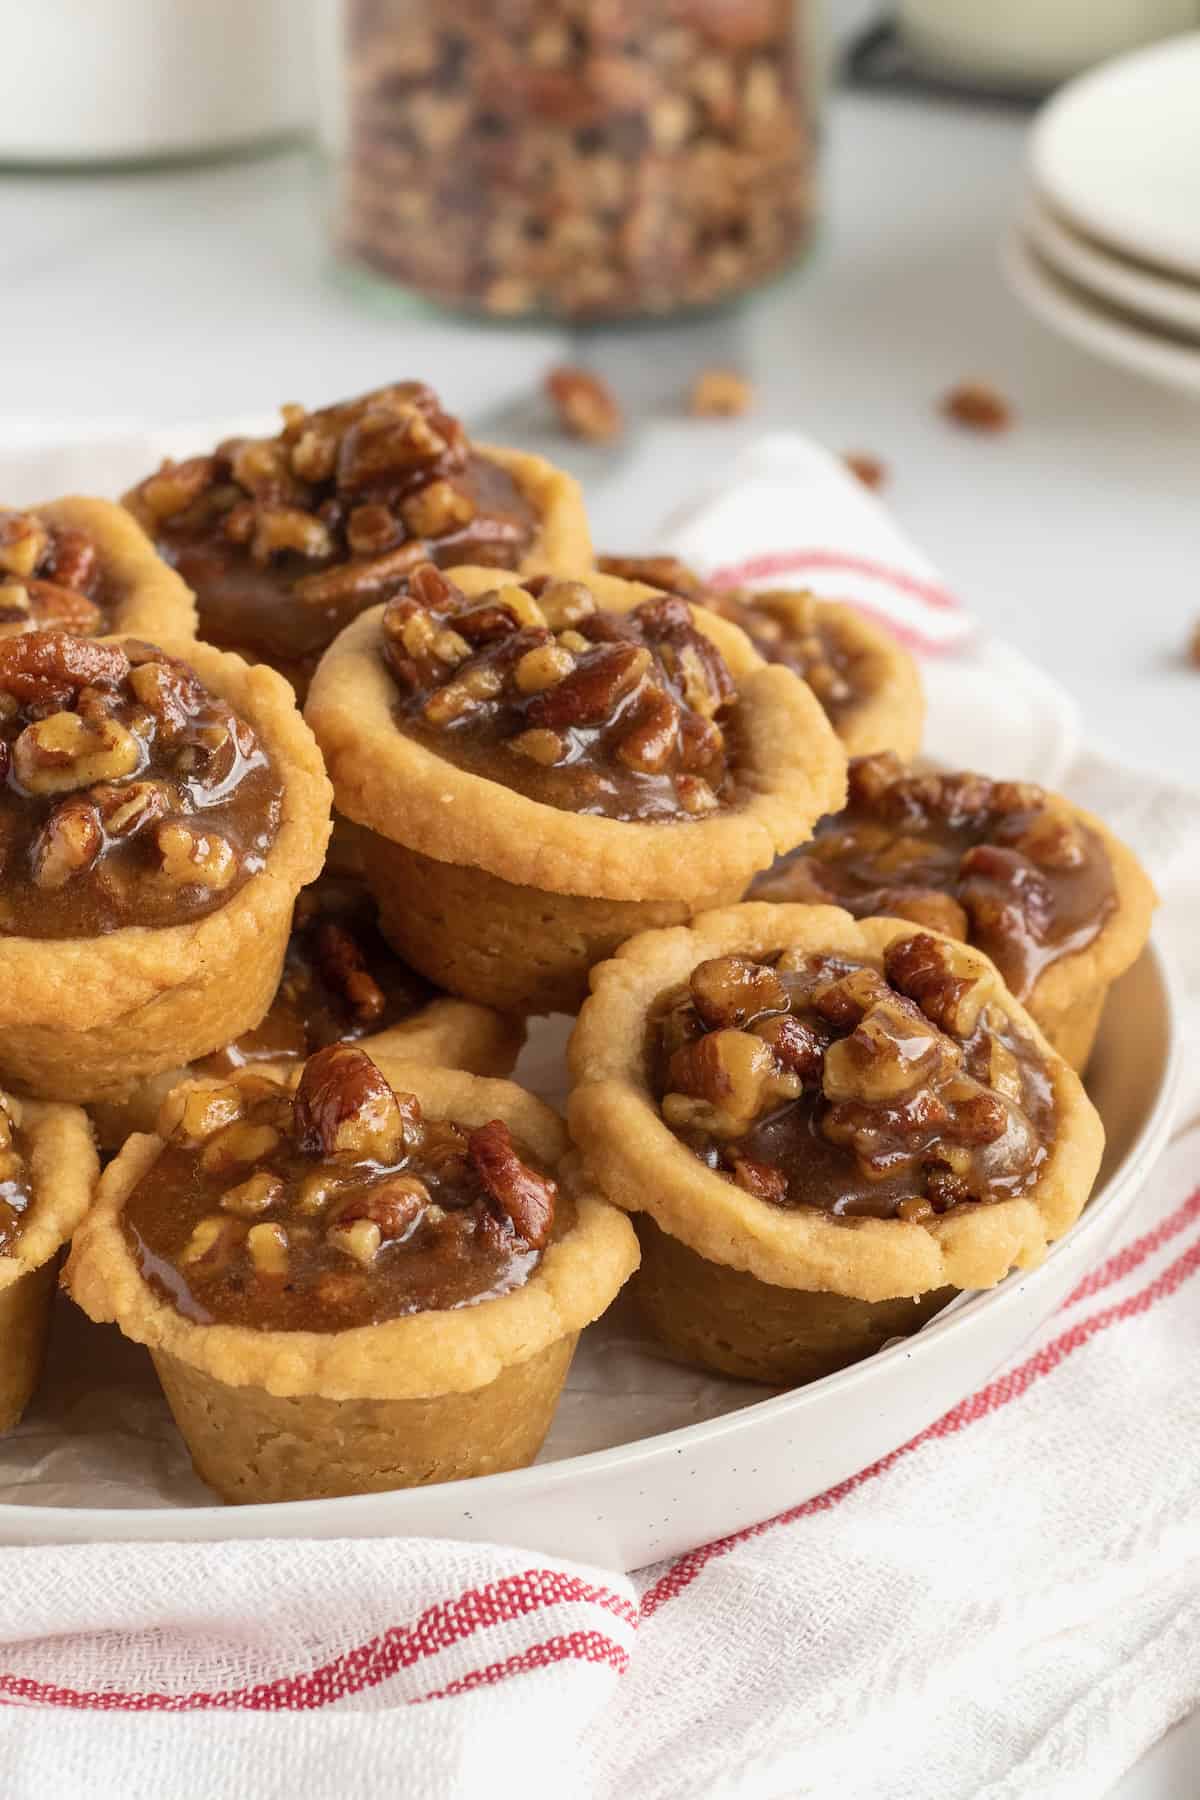
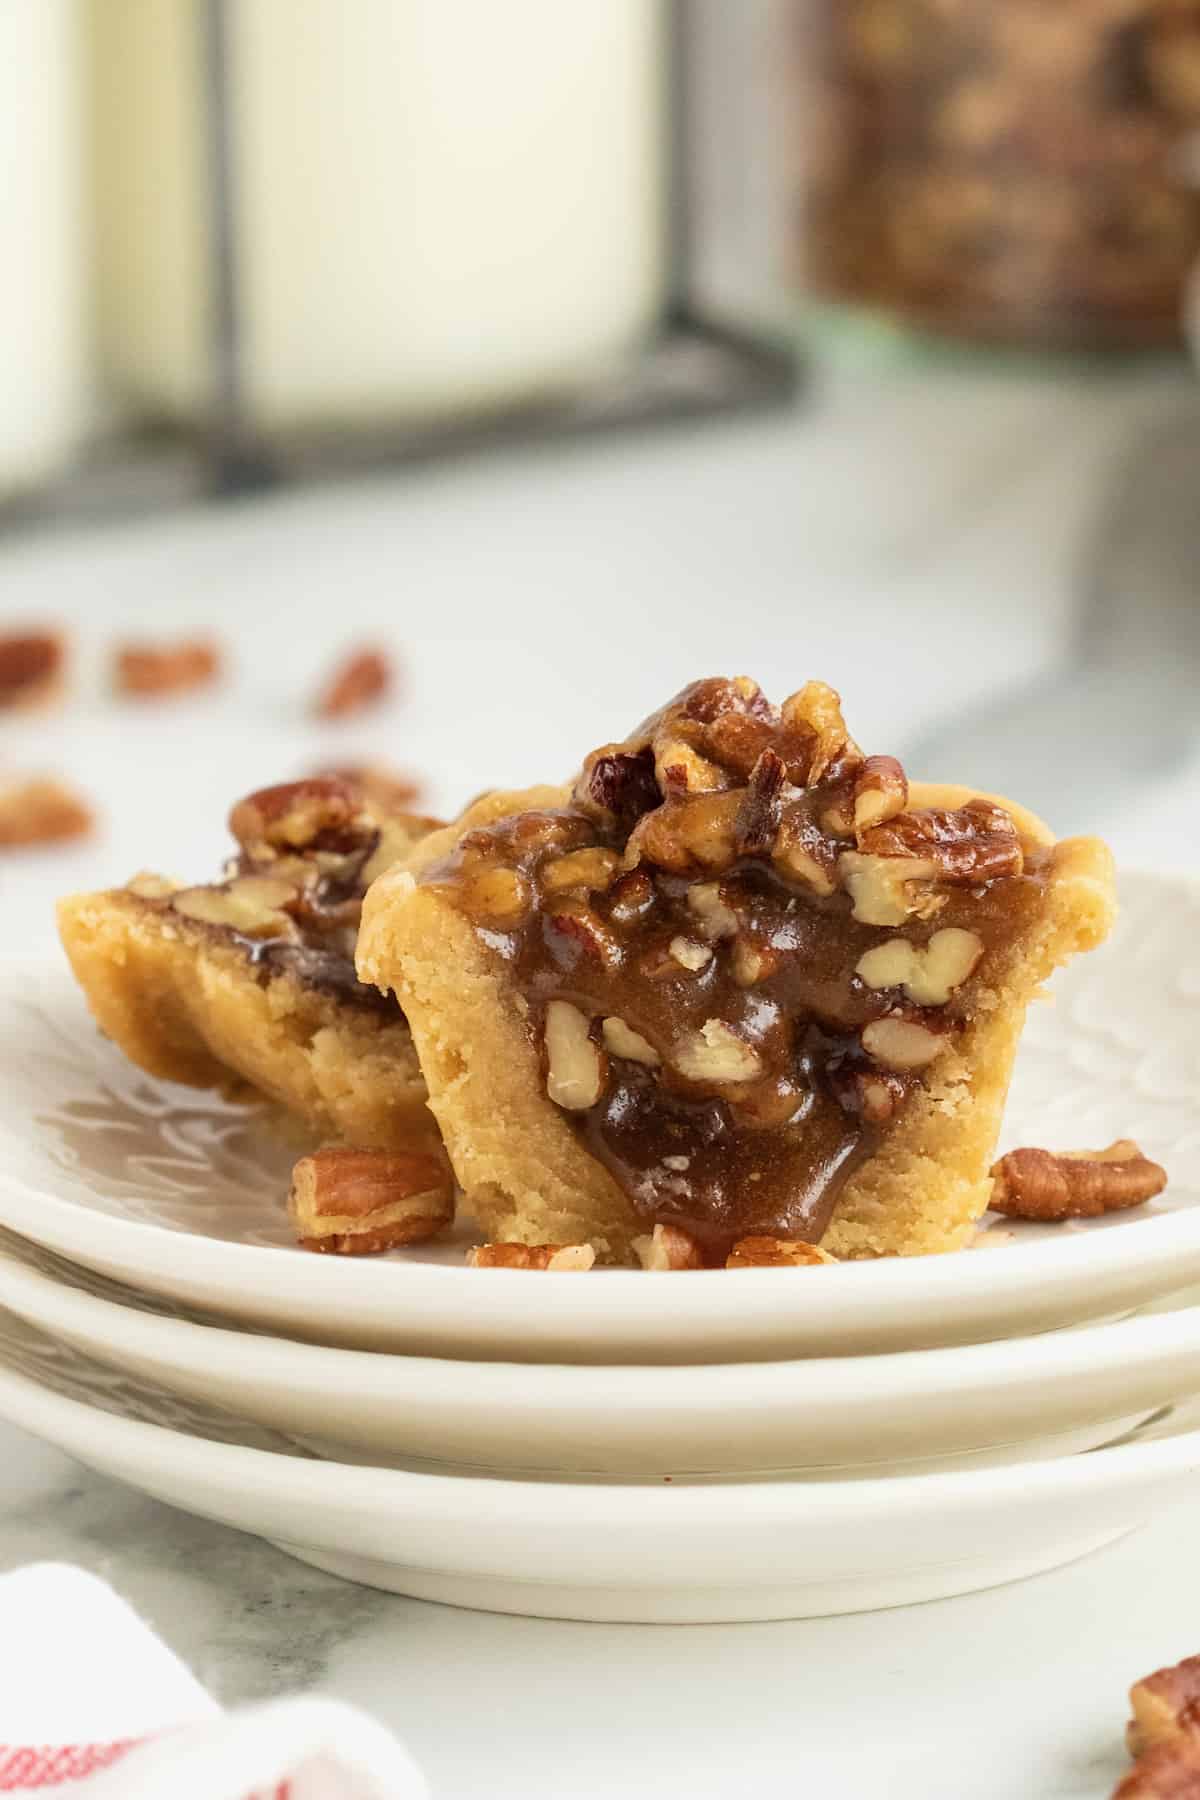
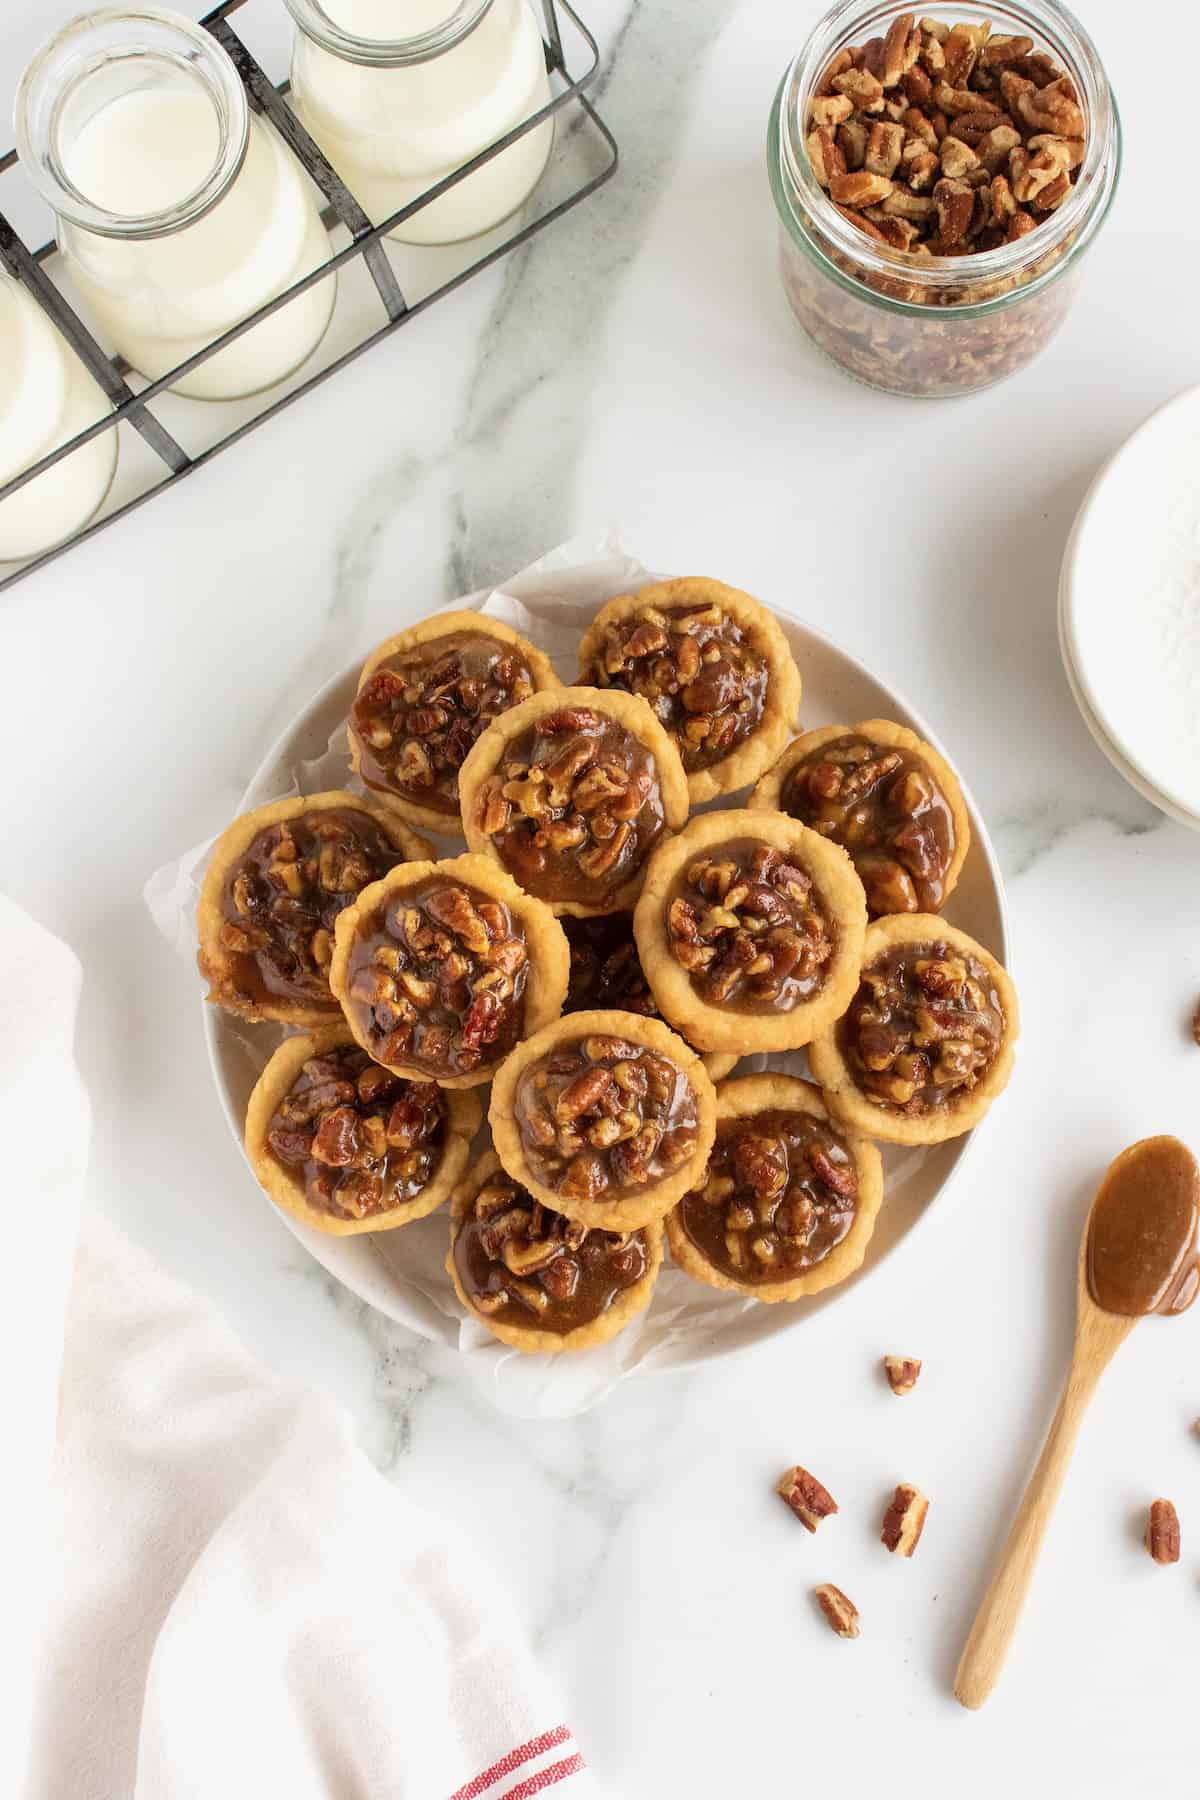
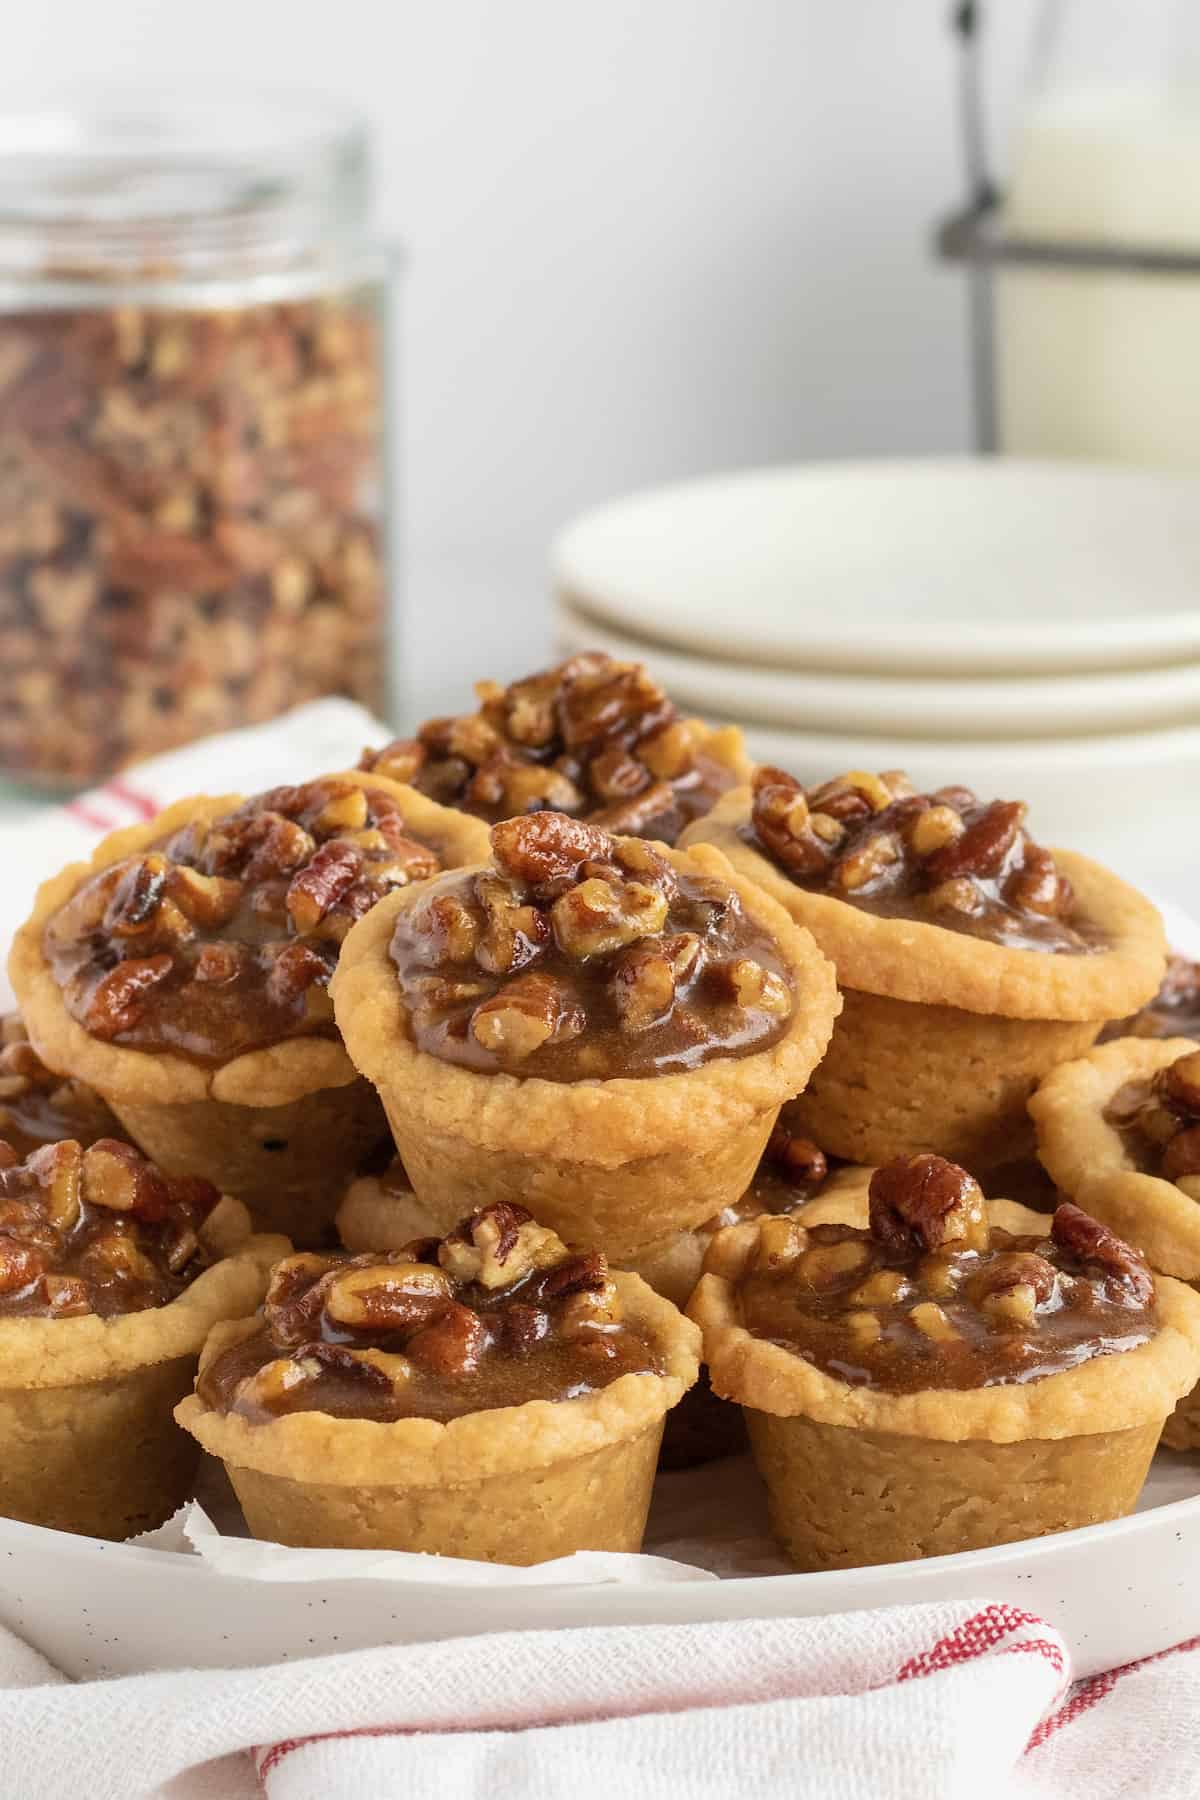
The crust is buttery, the filling is sweet and the pecans are plentiful in these delicious Pecan Pie Bites!
Tiny Pies with Big Holiday Flavor
Thanksgiving is less than a week away and I’ve got the easiest and most delicious little bites of pecan pie that will have your loved ones begging for more and thanking you over and over again! These mini pies are perfect in every way! The pie crust is buttery, the pecan pie filling is sweet and the pecans are plentiful!
Watch Me Make Pecan Pie Bites
Step into the kitchen with me as I make Pecan Pie Bites for Thanksgiving.
Fail-Proof and Fabulous
These mini pecan pies are the perfect ending to a huge Christmas or Thanksgiving feast or just a leftover turkey sandwich! You’ll be thanking yourself for adding these to your Holiday menu because with little effort these treats taste amazing and are sure to be the stars of your dessert table! Fail-proof and fabulous!
What Do I Need to Make Pecan Pie Bites?
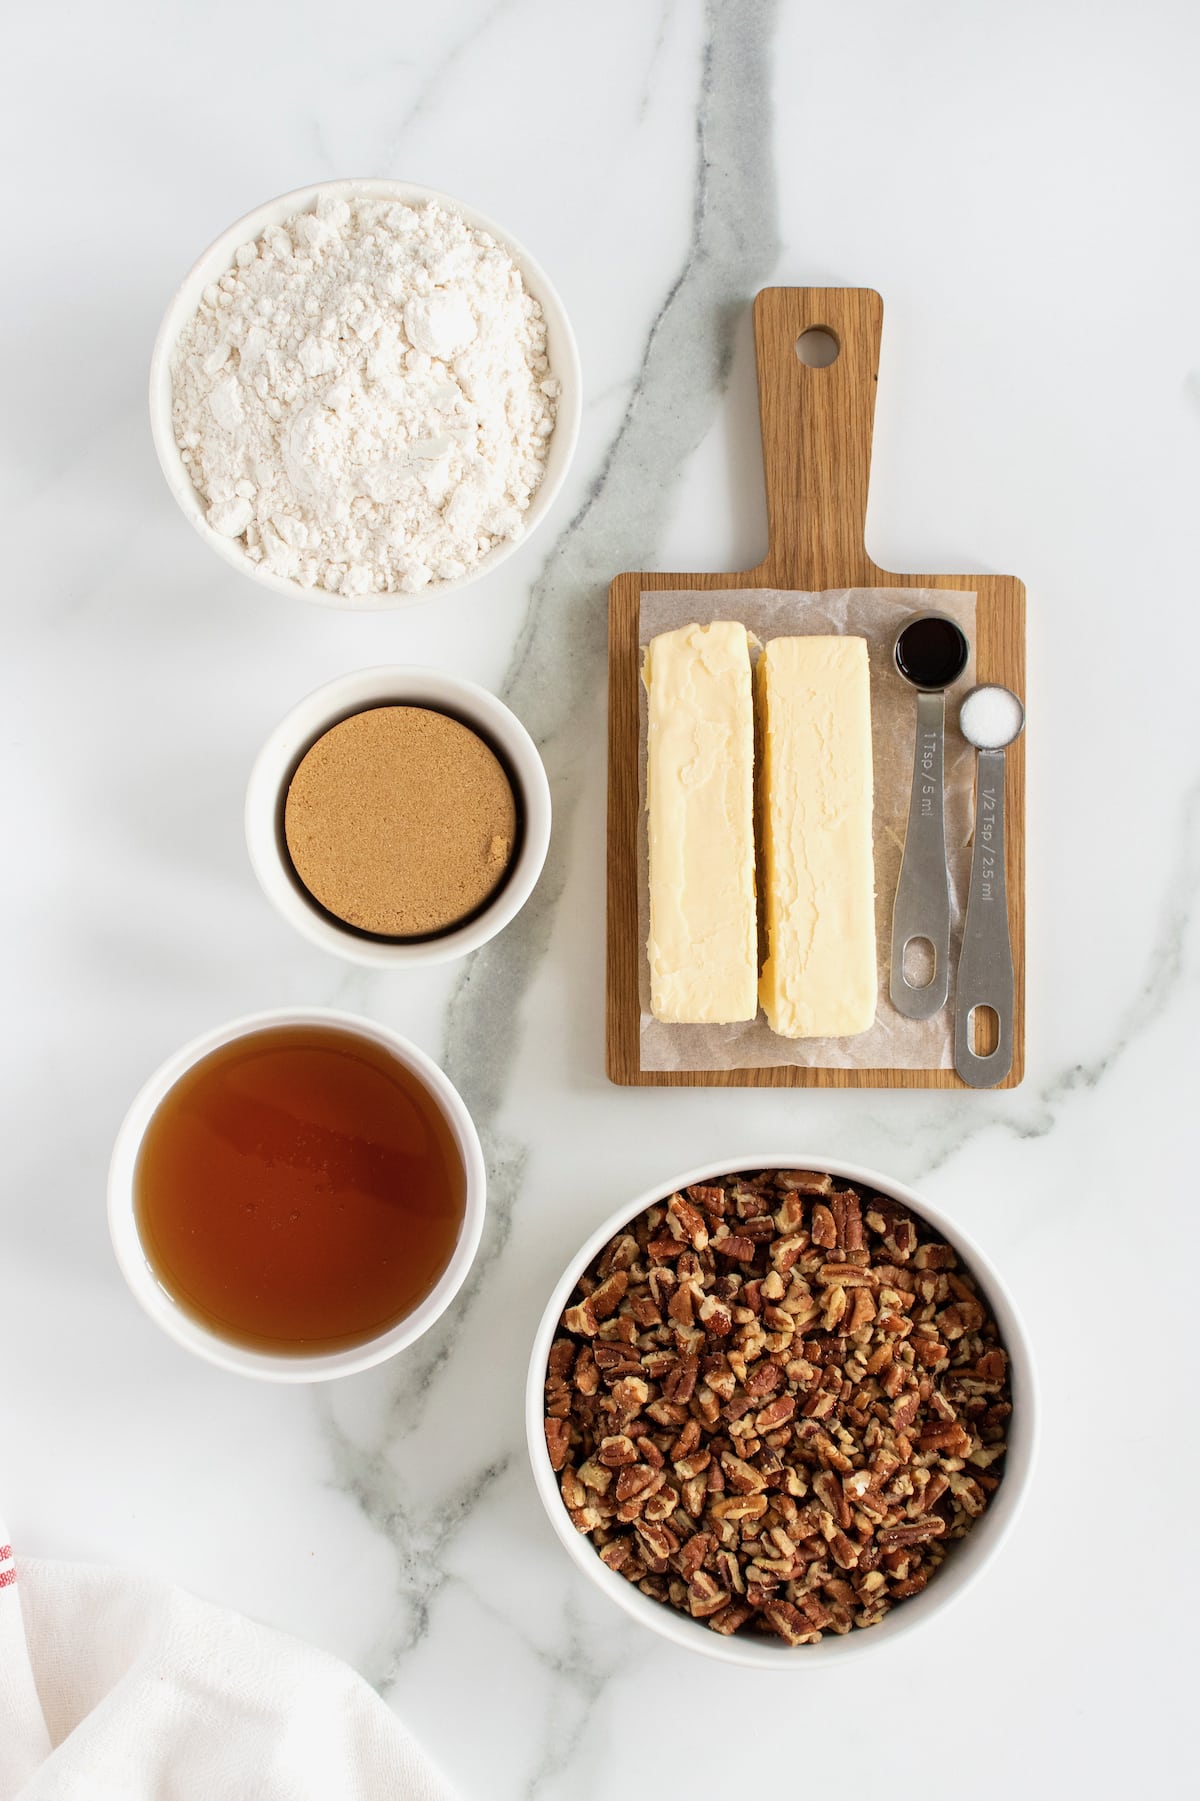
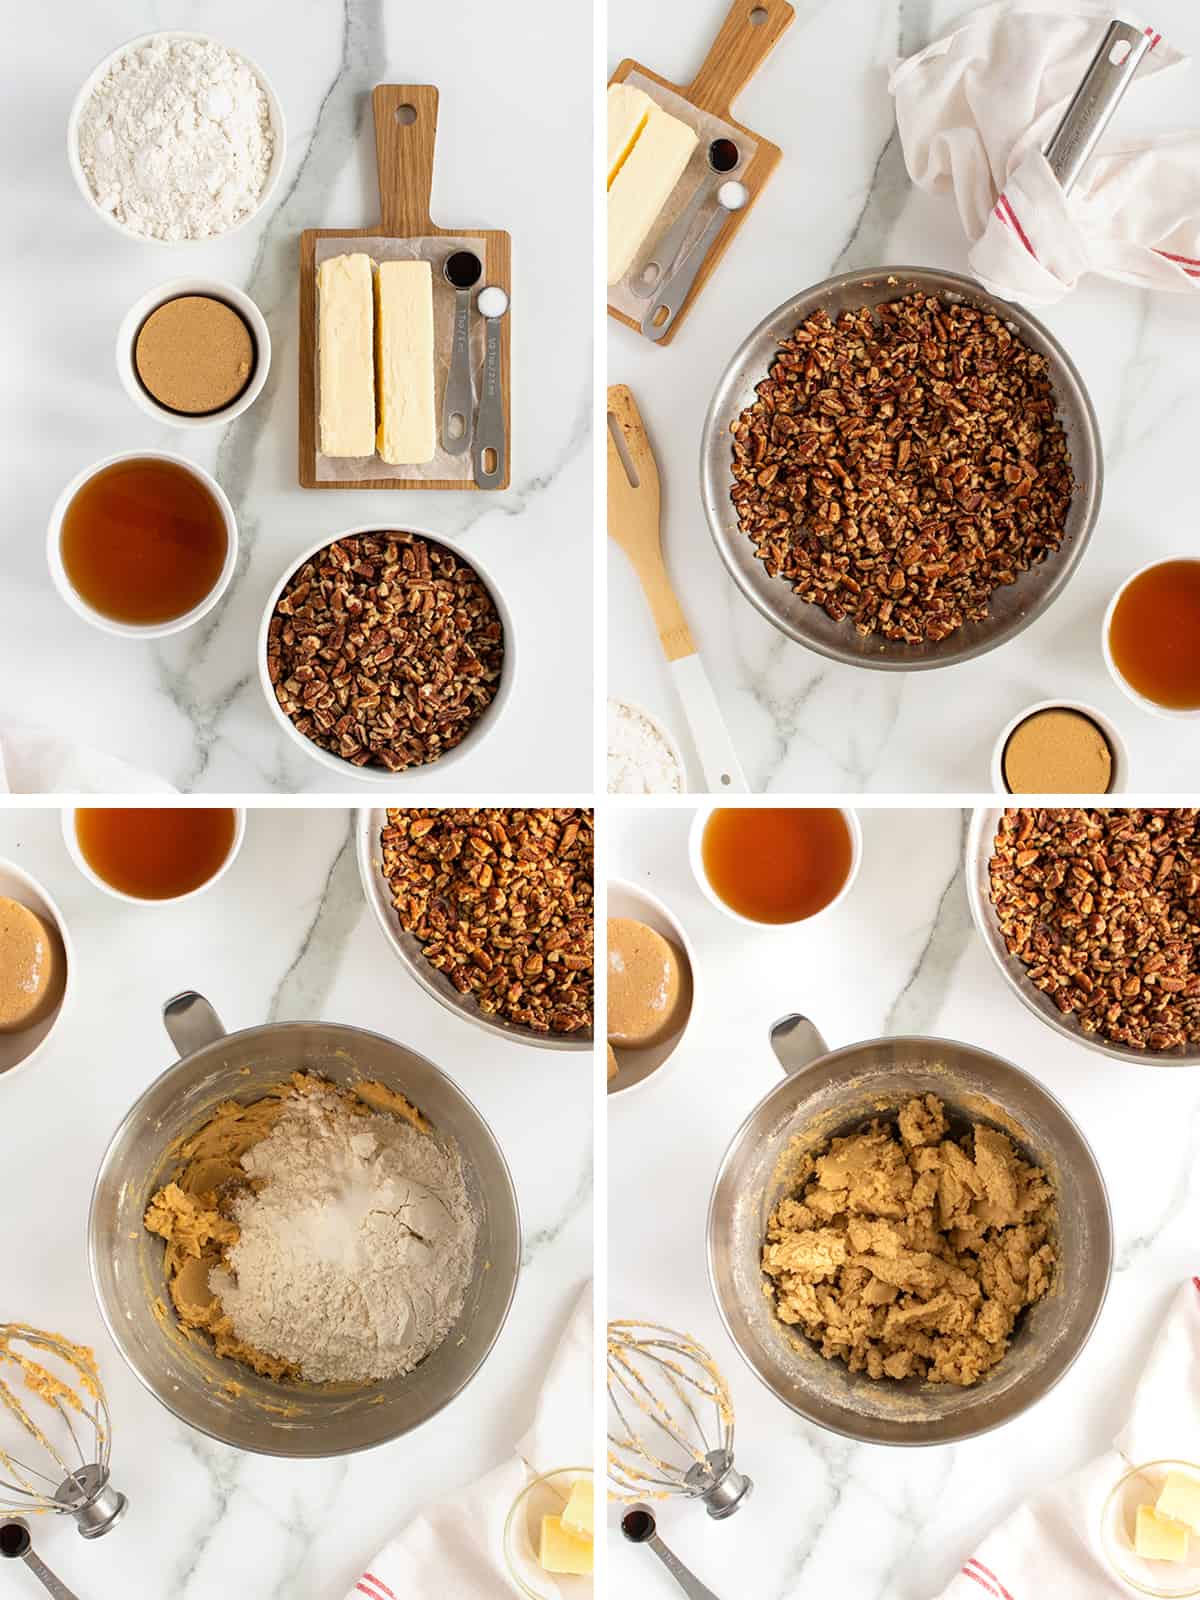
- Unsalted butter
- Pecans
- Brown sugar
- All-purpose flour
- Salt
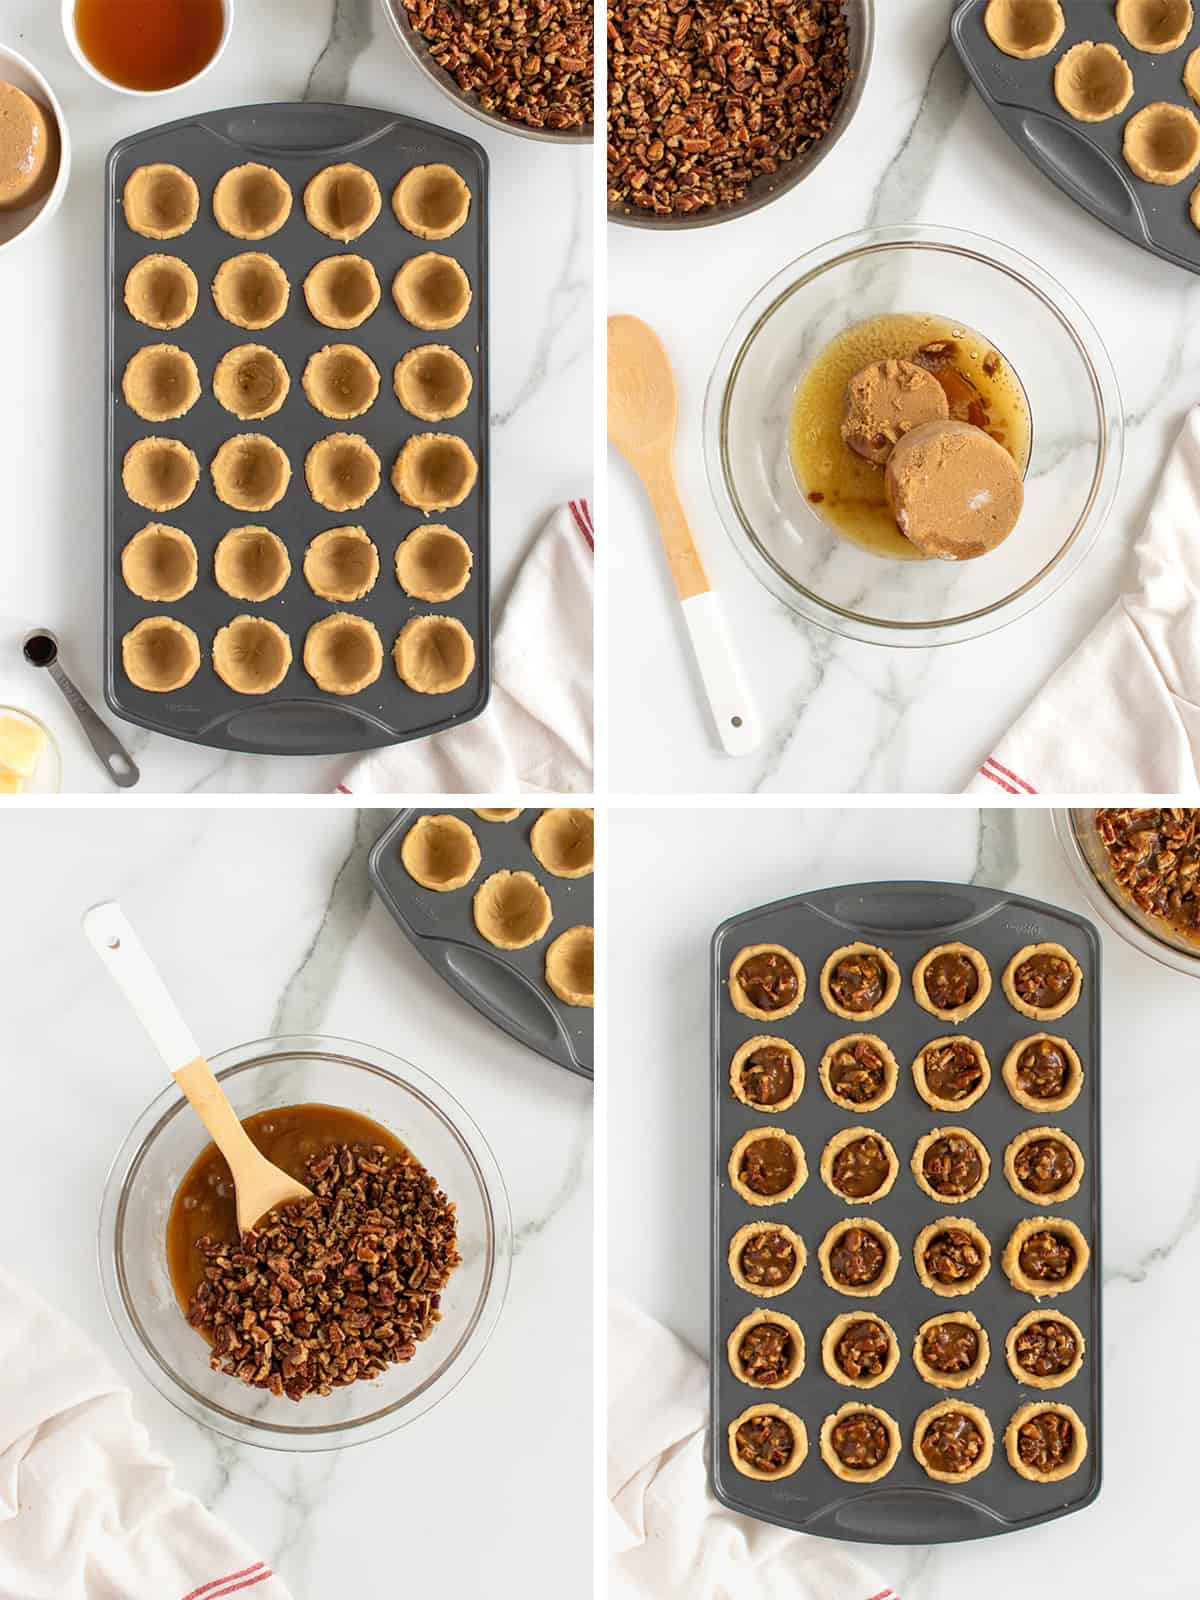
- Light corn syrup
- Vanilla extract
- Wooden tamper
- 24-cup mini muffin tin
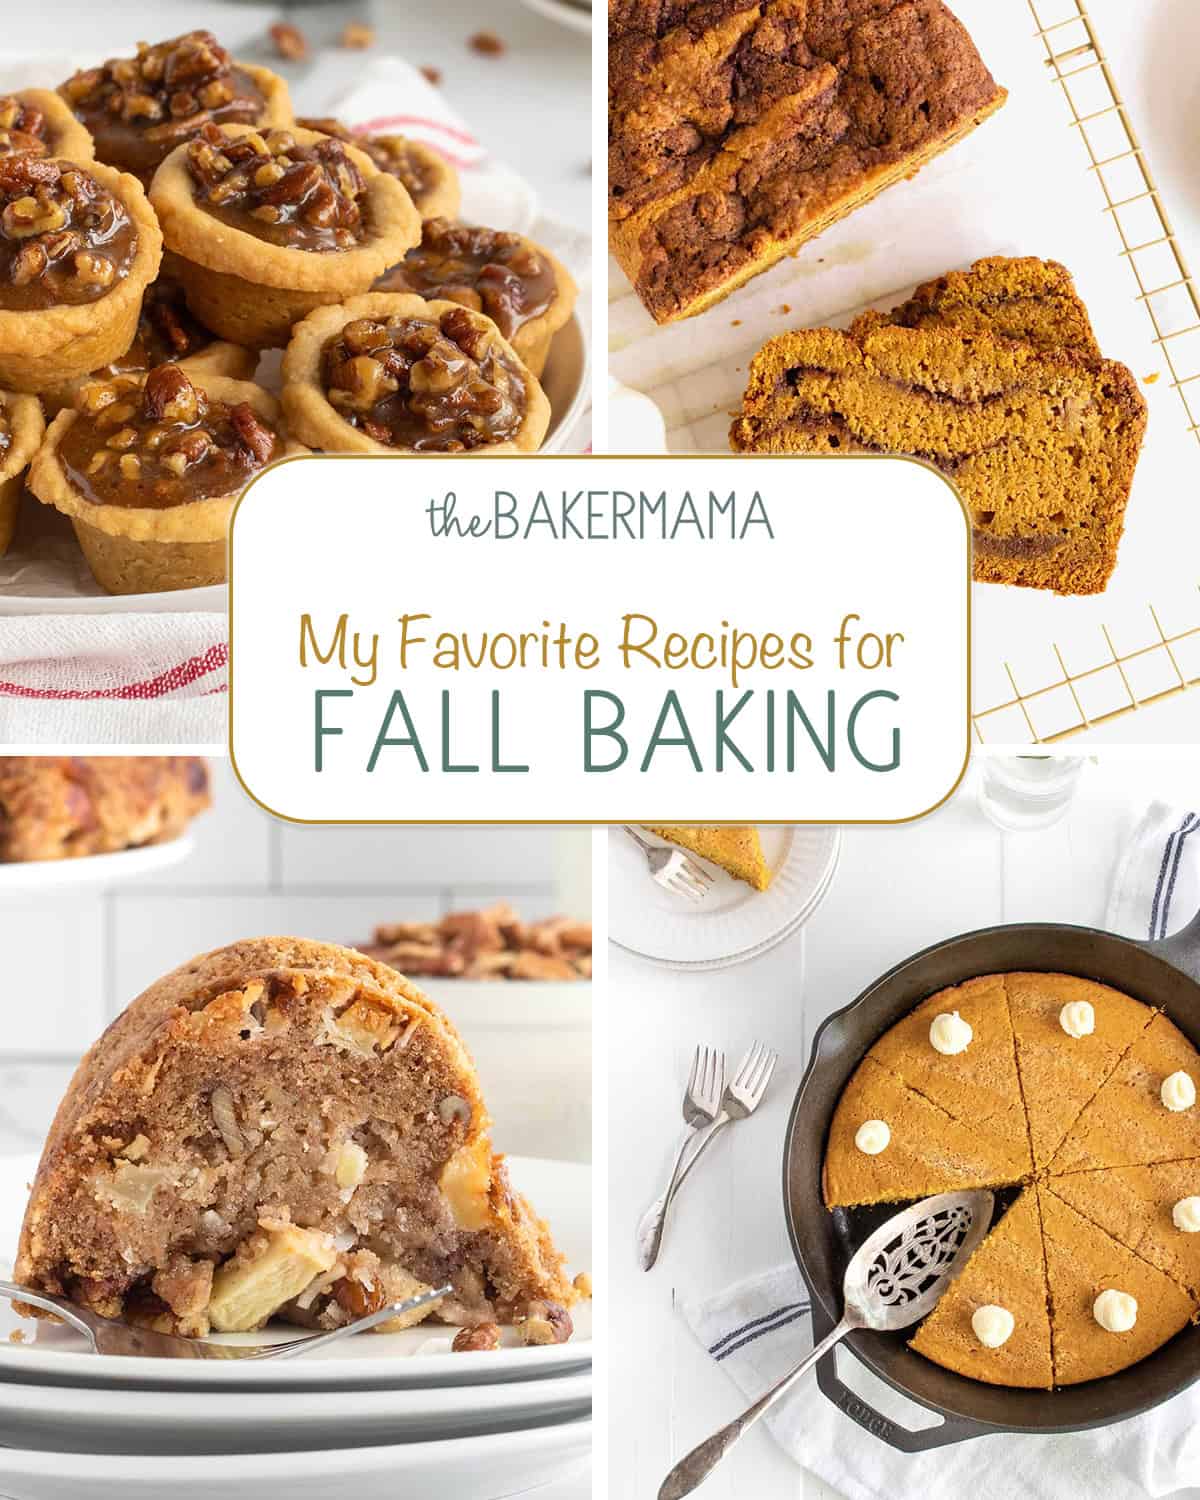
More Fall Baking
No need to wait for the leaves to start dropping to enjoy My Favorite Recipes for Fall Baking! From perfectly-spiced pumpkin bread to pecan pie bites and savory corn bread, you’re sure to fall for these autumn treats!
How to Make Pecan Pie Bites
- Preheat oven to 350°F. Lightly spray a mini muffin pan with cooking spray and set aside.
- In a large skillet, melt 2 tablespoons butter. Add the chopped pecans and toast for about 10 minutes until golden brown, stirring frequently.
- Meanwhile, make the crusts. In the bowl of an electric mixer, beat the butter and brown sugar until creamy. Add the flour and salt and beat until well combined.
- Take a heaping tablespoon of dough and press into and up the sides of each mini muffin tin.
- To make the filling, in a large bowl, stir together the brown sugar, light corn syrup, melted butter, and vanilla. Stir in the toasted pecans until well coated.
- Spoon about a tablespoon of filling into each crust, filling it about 3/4 full. Try not to overfill the crusts, as the filling will bubble over when they are baking. Don’t worry…you’ll be adding more filling after they bake!
- Bake the bites for about 15 minutes or until the crusts just start to brown. Remove from the oven and let set for about 5 minutes before scooping another tablespoon of filling onto each bite.
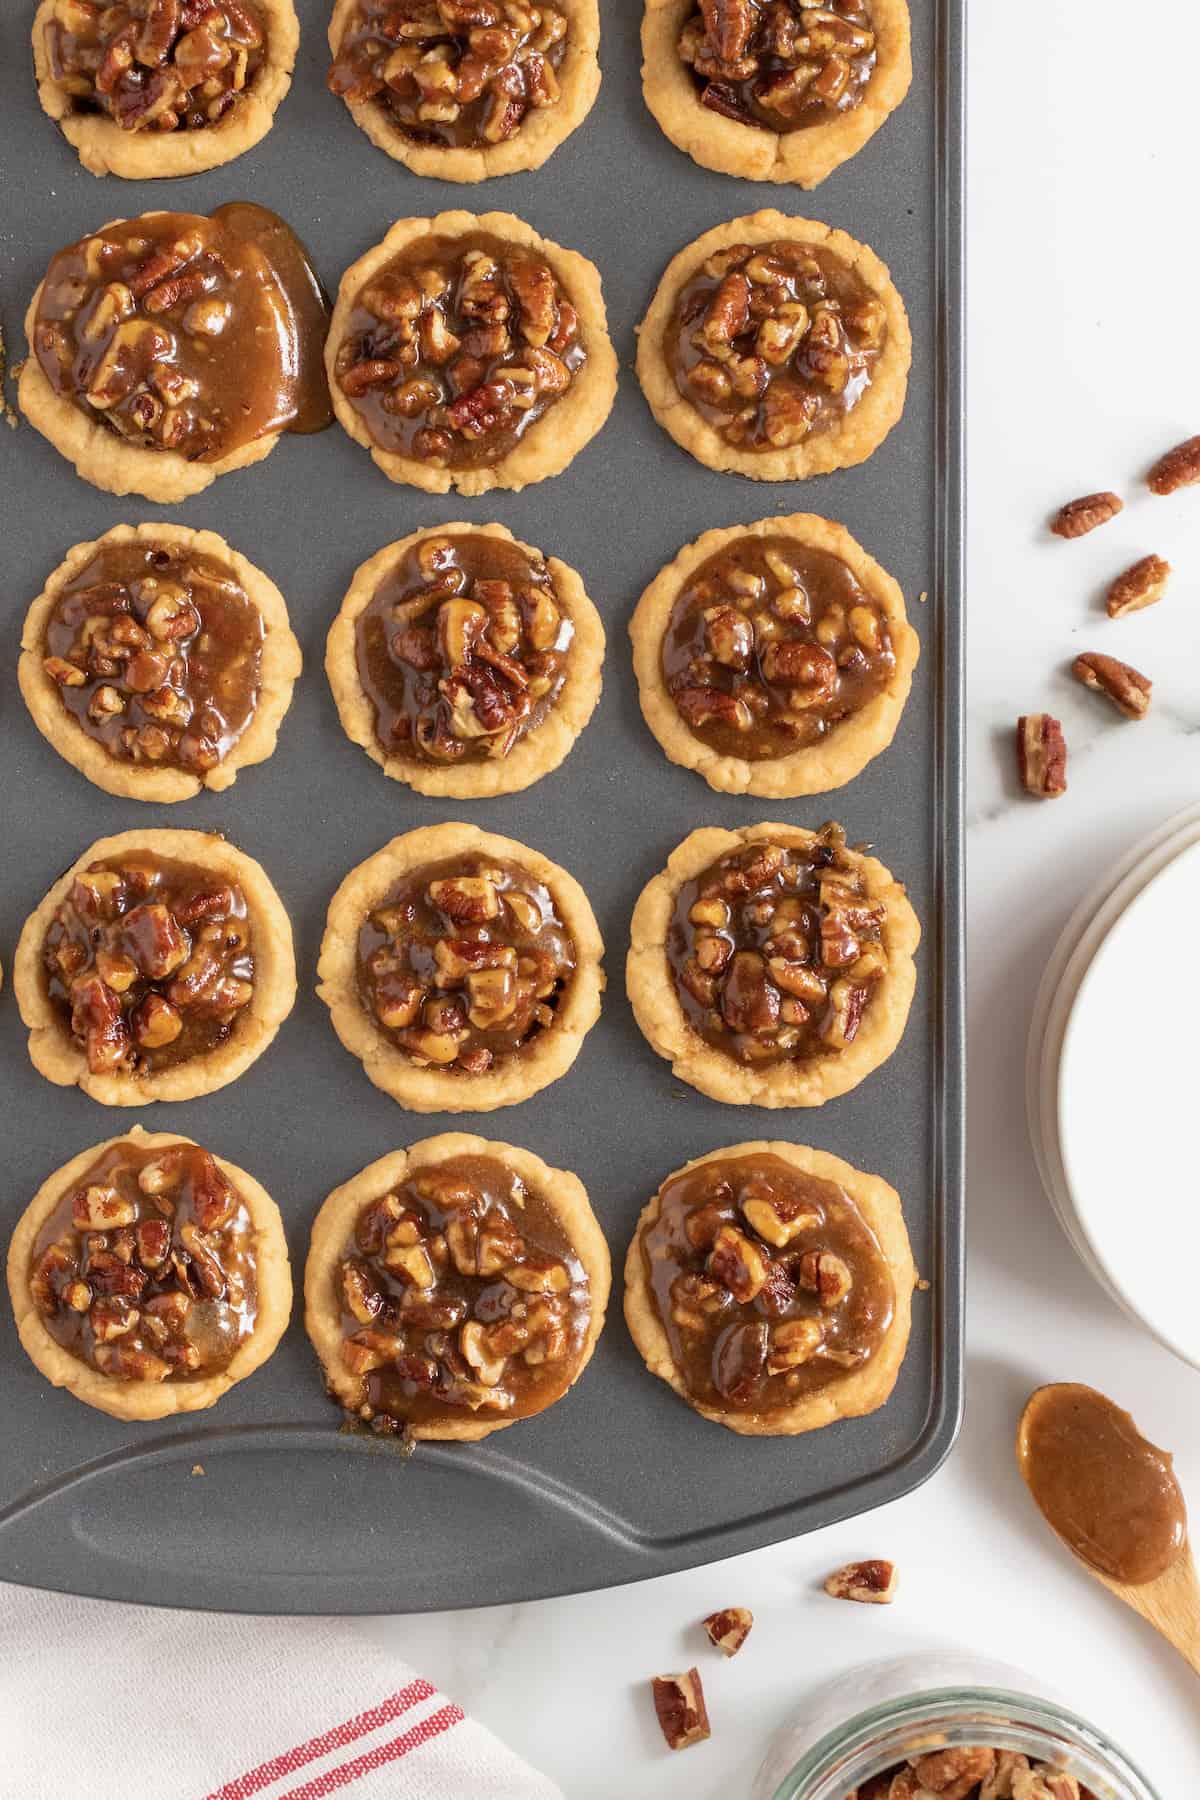
- Let bites cool in pan completely before removing. Store any leftovers in an airtight container.
Holiday Hint!
Making these Pecan Pie Bites in advance?
They freeze great! Just let them cool completely and then store them in a freezer-safe airtight container, with parchment paper between each layer, for up to 3 months. When ready to enjoy, allow them to thaw overnight in the fridge.
Alternatively, you can freeze the filling and make the crust fresh. Store filling in a freezer-safe airtight container for up to 3 months. When ready to enjoy, allow the filling to thaw overnight in the fridge.
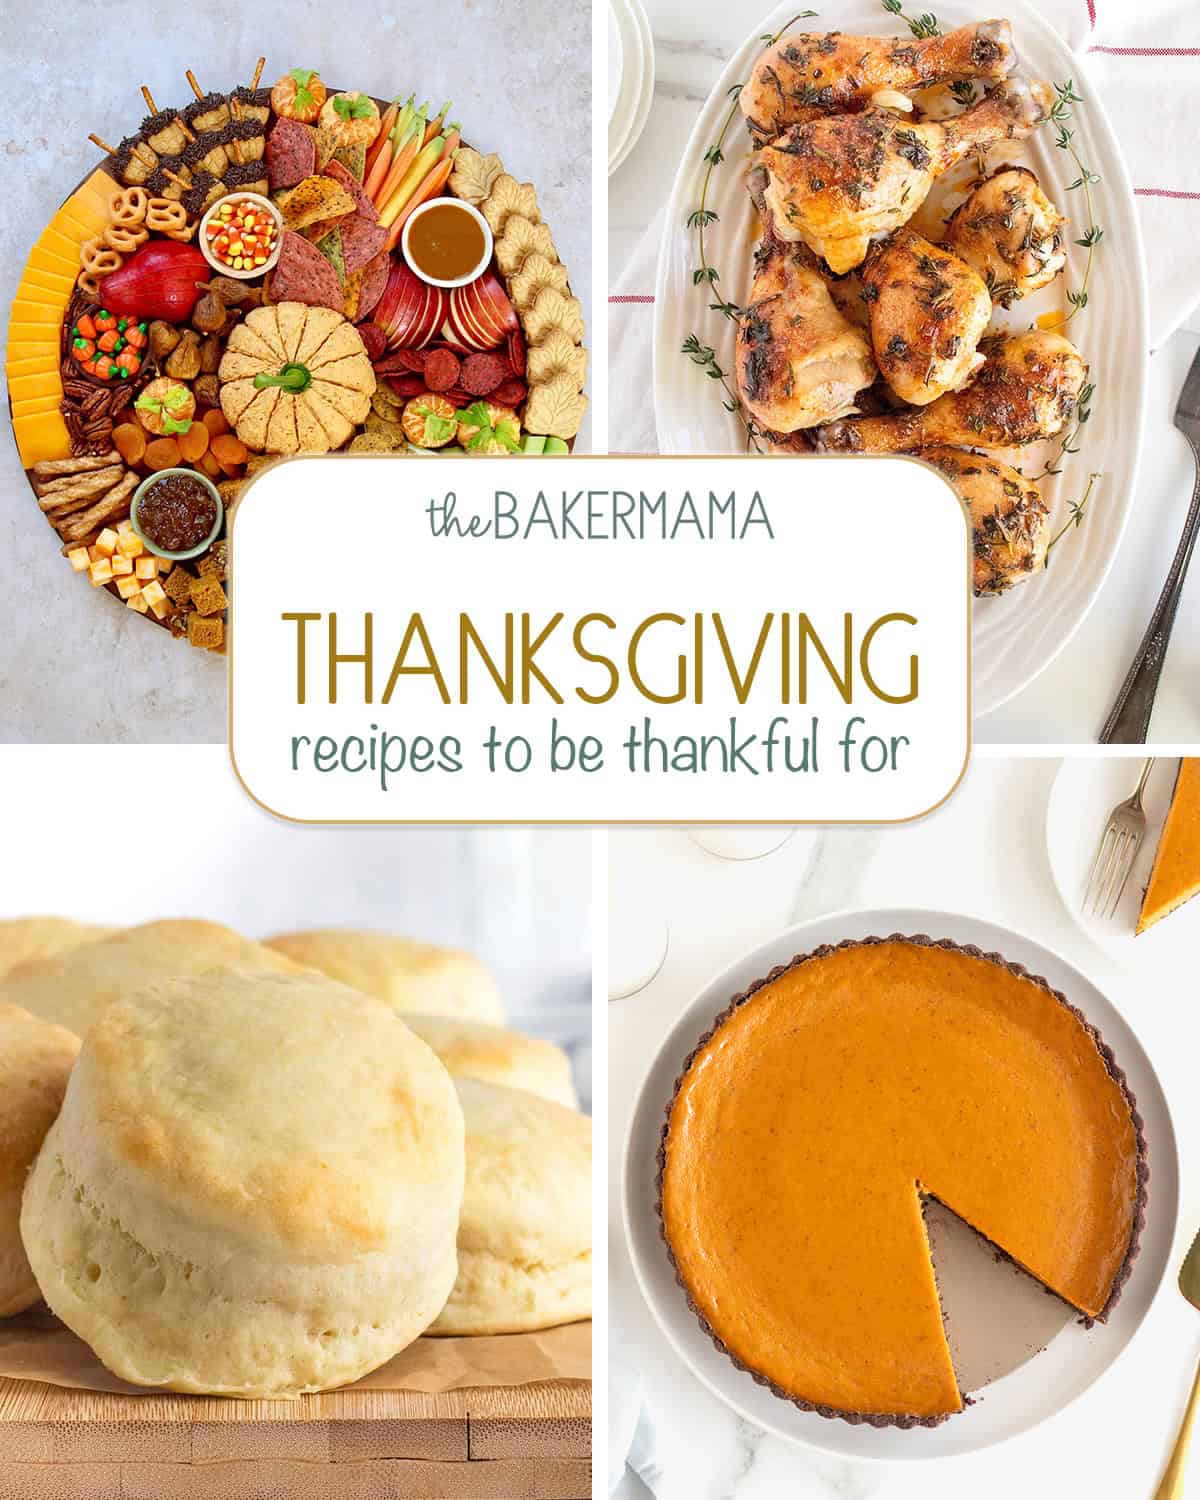
More Thanksgiving Recipes You’ll Love
Let’s get you ready for the big feast with these festive, delicious and easy Thanksgiving recipes everyone is sure to be thankful for!
If you make these Pecan Pie Bites, be sure to snap a picture and share it with me or tag me on Instagram @thebakermama so I can see.  I love seeing how inspired and creative y’all get with the recipes I share. Enjoy!
xoxo,


Pecan Pie Bites
- Prep Time: 30 mins
- Cook Time: 15 mins
- Total Time: 45 mins
- Yield: 24
- Category: Dessert
Description
The crust is buttery, the filling is sweet and the pecans are plentiful in these delicious little bites of pecan pie!
Ingredients
Toasted Pecans:
- 2 tablespoons butter
- 2 and 1/2 cups pecans, chopped
Crust:
- 1 cup (2 sticks) unsalted butter, softened
- 1/2 cup brown sugar
- 2 cups all-purpose flour
- 1/2 teaspoon salt
Filling:
- 1 and 1/2 cups brown sugar
- 3/4 cup light corn syrup
- 2 tablespoons melted butter
- 1 teaspoon vanilla
Instructions
- Preheat oven to 350°F. Lightly spray a mini muffin pan with cooking spray and set aside.
- In a large skillet, melt 2 tablespoons butter. Add the chopped pecans and toast for about 10 minutes until golden brown, stirring frequently.
- Meanwhile, make the crusts. In the bowl of an electric mixer, beat the butter and brown sugar until creamy. Add the flour and salt and beat until well combined. Take a heaping tablespoon of dough and press into and up the sides of each mini muffin cup.
- To make the filling, in a large bowl, stir together the brown sugar, light corn syrup, melted butter, and vanilla. Stir in the toasted pecans until well coated. Spoon about a tablespoon of filling into each crust, filling it about 3/4 full. Try not to overfill the crusts, as the filling will bubble over when they are baking. Don’t worry…you’ll be adding more filling after they bake!
- Bake the bites for about 15 minutes or until the crusts just start to brown. Remove from the oven and let set for about 5 minutes before scooping another tablespoon of filling onto each bite. Let bites cool in pan completely before removing.


Absolutely loved these! The crust yielded about 24, but I had a lot of left over filling. I made another batch of crust a couple days later to use the rest of the filling. I really enjoyed the crusts’ texture and flavor. Would definitely make again.
Hi, Ashley! I love that you enjoyed them so much! Thank you for sharing.
Can the salt be omitted and still taste ok?
Hi Linda! That is certainly a matter of preference. There is only salt in the crust so it will be slightly sweeter, but still bake up great. Enjoy!
I would like to make something like this in a large muffins pan for 6. Would that work and how would you change the baking temp and time?
Hi, Michelle! Yes, I think so! And while I just haven’t tested it to be able to give a recommended baking time, you could certainly give it a try! I think they would take closer to 40-45 minutes to bake. Good luck and you’ll have to let me know how they turn out!
Mine looked great but were quite chewy. Are they supposed to be chewy.
Hi K C! Yes, the filling should be gooey with a melt-in-your mouth chew to it along with the crunch from the pecans. I hope this helps and that y’all enjoy!
Hi, can I freeze the filling, I made too much and I wanted to save it for the next batch 🙂
Hi Sibani! Yes, you can store it in a freezer-safe airtight container for up to 3 months. When ready to enjoy, allow the filling to thaw overnight in the fridge. Enjoy!
If you use store bought shells then you don’t have to worry about bubbling over, plus more convenient. That’s with any filling. I’m going to definitely try your recipe. I cannot wait!
Hi, Kat! Can’t wait to hear how the turn out!
We made these a few days ago and Yum, we made them again today.
Hi, Lisa! So happy to hear you enjoyed them so much you made them twice! ❤️
Why spoon an additional amount after coming out of the oven!! Do it then go back in the oven?
Hi Kim! Because the more filling the better! 😉 If you overfill the bites before they bake, the filling will ooze out all over the pan. So the crusts are filled just 3/4 full with filling that gets baked into the crusts and more gets put on top after baking so they’re heaping full of filling. You don’t bake them after adding more filling. I hope this helps! Enjoy!
I was only able to get 1 rounded tablespoon of dough into each mini muffin cup. I used Wilton pan with 24 holes. And, I used all the dough. Did I fo something wrong with the dough?
Hi Lynne! Were you short on dough overall or did the amount you pressed into each mini muffin cup not fill it up enough around the sides and to the top?