
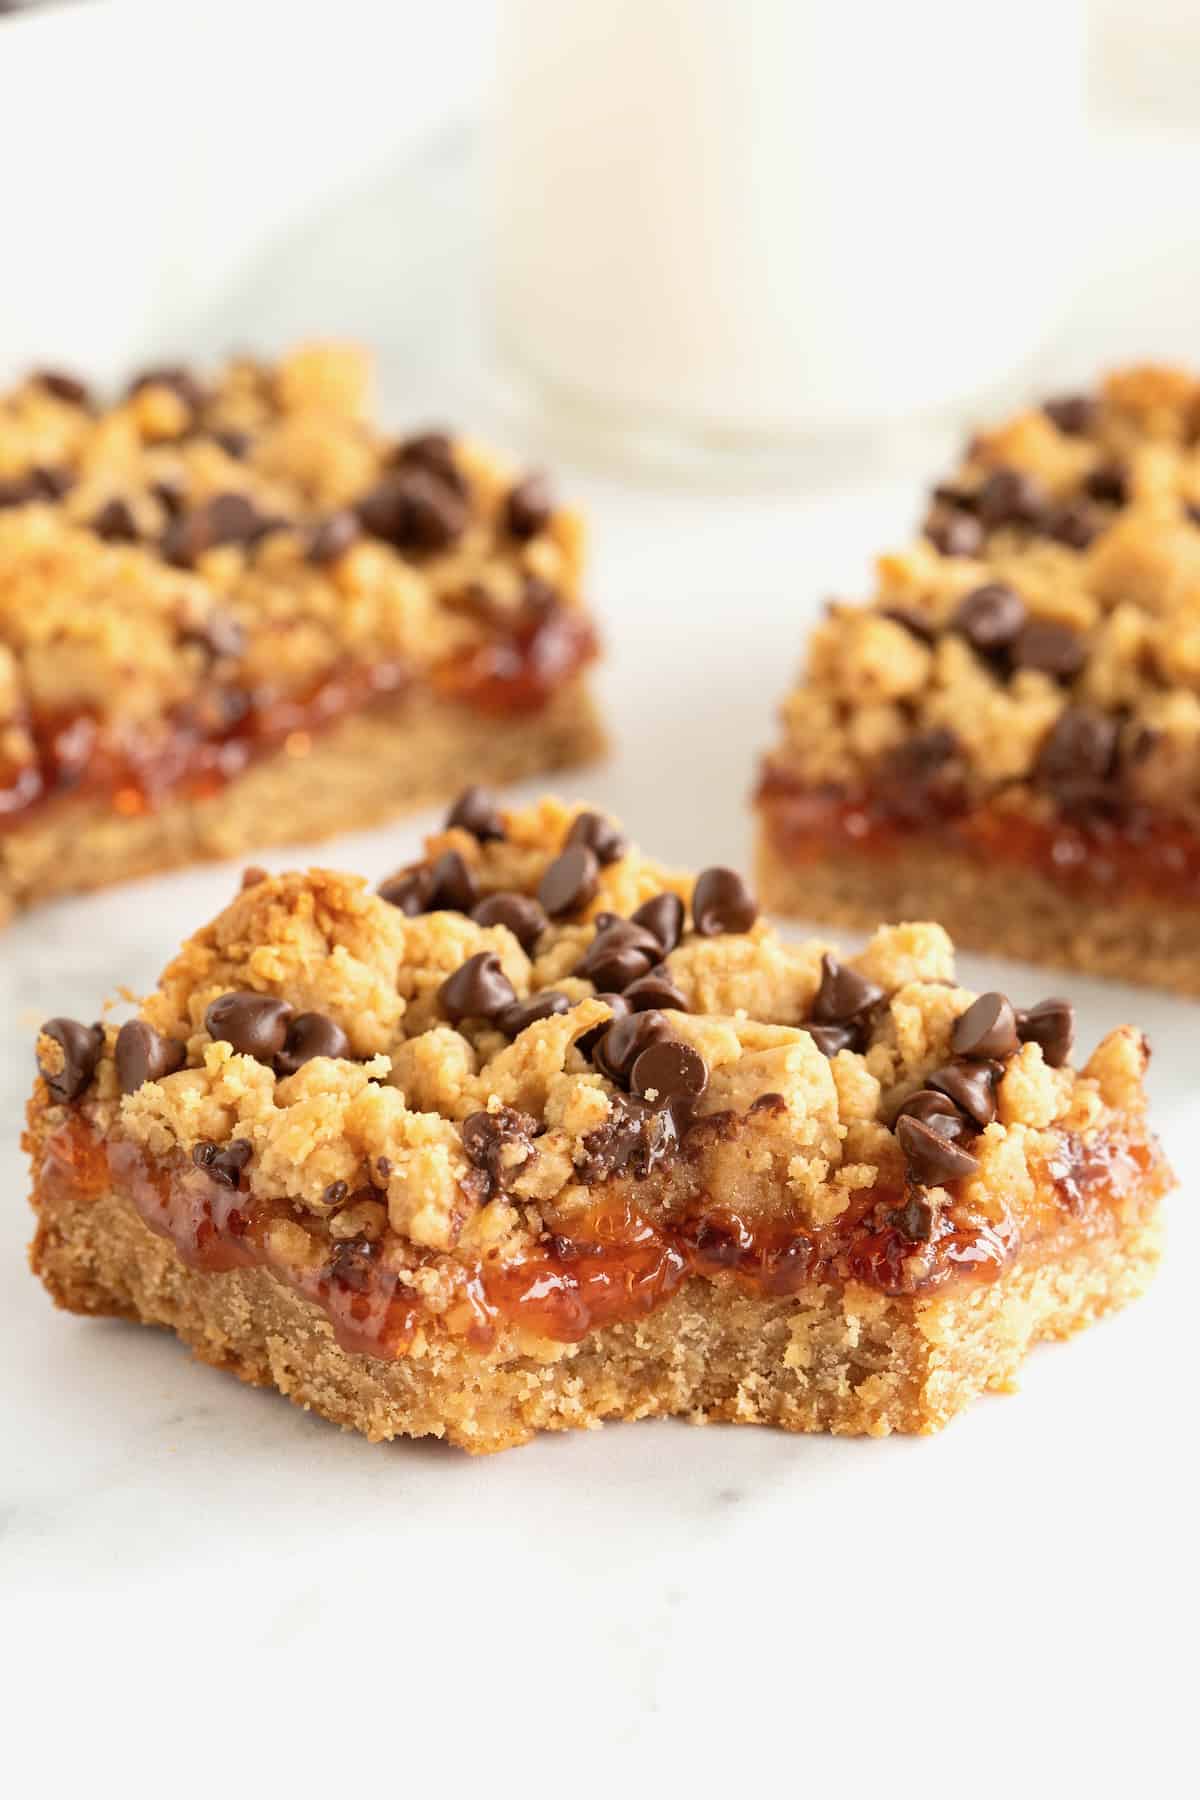
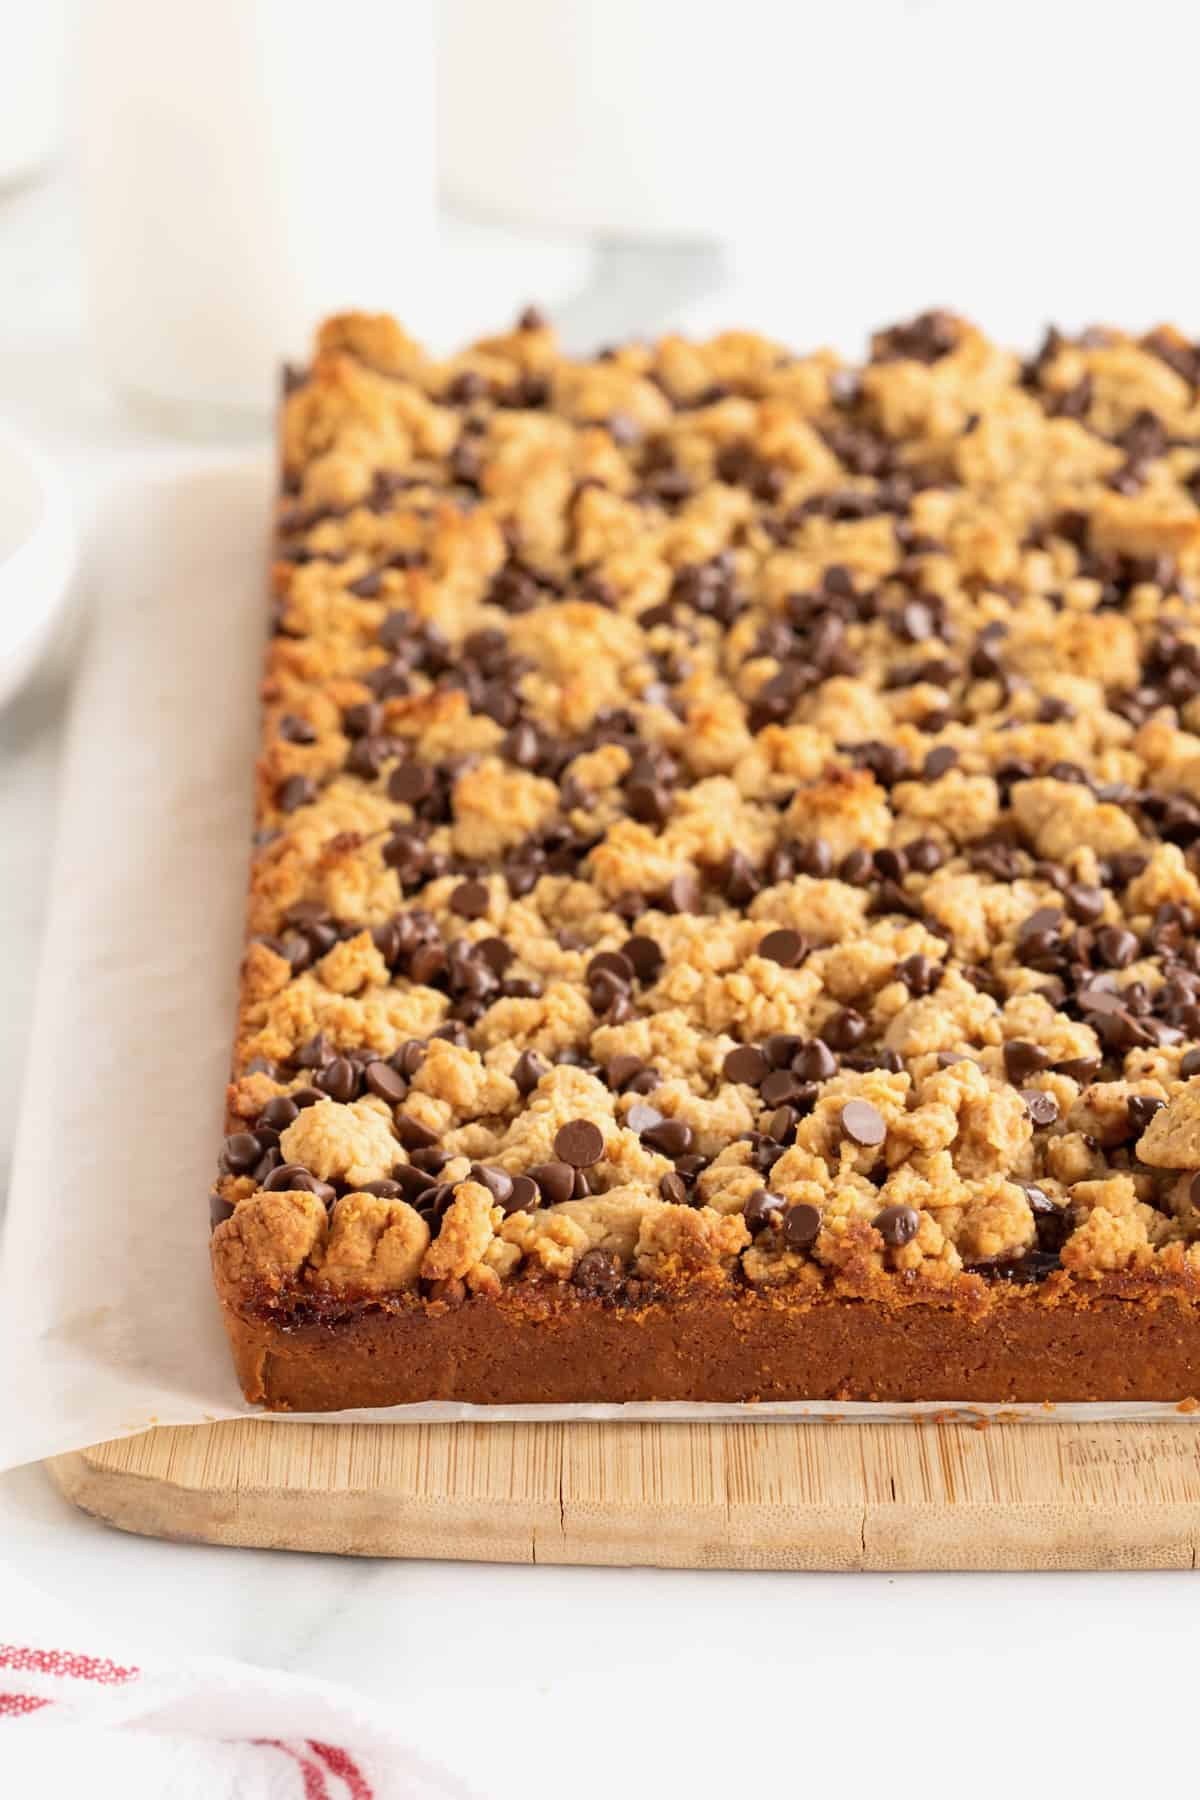
These Peanut Butter and Jelly Bars have all the familiar flavors of a classic peanut butter and jelly sandwich in dessert bar form with a hint of honey and an irresistible chocolate chip streusel!
A Classic Combo – With a Twist!
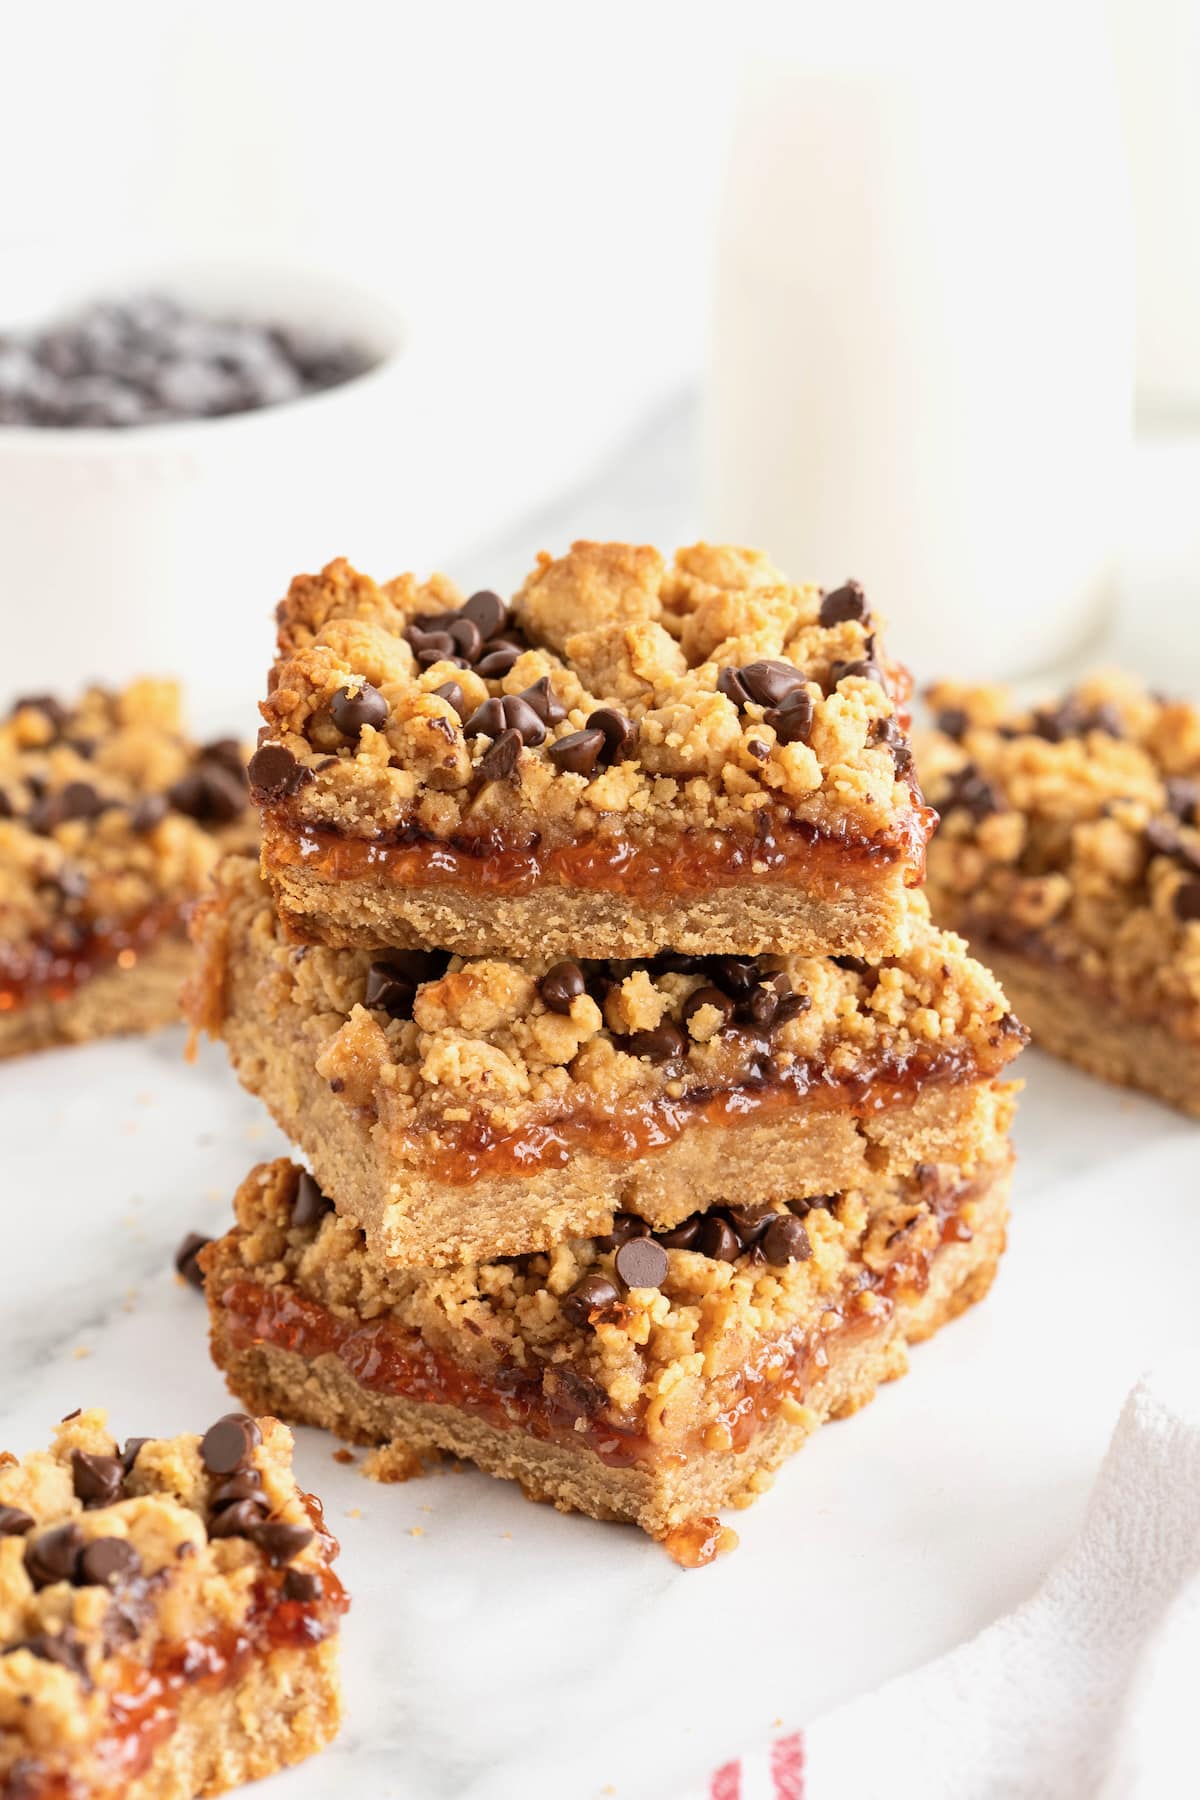
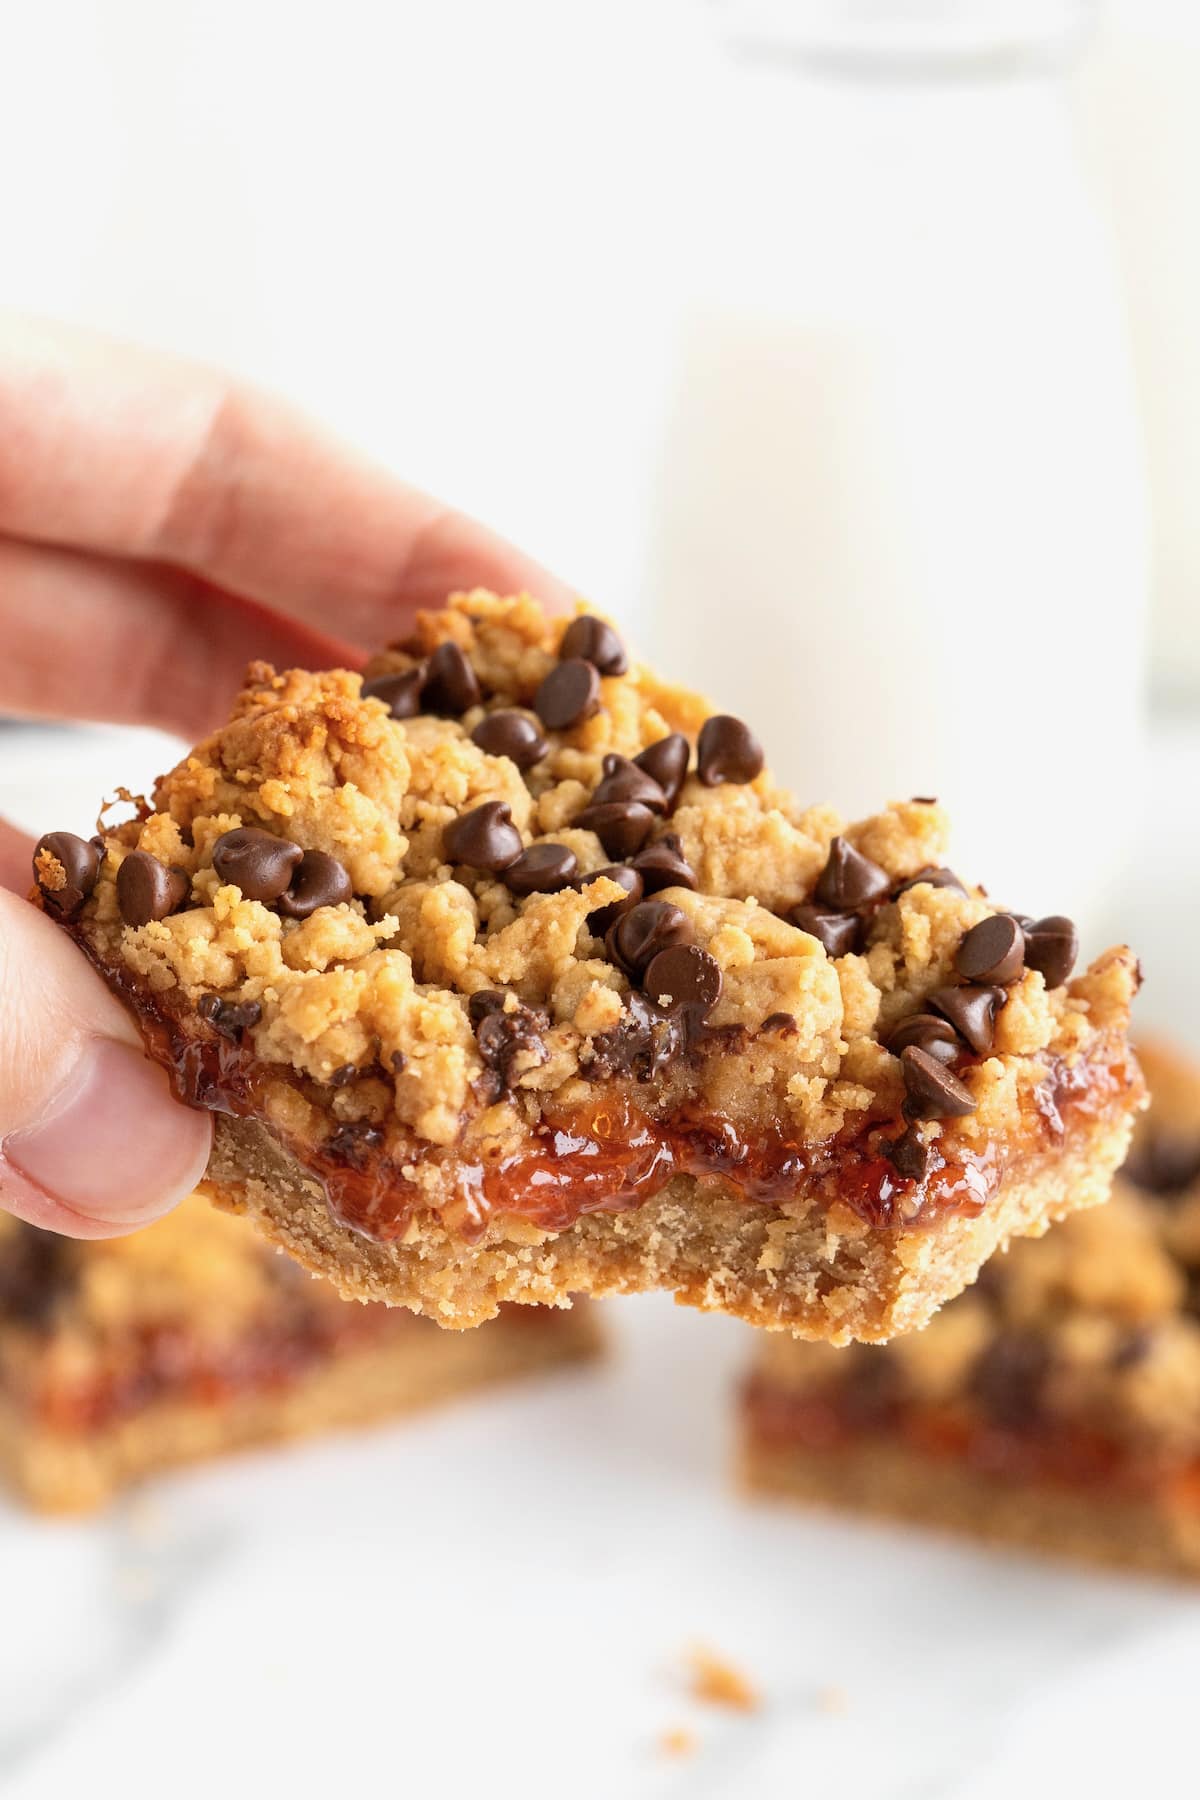
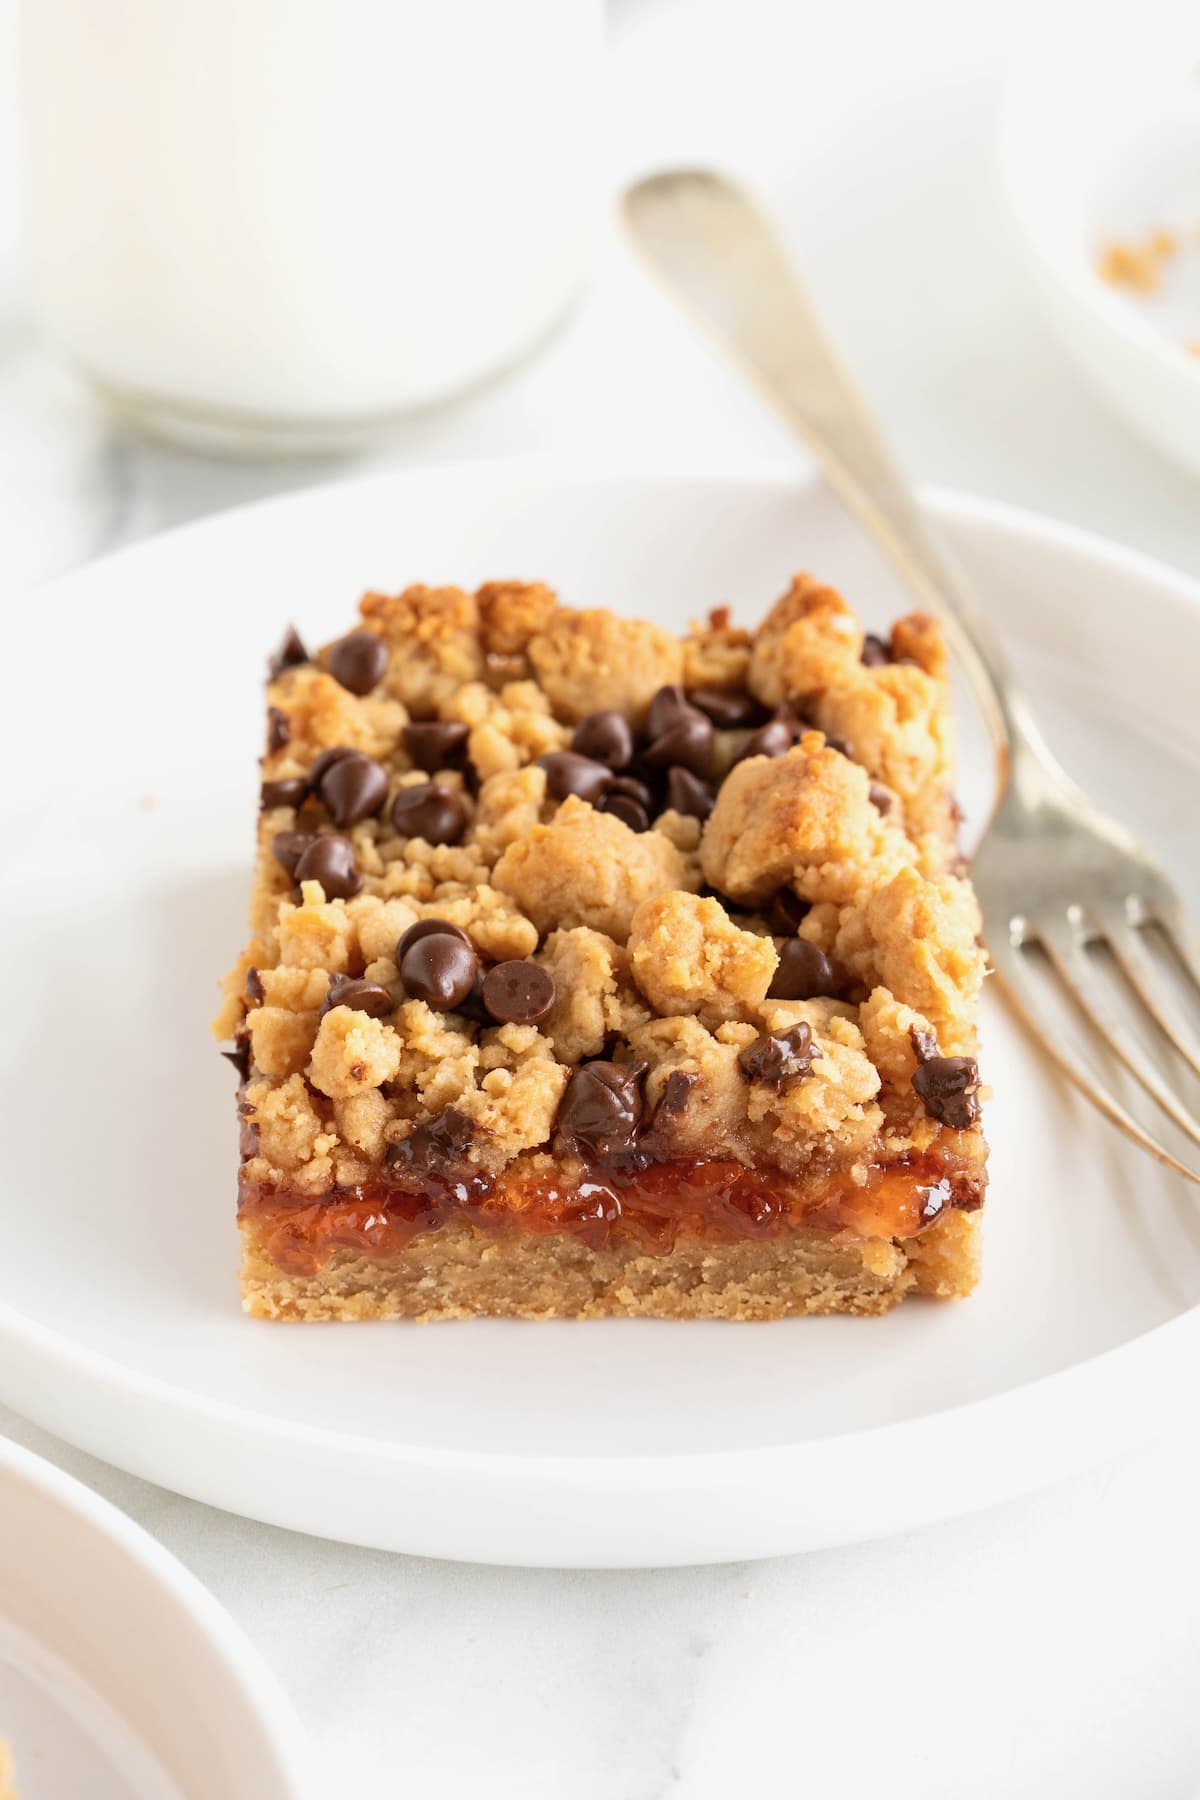
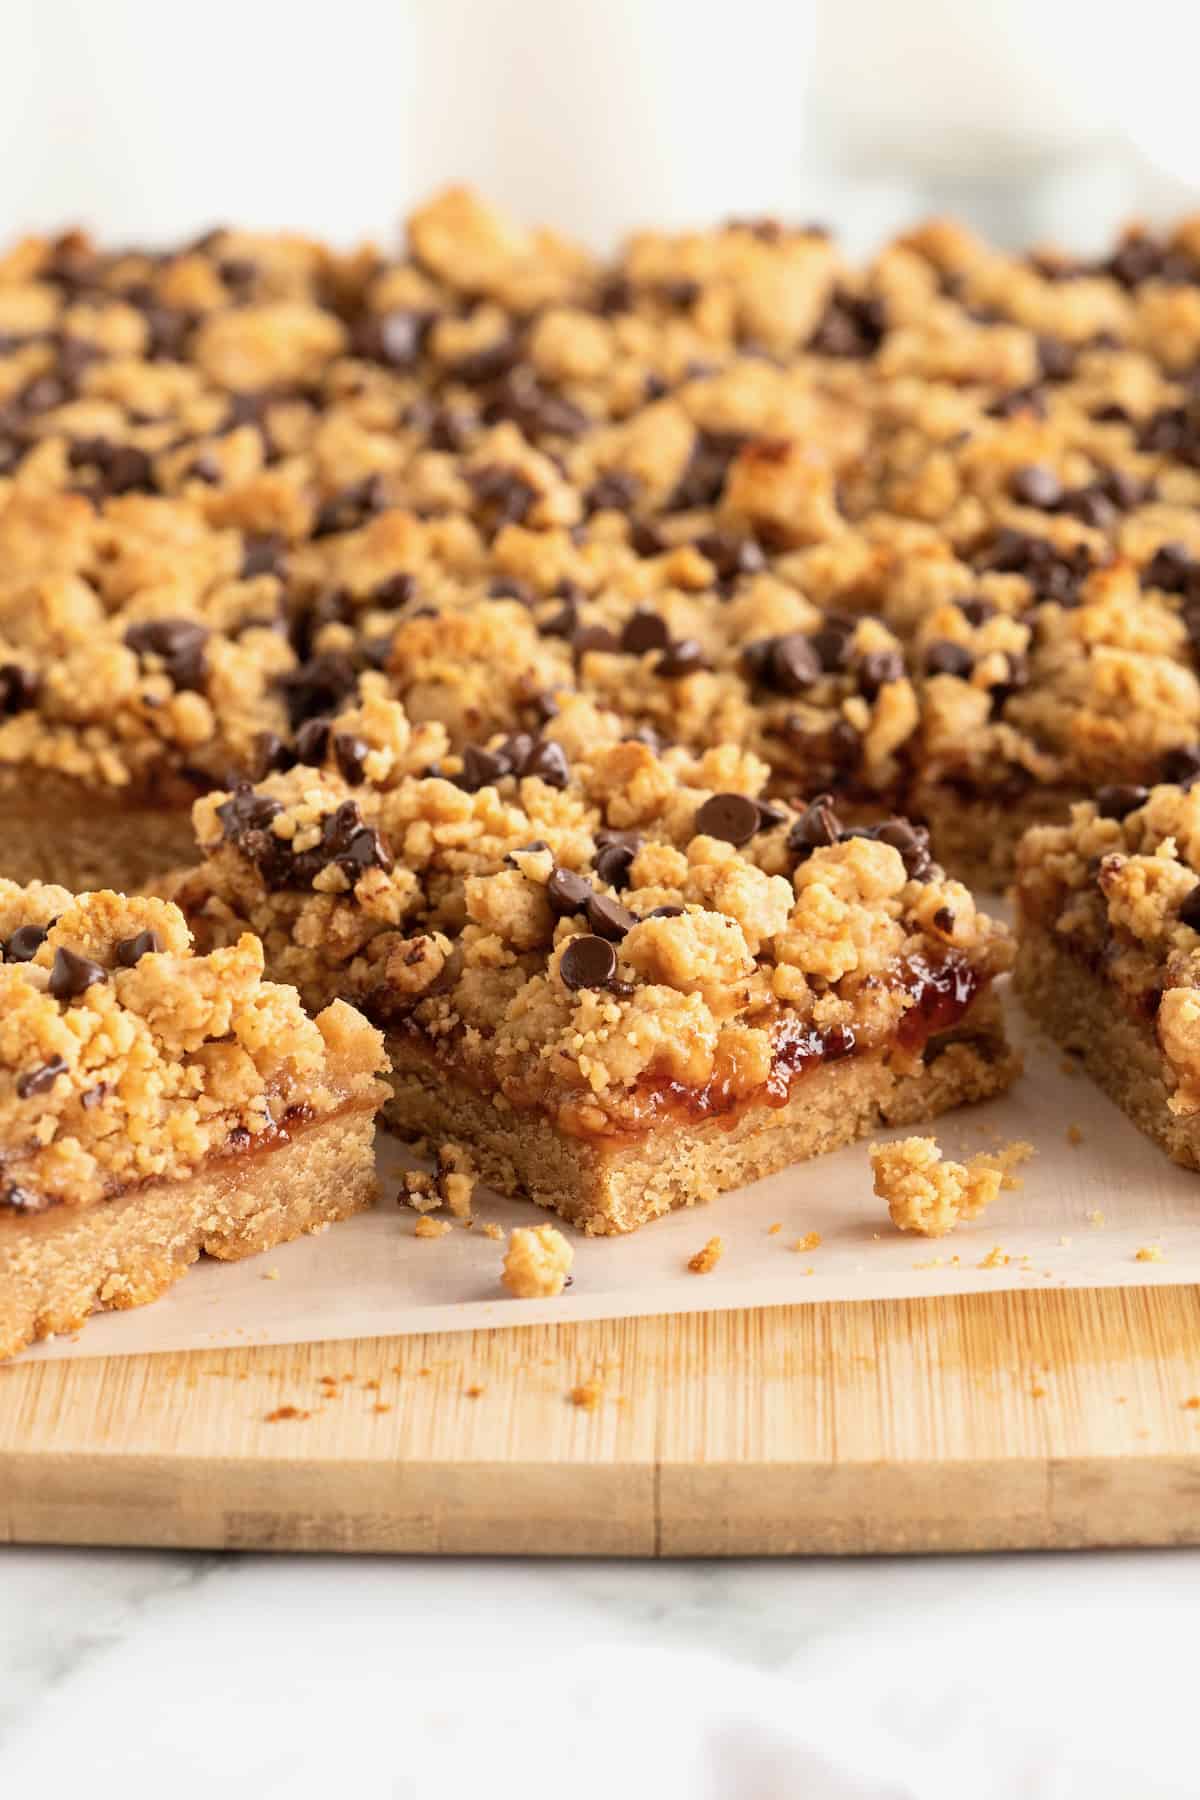
Satisfy that classic craving with these Peanut Butter and Jelly Bars. They’re so comforting and downright delicious. The chewy peanut butter base with a thin layer of fruity jelly and a crunchy chocolate chip sprinkled streusel on top all come together so perfectly. They turn out so yummy every time and get such rave reviews.
Taste a Memory
Oh, peanut butter and jelly! The classic combo holds such a memorable taste of childhood that I still crave through adulthood. It just never gets old!
I’ve been baking up a version of these Peanut Butter and Jelly bars since I was in college. It was my way of satisfying my craving for peanut butter and jelly all while trying to be a grown-up.
Crunchy or Creamy?
This recipe has taken on many tasty versions throughout the years. From variations with the flavor of jelly I use to the consistency of the peanut butter (are you team creamy or team crunchy??). Sometimes I use peanut butter chips and peanuts in place of the chocolate chips on top, like in these fresh Strawberry Peanut Butter Bars.
We love switching up the jelly each time we bake these bars. Strawberry or blackberry are definitely our go-tos, but peach and even blueberry jellies make their way into them quite often. You really can’t go wrong!
So Easy to Make!
These bars are so easy to make! A simple dough made with ingredients you probably already have on hand along with whichever jelly you’re feeling at the time.
Everyone loves them so much. I can’t tell you how many people I’ve shared the recipe with. Simple and yet so scrumptious!
A Drizzle of Honey & A Hint of Chocolate
I’ve always been a big fan of drizzling honey in my peanut butter and jelly sandwich for a beautiful balance of flavor and sweetness, so instead of using granulated sugar to bake these bars, I use honey and oh my yum! The hint of honey in every bite is absolutely amazing!
And I always say the chocolate chips on top are optional, but come on! If we’re making peanut butter and jelly in dessert form, chocolate has to be invited to the party.
What Do I Need to Make Peanut Butter and Jelly Bars?
(see recipe card for measurements and details)
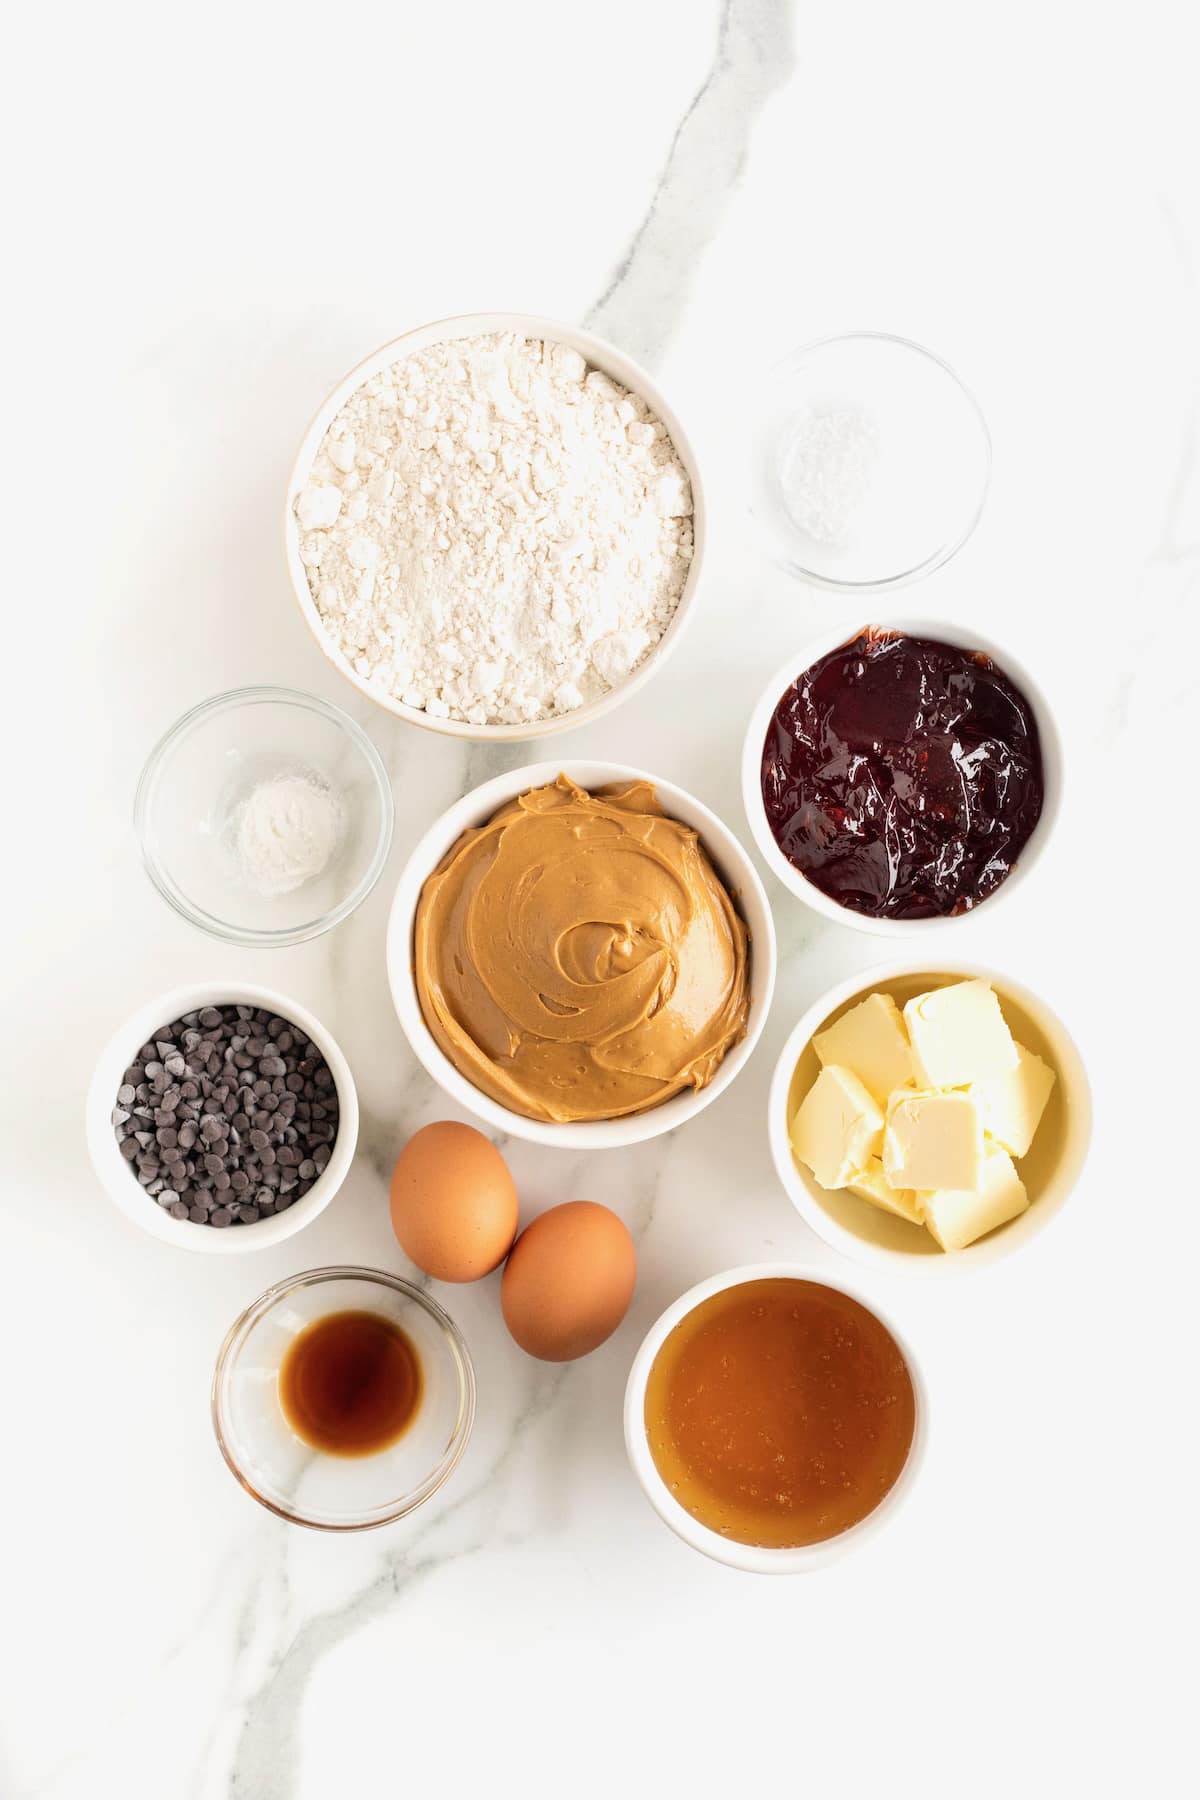
- Peanut butter (no-stir. creamy or crunchy)
- Unsalted butter
- Honey
- Large eggs
- Vanilla extract
- All-purpose flour
- Baking powder
- Kosher salt
- Jelly (any flavor) or jam
- Mini chocolate chips
- 9×13 baking dish
- Parchment paper
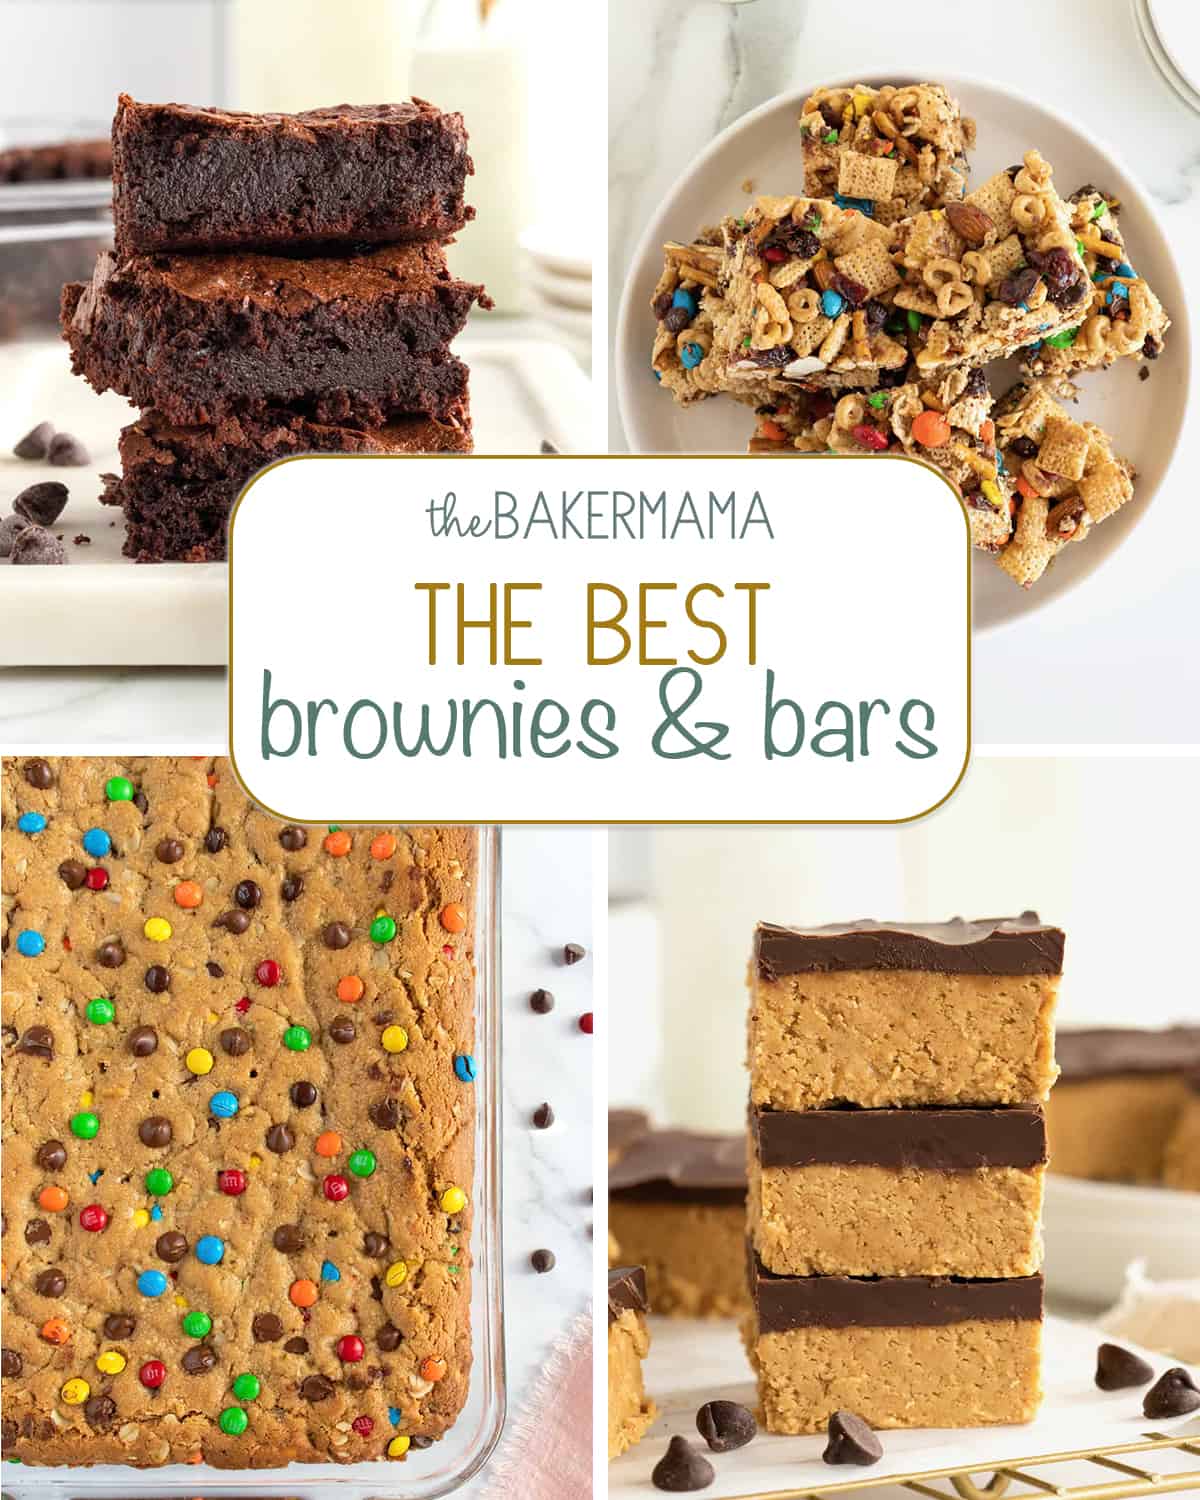
More of The Best Brownies and Bars
From chewy and fudgy to nutty, chunky, chocolatey, no-bake and flourless. My collection of the Best Brownies and Bars has something everyone will love!
How to Make Peanut Butter and Jelly Bars
- Preheat oven to 350°F. Grease a 9×13-inch baking pan with cooking spray or line with parchment paper; set aside.
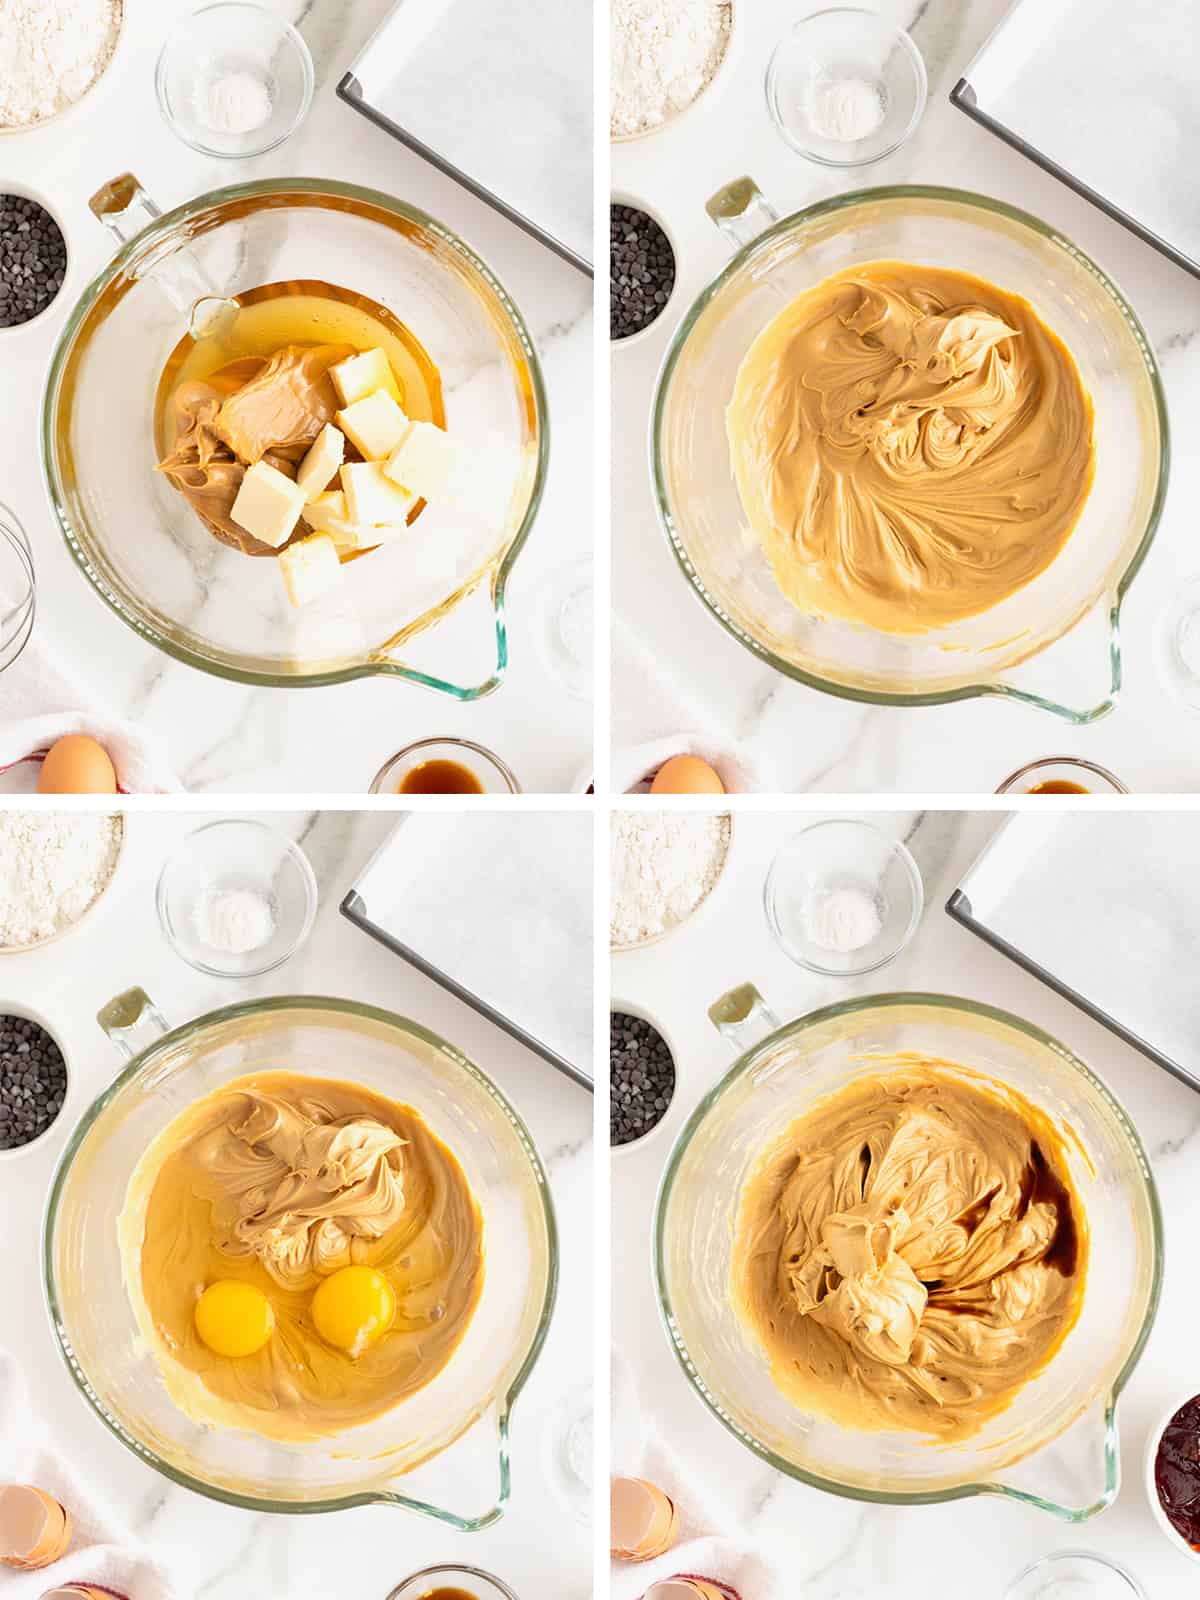
- In the bowl of an electric mixer fitted with the paddle attachment, combine the peanut butter, butter and honey. Beat on medium speed until light and fluffy.
- Add the eggs and beat until well combined.
- Beat in the vanilla.
- In a separate bowl, whisk together the flour, baking powder and salt.
- With the mixer on low speed, slowly add the flour mixture until well combined and a thick dough forms.
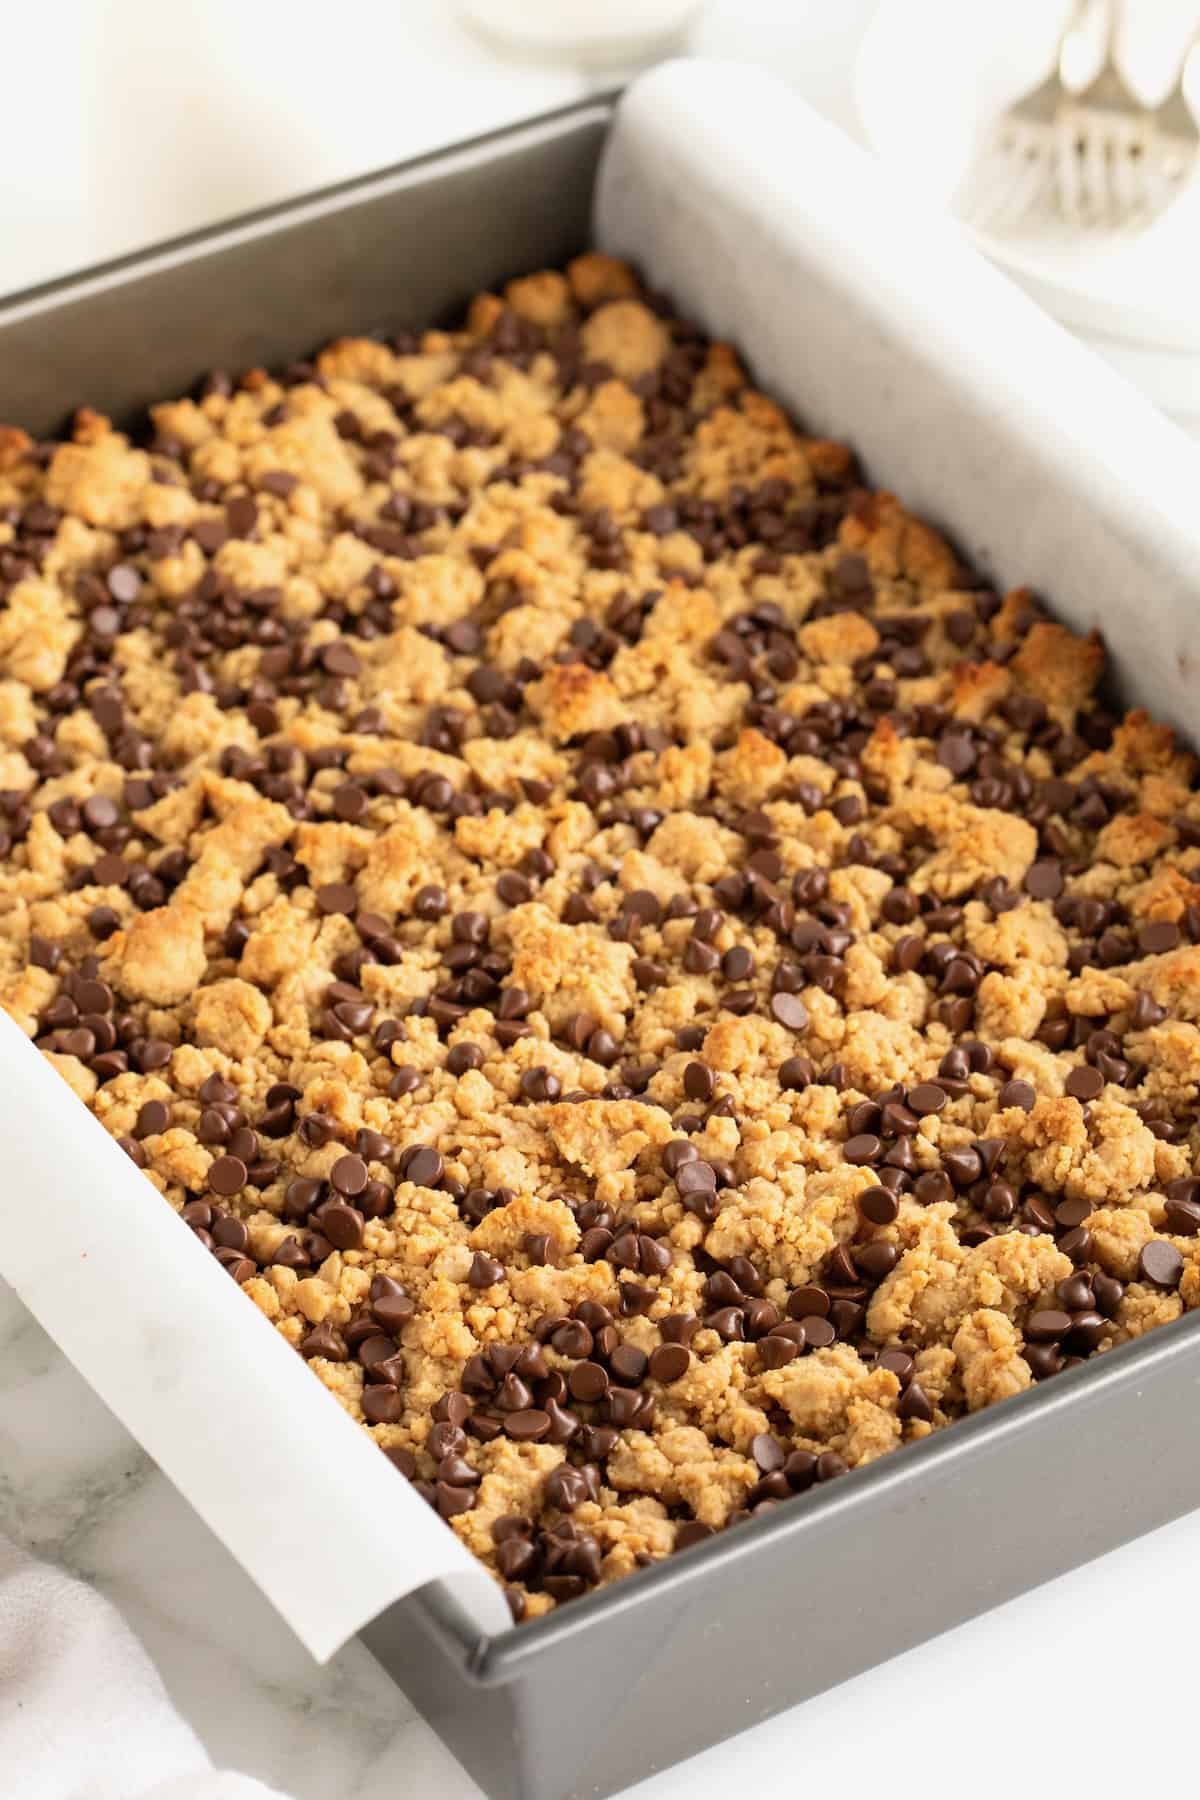
- Transfer 2/3 of the dough into to the prepared baking pan. Press down evenly with your hands or a spatula.
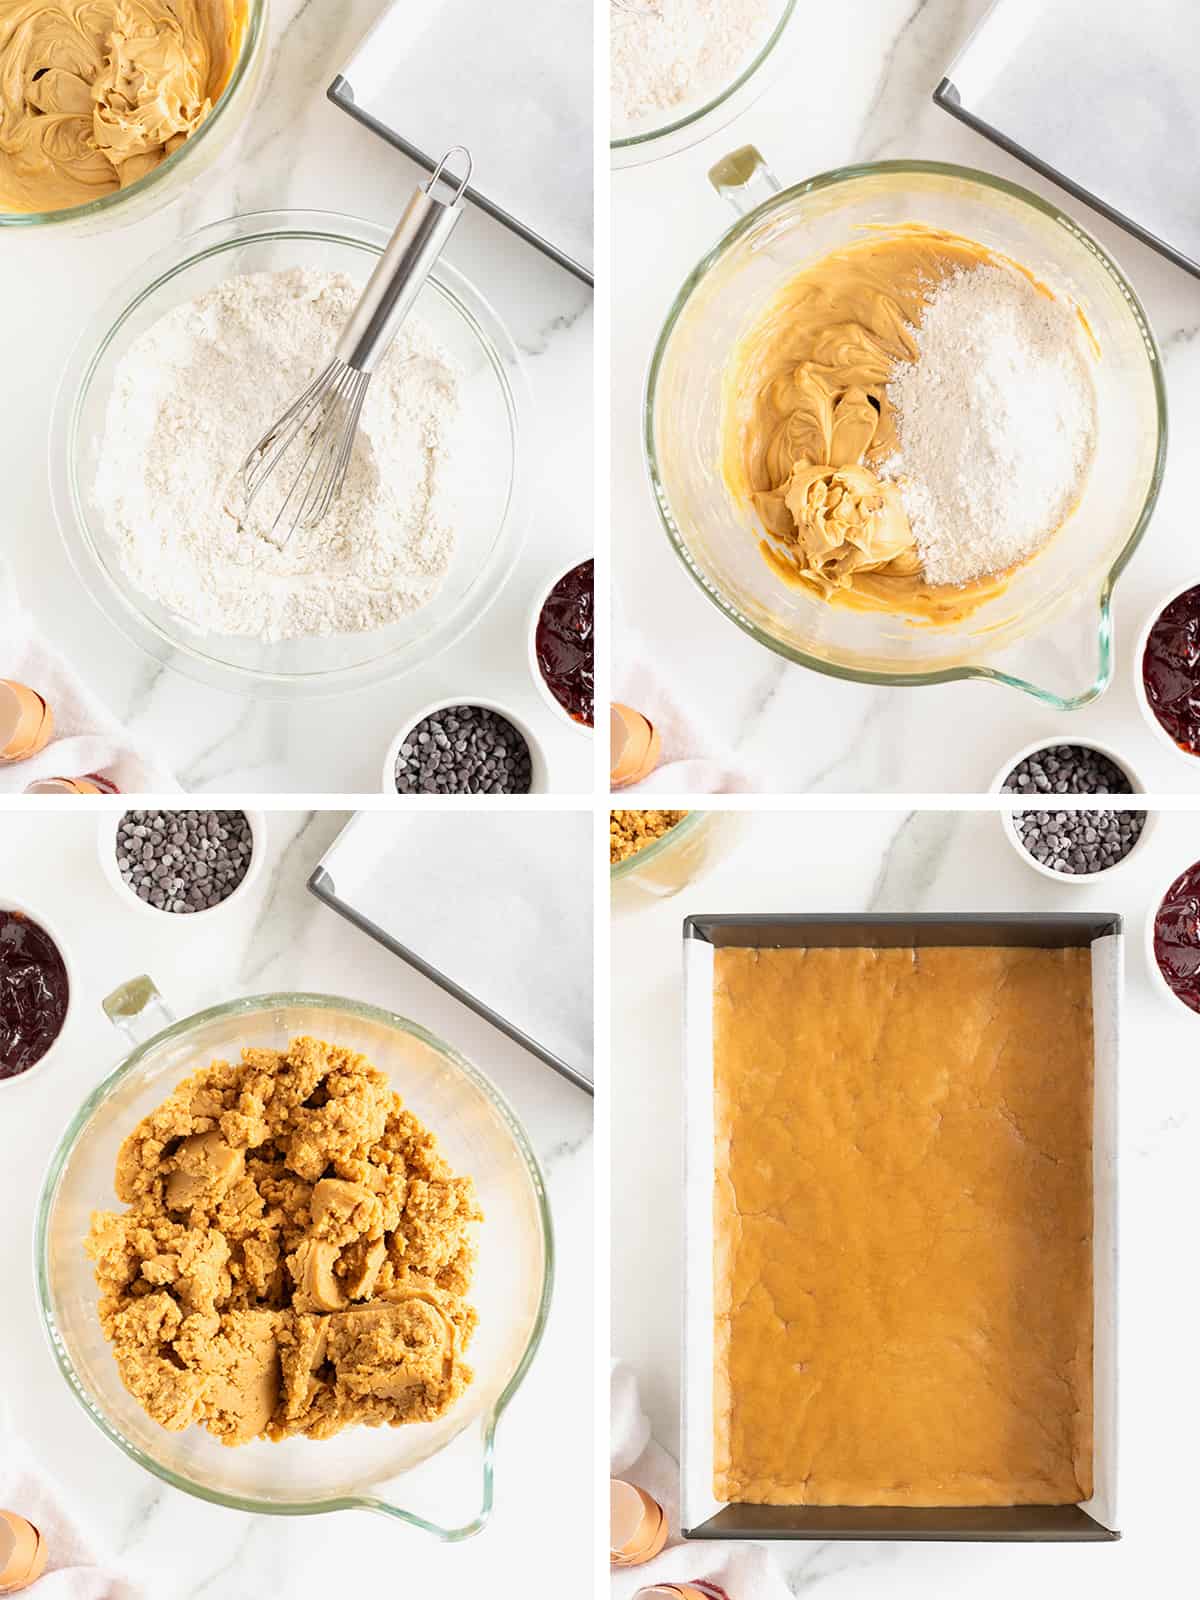
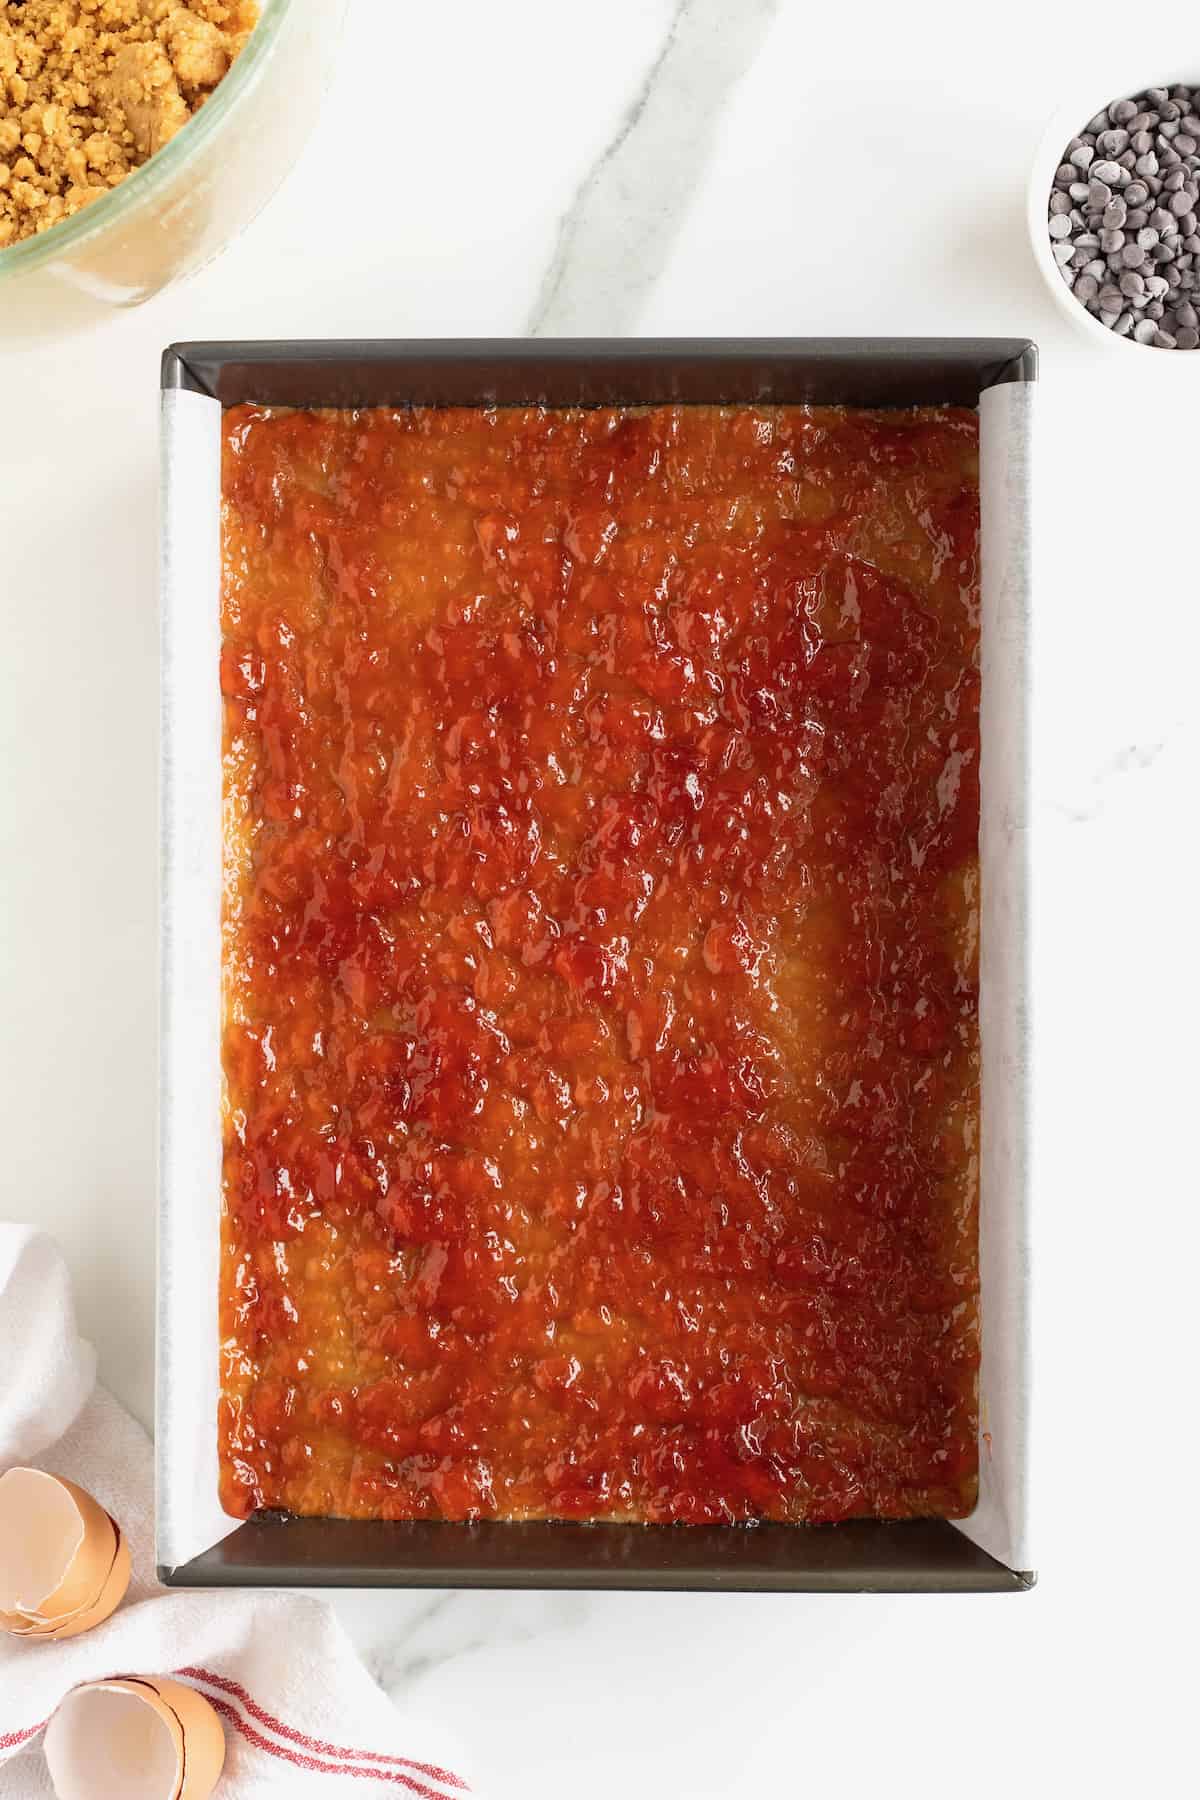
- Spread the jelly evenly over the peanut butter mixture.
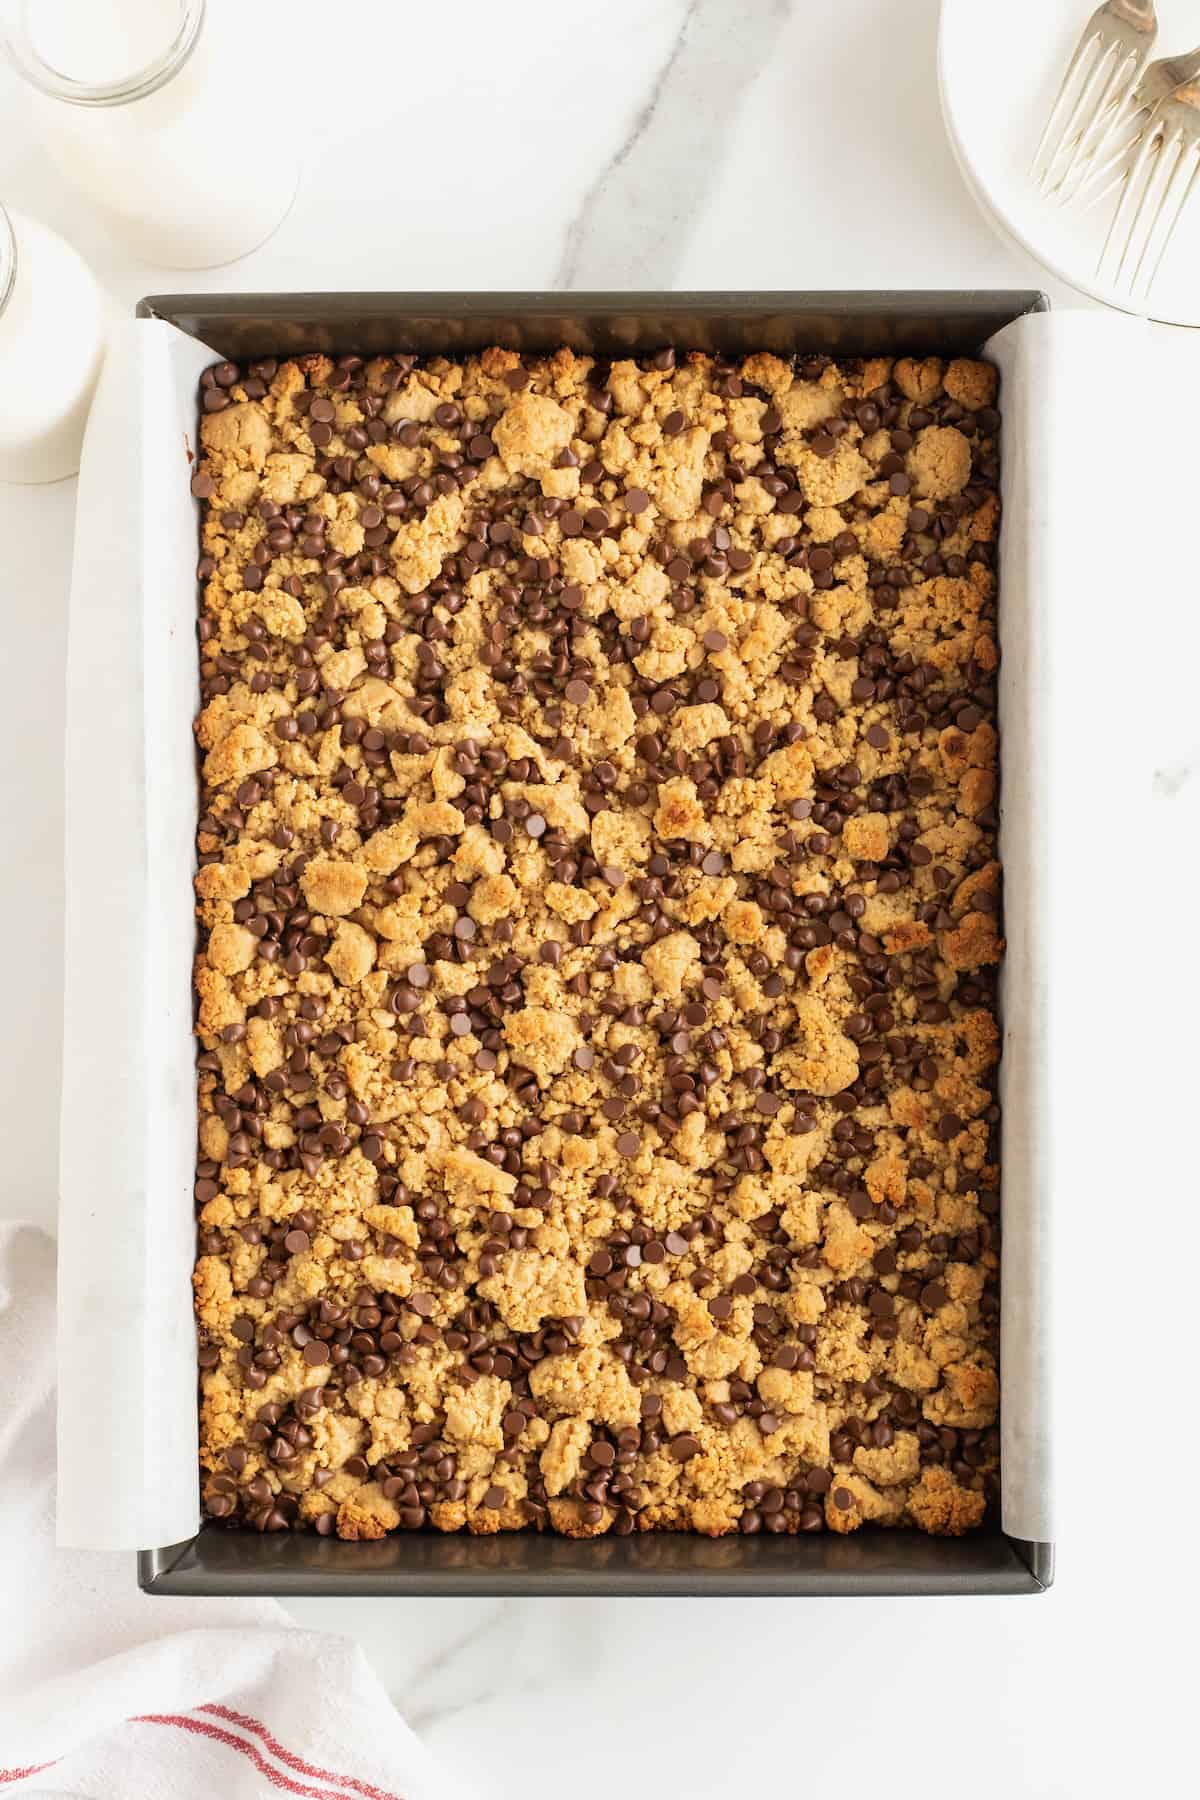
- Crumble the remaining 1/3 of the dough evenly over the jelly. Sprinkle with mini chocolate chips.

- Bake until golden, about 30 minutes. Let cool completely before cutting into bars.
How to Store Peanut Butter and Jelly Bars
Store peanut butter and jelly bars in an airtight container at room temperature for up to four days. They also store great in the refrigerator for up to a week. They’re really tasty when eaten chilled as well.
The bars can also be frozen for up to 3 months. To freeze, wrap each bar individually in plastic wrap and then place in a freezer safe plastic bag or container in the freezer. Let defrost at room temperature.
I could go on and on about how much we love these bars, and about how often I bake them for us and others, and about how I enjoy them for breakfast, lunch and definitely for dessert, but I don’t want you to wait any longer to bake them for yourselves. I know you’re going to love them just as much as we do!
If you make these Peanut Butter and Jelly Bars and post a picture to social, be sure to tag me on Instagram @thebakermama so I can see! 😍 I just love seeing how inspired and creative y’all get with the recipes and ideas I share. Enjoy!
xoxo,

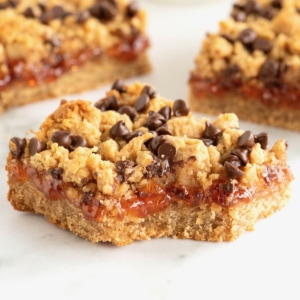
Peanut Butter and Jelly Bars
- Prep Time: 10 mins
- Cook Time: 30 mins
- Total Time: 40 mins
- Yield: 15
- Category: Dessert
Description
All the familiar flavors of a classic peanut butter and jelly sandwich in dessert bar form with a hint of honey and an irresistible chocolate chip streusel!
Ingredients
- 2 cups peanut butter (creamy or crunchy)
- 1/2 cup unsalted butter
- 3/4 cup honey
- 2 large eggs
- 1 teaspoon vanilla
- 3 cups all-purpose flour
- 1 teaspoon baking powder
- 1 teaspoon kosher salt
- 1 cup jelly (any flavor)
- 1/2 cup mini chocolate chips
Instructions
- Preheat oven to 350°F. Grease a 9×13-inch baking pan with cooking spray or line with parchment paper; set aside.
- In the bowl of an electric mixer fitted with the paddle attachment, combine the peanut butter, butter and honey. Beat on medium speed until light and fluffy. Add the eggs and beat until well combined. Beat in the vanilla.
- In a separate bowl, whisk together the flour, baking powder and salt. With the mixer on low speed, slowly add the flour mixture until well combined and a thick dough forms.
- Transfer 2/3 of the dough into to the prepared baking dish. Press down evenly with your hands or a spatula. Spread the jelly evenly over the peanut butter mixture. Crumble the remaining 1/3 of the dough evenly over the jelly. Sprinkle with mini chocolate chips.
- Bake until golden, about 30 minutes. Let cool completely before cutting into bars.
Do you need to use honey?
H, Terry! tThe honey definitely contributes to the chewy texture of the bars. But you could reduce the amount they use to just 1/2 cup and the bars will have more of a crumb texture to them. Or you could substitute it with maple syrup or even granulated sugar if you don’t have honey or are allergic to honey. Hope this helps! Enjoy!
Yikes! Incredibly dry. Made them as written. Should’ve known by how thick the dough was. Maybe less flour if I try them again.
Oh no! What kind of peanut butter did you use? They should be dry at all given the amount of peanut butter in them. I’m wondering if your peanut butter was dried out. Sorry to hear they didn’t turn out as great as they are supposed to!
Can these be frozen?
Hi Pat! Absolutely, they freeze great for up to 3 months. I put the bars in a freezer-friendly container between sheets of parchment paper. Defrost in the refrigerator overnight before serving or enjoy them slightly frozen. 🙂
Hello, do you think l could use almond or coconut flour instead of all purpose flour? THank you.
Hi Diana! I haven’t tried it so I can’t say for sure exactly how they will taste or how the texture will turn out, but I think it’s certainly worth a try. Keep me posted on how they turn out for you. Fingers crossed. Enjoy!