Kids (and kids at heart!) will love making this adorable Christmas Tree Snack Board. It’s an activity that’s easily made with simple ingredients everyone will enjoy snacking on.
Easy Christmas Snack Board for Kids
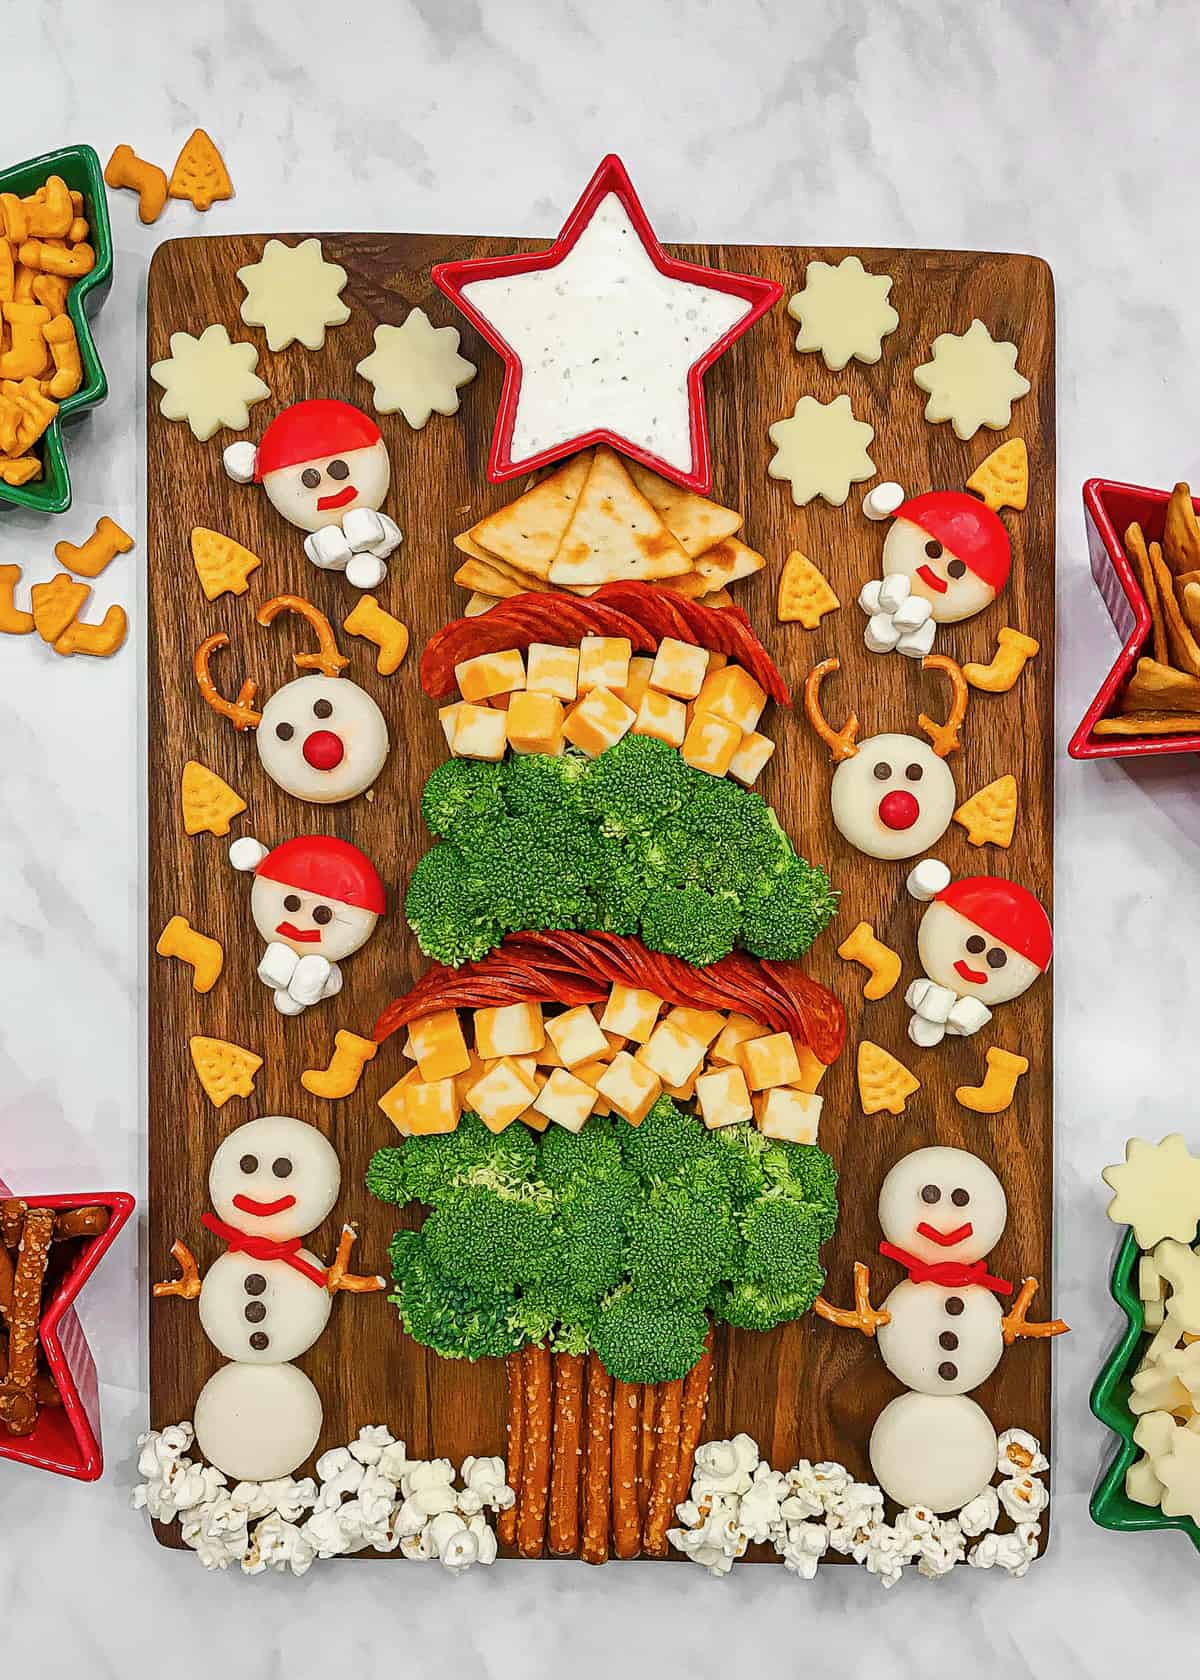
If you loved the Holly Jolly Kid’s Snack Board, I have another fun and yummy holiday snack board for you! We had a blast building and snacking on this adorably delicious Kid’s Christmas Tree Snack Board while watching Christmas movies. It was incredibly easy to make with some of our favorite everyday snacks. My crew pretty much built it all by themselves and were so excited with how cute and tasty it turned out.
There’s a ton of flexibility with this snack board, but for reference, we built this cutie on our 18″ x 12″ walnut wood board.
What Do I Need to Make a Kids’ Christmas Tree Snack Board?
- Babybel cheese rounds
- Mini chocolate chips
- Pretzels twists
- Pull & Peel Twizzlers
- Red M&M’s
- Mini marshmallows
- Pretzel dipping sticks
- Broccoli florets
- Colby jack cheese cubes
- Pepperoni slices
- Pita triangle crackers
- Ranch dressing
- White cheddar cracker cuts cut into stars with mini star cutter
- Goldfish tree and stocking holiday shapes
- Popcorn
- 18″ x 12″ walnut wood board
How to Make a Kids’ Christmas Tree Snack Board
To make the Santa, Rudolph and Snowman cheeses:
- Peel eight Babybel cheese rounds fully, and four partially leaving the top half on (you don’t want Santa’s head to get cold!).
- Use mini chocolate chips for the eyes and snowman buttons.
- Pretzel pieces make the reindeer antlers and snowman arms.
- Form Pull & Peel Twizzlers into smiles and snowman scarves (little fingers may need help with this one).
- Use red M&M’s for the Rudolph noses and mini marshmallows for Santa’s hat and beard. Too much cuteness!

Trim the Tree
To make the Christmas tree:
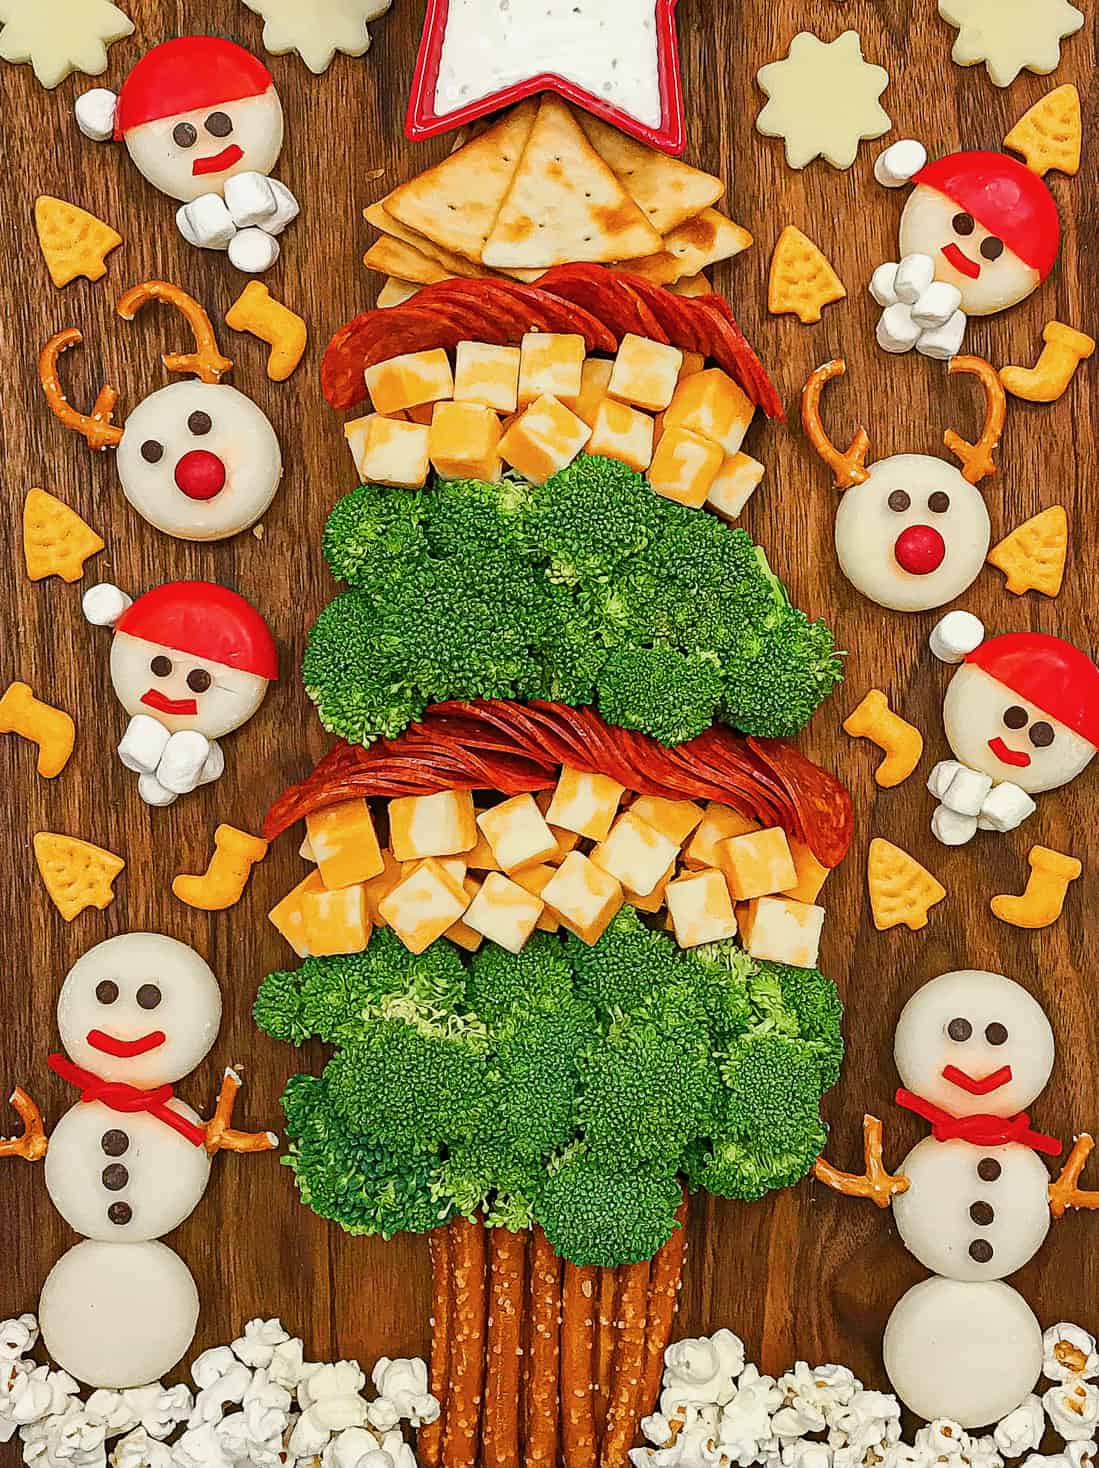
- Lay 10 pretzel dipping sticks vertically in the middle of the board, near the bottom, for the tree trunk. Next, create two horizontal layers each of broccoli florets, cheese cubes, and pepperoni then use pita triangle crackers as the top of the tree.
- Top the tree with a small star-shaped serving bowl filled with ranch dressing. No star-shaped bowl? Cut some thick cheese slices with a star-shaped cookie cutter and stack several slices to top your snack tree!
- To fill the space, I used Horizon Organic cheese shape stars toward the top of the board with more in a bowl on the side. I also took out the trees and stockings from the goldfish holiday shapes bag to place on the board and in a bowl to the side.
- Finish it off with a dusting of popcorn “snow” at the bottom. Now your holiday scene is complete!

Super cute and so easy. Make it an activity, have fun and enjoy the experience!
If you’re inspired to re-create this adorable snack board, be sure to snap a picture and share it with me @thebakermama on Instagram so I can see. I love seeing how inspired and creative y’all get with the ideas and recipes I share. Happy holidays and enjoy!
xoxo,

Kids’ Christmas Tree Snack Board
- Prep Time: 20 minutes
- Total Time: 20 minutes
- Yield: 6-8
Description
Kids (and kids at heart!) will love making this adorable Christmas Tree Snack Board. It’s an activity that’s easily made with simple ingredients everyone will enjoy snacking on.
Ingredients
Santa, Rudolph and Snowman Cheeses:
- 12 Babybel cheese rounds
- 24 mini chocolate chips
- pretzels twists
- Pull & Peel Twizzlers
- 2 red M&M’s
- 4 mini marshmallows
Christmas Tree:
- 10 pretzel dipping sticks
- 3 cups broccoli florets, divided
- 1 (16 oz) bag Colby jack cheese cubes, divided
- 1 (6oz) package pepperoni slices, divided
- 10 pita triangle crackers
Additional Goodies:
- 1 cup ranch dressing
- 1 cup Horizon Organic cheese shape stars or, white cheddar cracker cuts cut into stars with mini star cutter, 6 arranged on the board
- 1 cup goldfish tree and stocking holiday shapes, 14 arranged on board
- 1/2 cup popcorn
- 1 cup pita crackers
- 1 cup pretzel dipping sticks
Instructions
- To make the Santa, Rudolph and Snowman cheeses: peel 8 Babybel cheese rounds fully and 4, leaving the top half on. Use mini chocolate chips for the eyes and snowman buttons, pretzels pieces for the reindeer antlers and snowman arms, Pull & Peel Twizzlers for the smiles & snowman scarves, red M&M’s for the Rudolph noses, and mini marshmallows for Santa’s hat & beard.
- To make the Christmas tree: Lay 10 pretzel dipping sticks vertically in the middle of the board, near the bottom, for the tree trunk. Next, create two horizontal layers each of broccoli florets, cheese cubes, and pepperoni then use pita triangle crackers as the top of the tree.
- Top the tree with a small star-shaped serving bowl filled with ranch dressing.
- Arrange Horizon Organic cheese shape stars, or white cheddar cheese slices cut into stars, around the board with more in a bowl on the side.
- Use the tree and stocking shapes from the Goldfish Holiday Shapes bag to place on the board and in a bowl to the side.
- Add popcorn to the bottom of the board as “snow”.