No rolling or cutting required when making these adorable Snowman Sugar Cookies. A fun and festive winter treat to make with the kids!

Cookies to Make with Kids at Christmas
Do you want to build a snowman & eat it too?! Well, you won’t need scarves and mittens to build these adorable Snowman Sugar Cookies. And you can enjoy them in the comfort of your home with a cup of hot cocoa and some festive holiday music.

An All-Weather Snowman
It’s very rare that we get snow here in Dallas and when we do, we’d be lucky to build a snowball let alone a snowman. So as an alternative, we build a Snowman Snack Board, or a Snowman Cinnamon Roll or Snowman Scotcheroos. Or these adorably sweet snowman-shaped sugar cookies that the kids and I decorate with candies.
If you’re looking for a fun and yummy activity to do with the kids on a cold winter day or to take to a Holiday party, these adorable snowman cookies are sure to be enjoyed!

So Easy & Fun
The cookies are super easy to shape and bake with no rolling pin or cookie cutter required. You just shape the dough into three different sized balls next to each other and then press them all down together to create that snowman shape.
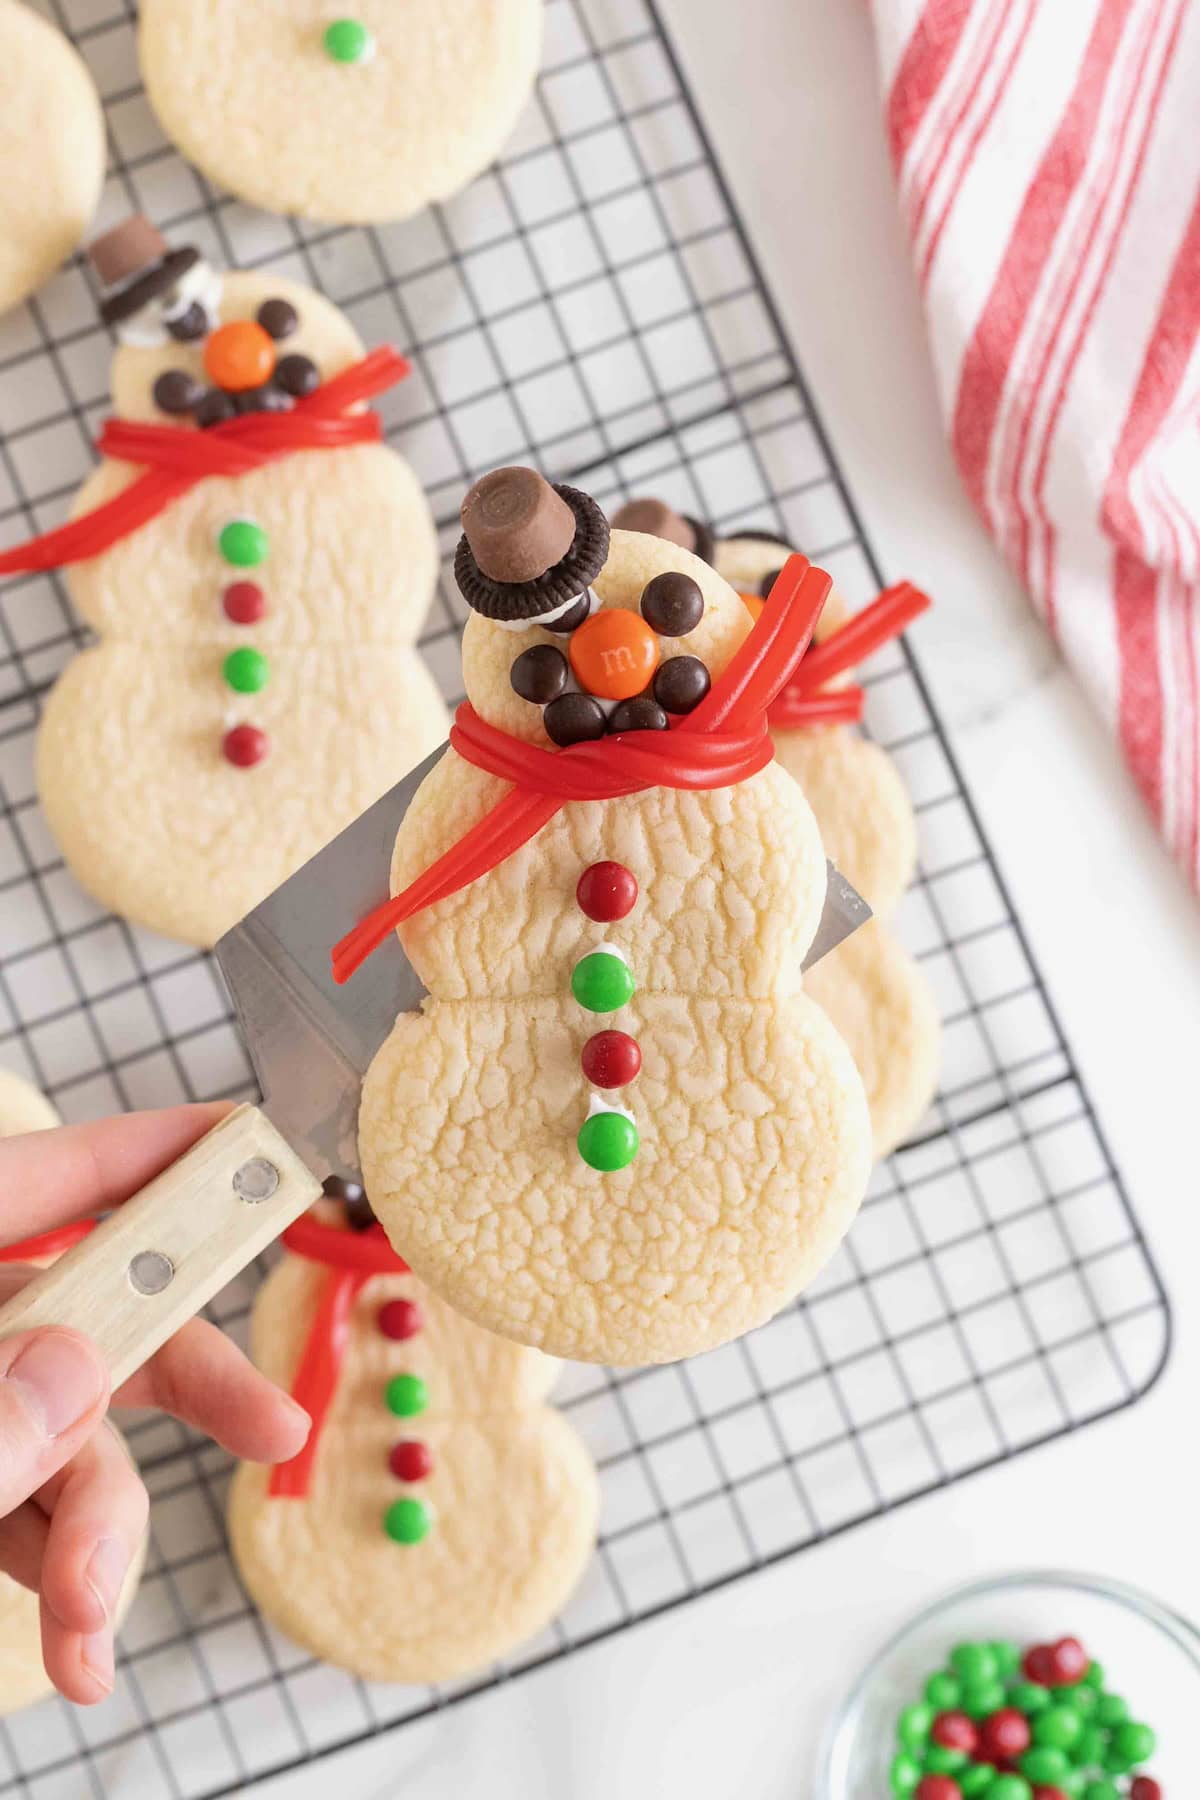
Once they’ve bake into cute little snowmen, you’ll attach assorted candies for the eyes, nose, mouth, hat, scarf, and buttons. It’s as easy as that!
Ingredients and Supplies
(see recipe card at the bottom of this post for measurements and details. To learn more about specific baking ingredients and how they function in baking recipes, reference my Complete Guide to Baking Ingredients)
Ingredients:
- Unsalted butter: adds moisture and richness and helps the cookies spread. If you use salted butter, you might consider using less salt in the recipe as it will affect the sweetness of the cookie.
- Powdered sugar: fine particles make powdered sugar dissolve quickly giving cookies that classic smooth, melt-in-your-mouth sugar cookie texture.
- Large egg: helps bind the ingredients together and adds moisture.
- Pure vanilla extract: enhances the flavor and balances the sweetness. Feel free to use almond extract or coconut extract, if desired.
- All-purpose flour: provides structure and body to the cookies.
- Baking soda: leavening agent that gives the cookies lift and helps them spread a little while baking.
- Cream of tartar: gives structure and a slight tangy flavor to the cookie dough.
- Oreos Minis: to make the brim of the snowman’s hat.
- Rolos candies: for the snowman’s top hat.
- Twizzlers Pull ‘N’ Peel: to make the snowman’s scarf.
- Orange regular M&M’s: to make the nose.
- Brown M&M’s Minis: for the eyes and mouth.
- Red and green M&M’s Minis: for the snowman’s buttons.
- White cookie icing: Acts like glue to stick the candies to the snowman.
Supplies:
- Baking sheets
- Parchment paper
- Electric mixer with paddle attachment (or hand mixer)
- Medium mixing bowl
- Whisk

How to Make Snowman Sugar Cookies
- Preheat oven to 350°F. Line baking sheets with parchment paper and set aside.
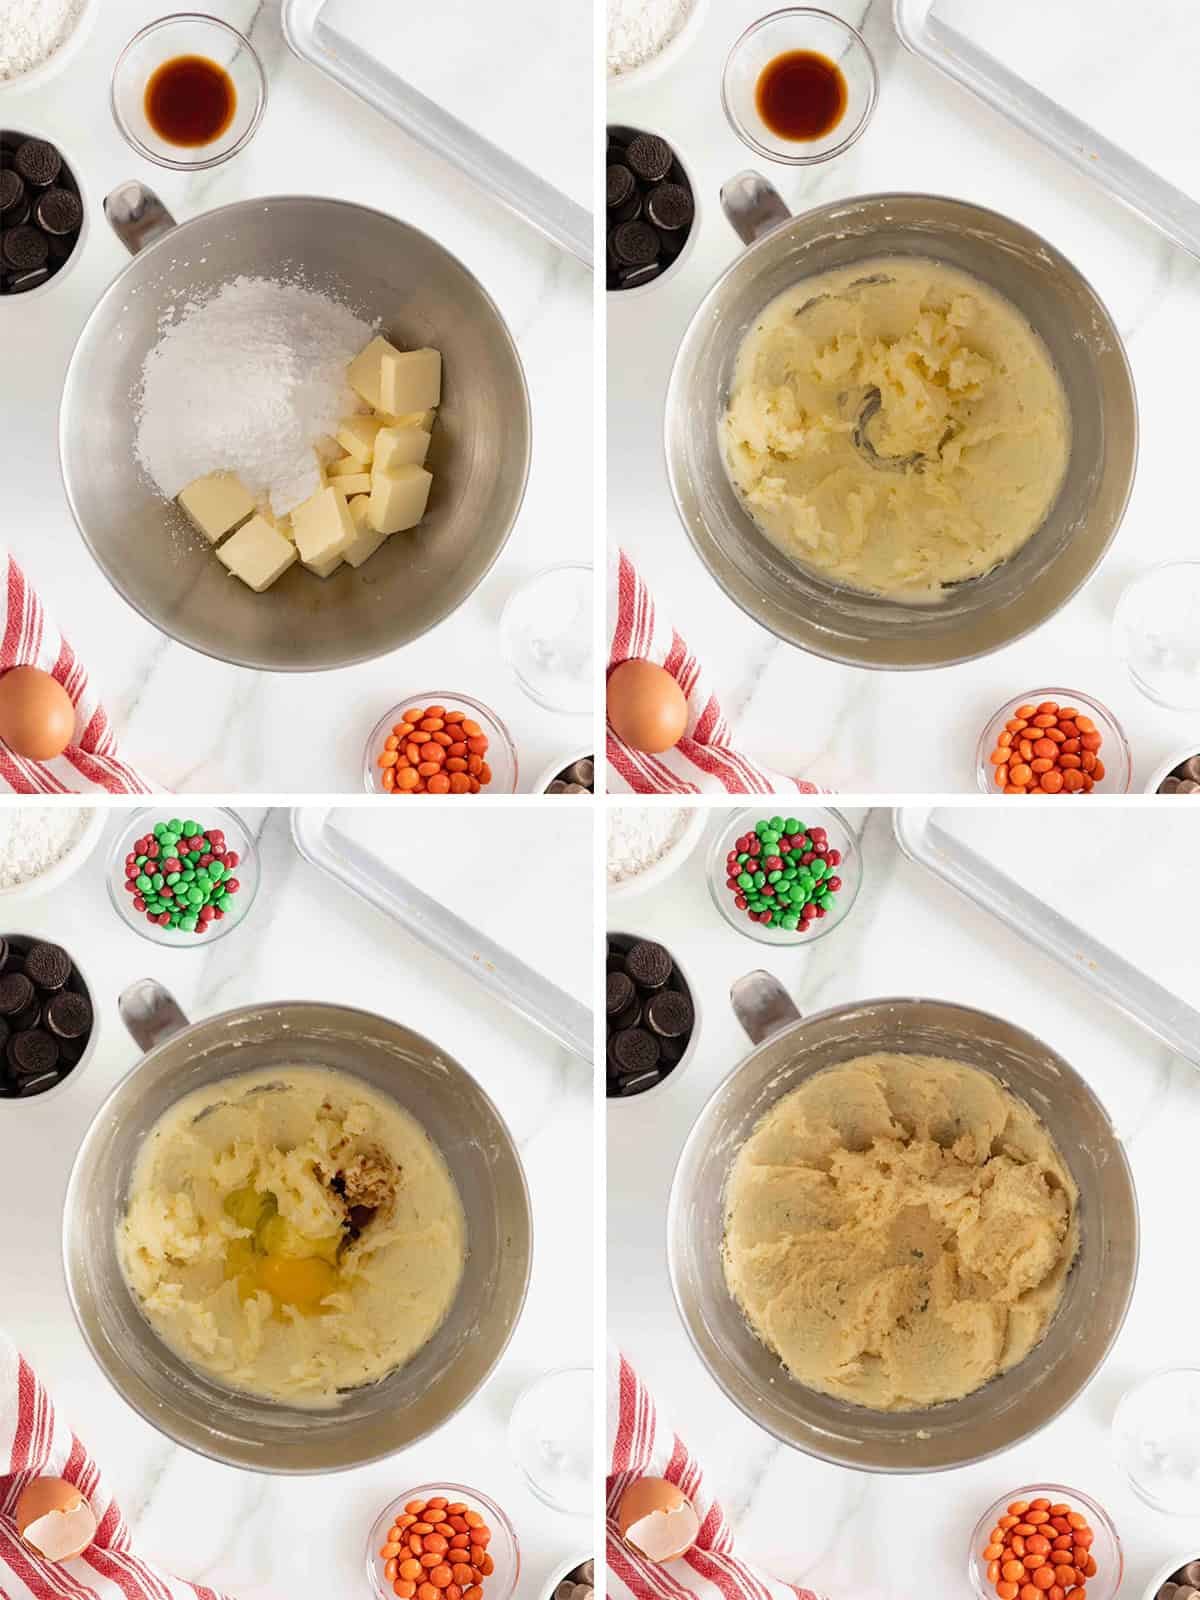
- In the bowl an electric mixer, beat the butter and powdered sugar until smooth.
- Scrape down the sides of the bowl.
- Add the egg and vanilla and beat on high speed until well combined.
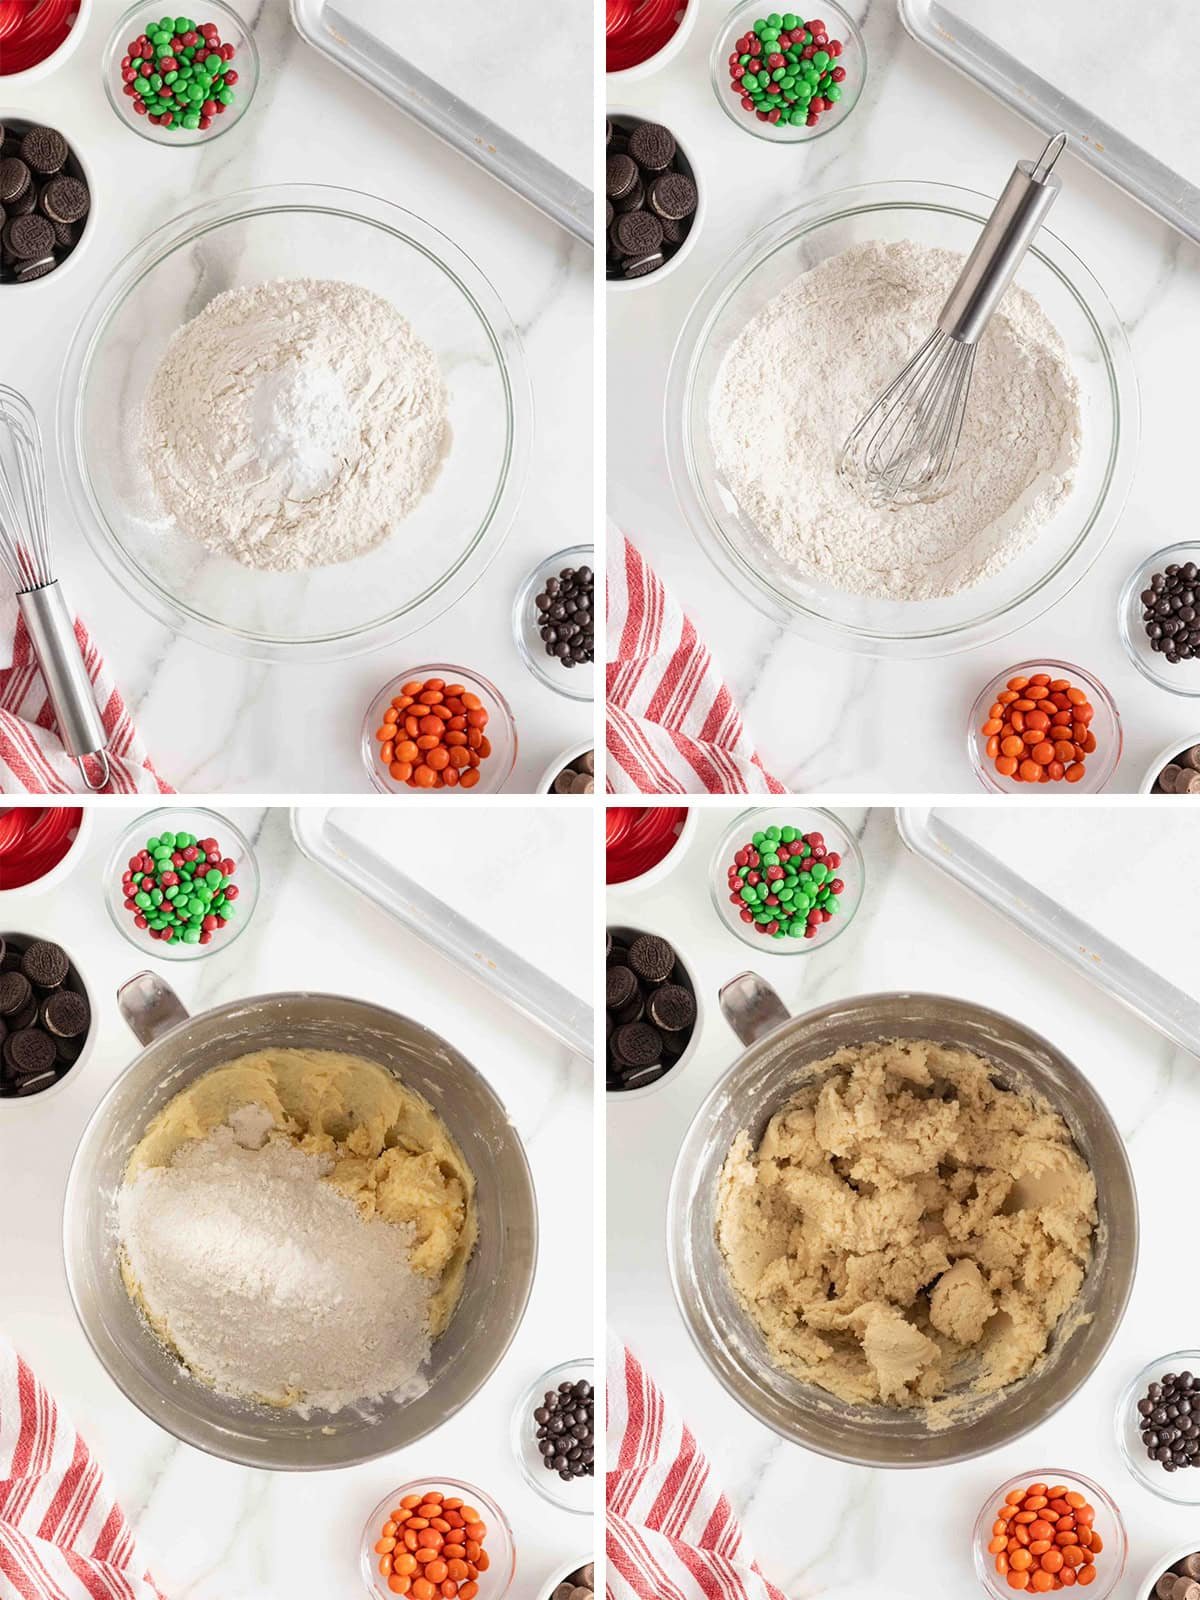
- In a separate bowl, whisk together the flour, baking soda and cream of tarter.
- Add the dry ingredients to the butter mixture in the mixer and beat on low speed until just combined and then on medium speed until a thick dough forms.
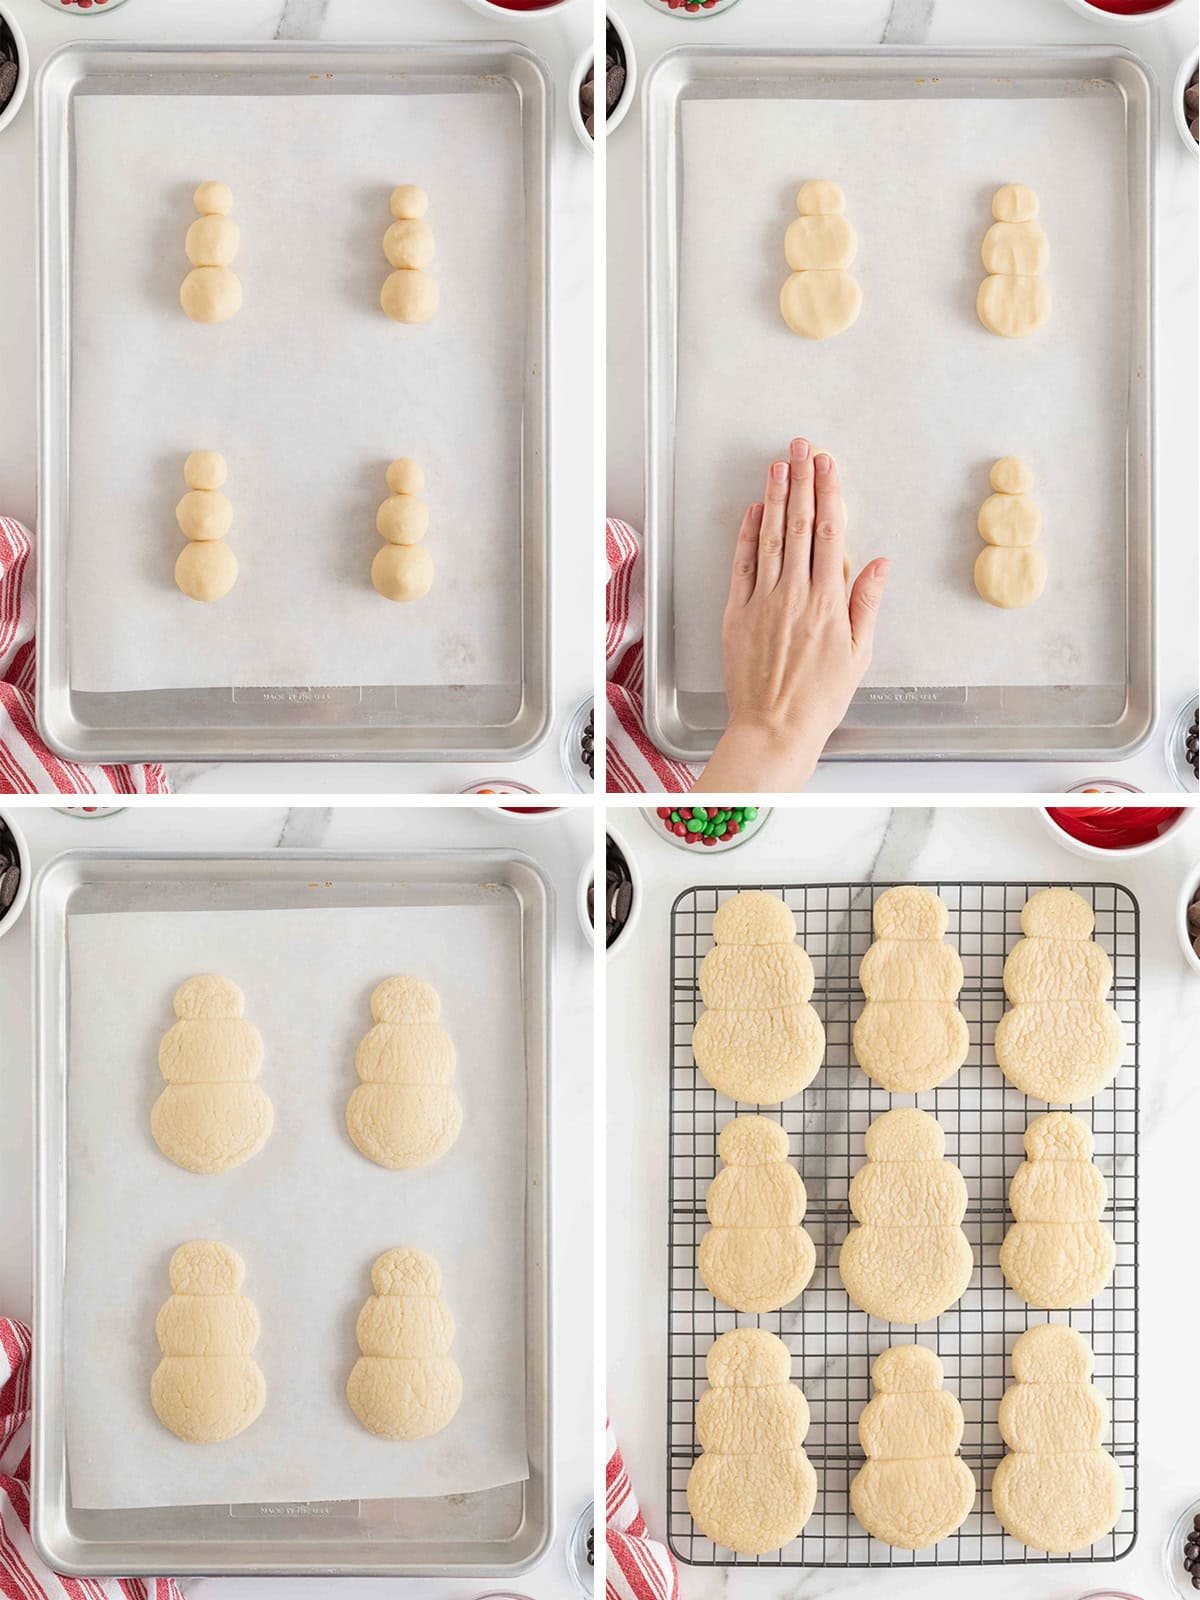
- Using measuring spoons or three different sized cookie scoops, scoop the dough into 2 tablespoon, 1 tablespoon and 1 teaspoon sized balls, placing them right next to each other on the prepared baking sheet in a snowman shape.
- Press down slightly on all three balls of dough at the same time with the palm of your hand to flatten the dough into a snowman shape. Repeat with remaining dough placing each snowman a few inches apart.
- Bake for 10 minutes or until cookies start to crack, but not brown. Let cool on cookie sheet 5 minutes before transferring to wire rack to cool completely before decorating.
- For the hat, separate the mini Oreo cookies and use the filled size as the bottom of the hat.
- Attach the bottom of the Rolos candy to the filled side of the mini cookie with a little white icing. Set aside.
- Arrange the brown M&M’s Minis and orange M&M onto the head for the eyes, nose and mouth, attaching with some white icing.
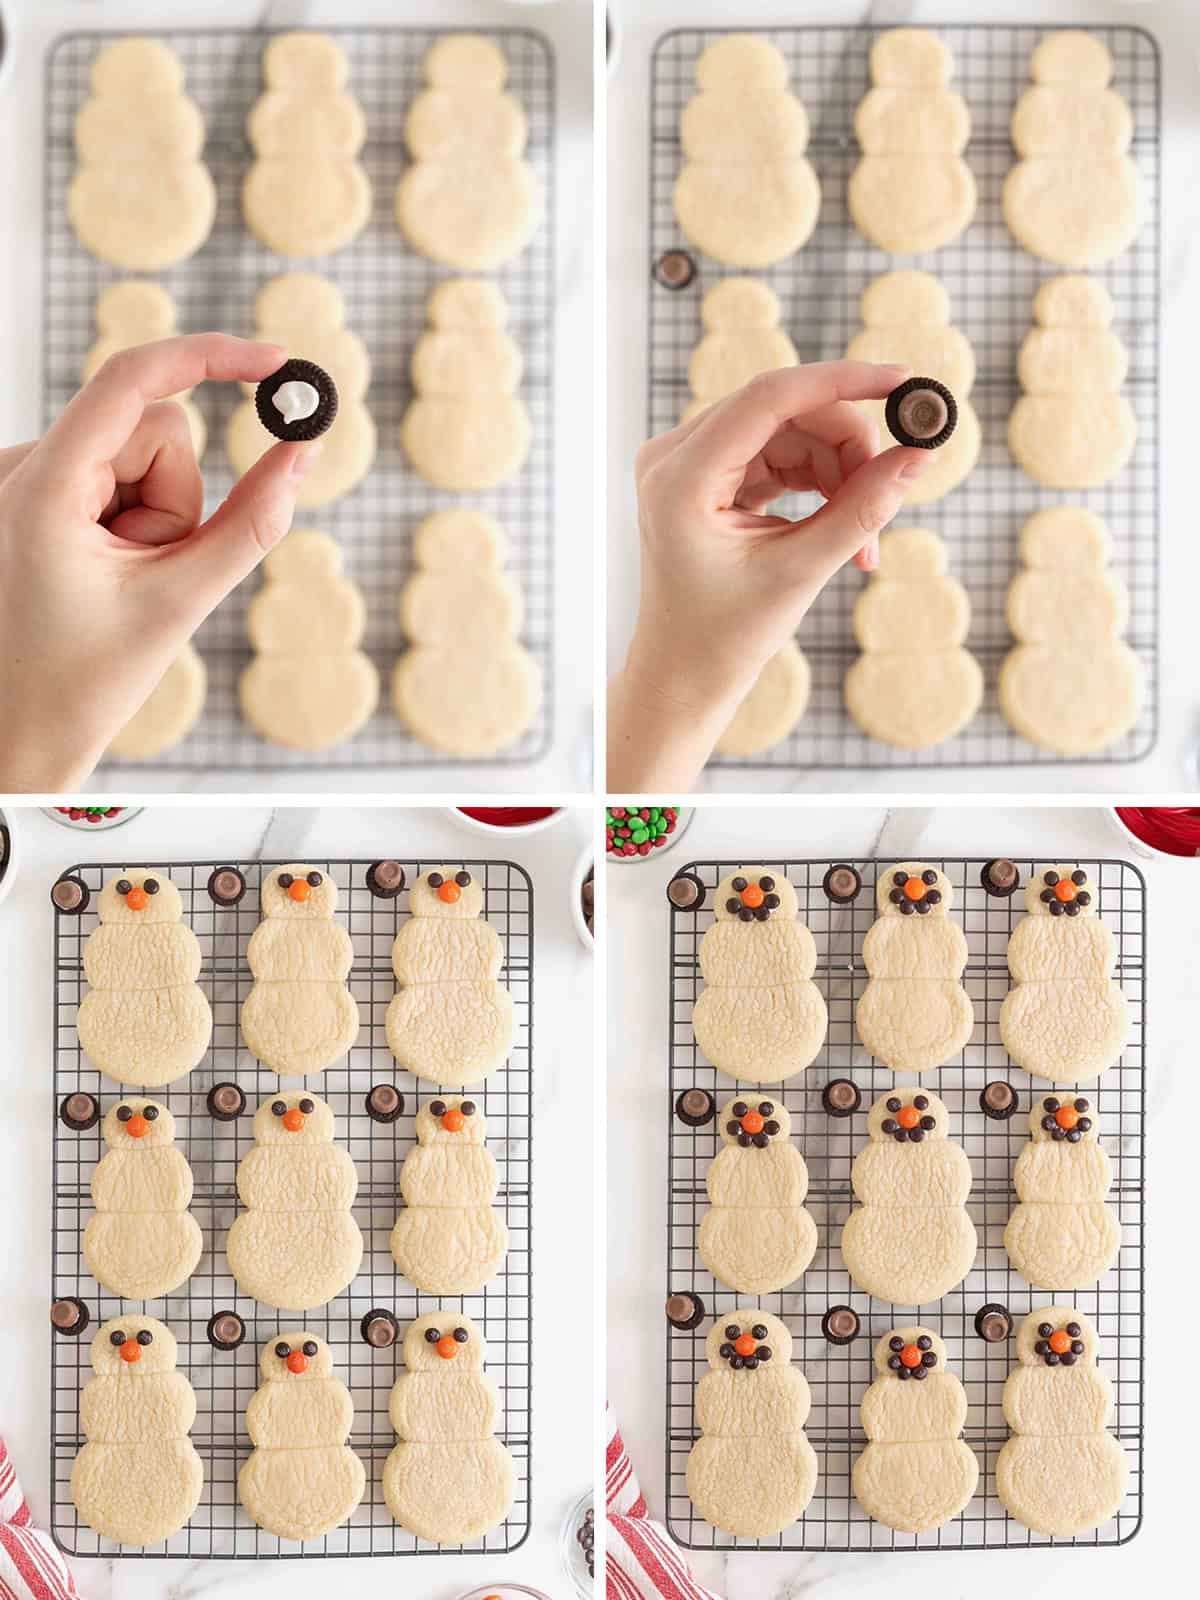
- Take two of the pull-apart Twizzlers strands and wrap them around the cookie where the top and middle cookie meet. Gently tie the Twizzlers like a scarf.
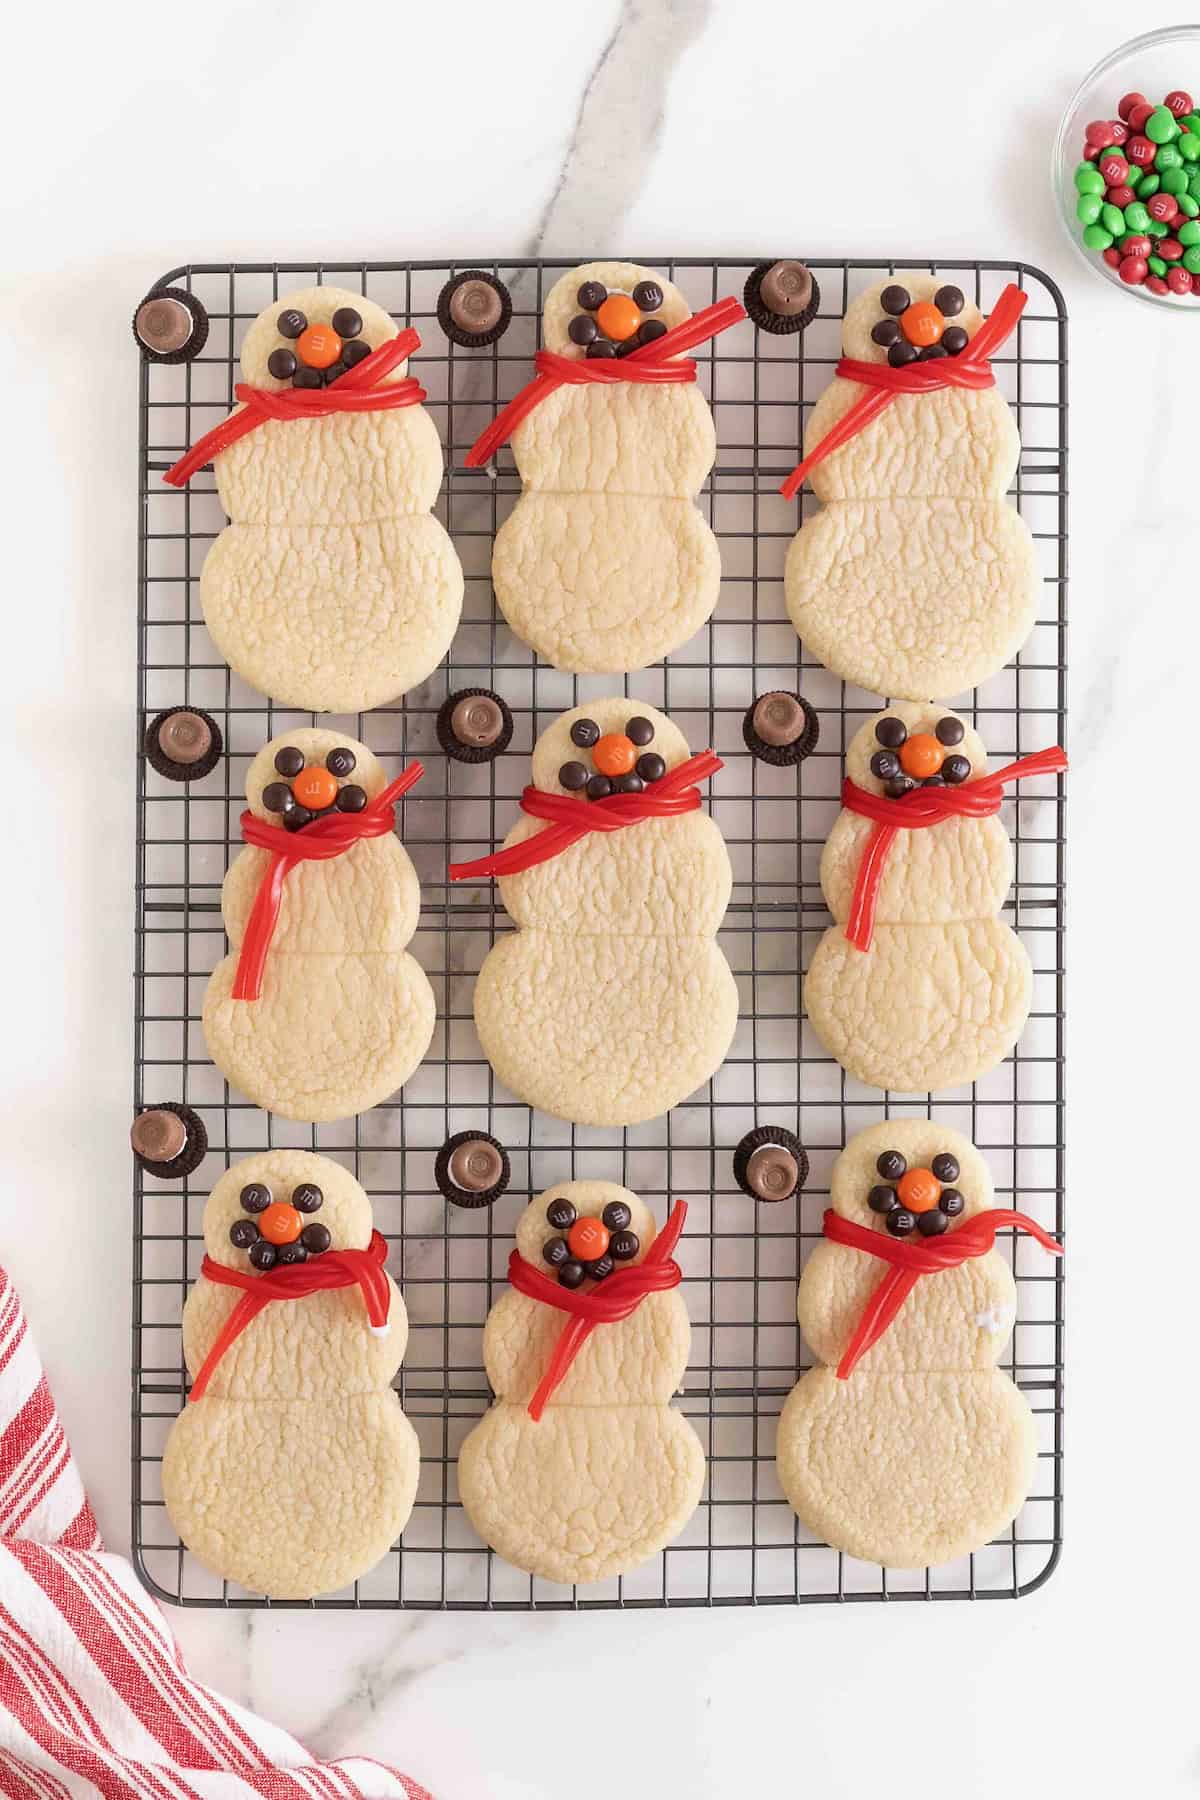
- Attach the hat to the top of the snowman’s head with some icing.
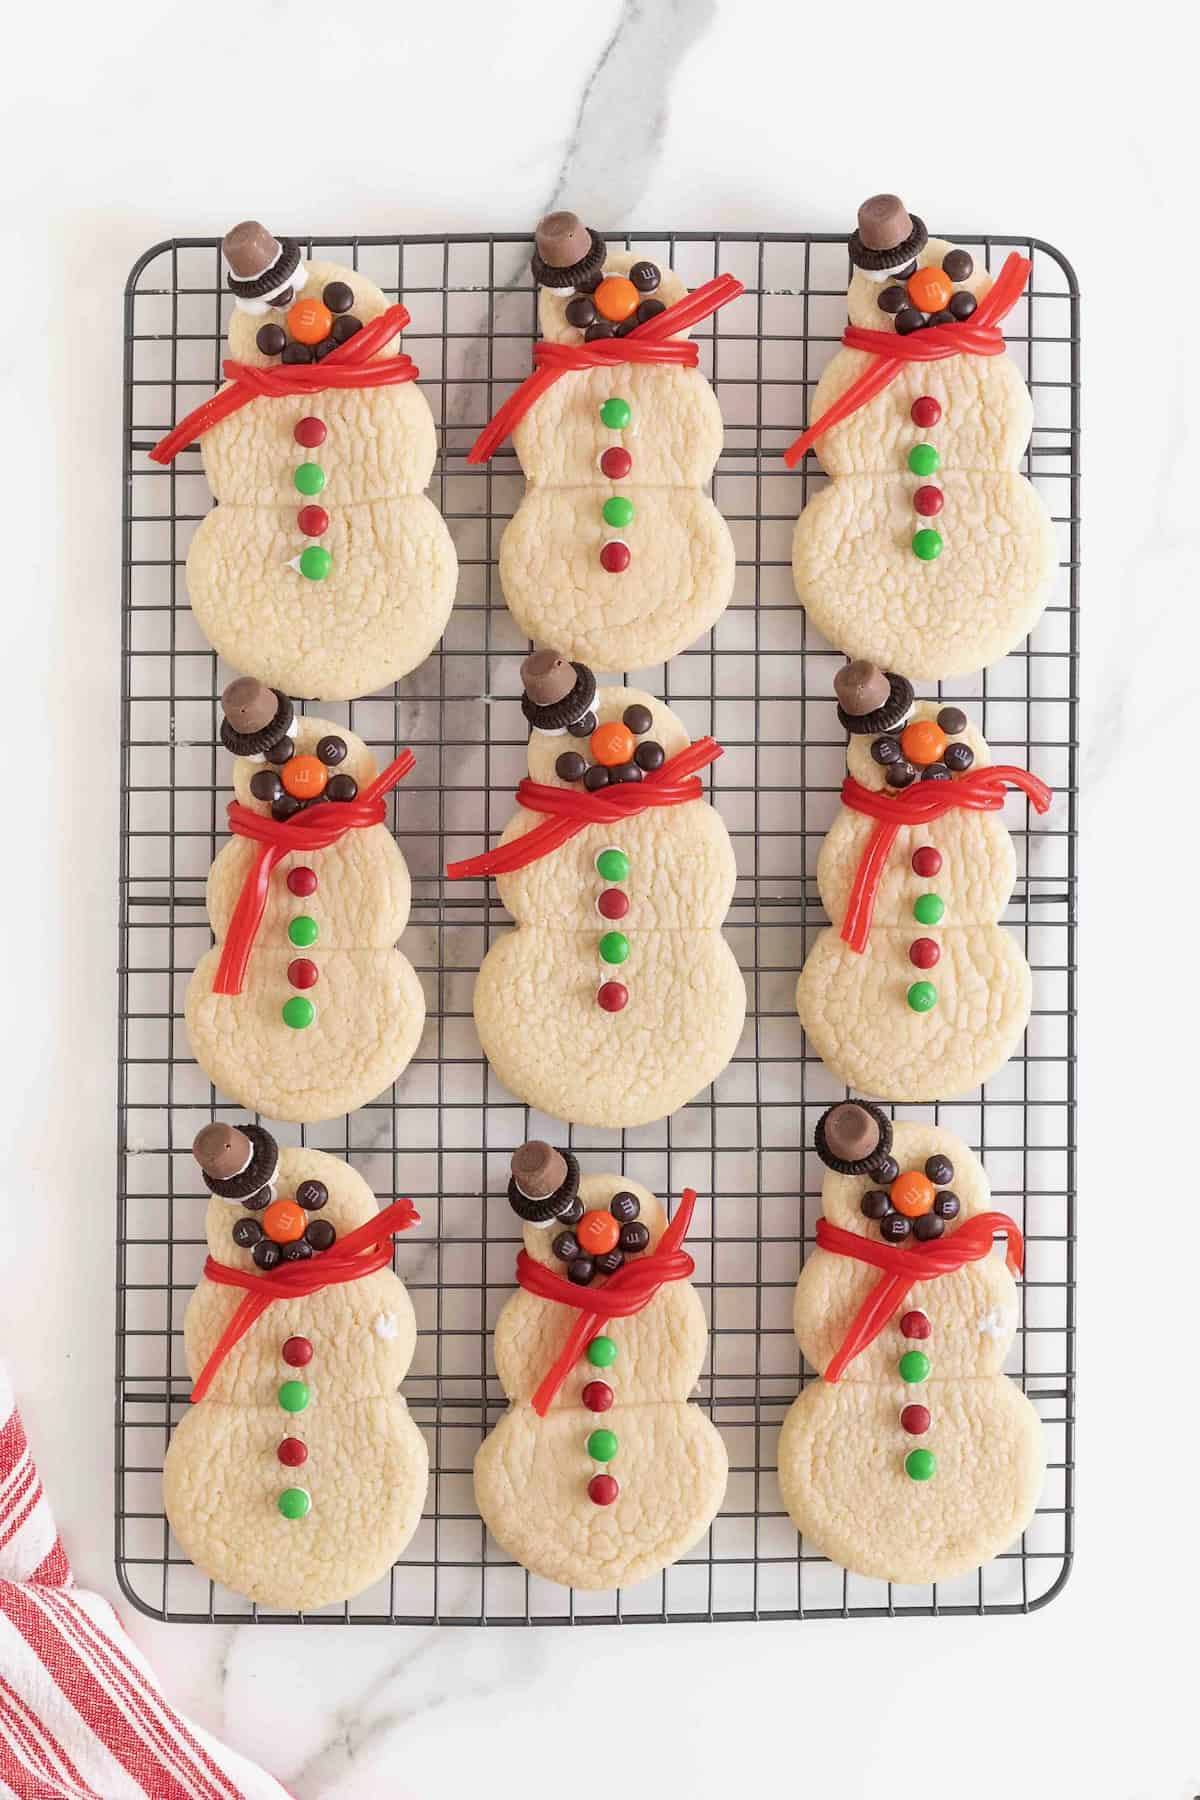
- Alternate the red and green M&M’s Minis down the middle of the snowman cookie, attaching with a dot of icing. Let the icing set.
Make Ahead and Storage
Store plain cookies in an airtight container (with parchment between each layer) for 3 days before decorating, and then they will stay great for another 2 days after decorating.
If decorating the same day that they’re baked, they’ll keep great in a sealed container at room temperature for 3-4 days.

More Christmas Cookies
Bring your A game to this year’s Christmas cookie exchange! I’ve got the Best Christmas Cookies to share at holiday cookie exchange or to gift to your neighbors this holiday season. They’re sure to spread tons of cheer! Plus, get tips on hosting your own Christmas cookie exchange party.

If you make my Snowman Sugar Cookies, be sure to snap a picture and share it with me @thebakermama on Instagram so I can see. If you’re on Facebook, be sure to join my Friends of The BakerMama group to connect and share all the fun and yummy recipes of mine that you make! 😍 I just love seeing how inspired and creative y’all get with the ideas I share. Enjoy!
xoxo,


Snowman Sugar Cookies
- Prep Time: 30 minutes
- Cook Time: 10 minutes
- Total Time: 40 minutes
- Yield: 24 cookies
Description
No rolling or cutting required when making these adorable snowman sugar cookies. A fun and festive winter treat to make with the kids!
Ingredients
- 1 cup (2 sticks) unsalted butter
- 1 and 1/2 cups powdered sugar
- 1 large egg
- 1 teaspoon vanilla extract
- 2 and 1/2 cups all-purpose flour
- 1 teaspoon baking soda
- 1 teaspoon cream of tartar
- Oreos Minis (for the base of the hat)
- Rolos candies (for the top of the hat)
- Twizzlers Pull ‘N’ Peels (for scarf)
- Orange Regular M&M’s (for nose)
- Brown M&M’s Minis (for eyes and mouth)
- Red and green M&M’s Minis (for buttons)
- White cookie icing, for sticking the candies to the snowman
Instructions
- Preheat oven to 350°F. Line baking sheets with parchment paper and set aside.
- In the bowl an electric mixer, beat the butter and powdered sugar until smooth. Scrap down the sides of the bowl. Add the egg and vanilla and beat on high speed until well combined.
- In a separate bowl, whisk together the flour, baking soda and cream of tarter. Add the dry ingredients to the butter mixture in the mixer and beat on low speed until just combined and then on medium speed until a thick dough forms.
- Using measuring spoons or three different sized cookie scoops, scoop the dough into 2 tablespoon, 1 tablespoon and 1 teaspoon sized balls, placing them right next to each other on the prepared baking sheet in a snowman shape. Press down slightly on all three balls of dough at the same time with the palm of your hand to flatten the dough into a snowman shape. Repeat with remaining dough placing each snowman a few inches apart.
- Bake for 10 minutes or until cookies start to crack, but not brown. Let cool on cookie sheet 5 minutes before transferring to wire rack to cool completely.
- Once the cookies are cooled, it’s time to decorate. For the hat, separate the mini Oreo cookies and use the filled size as the bottom of the hat. Attach the bottom of the Rolos candy to the filled side of the mini cookie with a little white icing. Set aside.
- Arrange the brown M&M’s Minis and orange M&M onto the head for the eyes, nose and mouth, attaching with some white icing.
- Take two of the pull-apart Twizzlers strands and wrap them around the cookie where the top and middle cookie meet. Gently tie the Twizzlers like a scarf.
- Attach the hat to the top of the snowman’s head with some icing.
- Alternate the red and green M&M’s Minis down the middle of the snowman cookie, attaching with a dot of icing. Let the icing set so the candy sticks. Enjoy!





You are so creative!!! Love this idea 🙂
Would be such a fun project to do with the kiddos I babysitt — thank you so much for sharing! 🙂 Xo, Alison
http://www.simplyfairbyalisonjeanine.com