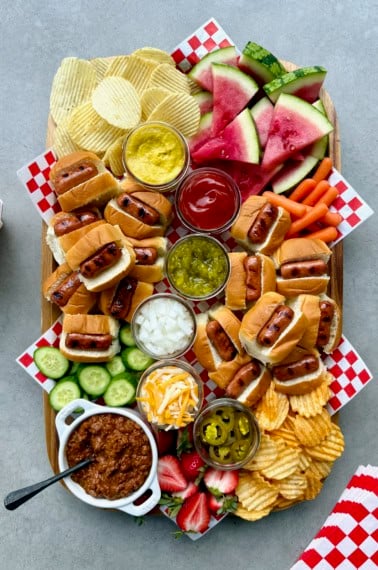
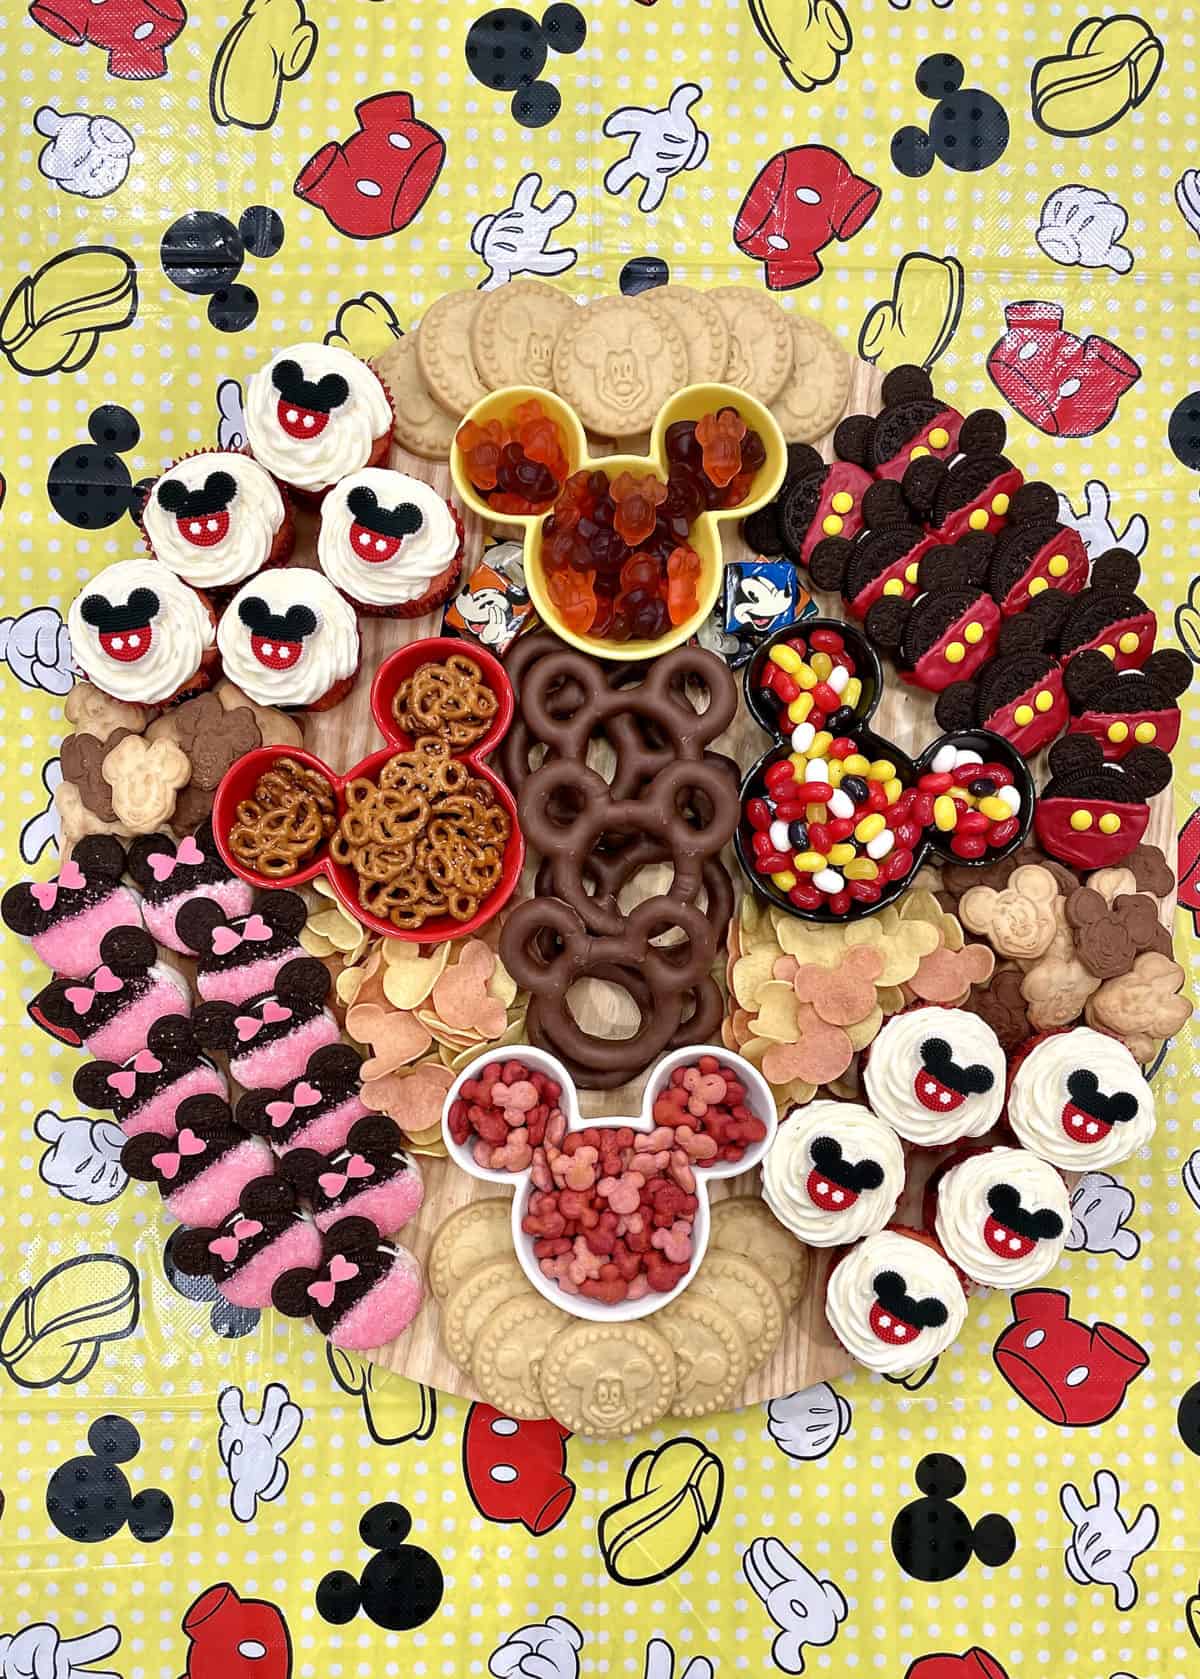
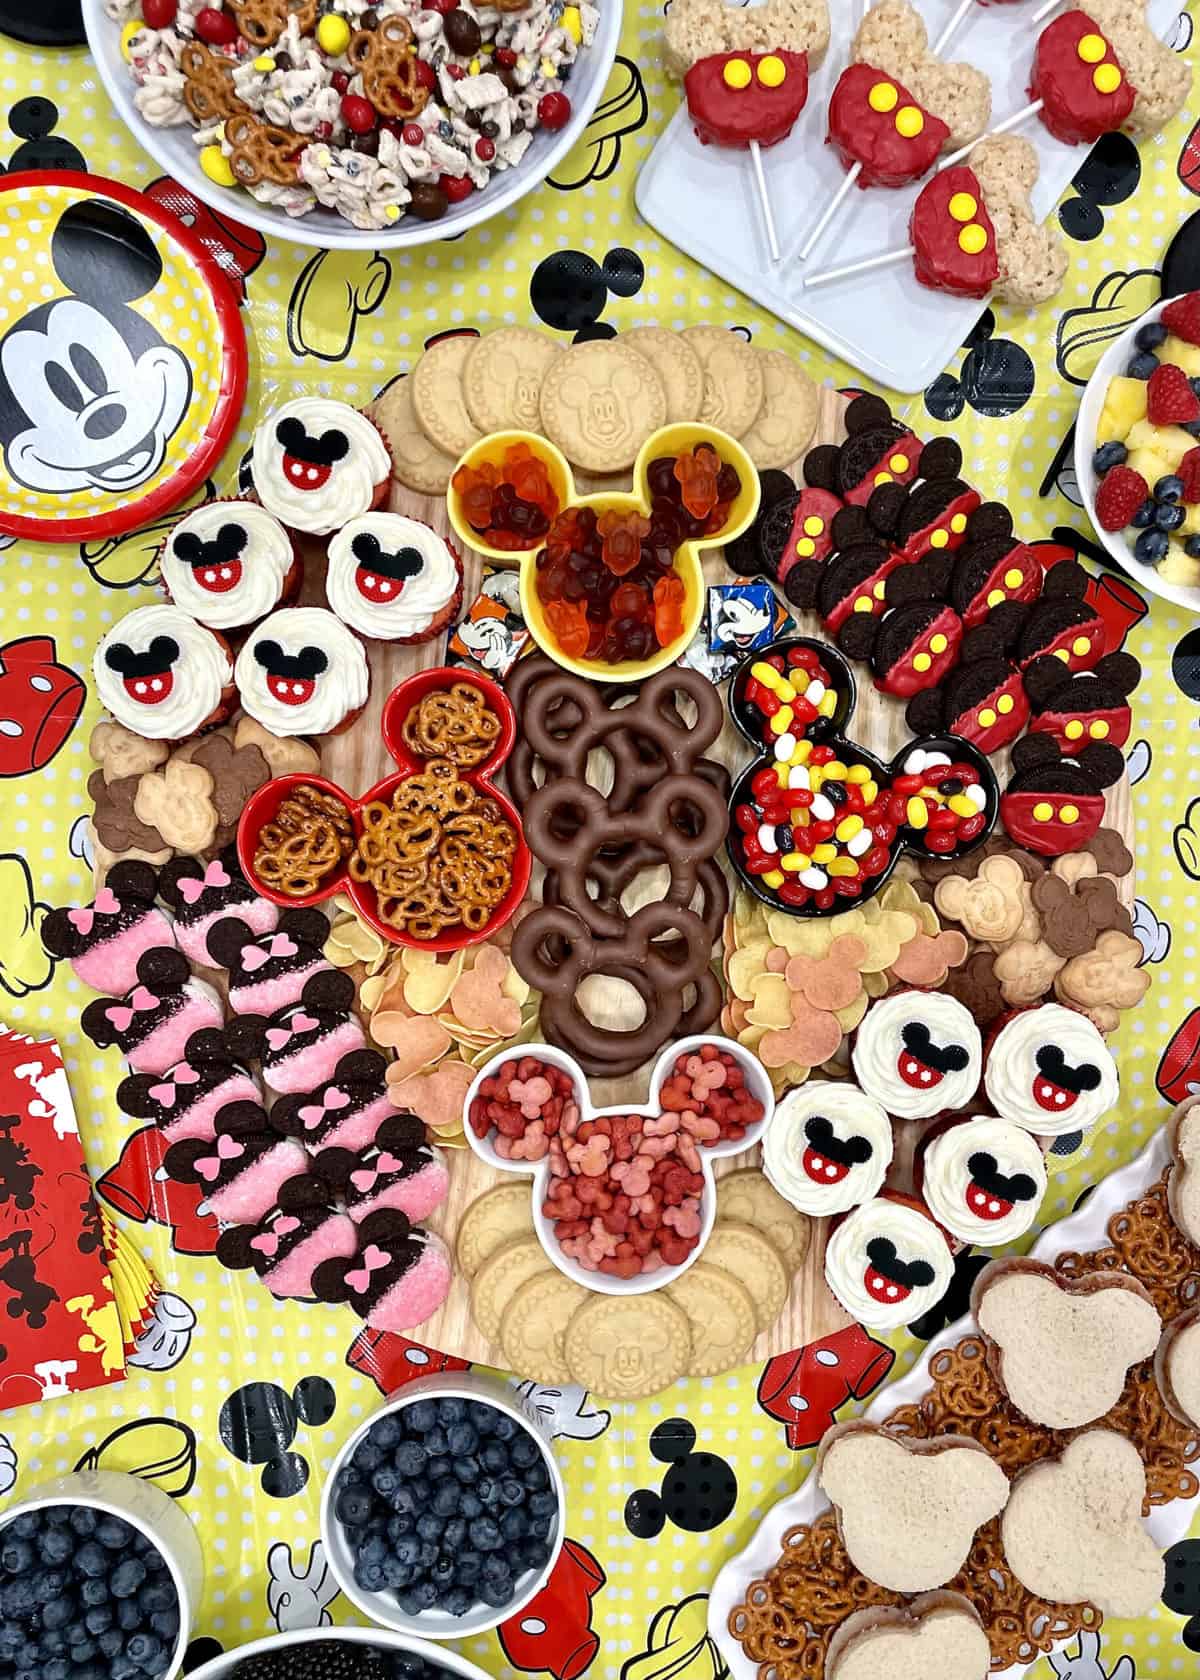
Aw, gee! Bring the fun and the yum to your next party with a Mickey Mouse Snack Board full of tasty treats with super-cute mouse-themed details. It’s perfect for all your Disney-loving pals!
Spread the Love!
This recipe is part of my Mickey Mouse Party Spread. Adorably detailed, delicious, and f-u-n, it’s a magical spread worthy of your favorite cartoon mouse. For more spreads inspiration, check out my Spectacular Spreads cookbook. This book is all about laying out a spread that you and your loved ones will enjoy and create memories with. Each spread features exciting and simple recipes with creative twists. I’ve done the creative thinking and detailed planning for you so all you have to do is bring it to the table!

Oh, Mickey, You’re So Fine!
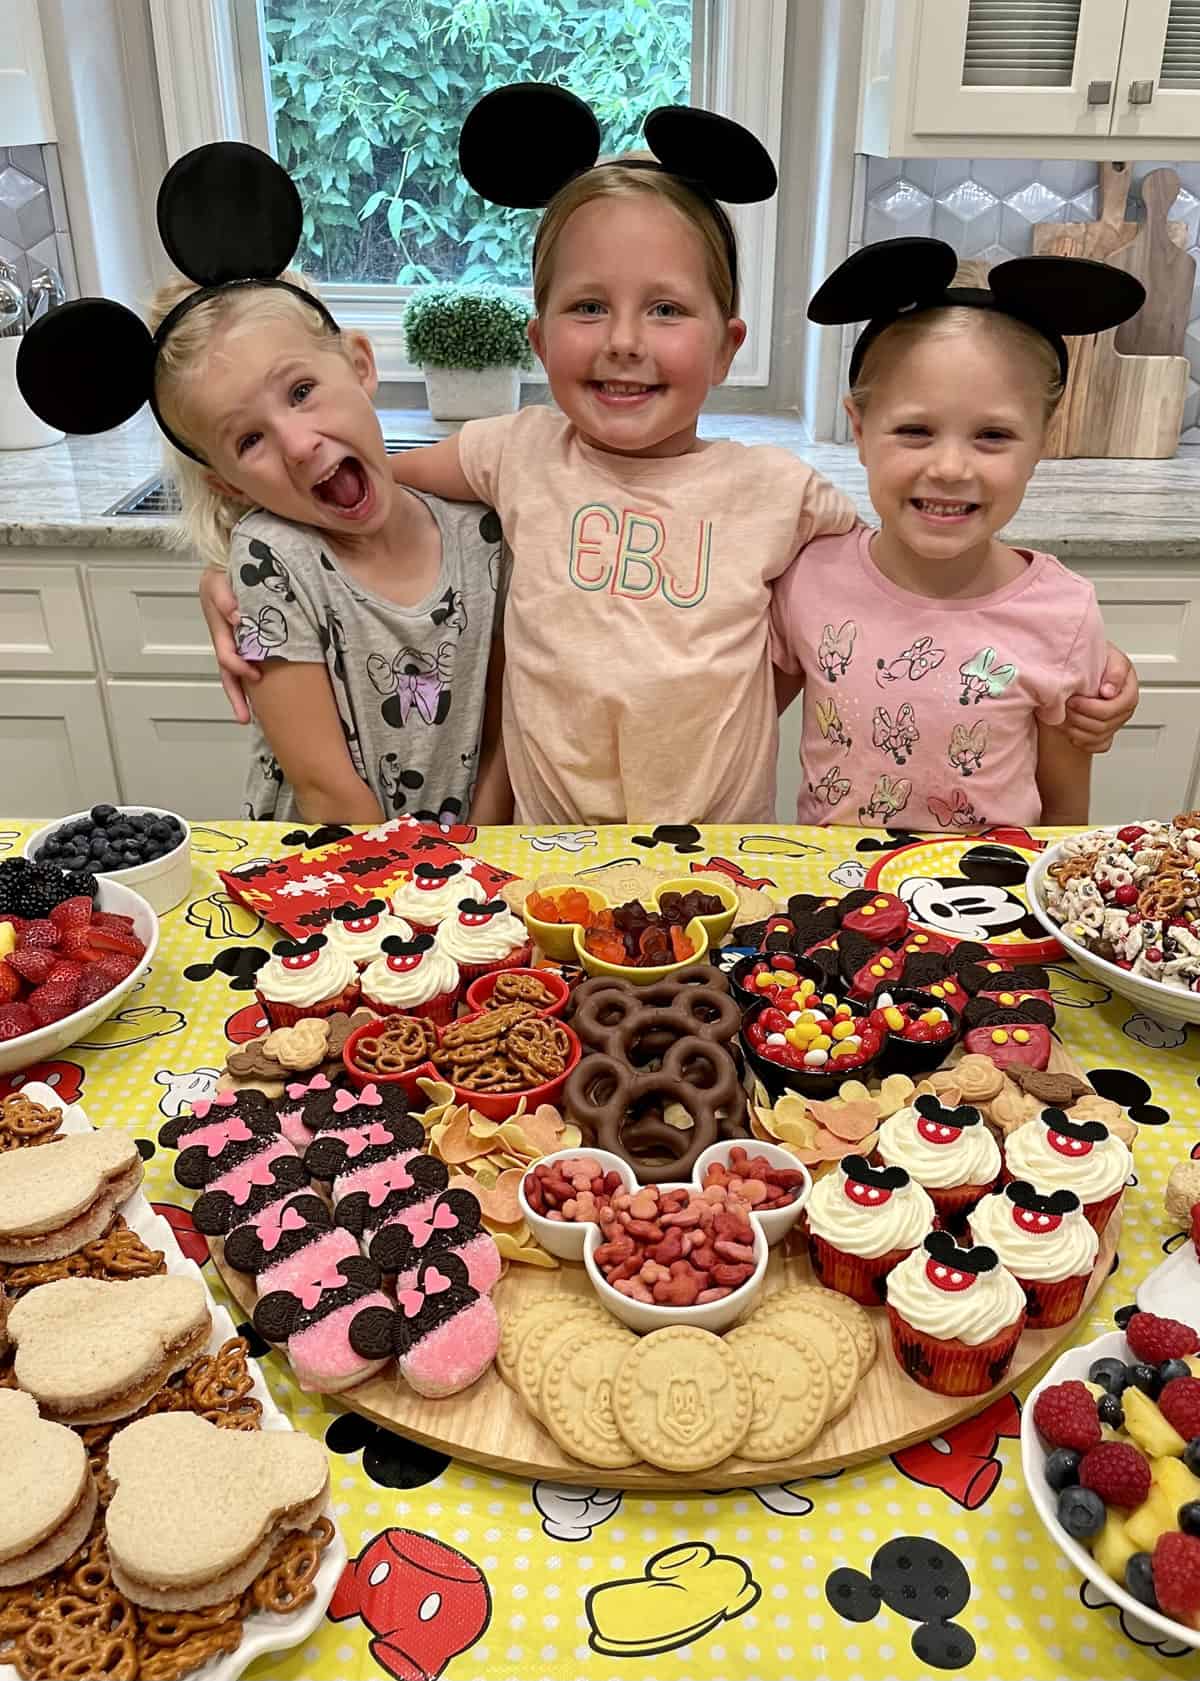
Our Disney adventure may be just a memory, but we’re still high on Mickey Mouse excitement! And once I saw these Mickey Mouse-themed bowls at the Disney Store, I knew I had to come up with something special. So I created this super fun, super festive Mickey Mouse Snack Board, with all the creative little details that make our favorite mouse so wonderful. Of course, I made sure Minnie made an appearance, too.
You may have already seen my sweet and salty Mickey Mouse Lovers Snack Mix. It’s so good, y’all! And if you look closely at the photo below, you can probably tell this adorable board is part of my Mickey Mouse Party Spread. Can you tell I’m Mickey crazy? I am so, so excited to share this with you!
Prep the Treats
You’ll need to do a little prep work before building the board. So set aside enough time before your get-together to make cupcakes and the Mickey and Minnie Oreo treats. After that, building the board is a breeze!
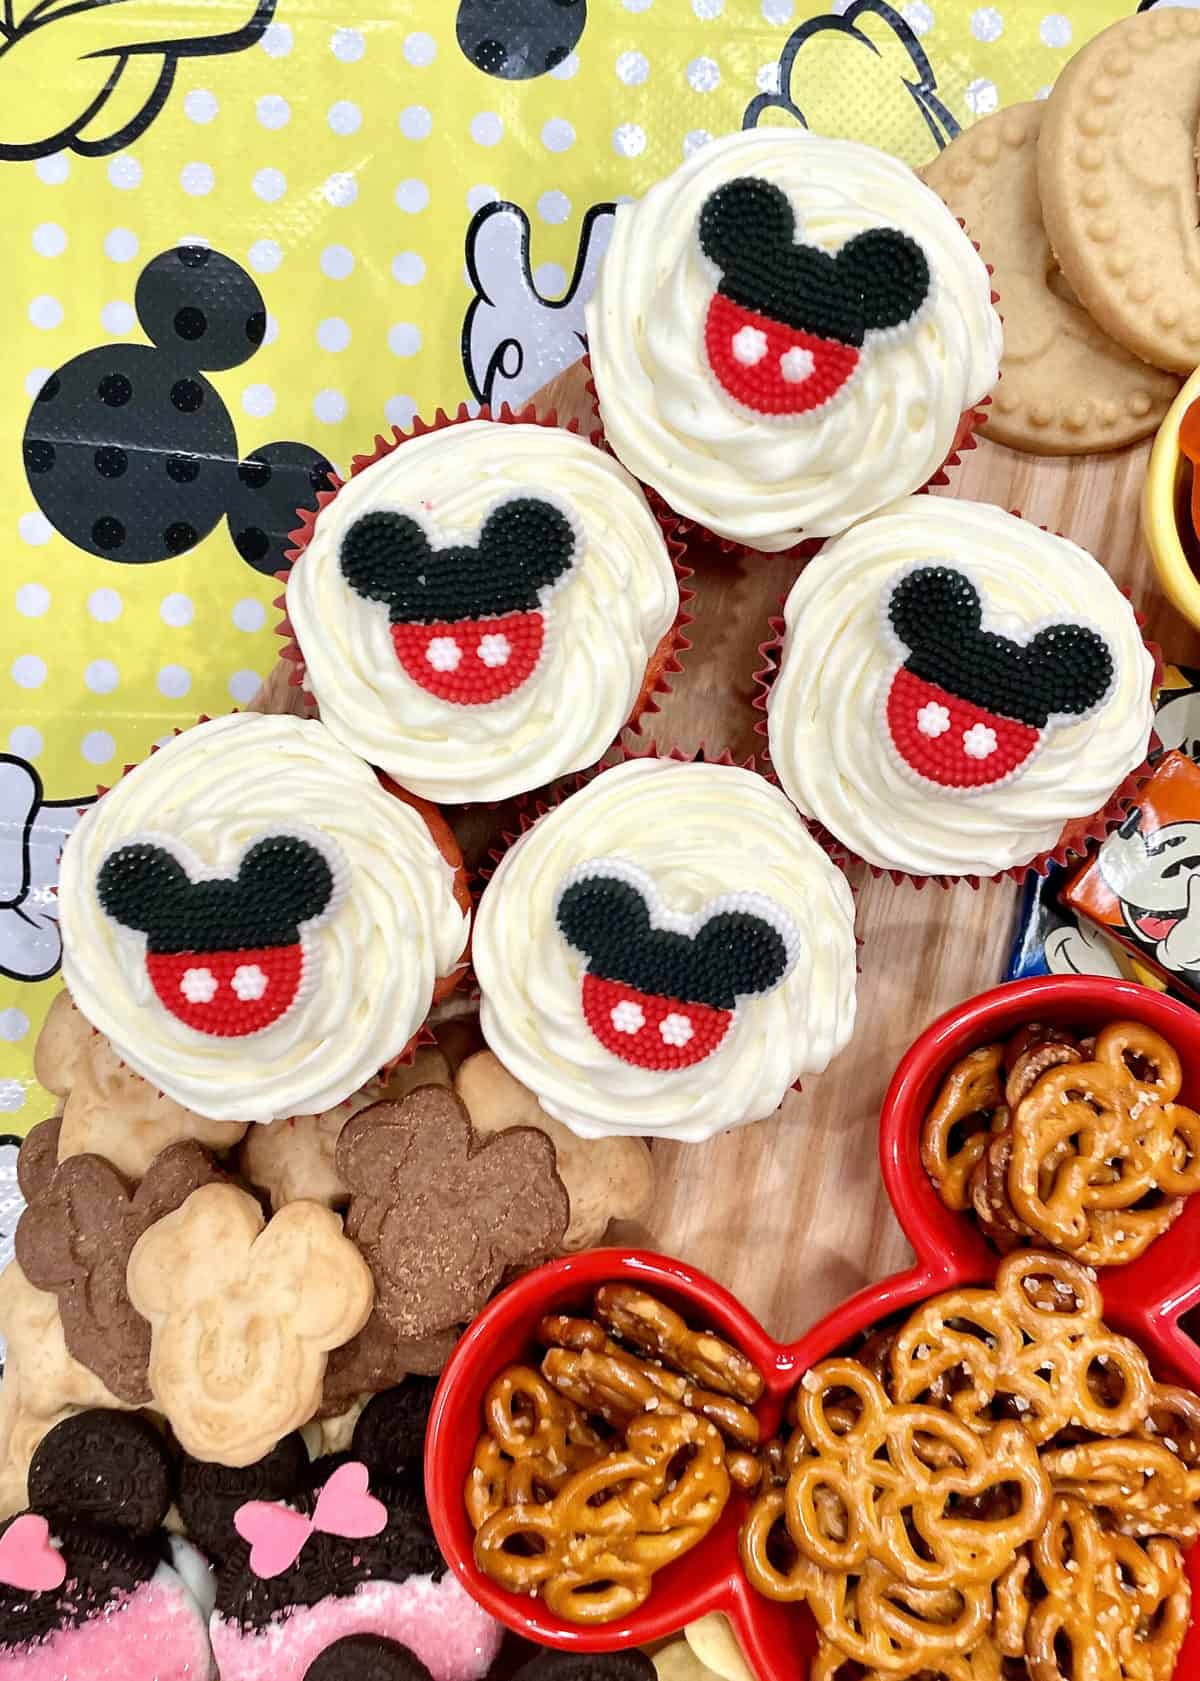
First, make cupcakes according to box directions. Once cool, frost them with vanilla frosting, and top with Mickey and the Roadster Racers Icing Decorations just before placing them on the board.
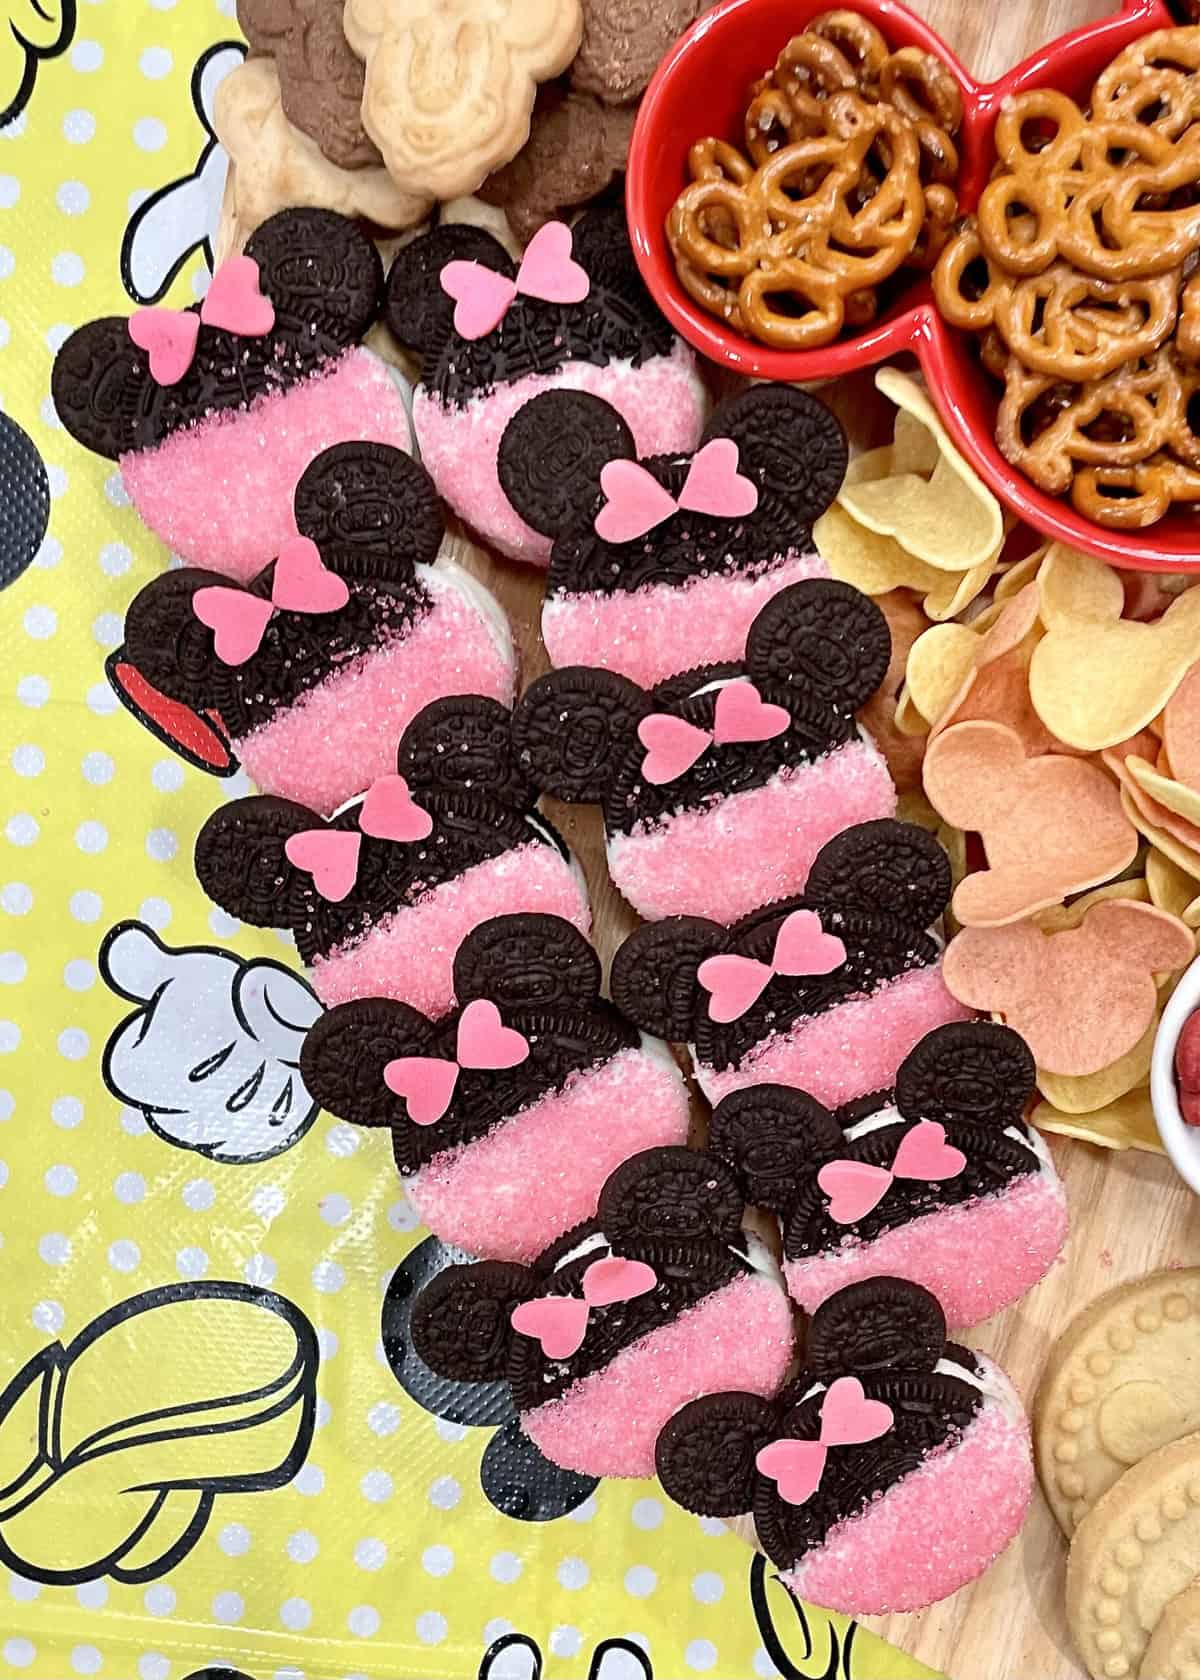
Next, make the Minnie Mouse Oreos by dipping the bottom half of an Oreo into melted white candy melts (follow package directions for melting) and place on a parchment-lined work surface. Immediately sprinkle the coated portion with pink sugar sprinkles. Let set until the candy coating is dry. Halve a mini Oreo and gently press each half into the creme at the uncoated side of the Oreo for her ears. Finally, fashion her bow by placing a dab of melted candy coating on the top of the Oreo between the ears and then attaching two heart-shaped sprinkles to create the bow shape. Let cool to set. So cute!
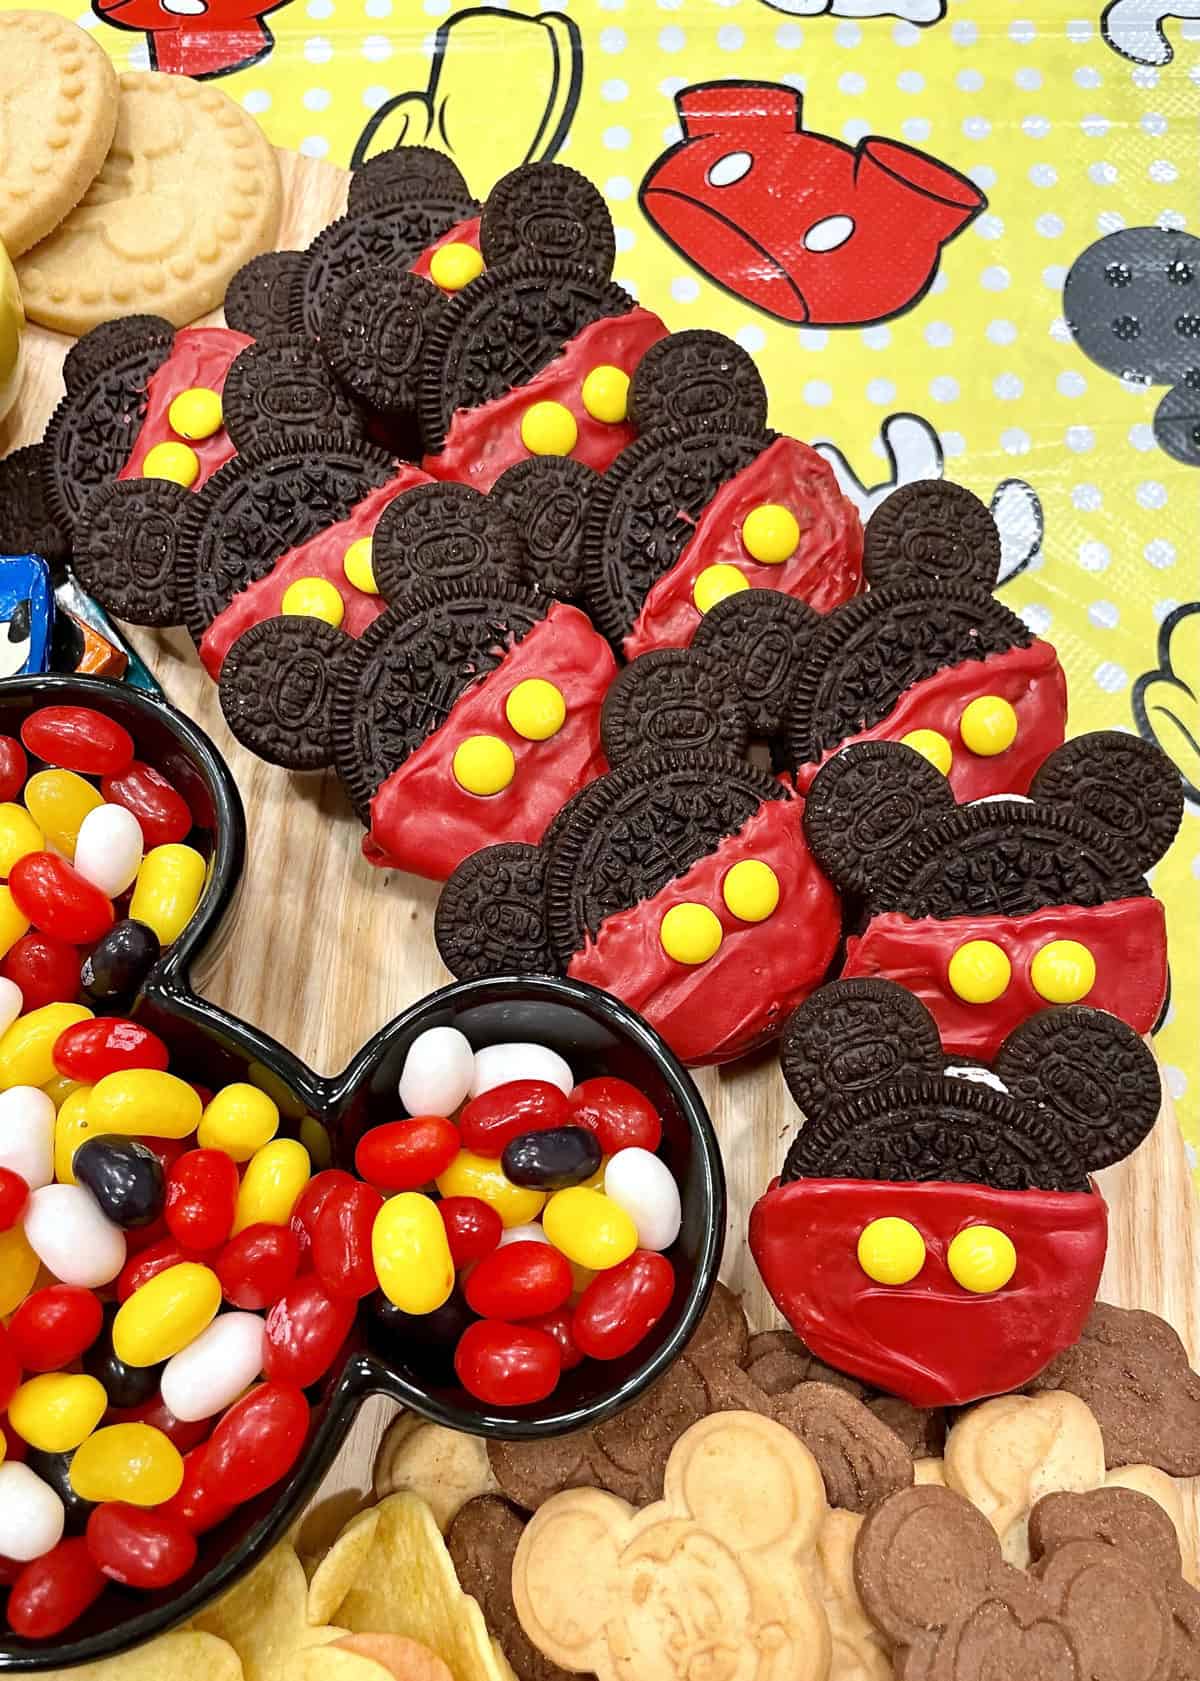
Then make Mickey Mouse Oreos by dipping the bottom half of an Oreo in melted red candy melts (follow package directions for melting). Lay the dipped Oreo on parchment paper and immediately press two yellow M&Ms Minis into the coating for his buttons. Let set to dry. Once the buttons are dried securely in place, make his ears by taking halved Oreo minis and gently pressing them into the creme on the non-coated side of the Oreo. Super simple and so adorable!
Build the Mickey Mouse Snack Board
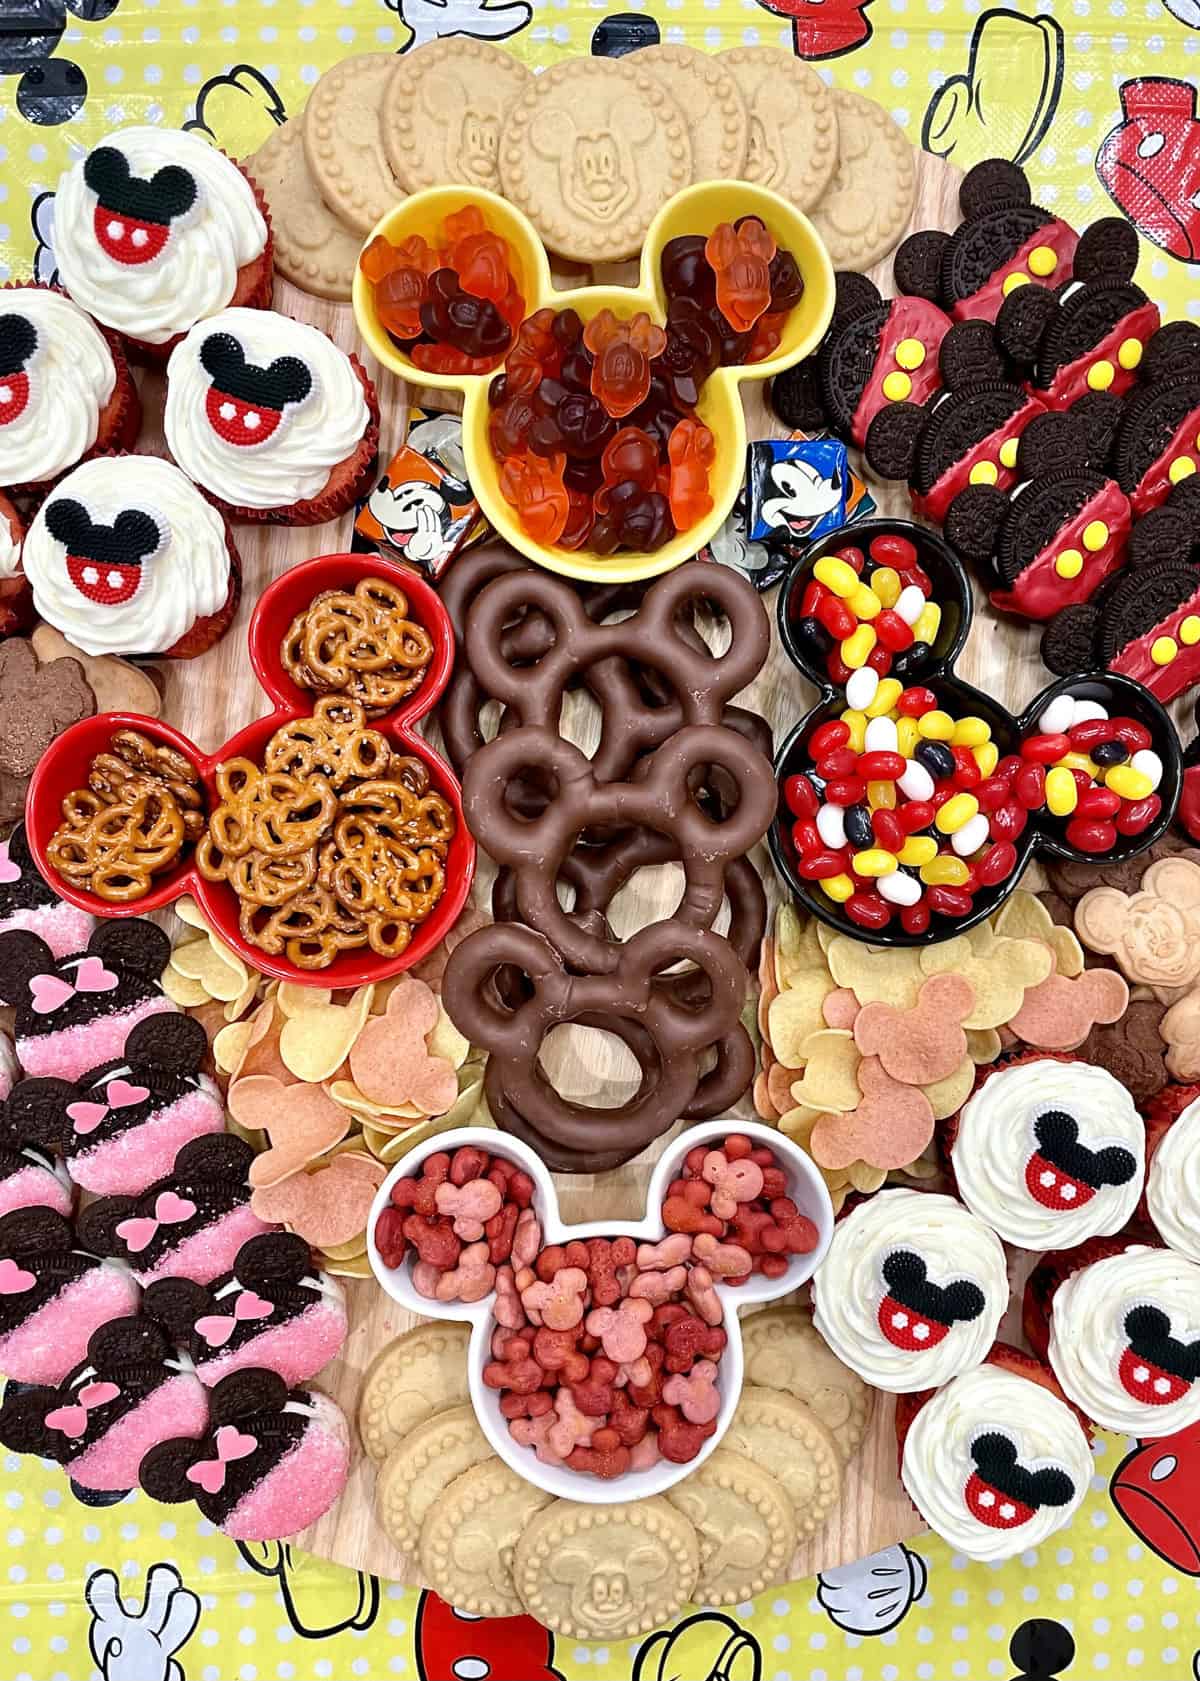
To put it all together, first, add six Milk Chocolate Covered Mickey Pretzels to the middle of a 14’ round wood board. Then place Mickey Mouse bowls filled with Mickey Mouse themed pretzels, gummies, jelly beans and goldfish to the top, bottom, left and right of the chocolate covered Mickey pretzels.
Line the top center and bottom center of the board with 6-8 Mickey Mouse shortbread rounds. Place 5 cupcakes each to the upper left and lower right edges of the board. Then add the Mickey Mouse Oreos to the top right edge and the Minnie Mouse Oreos to the lower left edge of the board.
Add Disney Minnie’s Sweets Character Cookies to the spaces in between the cupcakes and the Mickey and Minnie Oreos on both sides of the board. Fill the remaining spaces on the board with Mickey-Shaped Veggie Chips and Disney Mickey Chocolate Favorites Milk Chocolate Squares. Ta-da!
Your Shopping List
Here’s a handy dandy shopping list to help you fill your cart with everything you need to make this snack board:
Supplies
Ingredients:
- Cake Mix
- Vanilla frosting
- Mickey and the Roadster Racers Icing Decorations
- Oreo cookies
- Oreo Minis
- White melting wafers
- 1 container pink sugar sprinkles
- Pink heart-shaped sprinkles
- 1 package Wilton Red Candy Melts
- Milk Chocolate M&Ms Minis
- Mickey and Minnie Mouse Fruit Flavored Gummies
- 1 (7.5 oz) package Mickey Mouse Jelly Belly Jelly Beans
- Goldfish Mickey Mouse Cheddar Crackers
- Mickey Mouse Baked Pretzels
- Milk Chocolate Covered Mickey Pretzels
- Mickey Mouse Shortbread Rounds
- Disney Minnie’s Sweets Character Cookies
- Good Health Mickey Shaped Veggie Chips
- Disney Mickey Chocolate Favorites Milk Chocolate Squares
If you’re inspired to make this adorable Mickey Mouse Snack Board for your pals, be sure to snap a picture and share it with me @thebakermama on Instagram so I can see. I love seeing how inspired and creative y’all get with the ideas and recipes I share.
xoxo,

Mickey Mouse Snack Board
- Prep Time: 1 hour
- Total Time: 1 hour
- Yield: 12+
Description
Bring the fun and the yum to your next party with this Mickey Mouse Snack Board full of tasty treats with cute mouse-themed details.
Ingredients
- 10 cupcakes, frosted and topped with Mickey and the Roadster Racers Icing Decorations
- 11 Minnie Mouse Oreos
- 11 Oreo cookies
- 22 Oreo minis
- 1 package white melting wafers
- 1 container pink sugar sprinkles
- 22 heart-shaped sprinkles
- 10 Mickey Mouse Oreos
- 10 Oreo cookies
- 20 Oreo minis
- 1 package Wilton Red Candy Melts
- 20 yellow milk chocolate M&Ms minis
- 8 Milk Chocolate Covered Mickey Pretzels
- 1 cup Mickey and Minnie Mouse Fruit Flavored Gummies
- 1 (7.5 oz) package Mickey Mouse Jelly Belly Jelly Beans
- 1 cup Goldfish Mickey Mouse Cheddar Crackers
- 1 cup Mickey Mouse Pretzels
- 7 Mickey Mouse Shortbread Rounds
- 1 cup Minnie’s Sweets Character Cookies
- ½ cup Mickey Shaped Veggie Chips
- 8 Mickey Chocolate Favorites Milk Chocolate Squares
Instructions
- First, make cupcakes according to box directions. Once cool, frost them with vanilla frosting, and top with Mickey and the Roadster Racers Icing Decorations just before placing them on the board.
- Next, make the Minnie Mouse Oreos by dipping the bottom half of an Oreo into melted white candy melts (follow package directions for melting) and place on a parchment lined work surface. Immediately sprinkle the coated portion of the Oreo with pink sugar sprinkles. Let set until the candy coating is dry. Halve a mini Oreo and gently press each half into the creme at the uncoated side of the Oreo for her ears. Finally, fashion her bow by placing a dab of melted candy coating on the top of the Oreo between the ears and then attaching two heart-shaped sprinkles to create the bow shape. Let cool to set.
- Then make Mickey Mouse Oreos by dipping the bottom half of an Oreo in melted red candy melts (follow package directions for melting). Lay the dipped Oreo on parchment paper and immediately press two yellow M&Ms Minis into the coating for his buttons. Let set to dry. Once the buttons are dried securely in place, make his ears by taking halved Oreo minis and gently pressing them into the creme on the non-coated side of the Oreo.
- To put it all together, first, add six Milk Chocolate Covered Mickey Pretzels to the middle of a 14’ round wood board. Then place Mickey Mouse bowls filled with Mickey Mouse themed pretzels, gummies, jelly beans and goldfish to the top, bottom, left and right of the chocolate covered Mickey pretzels.
- Line the top center and bottom center of the board with 6-8 Mickey Mouse shortbread rounds. Place five cupcakes each to the upper left and lower right edges of the board. Then add the Mickey Mouse Oreos to the top right edge and the Minnie Mouse Oreos to the lower left edge of the board.
- Add Minnie’s Sweets Character Cookies to the spaces in between the cupcakes and the Mickey and Minnie Oreos on both sides of the board. Fill the remaining spaces on the board with Mickey-Shaped Veggie Chips and Disney Mickey Chocolate Favorites Milk Chocolate Squares.
- Serve and Enjoy!