• Skip to primary navigation
  • Skip to main content
  • Skip to primary sidebar
  • Skip to footer

The BakerMama logo

Nav Social Menu

  • Facebook
  • Pinterest
  • Instagram
  • Twitter
  • YouTube
  • Nav Social Menu

    • Facebook
    • Pinterest
    • Instagram
    • Twitter
    • YouTube
  • Home
  • About
    • About
    • Contact
    • faq
    • Subscribe
    • Work With Me
  • Recipes
    • Recipes
    • Basics
    • Gathering Guides
    • Tips & Tricks
  • Cookbooks
    • Spectacular Spreads – NEW!
    • Beautiful Boards Cookbook
  • Boards by The BakerMama
    • Shop Boards
    • Board Inspiration
  • Shop
    • Amazon Favorites
    • Boards
    • Board Accessories
    • Family Favorites
    • Gift Guides
      • Anniversary Gifts
      • Gifts for the Baker
      • Gifts for the Homebody
      • Gifts for a New Mom
      • Gifts to Say Thank You
      • Gifts for the Sports Fan
      • Housewarming Gifts
      • Hostess Gifts
      • Kid’s Birthday Party Gifts
      • Teacher Gifts
      • Wedding Gifts
    • In The Kitchen
    • Around the House
    • Holiday Favorites
    • Shop All

Home » Basics by The BakerMama » Basics by The BakerMama: How to Bake Bacon

Published on August 15, 2018 | Updated on March 25, 2021 by The BakerMama

Basics by The BakerMama: How to Bake Bacon

Jump to Recipe

Learn How to Bake Bacon that’s easy and results in perfectly crisp, beautiful bacon every time! 

How to Bake Bacon

The BakerMama’s Basics

Welcome to Basics by The BakerMama! I created this how-to series to help beginner cooks hone their skills, make the most of their time in the kitchen, and create great family memories. I hope you enjoy!

How to Bake Bacon

I get asked all the time how I bake our bacon so perfectly crisp so I decided to write this post to show you exactly how it’s done. I love how quick and easy baked bacon is and how I don’t have to stand and flip greasy sizzling bacon on my stovetop.

We are a bacon loving family that will go through a whole package in one meal. It’s so nice to be able to get the bacon baking in the oven while I prep the rest of the breakfast, brunch or brinner we’re having.

How to Bake Bacon

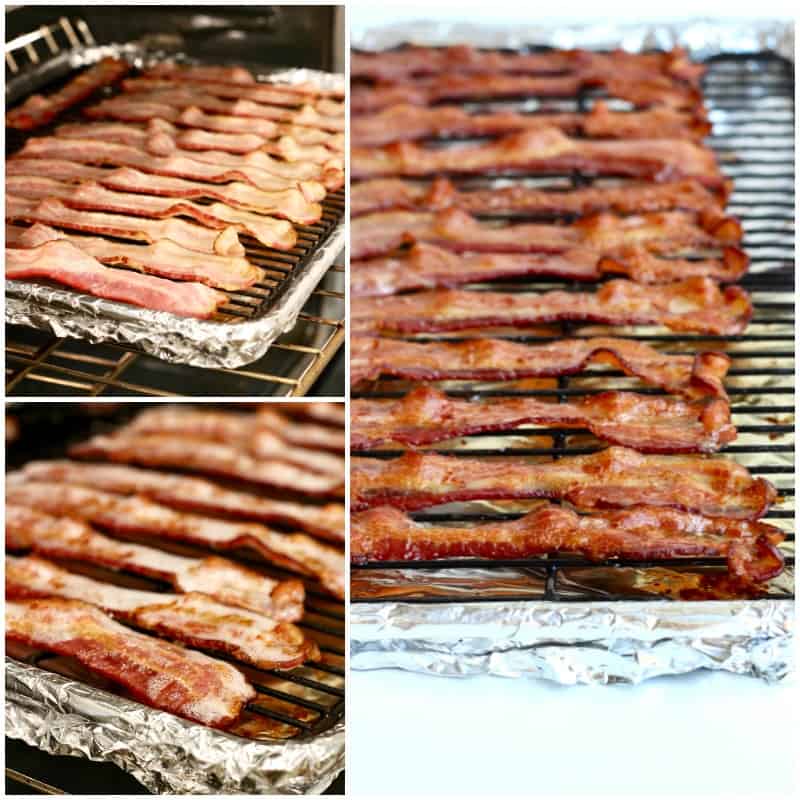
It’s all about the baking rack set over the foil-lined baking sheet so the bacon breathes as it bakes to beautiful crispness.

How to Bake Bacon

Just about 15 minutes in a 400°F oven is all it takes. It’s so nice to let the bacon bake while prepping the rest of the meal. Before I started baking our bacon, I would get so annoyed with all the little grease splatters that covered our stovetop after frying the bacon in a pan on the stove. No mess and no stress with this method.

How to Bake Bacon

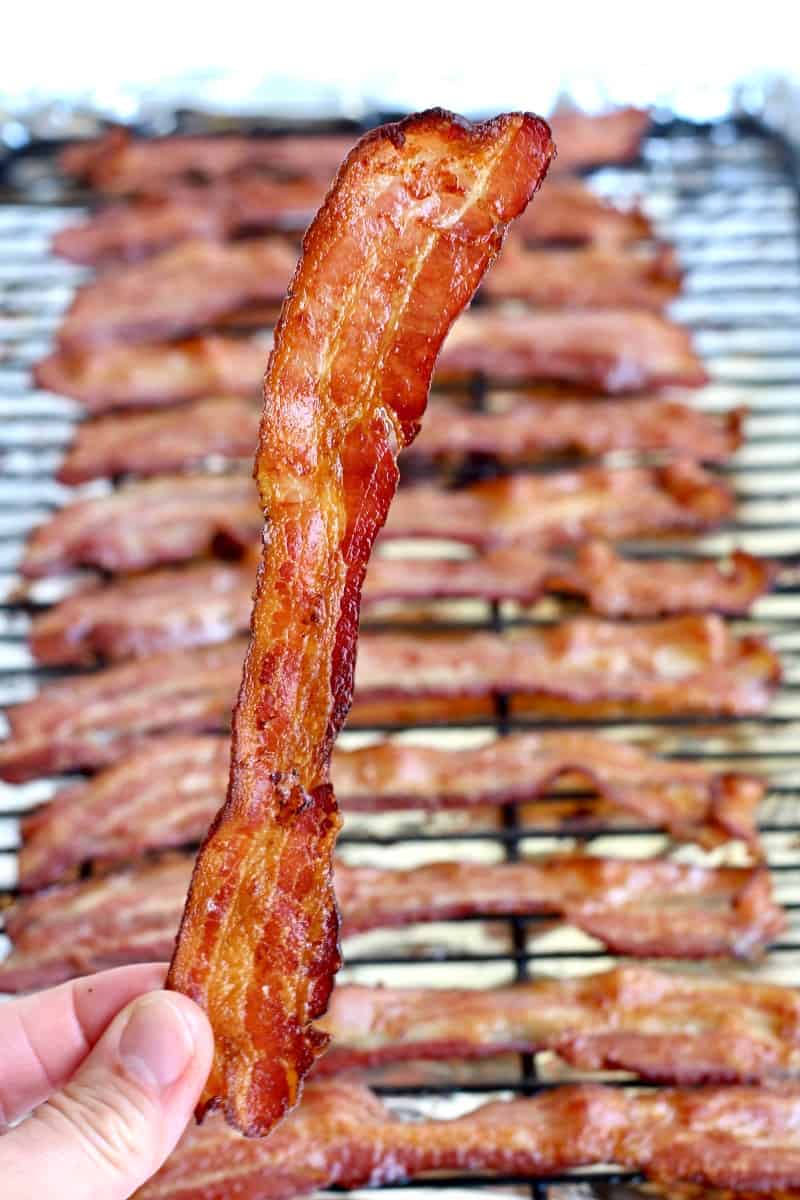
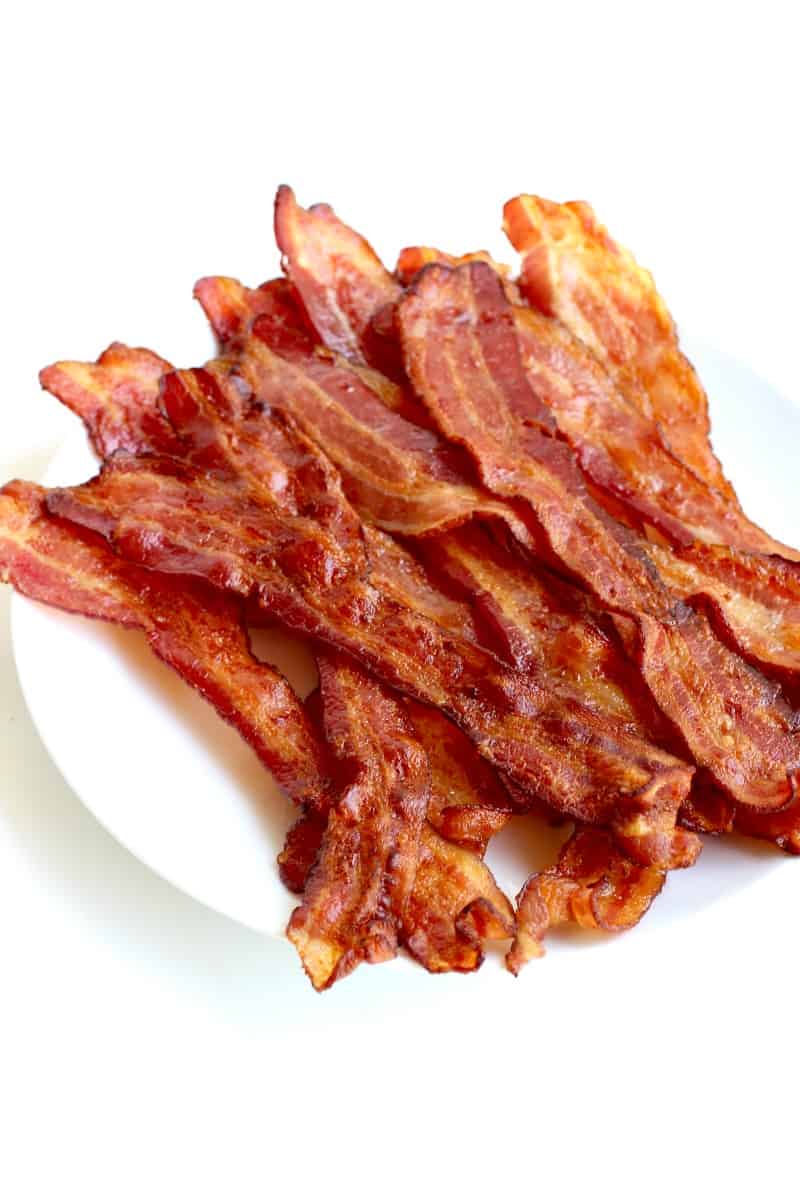
Just let the oven work its magic. Bacon at its best every time.

How to Bake Bacon

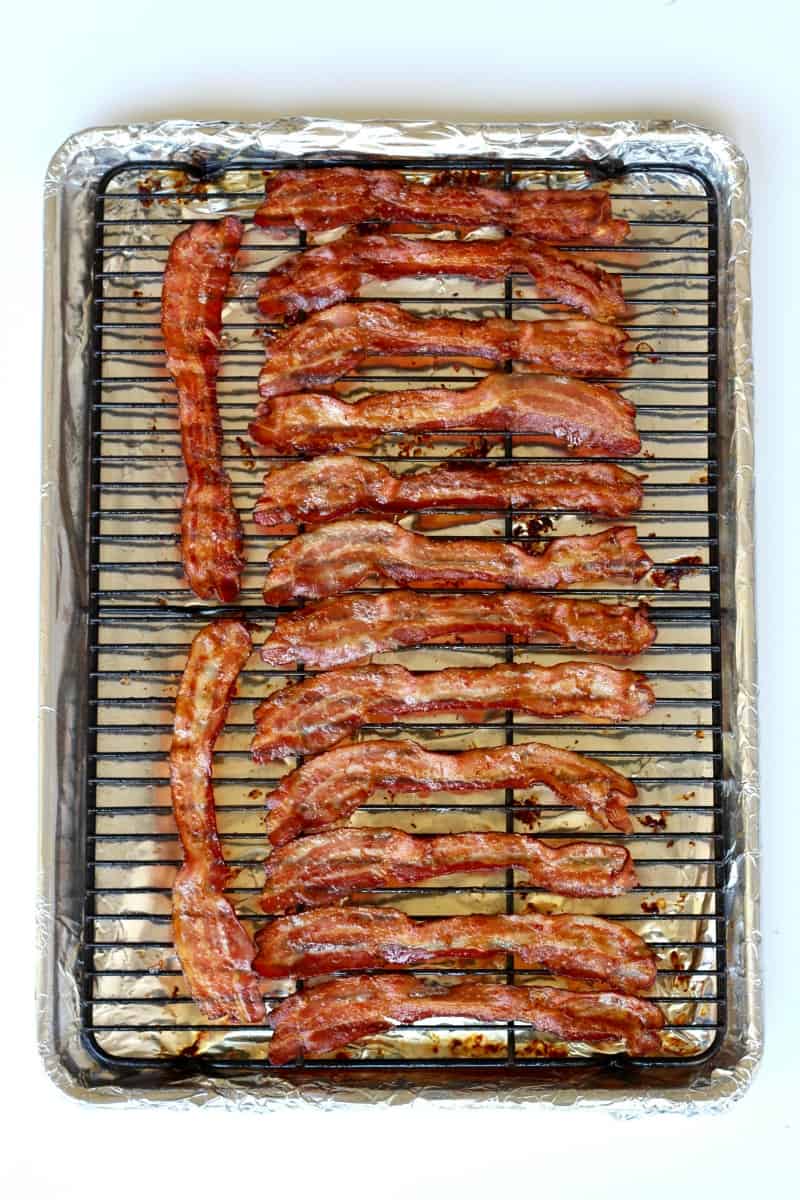
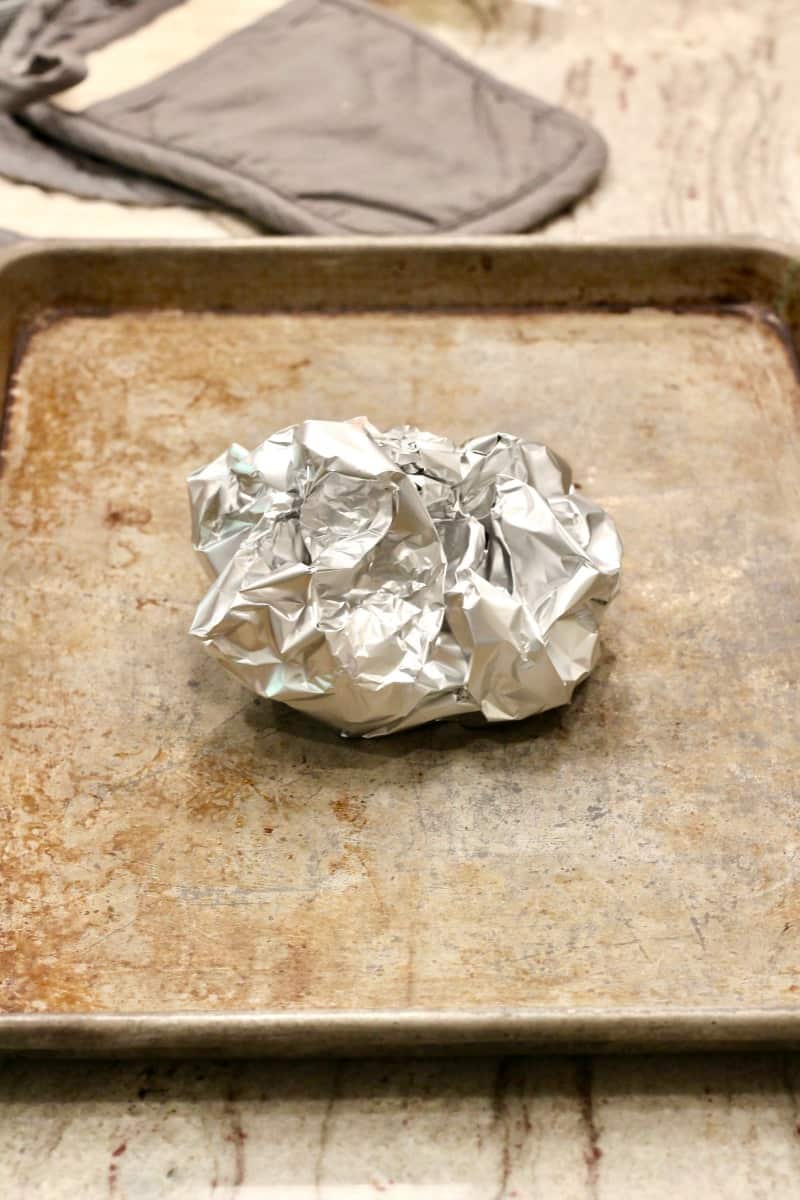
And what makes it even better is that the clean up is so easy. You just roll up the grease drippings in the foil and toss it. You’re left with a clean pan that can go right back into the cabinet and a baking rack that can hopefully go straight into your dishwasher.

How to Bake Bacon

Choosing Bacon

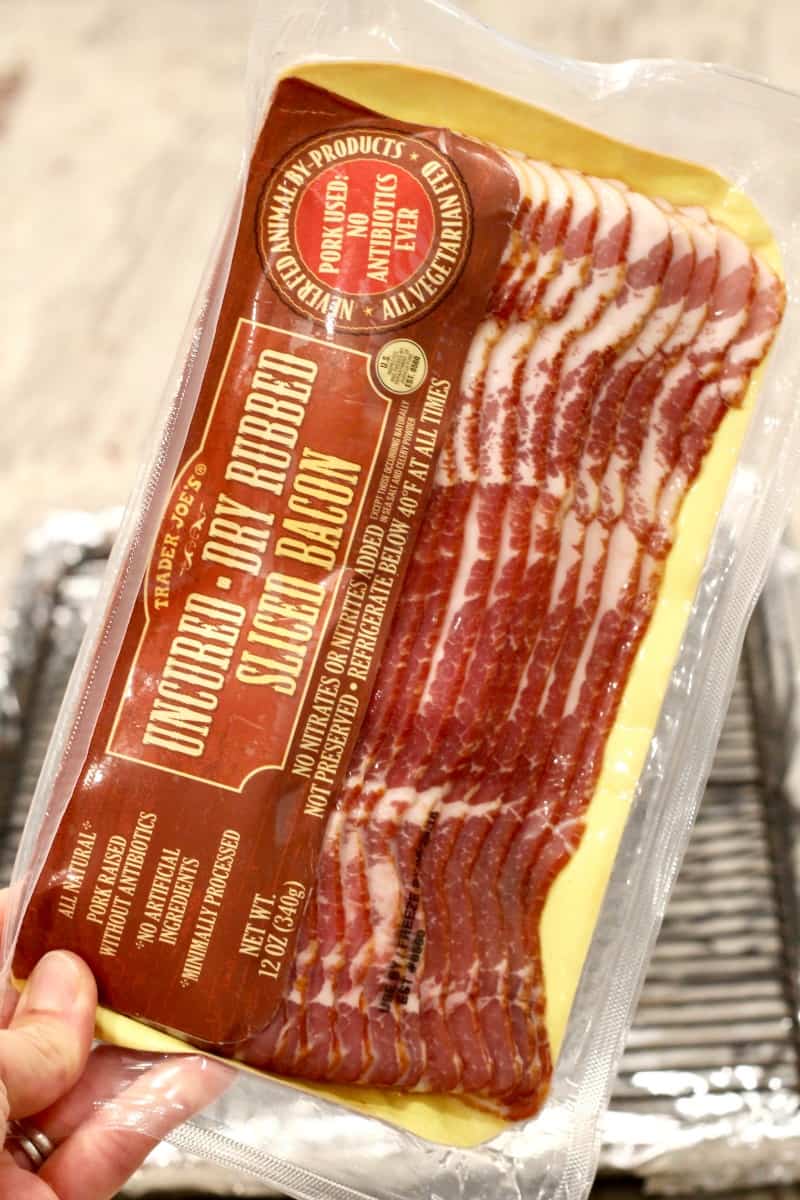
Readers often ask which brand of bacon I use. I’ve used this baked bacon method on so many different brands over the years and they’ve all turned out great. The thinner the bacon, the less time it takes to bake crisp. I’m currently loving this uncured dry rubbed bacon from Trader Joe’s. It’s thin sliced, but not too thin with beautiful marbling and flavor.

How to Bake Bacon

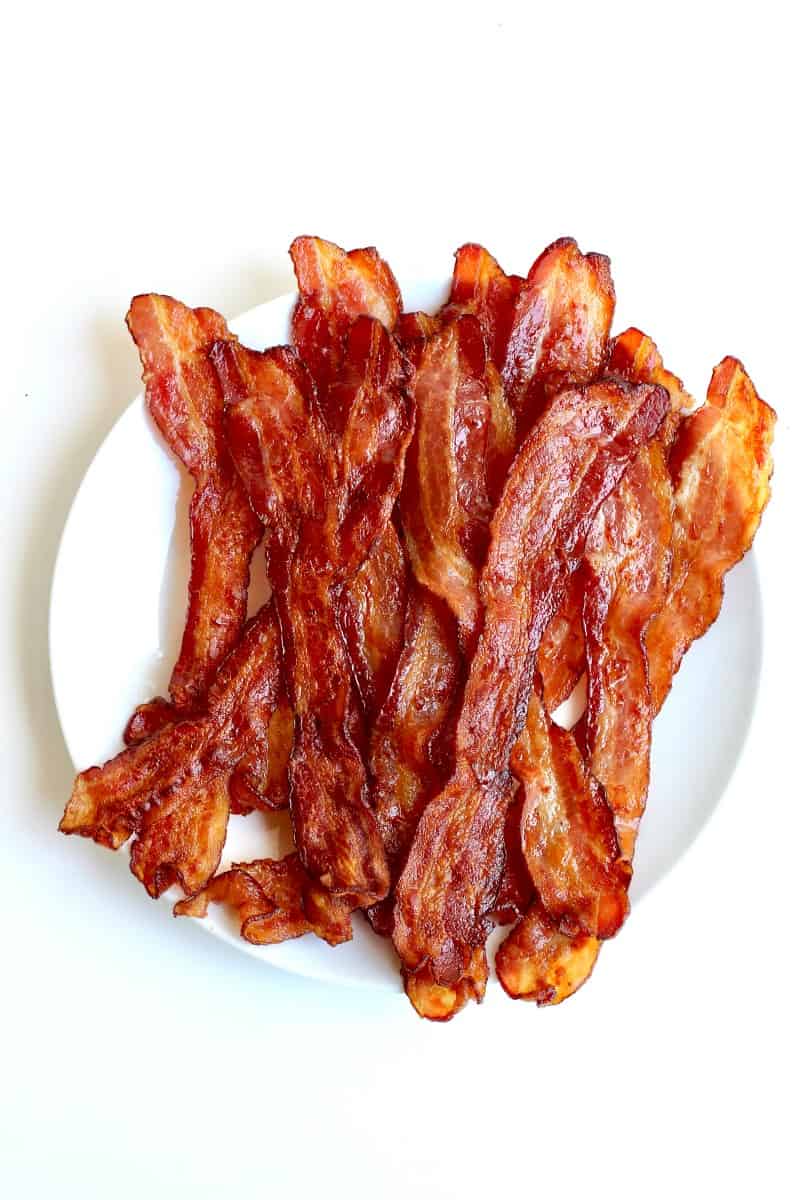
Crisp baked bacon is hard to beat. It goes so great with a big breakfast spread, layered in a sandwich, crumbled over salads, I could go on and on…

How to Bake Bacon

If you’ve never baked bacon, what are you waiting for? It’s the best! Easy, less mess, less stress, crispy, beautiful and most importantly, so darn delicious!

Looking for more Basics by The BakerMama? Try How to Bake a Potato for tried-and-true steps to getting the perfectly baked potato, every time. I hope you find these simple basics helpful! When you make something with the help of my BakerMama’s Basics series, be sure to snap a picture and tag me on Instagram @thebakermama so I can see and others can be inspired!

Enjoy!

xoxo,

Print
clock clock iconcutlery cutlery iconflag flag iconfolder folder iconinstagram instagram iconpinterest pinterest iconfacebook facebook iconprint print iconsquares squares iconheart heart iconheart solid heart solid icon

How to Bake Bacon

  • Author: Maegan - The BakerMama
  • Prep Time: 5 mins
  • Cook Time: 15 mins
  • Total Time: 20 mins
  • Yield: 14 slices
  • Category: Breakfast
Print Recipe
Pin Recipe

Description

Baked bacon is so easy and results in perfectly crisp, beautiful bacon every time!


Ingredients

  • 1 (12 ounce) package thin sliced bacon (about 14 slices)

Instructions

  1. Preheat oven to 400°F.
  2. Line a large rimmed baking pan with foil and set a baking rack into the pan. Spray the baking rack generously with non-stick cooking spray. Arrange bacon in a single layer on the rack trying not to let it overlap.
  3. Bake the bacon for about 15 minutes, rotating the pan halfway through baking time, until bacon is of desired crispness. Remove bacon from the oven and let set for a few minutes before serving.
  4. For easy clean-up, let baking sheet cool completely. Remove rack and gently fold up the foil to put in the trash.

Notes

Thick sliced bacon usually takes about 25 minutes to bake crisp.

Did you make this recipe?

Tag @thebakermama on Instagram and hashtag it #thebakermama

You may also like

  • Baked Maple Brown Sugar BaconBaked Maple Brown Sugar Bacon
  • Breakfast Boards GaloreBreakfast Boards Galore
  • Build-Your-Own Waffle BoardBuild-Your-Own Waffle Board
  • French Toast BoardFrench Toast Board
  • Pancake BoardPancake Board

Sharing is caring!

4916 shares

Reader Interactions

Comments · 10

  1. Jennifer says

    August 19, 2018 at 1:52 pm

    What kind of baking rack do you use?

    Reply
    • Maegan says

      August 19, 2018 at 3:49 pm

      Hi Jennifer! My absolute favorites is this Calphalon Rack: https://amzn.to/2whdq0C

      Reply
  2. Lauren @ A Nerd Cooks says

    August 20, 2018 at 7:54 pm

    I started baking my bacon a while back and can’t go back to frying it. So easy, and perfect every time! I’m usually pretty lazy and don’t use a baking rack, but I think you definitely have the right idea here!

    Reply
  3. Melissa says

    May 11, 2019 at 9:18 am

    @thebakermama Please tell me how you accomplish this on only 15 minutes?!? I LOVE baked bacon, bc I am a self-proclaimed bacon addict! Thus, baking it keeps u from frying it in its own grease. Plus, like u said, u can bake large amounts of bacon at one time, and the clean up is easy! (Thanks for the tip of lining the foil OVER the rim, btw, that makes a huge difference in the mess!) ALL that said, the picture you included with this recipe is EXACTLY how I like it! However, it takes me closer to 40 minutes to get it like that, and I still have to flip and rotate to keep the edges of the bacon from burning as well as the outer pieces from burning. Also, I line the bacon on the cookie sheet the same way you do… What am I missing here?

    Reply
    • Maegan says

      May 13, 2019 at 2:56 pm

      Hi Melissa! I love that you’re a bacon addict too! 😉 The only thing I can think of is that oven temperatures certainly vary so maybe yours just reads at a lower temperature than mine. Maybe try moving your top oven rack to the highest position so the bacon is closer to the heating elements. Are you putting the bacon in the oven after it has preheated to 400? Are you baking it on a rack or directly on the pan? Hope this helps.

      Reply
  4. GINA MCCONNEL says

    September 14, 2019 at 10:03 am

    I have tried baking bacon one time and my oven got so splattered with grease it was smoking the next time I used it. What did I do wrong? I really want to make the maple bacon for a birthday brunch I’m planning.

    Reply
    • Maegan says

      September 14, 2019 at 2:12 pm

      Hi Gina! Oh no, it sounds like your heating element at the top of your oven gets really hot. I would recommend moving the pan to a lower shelf in the oven or turning down the oven temperature and just baking it longer. Hope this helps! Have fun at the birthday brunch!

      Reply
  5. Lauren Kay’s Journal says

    December 6, 2019 at 9:12 am

    This is so awesome!!

    Reply
  6. Adam says

    January 29, 2021 at 1:13 pm

    THIS. This is the secret to perfect bacon! I shudder when I think of doing bacon on the stove-top again…

    I actually put my oven on 375 and put the bacon in right away, rather than pre-heat it first – something about the slow rise in temp rendering more fat out or something…

    Once the oven beeps that it’s at temp, I set a 9-minute timer, and it’s heavenly. I also don’t bother with the rack; it’s a pain to clean, and personally, didn’t see a huge difference in the end result.

    Okay, now I have to go make bacon!

    Reply
  7. Shelly says

    July 9, 2021 at 10:54 am

    I put mine in a COLD oven and then set the heat for 375. I don’t time it. I just kind of keep an eye on it and follow my nose. By the time my teenager comes out of his room, sniffing the air and declaring his love for bacon, it’s probably ready.

    Reply

Leave a Reply Cancel reply

Your email address will not be published. Required fields are marked *

Recipe rating ★☆ ★☆ ★☆ ★☆ ★☆

Primary Sidebar

NEVER MISS A RECIPE

Sign up to get new recipes via email

Order Now! Spectacular Spreads Cookbook

Spectacular Spreads cookbook by The BakerMama

Beautiful Boards Cookbook

Beautiful Boards cookbook by The BakerMama

Boards by The Bakermama

Hi, I’m Maegan!

Maegan, the BakerMama

Welcome to The BakerMama! I’m so happy you’re here! To learn more about me, click here.

Let’s Socialize

  • Facebook
  • Pinterest
  • Instagram
  • Twitter
  • YouTube
  • RSS

Trending Now

American Flag Caprese Salad by The BakerMama

American Flag Caprese Salad

Pancake Flag Board by The BakerMama

Pancake Flag Board

Hot Dog Flag Board by The BakerMama

Hot Dog Flag Board

Patriotic Party Mix

Patriotic Party Mix

Instagram

thebakermama

Maegan Brown ~ The BakerMama
Happy 4th, friends! I hope y’all have a sweet an Happy 4th, friends! I hope y’all have a sweet and safe day of celebrating! 🇺🇸❤️💥🎉

These are the dessert recipes from the Patriotic Picnic Spread in my Spectacular Spreads Cookbook:
🍒 Cherry Pie Bites
🍫 S’mores Brownie Bites
🎉 Patriotic Party Mix
⭐️ Star-Shaped Rice Krispies Treats

Tasty treats that are great for today or any party! 😋🎉 #TheBakerMama #SpectacularSpreadsCookbook

https://thebakermama.com/spectacular-spreads/
HOT DOG! This festive American flag inspired Hot D HOT DOG! This festive American flag inspired Hot Dog Board is so easy to create and the perfect patriotic way to serve hot dogs on the 4th of July! 🌭❤️💙 Everyone oohs and aahs over the presentation and deliciousness when I prep and serve this board for our family get-together. Click the link in my profile @thebakermama for more details and inspiration! 🇺🇸 #BoardsByTheBakerMama #TheBakerMama

https://thebakermama.com/recipes/hot-dog-flag-board/
Now here's a pie for the 4th of July! 🇺🇸😍 Now here's a pie for the 4th of July! 🇺🇸😍 This American Flag inspired pie is as delicious as it is easy to create! All the details are listed below. ENJOY! 😋🇺🇸🥧🎉 #TheBakerMama

Ingredients:

4 ready-to-bake pie crusts
3 (20 oz) cans cherry pie filling
1 (20 oz) can blueberry pie filling
1 egg
1 tbsp water
2 tbsp sparkling sugar

Instructions:

1. Let the pie crusts set out at room temperature for 10 min before using.
2. Spray a 12” x 17” rimmed baking sheet with cooking spray.
3. Using 3 of the pie crusts, fill the baking sheet completely with the dough. Cut the dough as necessary to cover the sheet pan.
4. Trim the dough even with the edge of the sheet pan and flute the edges.
5. Cut the excess dough into 12 stars using a mini star shaped cookie cutter.
6. Using a pizza cutter or sharp knife, cut the remaining pie crust into ½-inch wide strips.
7. Use one of the long strips to create a small rectangle barrier in the top left corner of the sheet pan.
8. In a small bowl, whisk together the egg and 1 tbsp water. Brush the egg wash over the top of the stars and stripes of dough.
9. Fill the large area completely with cherry pie filling.
10. Fill the small rectangle with blueberry pie filling.
11. Create 5 stripes on top of the cherry pie filling with the long strips of dough.
12. Arrange the stars on top of the blueberry pie filling.
13. Brush the edges of the pie crust with the remaining egg wash.
14. Sprinkle the stars and stripes with sparkling sugar.
15. Place the prepared pie in the refrigerator for 20 minutes to chill before baking.
16. Meanwhile, preheat the oven to 450°F.
17. Bake the pie for about 25 minutes or until the crusts are golden brown and the pie filling is bubbling. If the edges of the pie start to brown before the stars and stripes, cover the edges with foil and continue baking until the crusts on top of the pie are golden brown.
18. Let the pie set for about 10 minutes before slicing into and serving. Serve with vanilla ice cream, if desired. Enjoy!
13 stripes, one EPIC cheese tray! 🇺🇸🤩 Thi 13 stripes, one EPIC cheese tray! 🇺🇸🤩 This stunning patriotic platter makes for the perfect July 4th appetizer. It's super easy to make, complete with red, white, and blue cheeses, meats, fruits and accompaniments. 😍 Click the link in my profile @thebakermama for all the details and more inspiration. 🇺🇸❤️ #BoardsByTheBakerMama #TheBakerMama #BeautifulBoardsCookbook

https://thebakermama.com/recipes/american-flag-cheese-tray/
Load More... Follow on Instagram

Footer

Hi, I’m Maegan!

Maegan, the BakerMama

Welcome to The BakerMama! I’m so happy you’re here! To learn more about me, click here.

  • Facebook
  • Pinterest
  • Instagram
  • Twitter
  • YouTube
  • RSS

NEVER MISS A RECIPE

Sign up to get new recipes via email

Copyright © 2022 The BakerMama, LLC, All Rights Reserved. | Privacy Policy Website by Bright Coconut

4916 shares